


Shown above is a sneak peek of what you’ll find on Lisa Graham’s stop on the blog hop – you’ll be linked to it, along with full instructions, as you hop through the Blog Hop!
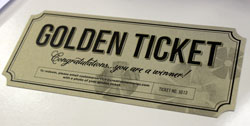
Happy Friday! Today’s the final day in our spectacular Birthay Bash week! REMINDER: all Birthday Bash promotions (Golden Ticket chance, free shipping, free stickers, etc.) end at 3 PM CT today, Friday November 6. Today’s Golden Ticket Prize Package features another collection of fab holiday products, including the Christmas Joy Fast2Fab Album, Paper Pack, Slide-In Pack and Stickers!
 By simply placing an order today, you could win the entire package and be ready for the holidays! Reminder: to qualify to win this, you simply need to place an order today (Friday, November 6). You’ll also receive FREE Days of Fall Title Stickers and FREE shipping on orders over $75!

And finally, on to the REALLY good stuff. Not only do we have a fun set of quick & easy holiday borders to share with you, but our spectacular team of 7 incredibly creative Content Contributors have each put together a blog post with some VERY clever holiday project ideas. Make some hot cocoa and put the Christmas carols on… you’re gonna be in the holiday spirit in just a few seconds!
As mentioned, before we send you on your merry way checking out all the stops on the blog hop, here’s a set of super quick & easy page borders you can make in no time flat! Included in the Christmas Joy Paper Pack, you’ll find 2 sheets of border strips:

They’ve been designed so you can simply slice each of them apart into 8 separate 1.5″ sections like this:

Now, you’ve instantly got a fun set of 8 borders you could use as-is. Isn’t that sweet? However, if you’re itching to dress them up a little, you can. And very easily, we might add. Here’s what they’ll look like with just a few things added:

To create these borders, you’ll need:
And here’s how to create them:
For the Happy Holidays border, cut a strip of light green patterned paper to measure 12″ x 1-3/4″. Adhere Happy Holidays border strip across center, then adhere Happy Holidays sticker to center using foam squares for dimension.
For trees border, cut a strip of dark green patterned paper to measure 12″ x 1-5/8″ and a strip of grey patterned paper to measure 12″ x 2″. Layer and adhere together as shown. Adhere red star sticker to top of tree, then adhere tree to border using foam squares for dimension.
For Merry Christmas border, cut a piece of dark green patterned paper to measure 12″ x 2″. Trim out large “tag” shape from border strip. Using scissors, cut a slit along both ends where small light green oval is. Cut a strip of red patterned paper to measure 12″ x 5-8″. Thread red strip through slits as shown, then adhere large tag and red strip to dark green strip as shown.
For ornaments border, tear a strip of red patterned paper to measure 12″ x approximately 1″. Adhere across top of ornaments border strip, then adhere Merry Christmas border sticker to finish.
For houses & snow border, cut a strip of grey patterned paper to measure 12″ x 1″, and a strip of red patterned paper to measure 12″ x 1/2″. Layer and adhere houses border strip, red strip and grey strip as shown. Tear a strip of white cardstock to create “hills” that measures 12″ x approximately 1/2″ – 3/4″. Adhere white strip to bottom of houses, then “roll” the tops of the torn area down to look like dimensional snow hills.
For gold Merry Christmas border, cut a strip of gold striped paper to measure 12″ x 2-1/4″, and a strip of red striped paper to measure 12″ x 2″. Layer and adhere strips as shown. Adhere Merry Christmas sticker using foam squares for dimension.
For light string border, cut a strip of green patterned paper to measure 12″ x 1-3/4″, and a piece of plaid paper to measure 12″ x 2″. Layer and adhere strips as shown. Adhere light bulbs to border using foam squares for dimension.
For Christmas tree border, cut a strip of gold striped paper to measure 12″ x 1-3/4″, and a piece of green patterned paper to measure 12″ x 2″. Layer and adhere strips as shown. Adhere red star sticker to top of tree, then adhere tree to border using foam squares for dimension. Lastly, adhere 25th sticker to tree using foam squares to finish.
AND… now on to more totally rockin’ holiday fun! Here are the stops in today’s blog hop – be sure to stop by each one and leave these ladies some mega love on their blogs in the comments. They’ve been busy little elves, and they love to hear your feedback! Happy hopping!
 ON TO THE BLOG HOP!
Let the happy holiday’ing begin! Miss Diana Brinsley kicks things off on our hop with her post on her blog, D. Brinsley’s Memory Keeping Blog. Shown right is a sneak peek of what you can expect to find there, and after you’ve soaked up the creativity she’s thrown your way with more cute holiday borders she’ll send you on your way to the next blog and so on.
A HUGE thank you to each of our bloggers today – Diana Brinsley, Stefani Jones, Lisa Graham, Fran Smitherman, Sarah Fitzgerald, Candace Bouldin and Julie Tambrini! Happy hopping!

Love the new products and can’t wait to get my order! Maybe it will be a happy birthday to me, too!
thank you! Getting ready to start up a 4-H scrapbooking project and need some ideas for the children. I am hoping to be able to use a few of these ideas in one of our classes!