March 29, 2023
Finesse A Fresh Fantasy With This Spring Scrapbook Layout

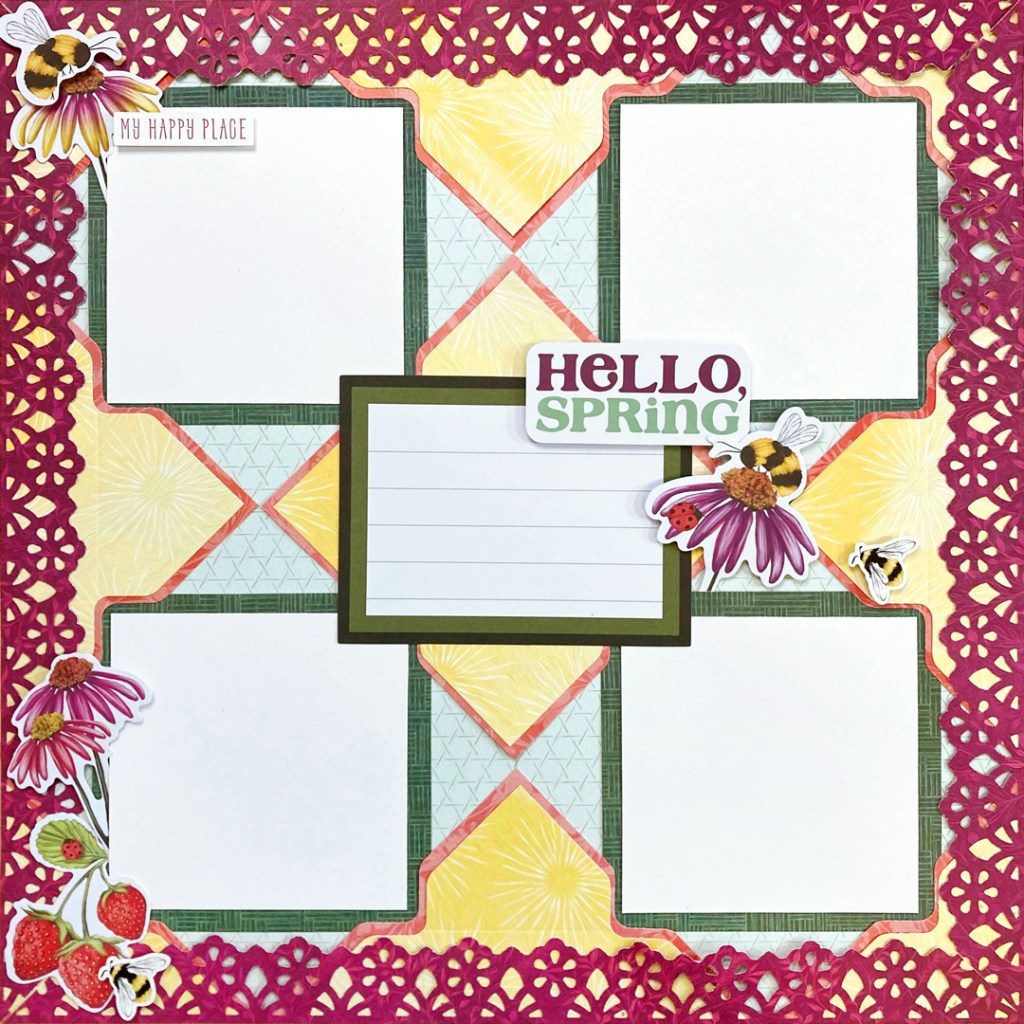
With the earth starting to thaw after a long winter, many want to add fun to their front yard or want to make their pergola pop. And that can be done by adding bright and beautiful flowers, lush leaves and divine decor! Take that idea and bring it to your next project — get a glimpse at blog contributor Sachiyo Omitsu’s spring scrapbook layout that gives off a dreamy, whimsical trellis vibe with plenty of fresh, floral fantasy!
To create this layout you will need:
- Painted Garden Paper Pack or (Shop Canada | Shop Australia)
- Painted Garden Tone-on-Tone Paper Pack or (Shop Canada | Shop Australia)
- Painted Garden Embellishments or (Shop Canada | Shop Australia) — currently out of stock and will be returning in May
- Painted Garden Stickers or (Shop Canada | Shop Australia)
- White Solid Cardstock or (Shop Canada | Shop Australia)
- Floral Peaks Border Punch or (Shop Canada | Shop Australia)
- Envelope & Bow Creator or (Shop Canada | Shop Australia)
- 12-inch Trimmer or (Shop Canada | Shop Australia)
- All-Purpose Scissors or (Shop Canada | Shop Australia)
- Tape Runner or (Shop Canada | Shop Australia)
- Repositionable Tape Runner or (Shop Canada | Shop Australia)
- Foam Squares or (Shop Canada | Shop Australia)


Step 1: Use a piece of the mint weave tonal paper as the base of this layout. Draw horizontal lines and vertical lines with a pencil at 5″, 6″ and 7″ as shown.

Step 2: Cut four mats to measure 4″ x 4″ from a piece of the dark green blanket fabric tonal paper. Adhere to the page using the 5” and 7” pencil lines as the guide.
Step 3: Cut four 4-1/4″ x 4-1/4″ pieces from the coral flowers and leaves designer paper. Align the left edge of the paper to 2-1/8″ on the “Punch Guide” of the Envelope & Bow Creator. Score “Line A” and “Line B.” Rotate the paper 180 degrees and align at 2-1/8″. Score “Line A” and “Line B.” Following the diagram on the Envelope & Bow Creator, use the “Notch Punch.”
Cut four pieces of 4″ x 4″ from the golden yellow sunshine bursts designer paper. Align the left edge of the paper at 2″ on the “Punch Guide.” Repeat the same steps as explained above.


Step 4: Adhere the golden yellow pieces to the coral pieces. Cut one of the pieces diagonally to make four triangle shapes. Cut two of the pieces diagonally in half. Adhere the pieces to the page.
Step 5: Cut four mats to measure 3-1/2″ x 3-1/2″ from a piece of White Solid Cardstock. Add to the middle of each mat.

Step 6: Use the Floral Peaks Border Punch to punch four borders from a piece of violet spring leaves designer paper. Cut each border at 1″ width. Use the 45-degree line of the 12-inch Trimmer to trim both ends of border as shown. Adhere to the page.

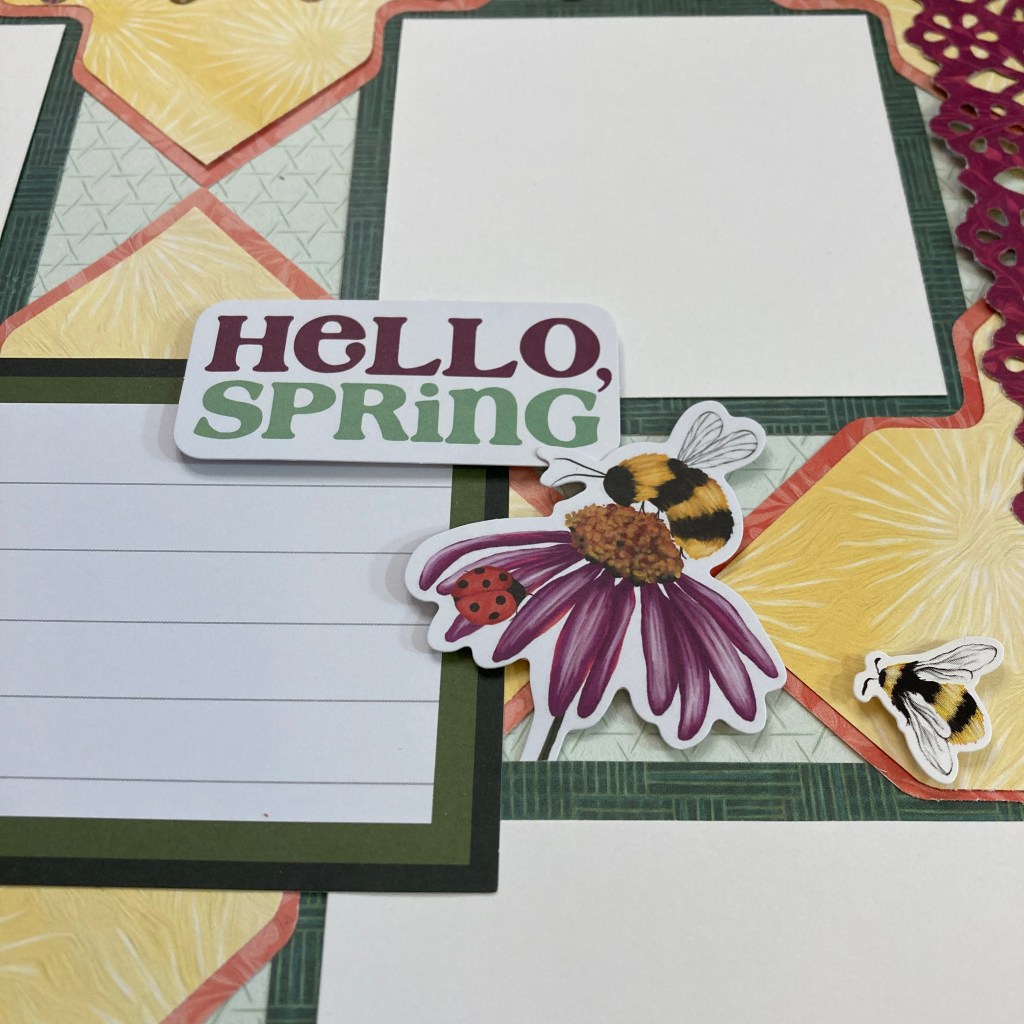

Step 7: Adhere stickers and embellishments, using Foam Squares on some for added dimension.
Do you like the decorative, detailed design of this spring scrapbook layout from Sachiyo?
P.S. Are YOU a member of the Virtual Crop Facebook Group? It’s your go-to place for MONTHLY Virtual Crops, MONTHLY Completed Album Challenges, WEEKLY LIVE STREAMING of Fast & Fun Projects with Noreen, LIVE QUARTERLY Secret Box Openings with project tutorials and so much more! We hope you’ll join our community of more than 30,000 fellow memory-keeping enthusiasts — you’ll feel right at home!

This is very pretty tho I will use different colors. Not fond of that reddish border color. Love the feelings that are given off by the overall design.
Great use of the Envelope and Bow Maker! Love this!
Can’t wait to make this frame ????
Gorgeous but I wish you showed step 3. It’s confusing.
Love the layout! Have to give this one a try!
ABSOLUTELY BEAUTIFUL LAYOUT! Love the beautiful colors and design!