March 22, 2024
Remember Every Moment With This Baby Scrapbook Layout

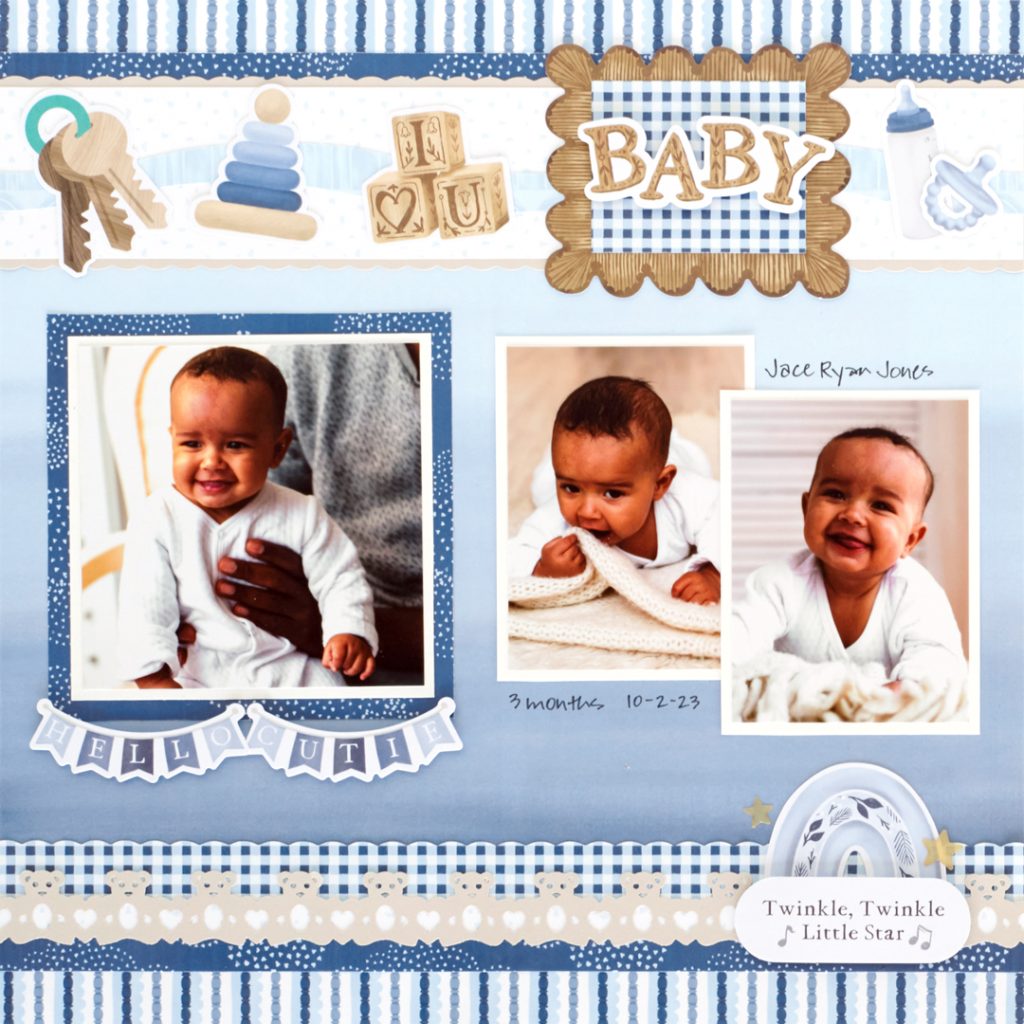
The first few months of your little one’s life speed by too fast! Recording them in a baby scrapbook layout like the one below can help you remember every little ‘first.’ The Welcome Baby collection offers a variety of colors and there are so many ways you can recreate this layout with your own style. Not sure where to start? Choosing papers within the same color family will always give you a cohesive look!
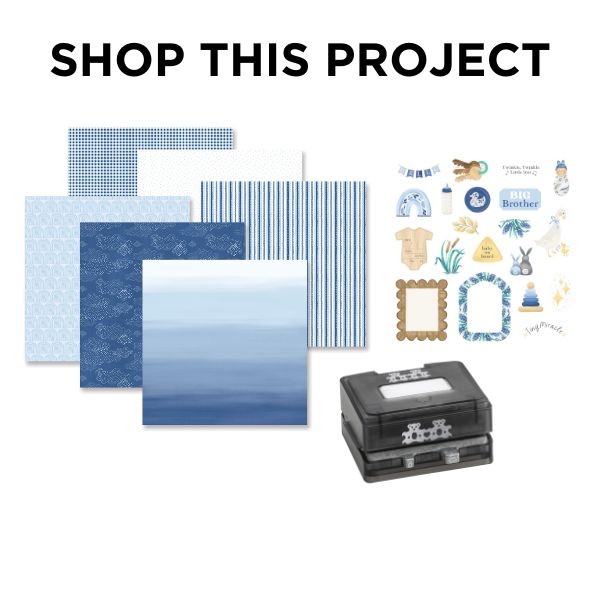
To create this layout you will need:
- Welcome Baby Blue Paper Pack or (Shop Canada | Shop Australia)
- Welcome Baby Blue Embellishments or (Shop Canada | Shop Australia)
- Beige & White Solid Cardstock or (Shop Canada | Shop Australia)
- Original Border Maker System with Bears Chain Cartridge or (Shop Canada | Shop Australia)
- 12-inch Decorative Trimmer or (Shop Canada | Shop Australia)
- 12-inch Trimmer with Straight & Scallop Blades or (Shop Canada | Shop Australia)
- Tape Runner or (Shop Canada | Shop Australia)
- Repositionable Tape Runner or (Shop Canada | Shop Australia)
- Foam Squares Variety Pack or (Shop Canada | Shop Australia)
- Black Dual-Tip Pen or (Shop Canada | Shop Australia)

Step 1: Use a sheet of ombré paper as the base for this layout. Cut two 12” x 5/8” strips with scallop stripes paper and adhere on the top and bottom edges of the layout. Cut two 12” x 3/8” strips with clouds paper and adhere just below/above the striped strips.
Step 2: Using the Scallop Blade, cut a 12” x 2-1/4” strip with Beige Solid Cardstock. Adhere on the layout as shown. Using the Straight Blade, cut a 12” x 2” strip with scattered bits paper and adhere on the cardstock strip. Using the swell edge of the 12-inch Decorative Trimmer, cut a 12” x 1/2” strip with rainbows paper and mount on top. Place a journal box embellishment on the border. Top the embellishment with a 2-1/2” x 2” piece of gingham paper. Place the “BABY” embellishment on top using Foam Squares. Adhere embellishments along the swell strip as shown.
Step 3: Using the Scallop Blade, cut a 12” x 1-1/4” strip with gingham paper. Adhere on the bottom of the layout as shown. Cut a 12” x 3/8” strip with scattered bits paper and adhere along the bottom of the gingham strip. Using the Original Border Maker System with the Bears Chain Cartridge, punch a border with Beige Solid Cardstock. Adhere on top of the scattered bits strip.
Step 4: Cut a 4-3/4”x 4-3/4” photo mat with clouds paper. Crop a photo to 4” x 4” and mount on a 4-1/4” x 4-1/4” piece of White Solid Cardstock, then mount on the clouds mat. Crop two photos to 2-3/4” x 3-3/4” and mount on two pieces of 3” x 4” White Solid Cardstock. Adhere all on the layout as shown.
Step 5: Adhere additional embellishments, popping some up with Foam Squares for dimension.
Step 6: Write captions as desired.
How did your baby scrapbook layout turn out? What colors did you choose to use?
P.S. Are YOU a member of the Virtual Crop Facebook Group? It’s your go-to place for MONTHLY Virtual Crops, MONTHLY Completed Album Challenges, WEEKLY LIVE STREAMING of Fast & Fun Projects with Noreen, LIVE QUARTERLY Secret Box Openings with project tutorials and so much more! We hope you’ll join our community of more than 38,000 fellow memory-keeping enthusiasts — you’ll feel right at home!

Fabulous layout, but the Blue paper is no longer available. Will you be restocking this item?
It’s in the what’s new section. It just came out.
Hi Karen! The Welcome Baby Blue Paper Pack is available on the site! If you click the link under the ingredients section, it’ll take you to the paper pack!