April 2, 2024
Peep At This Easter Scrapbooking Layout
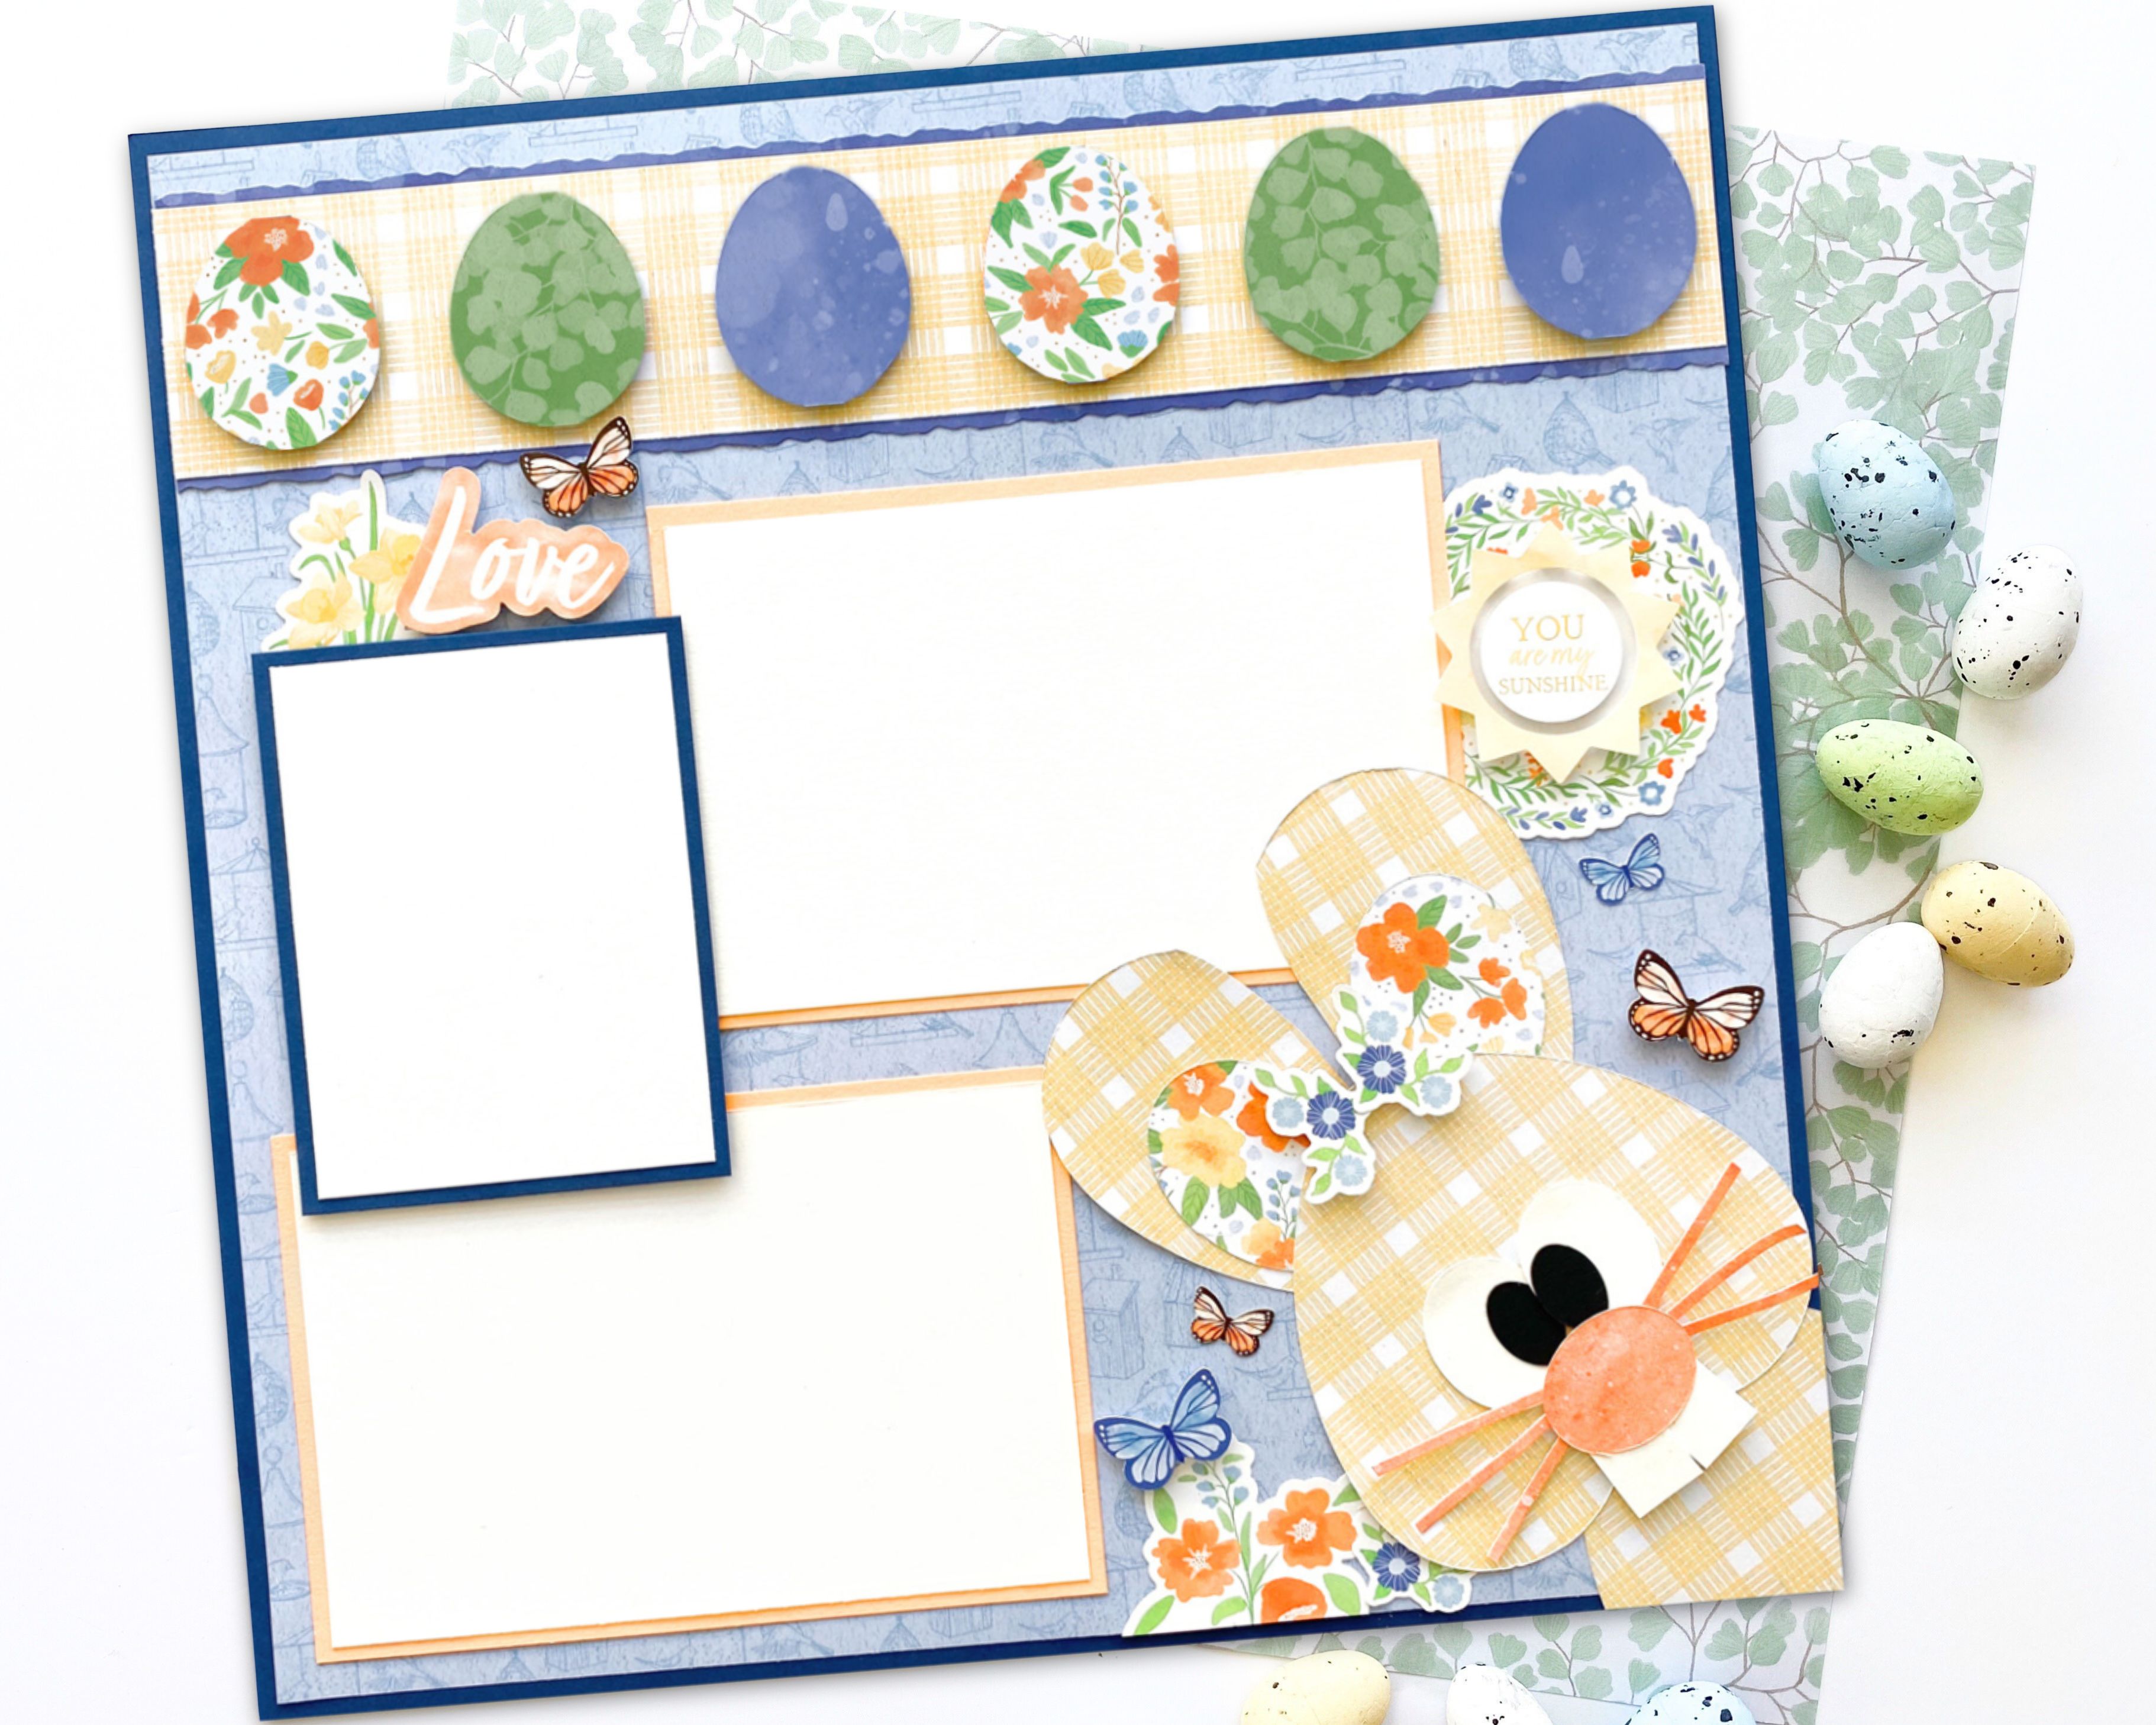
For the memories you made celebrating Easter last weekend, we have a new layout for you designed by blog contributor Kylie Kingham. Using materials from the Birds & Blossoms collection, she created an egg-cellent Easter layout complete with a cute bunny and eggs on them!
Kylie’s Inspiration
I was naturally drawn to the checks and florals of the Birds & Blossoms papers. They make me think of a cottage garden in springtime! They also blended beautifully to create a sweet & curious Easter Bunny ‘photo bombing’ the page, as well as an Easter Egg border.

To create this layout you will need:
- Birds & Blossoms Paper Pack or (Shop Canada | Shop Australia)
- Birds & Blossoms Stickers or (Shop Canada | Shop Australia)
- Blue, Tangerine, Black & White Solid Cardstock or (Shop Canada | Shop Australia)
- 12-inch Trimmer with Straight & Deckle Blades or (Shop Canada | Shop Australia)
- Custom Cutting System with Gemstone & Oval Patterns or (Shop Canada | Shop Australia)
- All-Purpose Scissors or (Shop Canada | Shop Australia)
- Repositionable Tape Runner or (Shop Canada | Shop Australia)
- Foam Squares Variety Pack or (Shop Canada | Shop Australia)


Step 1: Trim a sheet of birdhouse paper to measure 11-3/4” x 11-3/4” and adhere on top of a sheet of Blue Solid Cardstock. (Tip: To conserve cardstock you can “gut” or remove the middle of the cardstock first.)
Step 2: Using the 12-inch Trimmer with the Deckle Blade, cut a strip of rain paper to measure 2-1/4” x 11-3/4”. Using the Straight Blade in the 12-inch Trimmer, cut a strip of canary plaid paper to measure 2” x 11-3/4” and adhere in the middle of the rain strip.
Step 3: Using the inside edge of the small heart Custom Cutting System Gemstone Pattern and the Red Blade, cut six egg shapes total: two egg shapes from floral spring paper, two from greenery paper and two from rain paper. Adhere the eggs using Foam Squares while evenly spacing them across the border strip. Adhere the border strip 1/2? down from the top-edge of the background paper.
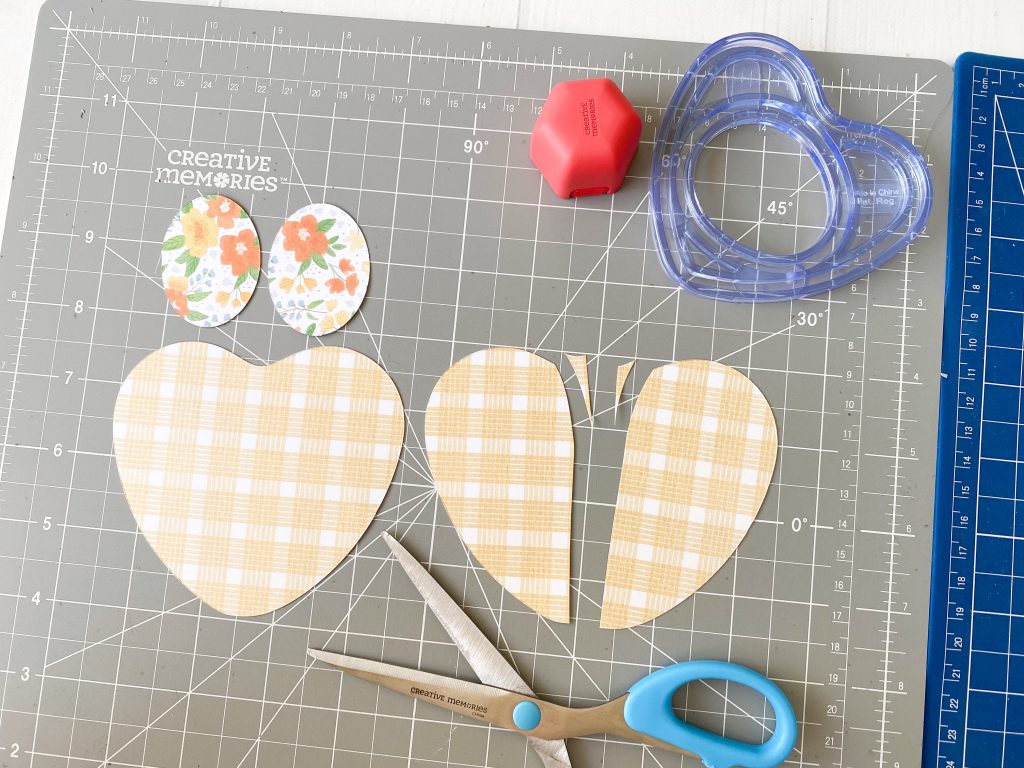
Step 5: Using the outside edge of the small heart Custom Cutting System Gemstone Pattern and the Red Blade, cut two hearts from canary plaid paper. Cut one of these hearts in half and round off any sharp corners on the curve so that they resemble ears. Using the inside edge of the second smallest Custom Cutting System Oval Pattern and the Red Blade, cut two ovals from spring floral paper.

Step 6: Cut half an oval shape by lining up the second smallest Custom Cutting System Oval Pattern halfway on the edge of canary plaid paper while using the Red Blade on the outside edge.

Step 7: Adhere the canary plaid oval half in the bottom-right corner of the background page on a diagonal. Allow it to overhang the page and trim away the excess.
Step 8: Adhere the two spring floral oval shapes to the canary plaid heart halves. Turn the remaining heart upside-down and adhere the two halves behind to form ears. Adhere the head on a diagonal on top of the oval half in the corner.
Step 9: From orange watercolor paper, cut one oval using the inside edge of the smallest Custom Cutting System Oval Pattern and the Red Blade. From the same orange watercolor paper, cut three very thin strips — approximately 3-3/4? long. Adhere these behind the oval as whiskers.


Step 10: From White Solid Cardstock, cut two pieces to measure 3/4? x 1?. Adhere these behind the base of the nose as teeth. Using a Foam Square, add them to the head.
Step 11: Using White Solid Cardstock and the inside edge of the smallest Custom Cutting System Oval Pattern with the Red Blade, cut two ovals. Use the inside edge of the same Custom Cutting System Pattern now with the Blue Blade to cut two ovals from Black Solid Cardstock. Adhere the black ovals as pupils to the white ovals before adding them above the nose.

Step 12: Cut two photo mats from Tangerine Solid Cardstock to measure 6-1/4? x 4-1/4?. Cut one photo mat from Blue Solid Cardstock to measure 3-1/4? x 4-1/4?. Adhere two 6? x 4? photos to the larger mats and one 3? x 4? to the smaller. Finish the page by embellishing with stickers.
How did your bunny turn out? Did you enjoy making this Easter scrapbooking layout?
P.S. Are YOU a member of the Virtual Crop Facebook Group? It’s your go-to place for MONTHLY Virtual Crops, MONTHLY Completed Album Challenges, WEEKLY LIVE STREAMING of Fast & Fun Projects with Noreen, LIVE QUARTERLY Secret Box Openings with project tutorials and so much more! We hope you’ll join our community of more than 38,000 fellow memory-keeping enthusiasts — you’ll feel right at home!

Such a sweet, creative layout! Love it! ?