May 15, 2024
Caps Off To This Graduation Layout!
It’s May and graduation ceremonies are coming up in full force! Remember everything from the last day of school to the parties to the ceremony itself with this graduation-themed layout. Using the Gemstone Custom Cutting System Patterns, Micro-Tip Scissors and Shimmer Brush Pens, you can create the perfect balloon bouquets for the occasion.

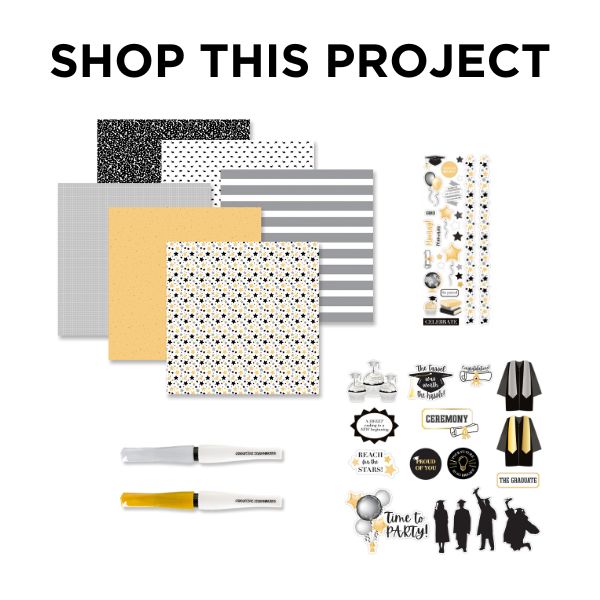
To create this layout you will need:
- You Graduated! Paper Pack or (Shop Canada | Shop Australia)
- You Graduated! Foiled Embellishments or (Shop Canada | Shop Australia)
- You Graduated! Stickers or (Shop Canada | Shop Australia)
- Gold Shimmer, Platinum Shimmer & Black Shimmer Solid Core Paper Pack or (Shop Canada | Shop Australia)
- Black Solid Cardstock or (Shop Canada | Shop Australia)
- 12-inch Trimmer or (Shop Canada | Shop Australia)
- 12-inch Decorative Trimmer or (Shop Canada | Shop Australia)
- Custom Cutting System with Gemstone Patterns or (Shop Canada | Shop Australia)
- Micro-Tip Scissors or (Shop Canada | Shop Australia)
- Repositionable Tape Runner or (Shop Canada | Shop Australia)
- Foam Squares Variety Pack or (Shop Canada | Shop Australia)
- Gold Shimmer Brush Pen or (Shop Canada |Shop Australia)
- Silver Shimmer Brush Pen or (Shop Canada |Shop Australia)
- Black Dual-Tip Pen or (Shop Canada | Shop Australia)

Step 1: Cut caps paper to 11-3/4?x 10-1/4? and adhere to a sheet of Black Solid Cardstock. (Tip: To conserve cardstock, cut a 1? hollow frame from the Black Solid Cardstock first.)
Step 2: Cut stripes paper to 11-3/4? x 1-1/2? and adhere underneath the cap paper, leaving an 1/8? of Black Solid Cardstock showing.
Step 3: Using the inside edge of the smallest heart Gemstone Custom Cutting System Pattern and the Red Blade, cut two egg shapes each from Black Shimmer, Platinum Shimmer and Gold Shimmer Solid Core Paper Packs.
Step 4: Use Micro-Tip Scissors to cut small triangle shapes from Black Shimmer, Platinum Shimmer and Gold Shimmer Solid Core Paper Packs. Adhere the triangle pieces to the smaller end of the egg shapes to create balloons.
Step 5: Cut 1/8? x 12? strips using the swell side of the 12-inch Decorative Trimmer from Black Shimmer, Platinum Shimmer and Gold Shimmer Solid Core Paper Packs.
Step 6: Layer and adhere the balloons to the top right and left sides of the layout. Adhere the “swell” strips so they overhang from the bottom of the layout. Snip off the excess with Micro-Tip Scissors.
Step 7: Cut composition paper to 12? x 4-1/4? and adhere above the stripes strip.
Step 8: Crop two photos to 3-1/4? x 4? and one photo to 4-7/8? x 4?. Adhere to the composition paper.
Step 9: Adhere the balloon arch embellishment to the top middle of the layout using Foam Squares. Add the “Top 3 Moments” journaling embellishment and add journaling with a Black Dual-Tip Pen. Add additional embellishments and stickers as shown using Foam Squares.
Step 10: Use the Silver and Gold Shimmer Brush Pens to add accents to the balloons and embellishments.
Do you know any Class of 2024 graduates? Will you be creating your own balloon bouquets using Karyn’s technique?
P.S. Are YOU a member of the Virtual Crop Facebook Group? It’s your go-to place for MONTHLY Virtual Crops, MONTHLY Completed Album Challenges, WEEKLY STREAMING of Fast & Fun Projects with Noreen, QUARTERLY Secret Box Openings with project tutorials and so much more! We hope you’ll join our community of more than 39,000 fellow memory-keeping enthusiasts — you’ll feel right at home!
