May 16, 2024
The Childlike Fun of Kite Build-A-Punch Projects
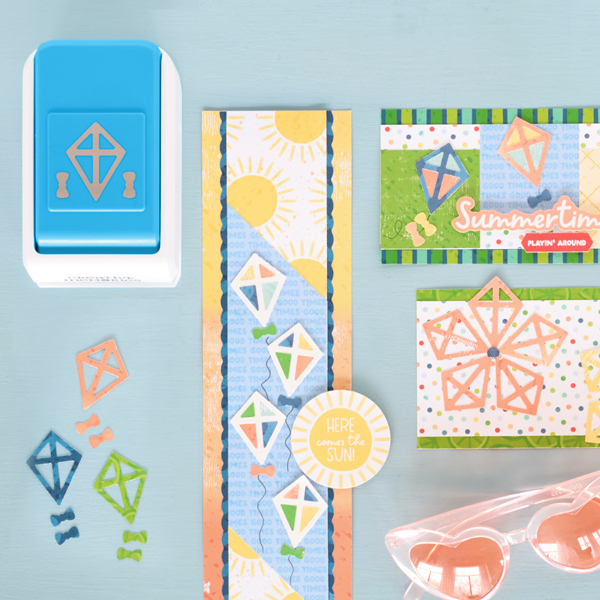
Whether you’re scrapbooking with a child or just want to relive that childlike wonder of playing with kites, you’ll love these projects made with the Kite Build-A-Punch. You can use the punch to create your own DIY kite designs like the ones shown down below.
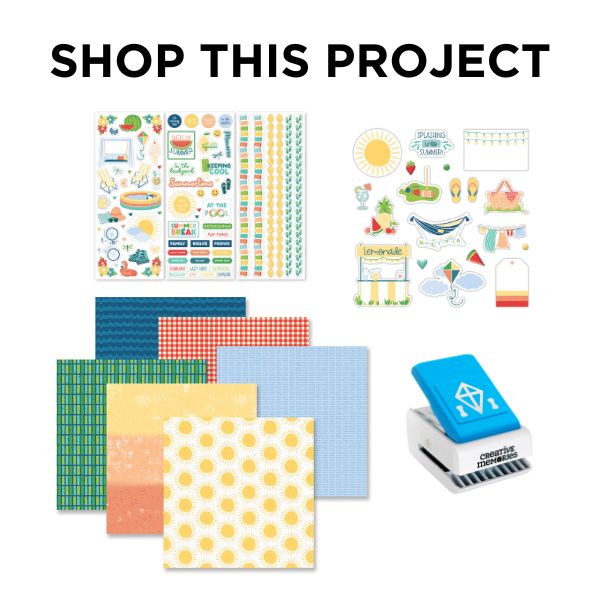
To create these borders you will need:
- Summer Break Paper Pack or (Shop Canada | Shop Australia)
- Summer Break Embellishments or (Shop Canada | Shop Australia)
- Summer Break Stickers or (Shop Canada | Shop Australia)
- White Solid Cardstock or (Shop Canada | Shop Australia)
- Kite Build-A-Punch or (Shop Canada | Shop Australia)
- 12-inch Trimmer with Straight & Scallop Blades or (Shop Canada | Shop Australia)
- Tape Runner or (Shop Canada | Shop Australia)
- Repositionable Tape Runner or (Shop Canada | Shop Australia)
- Foam Squares Variety Pack or (Shop Canada | Shop Australia)
- Black Dual-Tip Pen or (Shop Canada | Shop Australia)

Summertime Border
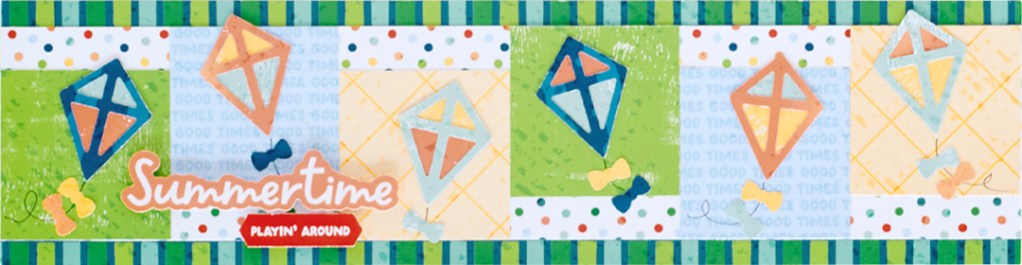
Step 1: Cut a 12? x 3? strip with strokes paper for the base. Cut a 12? x 2-1/2? strip with dots paper and adhere on the base. Cut six 2? squares with cool tonal colorblock, good times and ice cream cone papers. Adhere on the border as shown.
Step 2: Using the Kite Build-A-Punch, punch shapes with a variety of designer papers. Build kites on each of the squares, filling in with different colors as desired. Draw kite strings and adhere the bows.
Step 3: Adhere stickers using Foam Squares.
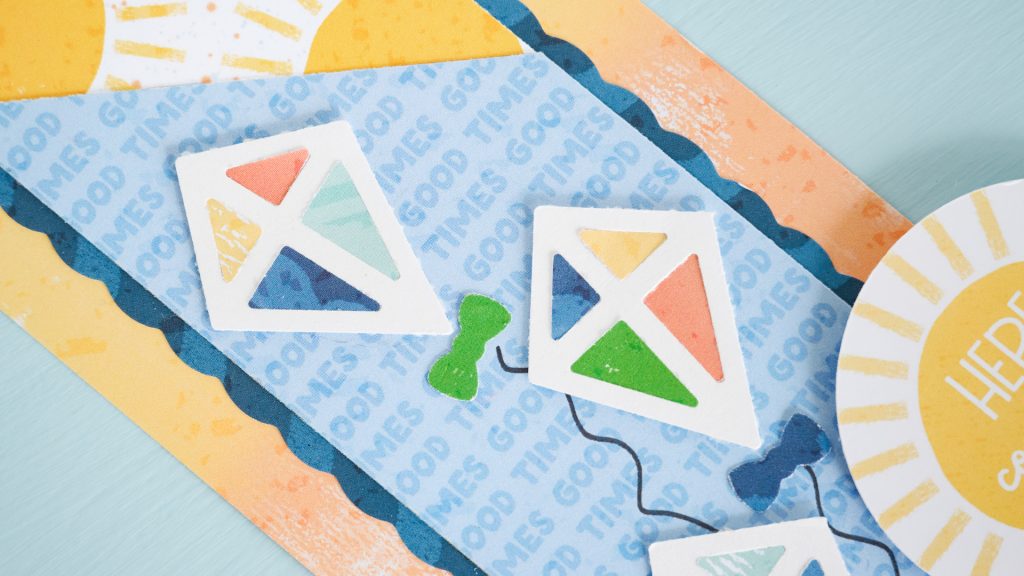
Here Comes the Sun Border
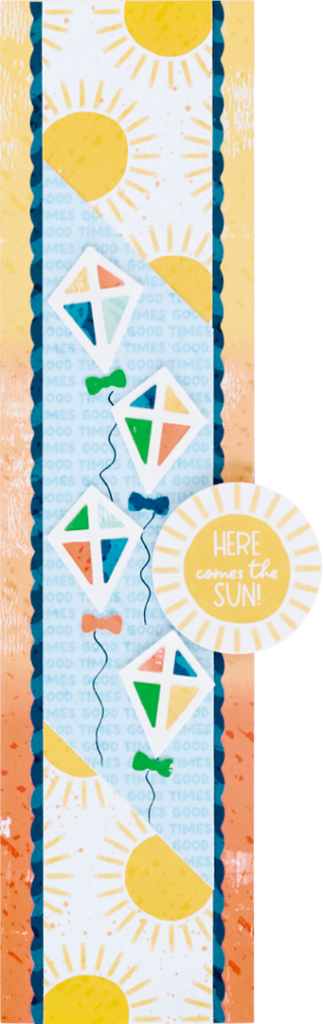
Step 1: Cut a 3? x 12? strip with warm tonal colorblock paper. Using the Scallop Blade with the 12-inch Trimmer, cut a 2-1/4? x 12? strip with waves paper and adhere on the base. Using the Straight Blade, cut a 2? x 12? strip with sunshine paper and adhere on top.
Step 2: Cut a 2? strip with good times paper. Align the paper on the 45-degree angle line on the 12-inch Trimmer and cut one corner off the strip. Measure 6-1/2? from the top corner just cut and draw a mark. Align the strip on the angled line again with the mark on the cutting edge and cut. Adhere the strip on the border.
Step 3: Using the Kite Build-A-Punch, punch four shapes from White Solid Cardstock. Punch additional shapes with other paper scraps to give you a variety of colors. Adhere the kites on the border, filling in with colorful paper scraps. Draw kite strings and adhere bows.
Step 4: Adhere the title sticker using Foam Squares.
Kite Flowers Border
Step 1: Cut a 3-1/4? x 12? strip with citrus paper for the base. Cut a 2-3/4? x 12? strip with dots paper and adhere on the base.
Step 2: Using the Kite Build-A-Punch, punch five shapes with each: tangerine section from warm tonal colorblock paper, yellow section from warm tonal colorblock paper, orange section from warm tonal colorblock section, island waters section from cool tonal colorblock. Adhere on the border as shown to make flower shapes.
Step 3: Apply enamel dots in the centers.
How cute are these DIY kites projects?! Which one was your favorite?
P.S. Are YOU a member of the Virtual Crop Facebook Group? It’s your go-to place for MONTHLY Virtual Crops, MONTHLY Completed Album Challenges, WEEKLY STREAMING of Fast & Fun Projects with Noreen, QUARTERLY Secret Box Openings with project tutorials and so much more! We hope you’ll join our community of more than 39,000 fellow memory-keeping enthusiasts — you’ll feel right at home!
