May 20, 2024
Shine A Light On Your Scrapbooks With These Promo Bundles

Looking for a way to light up your summer spreads? Right now you can earn the Hello, Sunshine! and Scenic Lighthouse Bundles FREE with qualifying orders. From enjoying fun in the sun and summer picnics to spending time at the lake or walking along beaches, these two bundles include must-have exclusive products. You’ll want to place a qualifying order to earn yours FREE by May 31 (or while supplies last)! Check out the layouts using these bundles below for inspiration!
For more details, visit: US | CA | AU
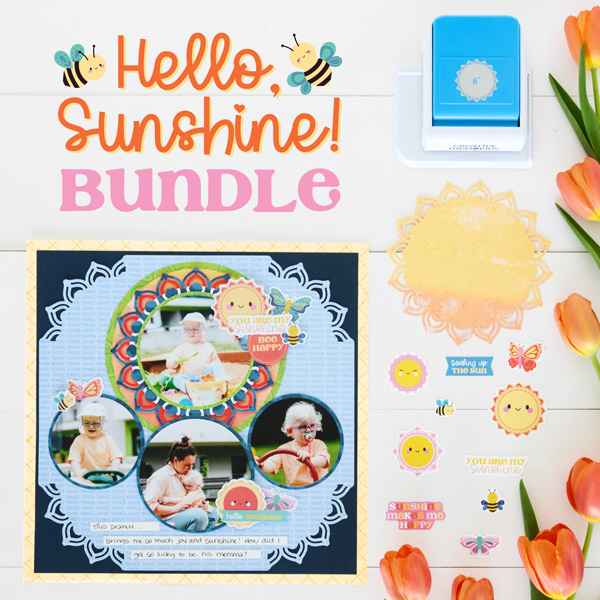

Check out the two options for gift bundles you can earn free above — the Hello, Sunshine! Bundle and the Scenic Lighthouse Bundle! AND for any quantity you earn, you can choose exactly which bundle(s) you would like to get FREE in ANY combination!

To create the Hello, Sunshine! layout and border you will need:
- Hello, Sunshine! Bundle — Earn this bundle FREE during the current Spend/Get Promo!
- Hello, Sunshine! Embellishments
- Sunshine Mandala Circle Punch
- Summer Break Paper Pack or (Shop Canada | Shop Australia)
- Navy, White & Red Solid Cardstocks or (Shop Canada | Shop Australia)
- Custom Cutting System with Circle Patterns or (Shop Canada | Shop Australia)
- 12-inch Trimmer or (Shop Canada | Shop Australia)
- Micro-Tip Scissors or (Shop Canada | Shop Australia)
- Tape Runner or (Shop Canada | Shop Australia)
- Repositionable Tape Runner or (Shop Canada | Shop Australia)
- Foam Squares Variety Pack or (Shop Canada | Shop Australia)
- Foam Tape or (Shop Canada | Shop Australia)
- Black Dual-Tip Pen or (Shop Canada | Shop Australia)

Hello, Sunshine! Layout
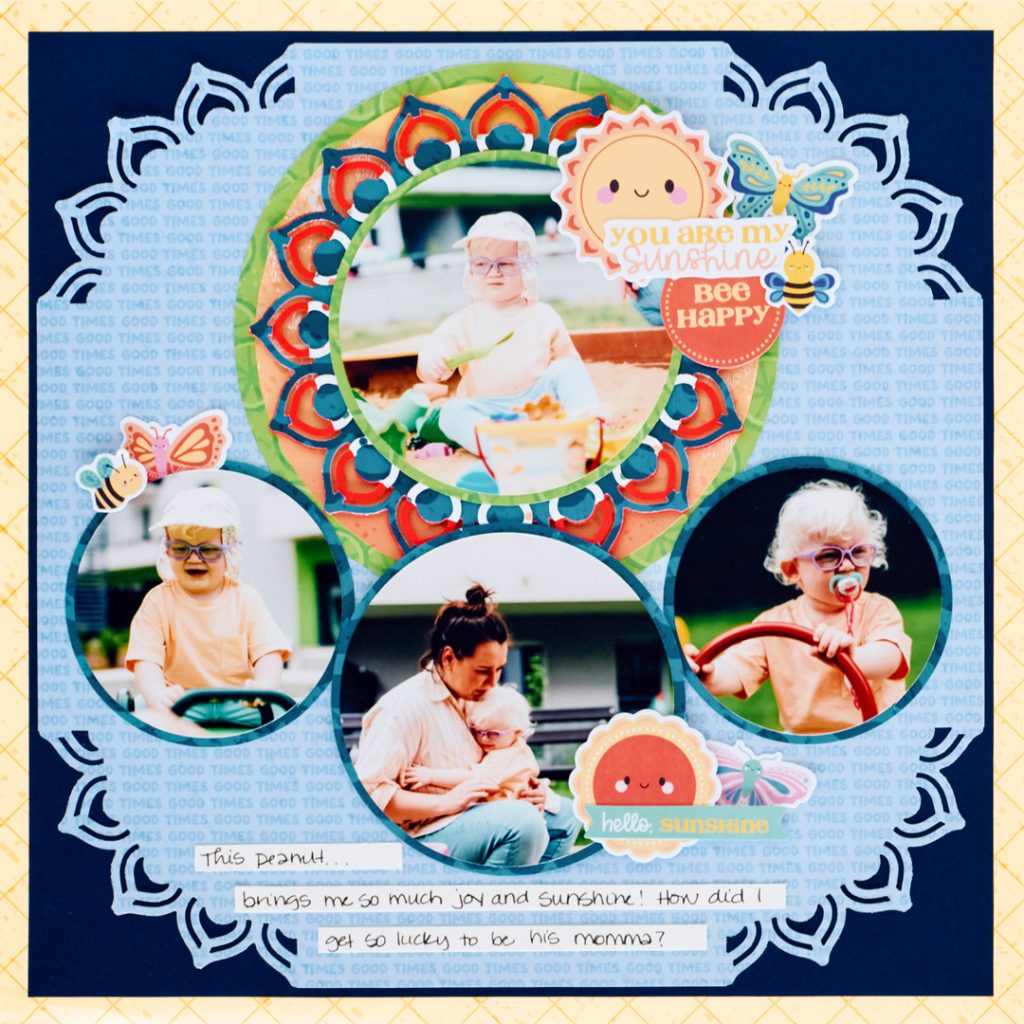
Step 1: Use the ice cream cone paper as the base of the layout.
Step 2: Cut a piece of Navy Solid Cardstock to measure 11-1/4? x 11-1/4?. Adhere to the layout.
Step 3: Cut a piece of good times paper to measure 11? x 11?. Punch the corners using the Sunshine Mandala Circle Punch. Adhere to the layout.
Step 4: Using the outside edge of the large Custom Cutting System Circle Pattern with the Blue Blade, cut a circle from the citrus paper.
Step 5: Using the outside edge of the large Custom Cutting System Circle Pattern with the Red Blade, cut a circle from warm tonal color block paper. Adhere to the circle you cut in Step 4. Adhere this whole piece to the layout.
Step 6: Cut a piece of Red Solid Cardstock to measure 6? x 6?. Punch using the Sunshine Mandala Circle Punch.
Step 7: Cut a piece of waves paper to measure 6? x 6?. Punch using the Sunshine Mandala Circle Punch.
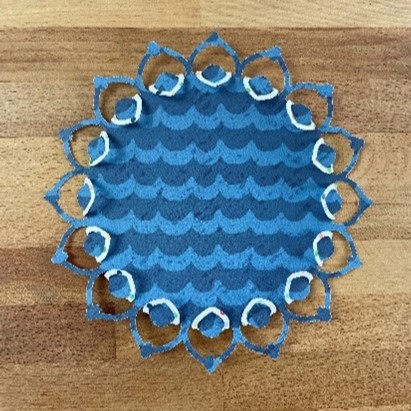
Step 8: Use scissors to snip in between each “petal” of the punched piece. Fold the snipped pieces backward. Adhere to the top of the Red Solid Cardstock piece.
Step 9: Using the outside edge of the small Custom Cutting System Circle Pattern with the Green Blade, cut a circle from the citrus paper. Adhere to the top middle of the folded back pieces.
Step 10: Using the outside edge of the small Custom Cutting System Circle Pattern with the Red Blade, cut a photo. Adhere to the previous piece.
Step 11: Adhere the whole Mandala Sunshine Circle and matted photo piece to the middle of the larger circles on the layout using Foam Squares or Foam Tape.
Step 12: Using the waves paper, cut two circles using the inside edge of the large Custom Cutting System Circle Pattern with the Red Blade and one circle using the outside edge of the small Custom Cutting System Circle Pattern with the Red Blade.
Step 13: Cut photos using the outside edge of the small Custom Cutting System Circle Pattern with the Red Blade (1), and (2) using the inside edge of the large Custom Cutting System Circle Pattern using the Green Blade.
Step 14: Adhere the photos to the mats.
Step 15: Adhere matted photos to the layout.
Step 16: Adhere embellishments using Foam Squares on some for added dimension.
Hello, Sunshine! Border

Step 1: Cut a piece of scrap paper or cardstock to measure 12? x 1-1/4? for the base of the border. Use a ruler to mark at 6?.

Step 2: Using waves paper, cut two pieces that are 6? x 6?. Then punch with the Sunshine Mandala Circle Punch. Cut the sunshine-punched piece in half, then in half again. This should give you four quarters for each sunshine piece. Fold each quarter piece so the point is in between two of the “rays” as shown below.


Step 3: Adhere the folded pieces to the base of the border, keeping them aligned in the middle, using the pencil mark as a guide.
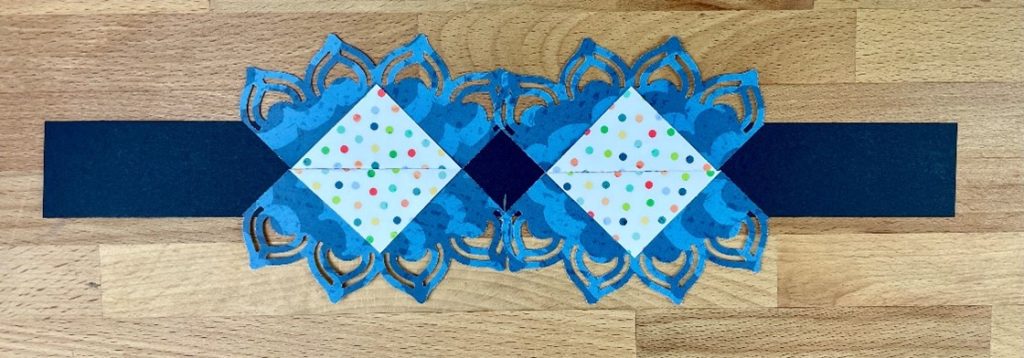
Step 4: Adhere all eight folded pieces. Cut off the excess on the ends of the border.
Step 5: Adhere Hello, Sunshine! Embellishments pieces in between each section.
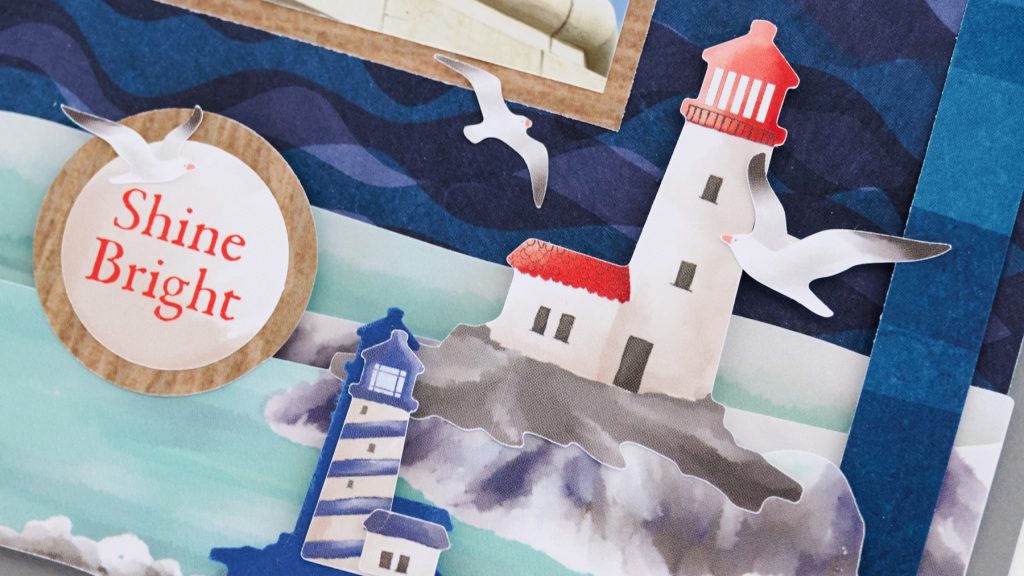
To create the Scenic Lighthouse layout you will need:
- Scenic Lighthouse Bundle — Earn this bundle FREE during the current Spend/Get Promo!
- Scenic Lighthouse Stickers
- Scenic Lighthouse Punch
- Seas, Please! Paper Pack or (Shop Canada | Shop Australia)
- Cool Gray Solid Cardstock or (Shop Canada | Shop Australia)
- 12-inch Trimmer or (Shop Canada | Shop Australia)
- Tape Runner or (Shop Canada | Shop Australia)
- Repositionable Tape Runner or (Shop Canada | Shop Australia)
- Foam Squares Variety Pack or (Shop Canada | Shop Australia)
- Foam Tape or (Shop Canada | Shop Australia)
- Micro-Tip or All-Purpose Scissors or (Shop Canada | Shop Australia)
Scenic Lighthouse Layout
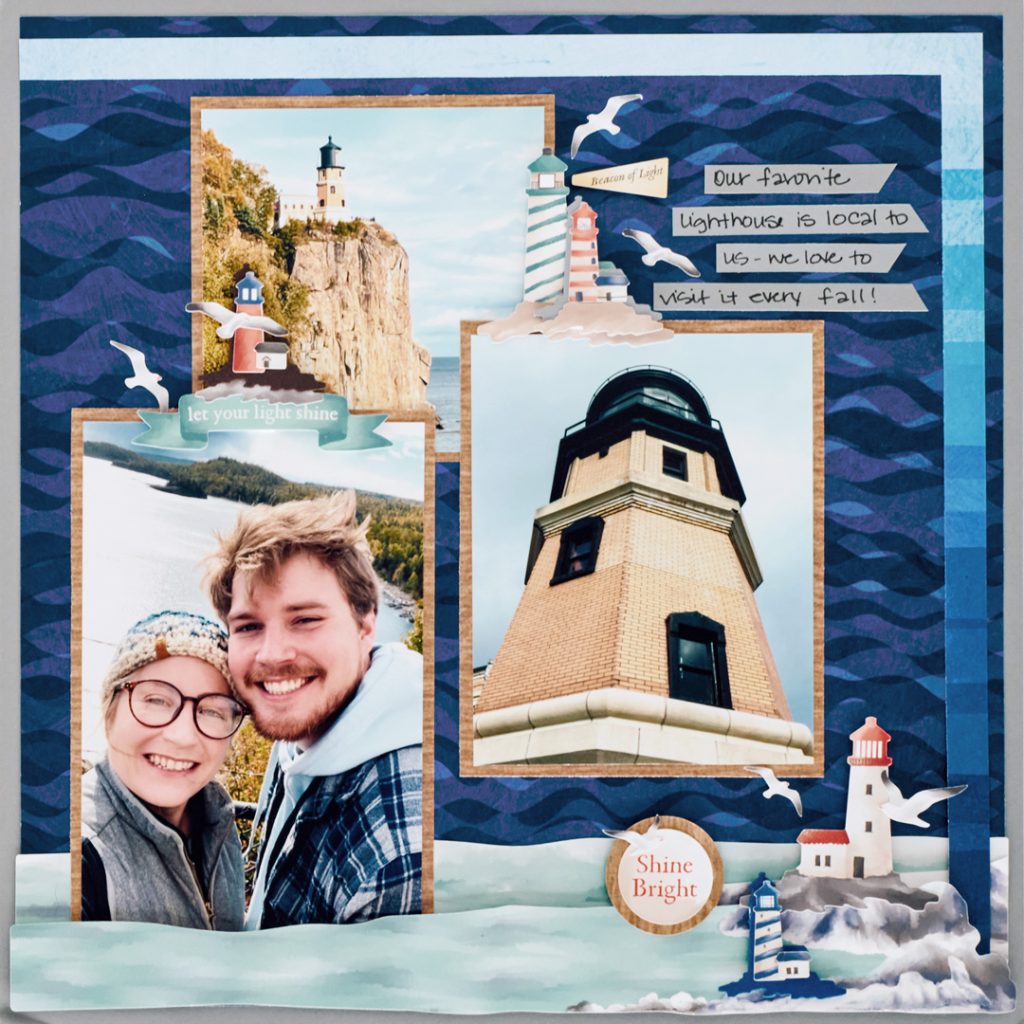
Step 1: Use Cool Gray Cardstock as the base for the layout.
Step 2: Cut a piece of waves paper to measure 11-1/2? x 11-1/2?. Adhere to the layout.
Step 3: Layer the border stickers along the bottom edge of the waves paper, adhering one of the wave borders using Foam Tape.
Step 4: Cut photo mats from wood paper to measure: (1) 4-1/4? x 6-1/4?, (1) 4-1/4? x 5-1/4? and (1) 4-1/4? x 4-1/4?.
Step 5: Cut and adhere photos that measure: (1) 4? x 6?, (1) 4? x 5? and (1) 4? x 4?.
Step 6: Adhere matted photos to the layout.
Step 7: Cut an “L” from ombre paper that is 1/2? wide, then adhere to the layout.
Step 8: Cut strips that measure 3/8? from Cool Gray Solid Cardstock for the journaling. Adhere to the upper right of the layout.
Step 9: Punch several pieces from the Scenic Lighthouse Punch, then layer with stickers. Adhere to the layout.
Step 10: Adhere any other stickers to the layout using Foam Squares on some for added dimension.
Don’t these layouts make you want summer to come faster?! Which bundle will YOU be earning FREE?
P.S. Are YOU a member of the Virtual Crop Facebook Group? It’s your go-to place for MONTHLY Virtual Crops, MONTHLY Completed Album Challenges, WEEKLY STREAMING of Fast & Fun Projects with Noreen, QUARTERLY Secret Box Openings with project tutorials and so much more! We hope you’ll join our community of more than 40,000 fellow memory-keeping enthusiasts — you’ll feel right at home!

I love these layouts!