May 23, 2024
Celebrate The Grad With These Graduation Projects

Congratulations to the class of 2024! If you were part of the graduation festivities this year — as a graduate or a supporter — these graduation projects are the perfect way to cherish those memories! Whether you want to save your photos in a scrapbook page or gift them to your recent graduate, these projects add the ideal amount of celebratory sparkle.

To create this layout and card you will need:
- You Graduated! Paper Pack or (Shop Canada | Shop Australia)
- You Graduated! Stickers or (Shop Canada | Shop Australia)
- You Graduated! Foiled Embellishments or (Shop Canada | Shop Australia)
- This Life Black & White Paper Pack or (Shop Canada | Shop Australia)
- Black & White Solid Cardstocks or (Shop Canada | Shop Australia)
- Black Shimmer Solid Core Paper Pack or (Shop Canada | Shop Australia)
- Cap & Diploma Punch or (Shop Canada | Shop Australia)
- Circle Punch or (Shop Canada | Shop Australia)
- Custom Cutting System with Circle Patterns or (Shop Canada | Shop Australia)
- 12-inch Trimmer with Straight & Scoring Blades or (Shop Canada | Shop Australia)
- 12-inch Decorative Trimmer or (Shop Canada | Shop Australia)
- All-Purpose Scissors or (Shop Canada | Shop Australia)
- Tape Runner or (Shop Canada | Shop Australia)
- Repositionable Tape Runner or (Shop Canada | Shop Australia)
- Foam Squares Variety Pack or (Shop Canada | Shop Australia)
- Precision Point Adhesive Pen or (Shop Canada | Shop Australia)
- Bone Folder
- Sewing thread


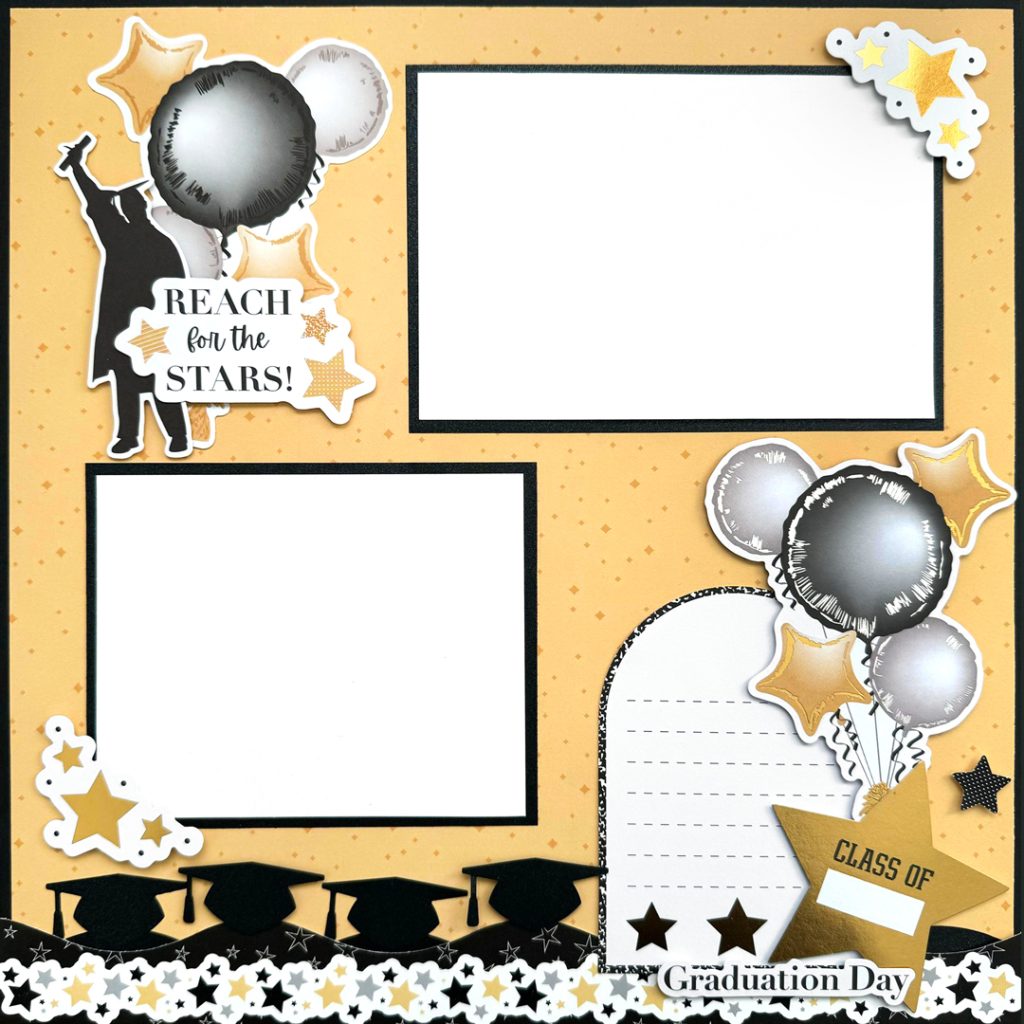
Graduation Day Layout
Step 1: Use a piece of Black Solid Cardstock as the base of this layout. Cut the sparkles paper from the You Graduated! Paper Pack to 11-3/4? x 11-3/4? and add to the base.
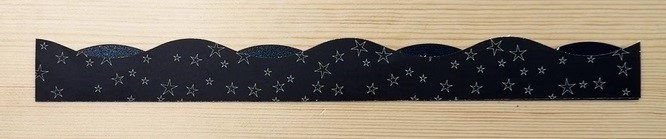
Step 2: Use the 12-inch Decorative Trimmer to cut waves to measure 12? x 1-1/4? from black stars paper from the This Life Black & White Paper Pack. Use the 12-inch Decorative Trimmer again to cut waves to measure 12? x 1-1/8? from Black Shimmer Solid Core Paper. Adhere the two borders to the base.

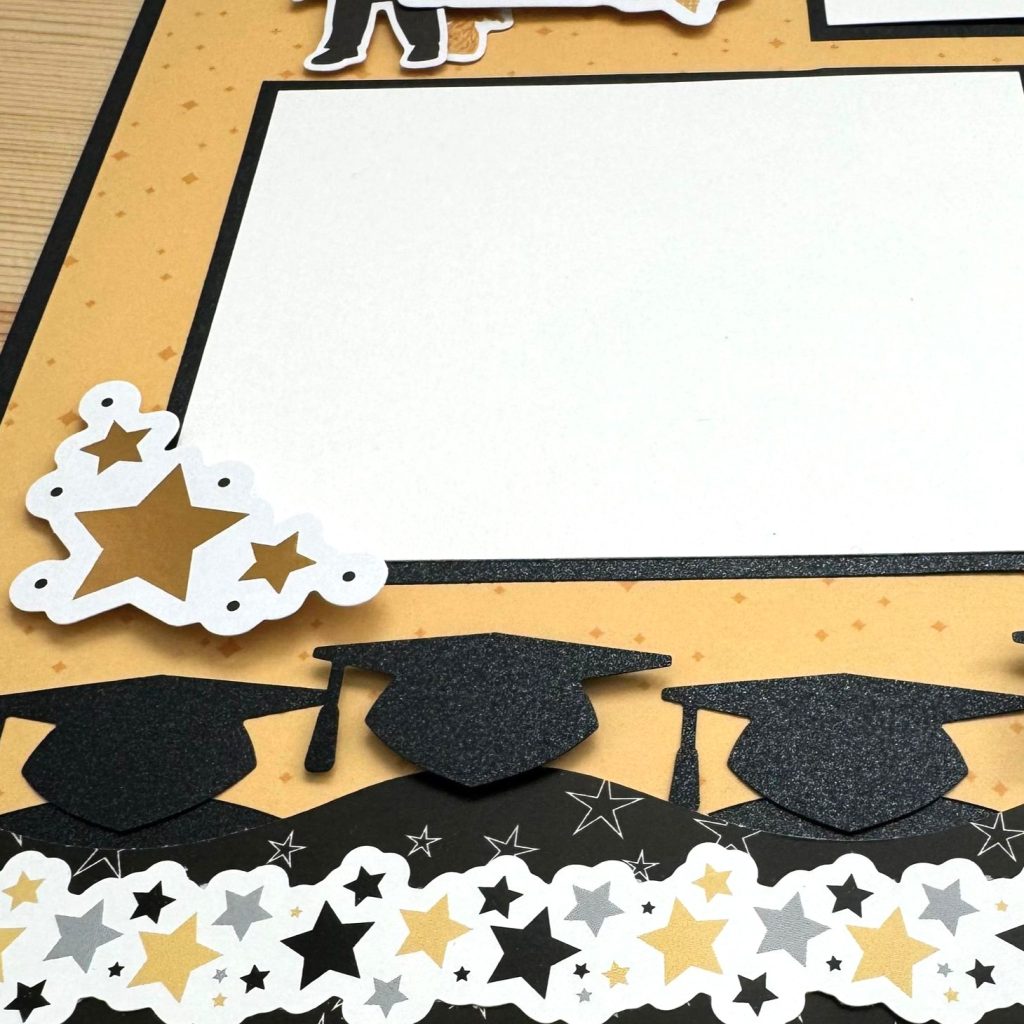
Step 3: Use the Cap & Diploma Punch to punch four graduation caps from a piece of Black Shimmer Solid Core Paper. Add to the base using Foam Squares on two of the caps marked with a red arrow in the image above for added dimension.
Step 4: Cut the following sized mats from Black Solid Cardstock: (1) 6-1/4? x 4-1/4? and (1) 5? x 4-1/4?. Cut the following sized mats from White Solid Cardstock and add to the black mats: (1) 6? x 4? and (1) 5? x 4?.


Step 5: Adhere the stickers, embellishments and photo mats, using Foam Squares on some for added dimension.
Graduation Accordion Fold Card
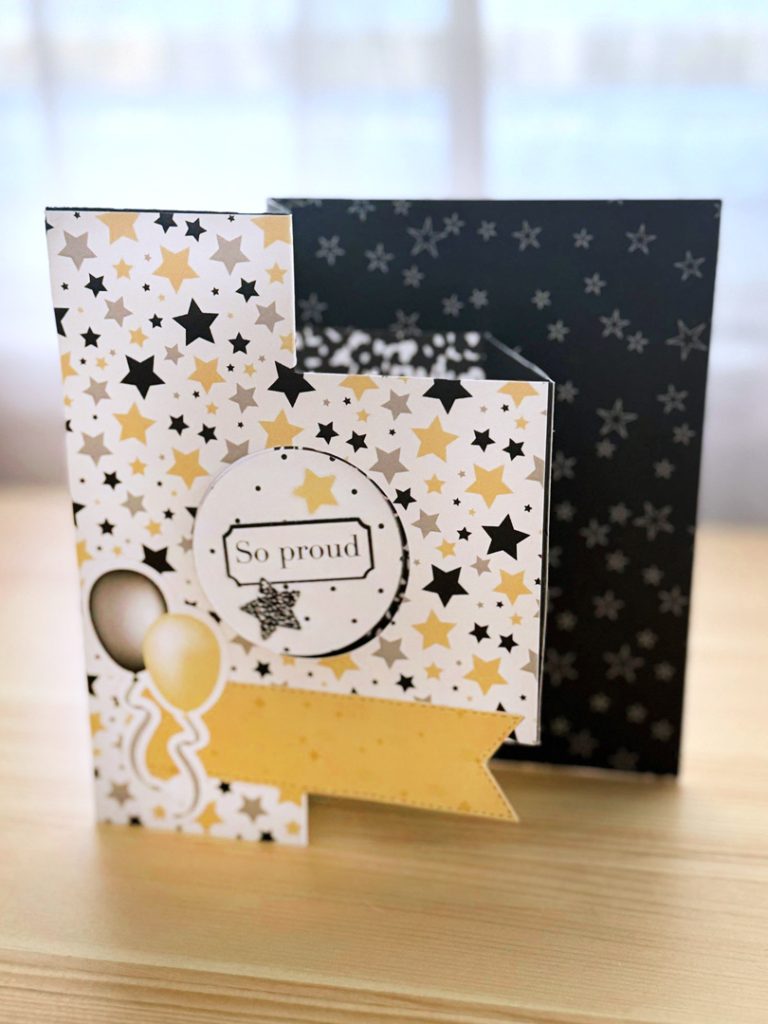

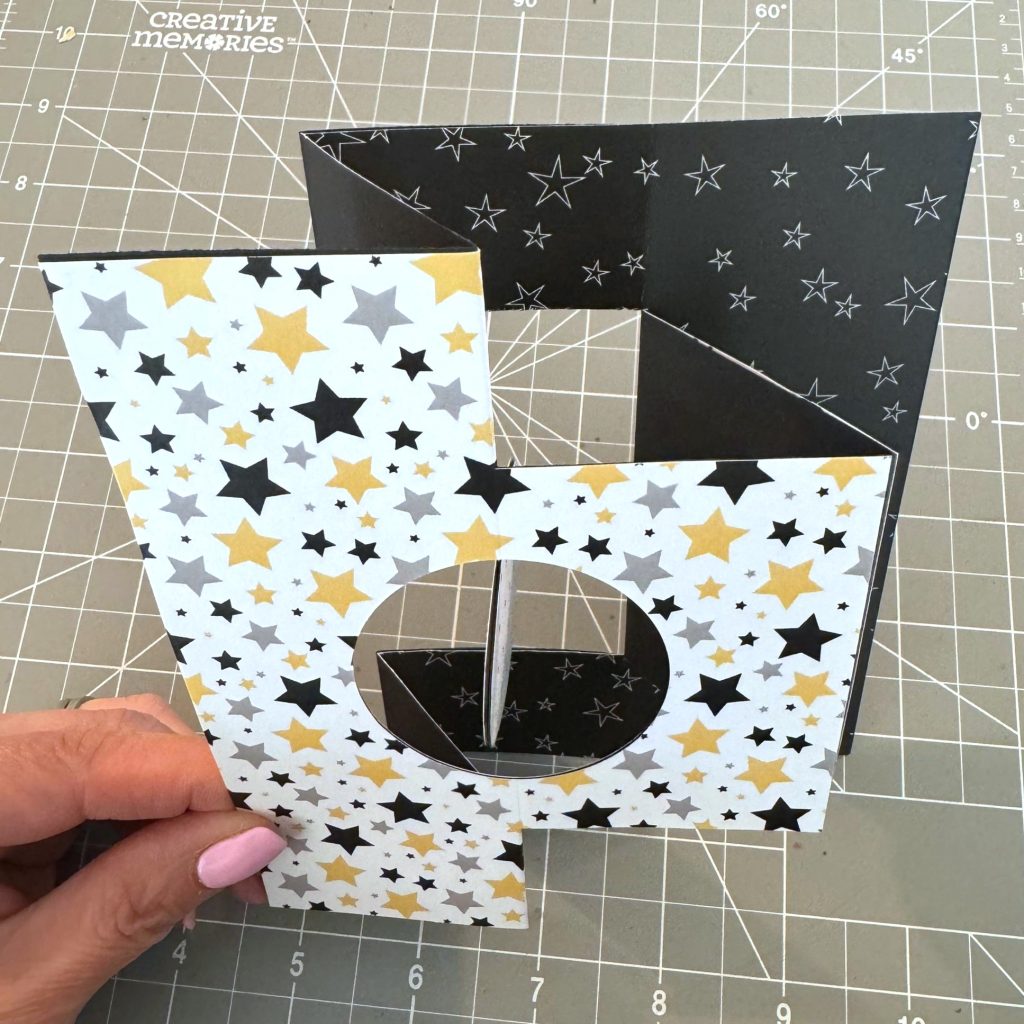
Step 1: Cut a piece of cardstock to measure 8? x 5-1/2?. Score at 4? on the longer side. Cut three pieces of patterned paper to measure 4? x 5-1/2?. Adhere two of the pieces to the card base as shown.

Step 2: Score at 2? from the middle line on both sides as shown in the red lines above.

Step 3: Cut from one of the scored lines to the other at 1-1/4? from the edge.

Step 4: Use the Circle Punch to punch two circles from a piece of Black Solid Cardstock and two circles from patterned papers. Adhere the patterned circle to the cardstock circle. Use Precision Point Adhesive to glue the thread. Adhere another circle piece to cover.

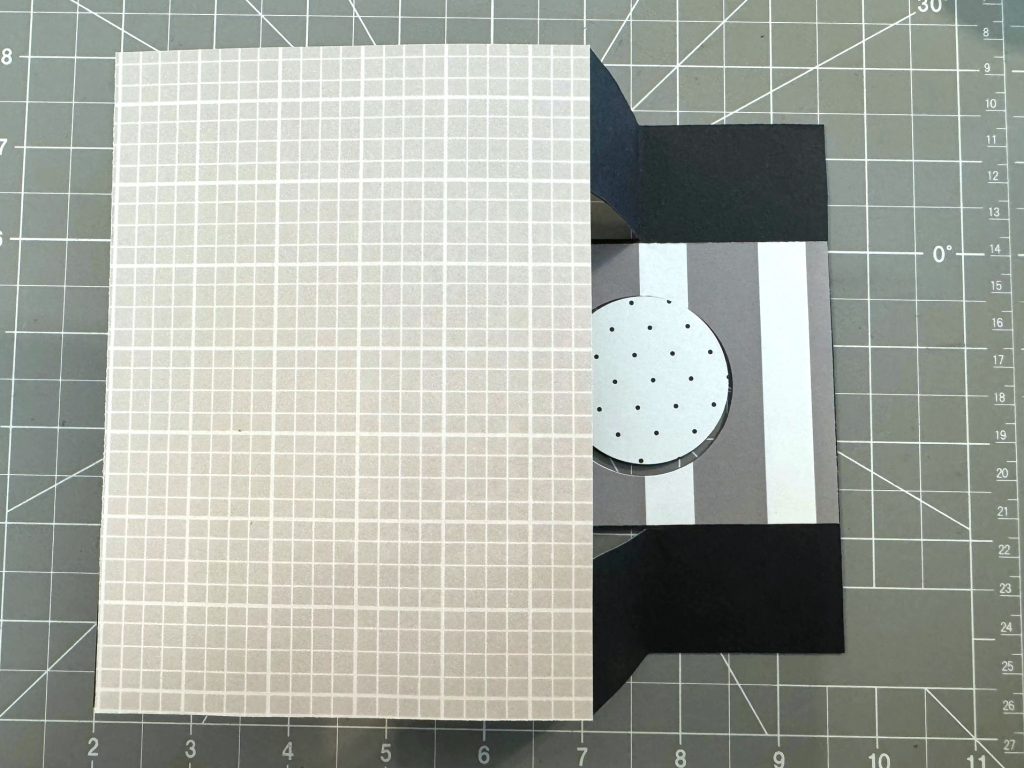
Step 5: Cut a piece of patterned paper to measure 4? x 3?. Flip the card base and place the piece as shown above. Cut a circle using the inside edge of the medium Custom Cutting System Circle Pattern with the Blue Blade. Set the 4? x 3? piece aside.
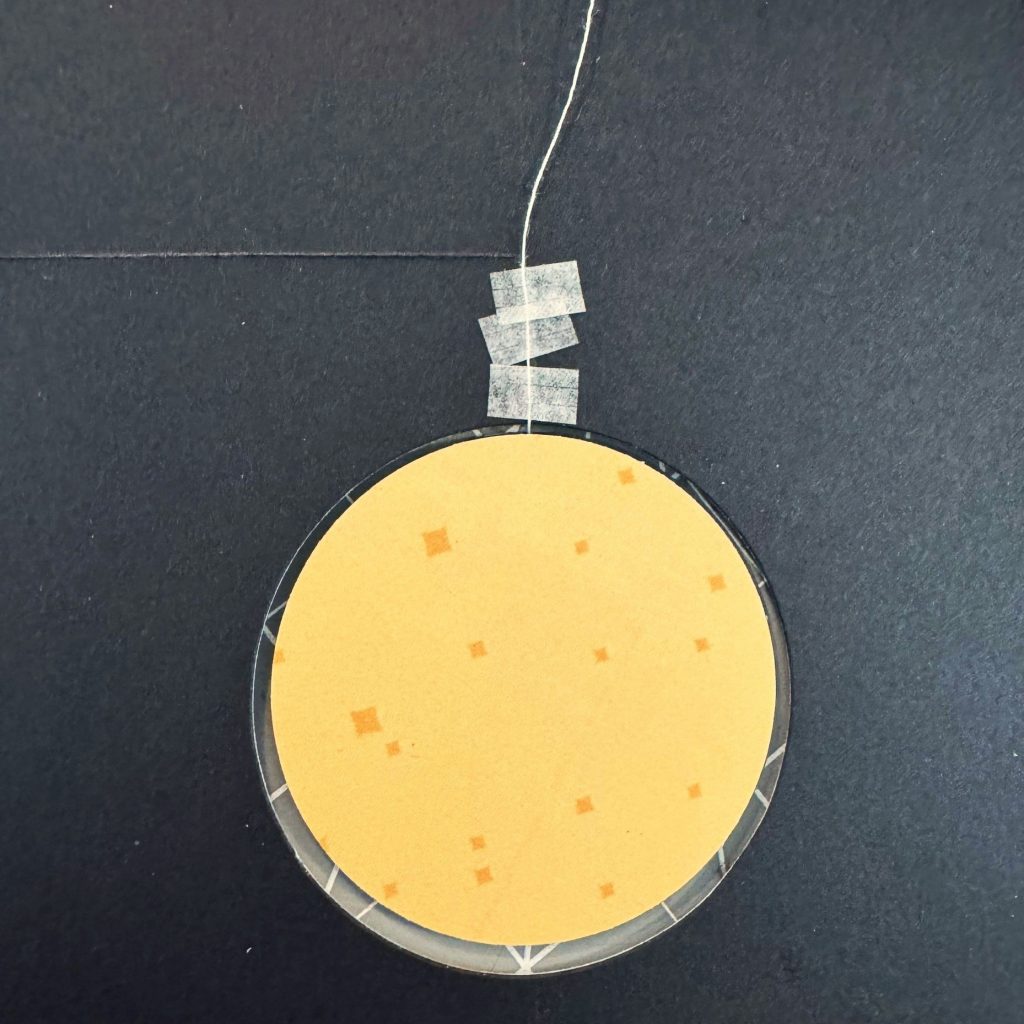

Step 6: Place the swinging piece in the middle of the circle window. Adhere the thread using the Tape Runner. Trim the excess thread as you go. Adhere the 4? x 3? piece to cover.
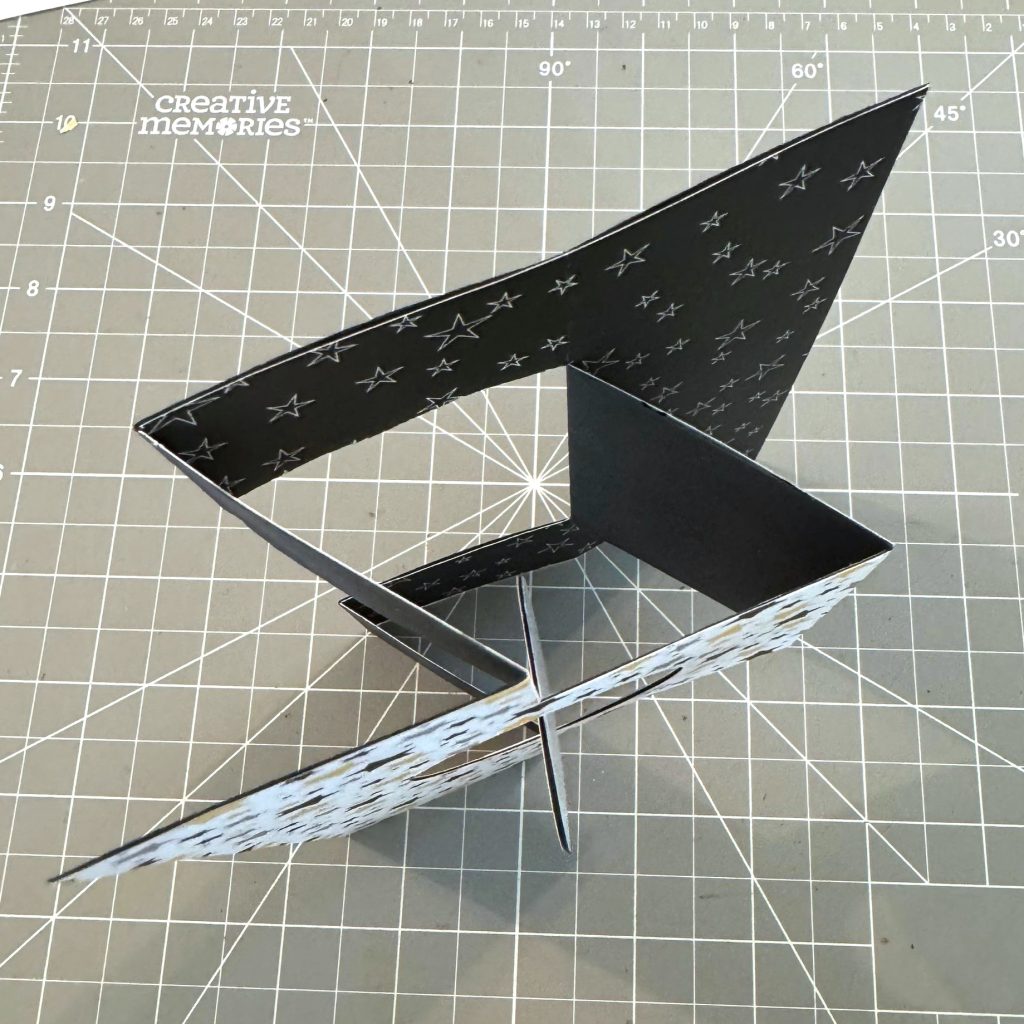

Step 7: Accordion fold the card as shown above. Use the Bone Folder to make the crease. Add a 4? x 5-1/2? patterned piece of paper to the back of the card as shown.


Step 8: Cut a piece of patterned paper to measure 4? x 3?. Use the Precision Point Adhesive Pen to glue the sides and the bottom of the piece. Adhere to the back of the card as a pocket to hold a gift card.
Step 9: Cut a piece of patterned paper to measure 3-1/2? x 1?. Cut one edge to make a banner shape. Adhere the banner and stickers, using Foam Squares on some for added dimension.
Do you have any graduates you plan on making these graduation scrapbooking projects for?
P.S. Are YOU a member of the Virtual Crop Facebook Group? It’s your go-to place for MONTHLY Virtual Crops, MONTHLY Completed Album Challenges, WEEKLY STREAMING of Fast & Fun Projects with Noreen, QUARTERLY Secret Box Openings with project tutorials and so much more! We hope you’ll join our community of more than 40,000 fellow memory-keeping enthusiasts — you’ll feel right at home!

Very creative ideas – thanks for the detailed instructions.