September 17, 2024
Welcome Baby With This Layout
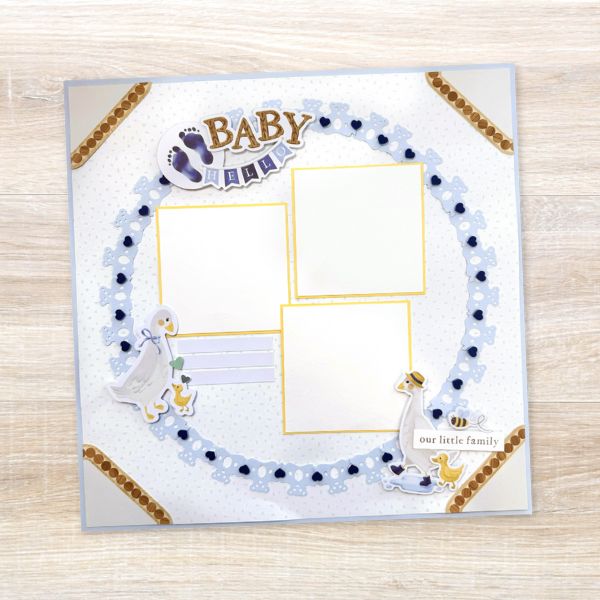
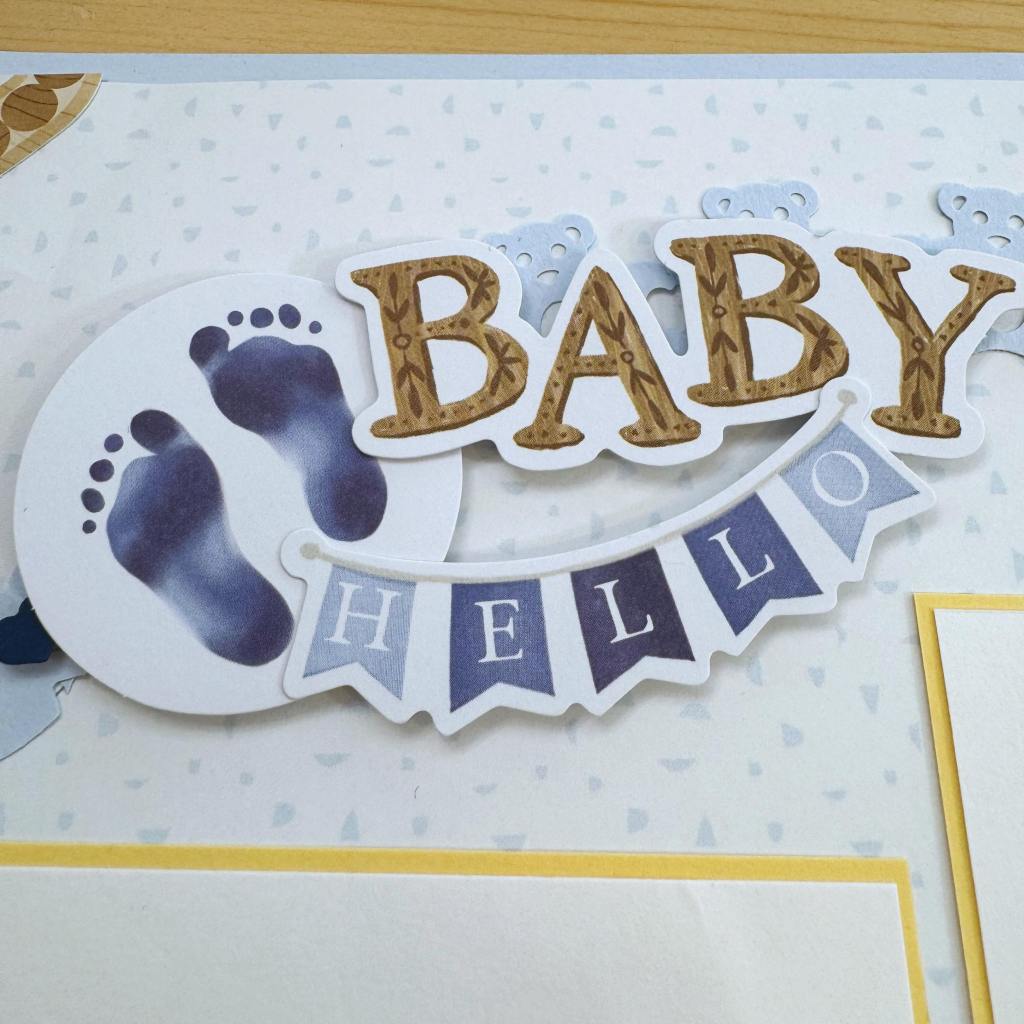
The first weeks of parenting go by in a flash. Remember all those adorable, special moments for years to come with this baby-themed layout created by blog contributor Sachiyo Omitsu! You can make your own bear-y adorable border by using the Original Border Maker System with the Bears Chain Cartridge. Keep reading to learn how.

To create this layout you will need:
- Welcome Baby Blue Paper Pack or (Shop Canada | Shop Australia)
- Welcome Baby Blue Embellishments or (Shop Canada | Shop Australia)
- Baby Blue, Blue, Canary & White Solid Cardstock or (Shop Canada | Shop Australia)
- Welcome Baby Stickers or (Shop Canada | Shop Australia)
- Write On! Stickers or (Shop Canada | Shop Australia)
- Original Border Maker System with Bears Chain Cartridge or (Shop Canada | Shop Australia)
- 12-inch Trimmer or (Shop Canada | Shop Australia)
- Custom Cutting System with the Jumbo Circle Pattern or (Shop Canada | Shop Australia)
- Tape Runner or (Shop Canada | Shop Australia)
- Repositionable Tape Runner or (Shop Canada | Shop Australia)
- Foam Squares Variety Pack or (Shop Canada | Shop Australia)
- All-Purpose Scissors or (Shop Canada | Shop Australia)

Step 1: Cut out a 1” frame from a piece of Baby Blue Solid Cardstock. Set aside the inside square piece to use in Step 2. Cut the scattered bits patterned paper to measure 11-3/4” x 11-3/4” and adhere to the frame.


Step 2: Use the Original Border Maker System with the Bears Chain Border Maker Cartridge to punch four borders from the baby blue cutout square piece from Step 1. Cut a slit on the bottom of the heart shape as shown. Bend the border to make it a curved line as shown. Trace the inside edge of the Jumbo Circle Custom Cutting System Pattern onto the scattered bits base with a pencil . Using the pencil line as the
guide, adhere the bear borders. Trim the excess as you go.

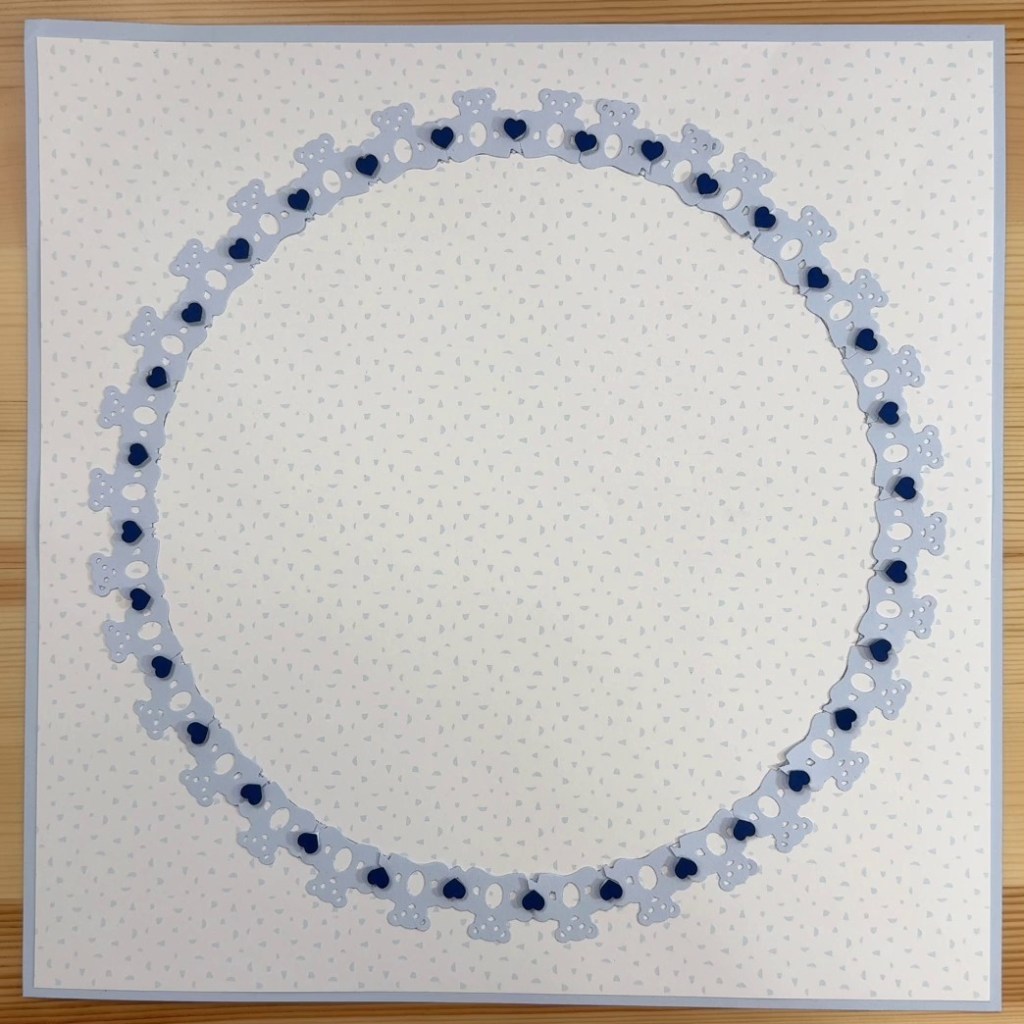
Step 3: Cut two 1/2” strips from a piece of Blue Solid Cardstock. Insert the strips into the BMC housing unit with the Bears Chain Cartridge and punch a heart shape as shown. Punch 32 heart shapes in total. Use Foam Squares to add the heart shapes to the page.
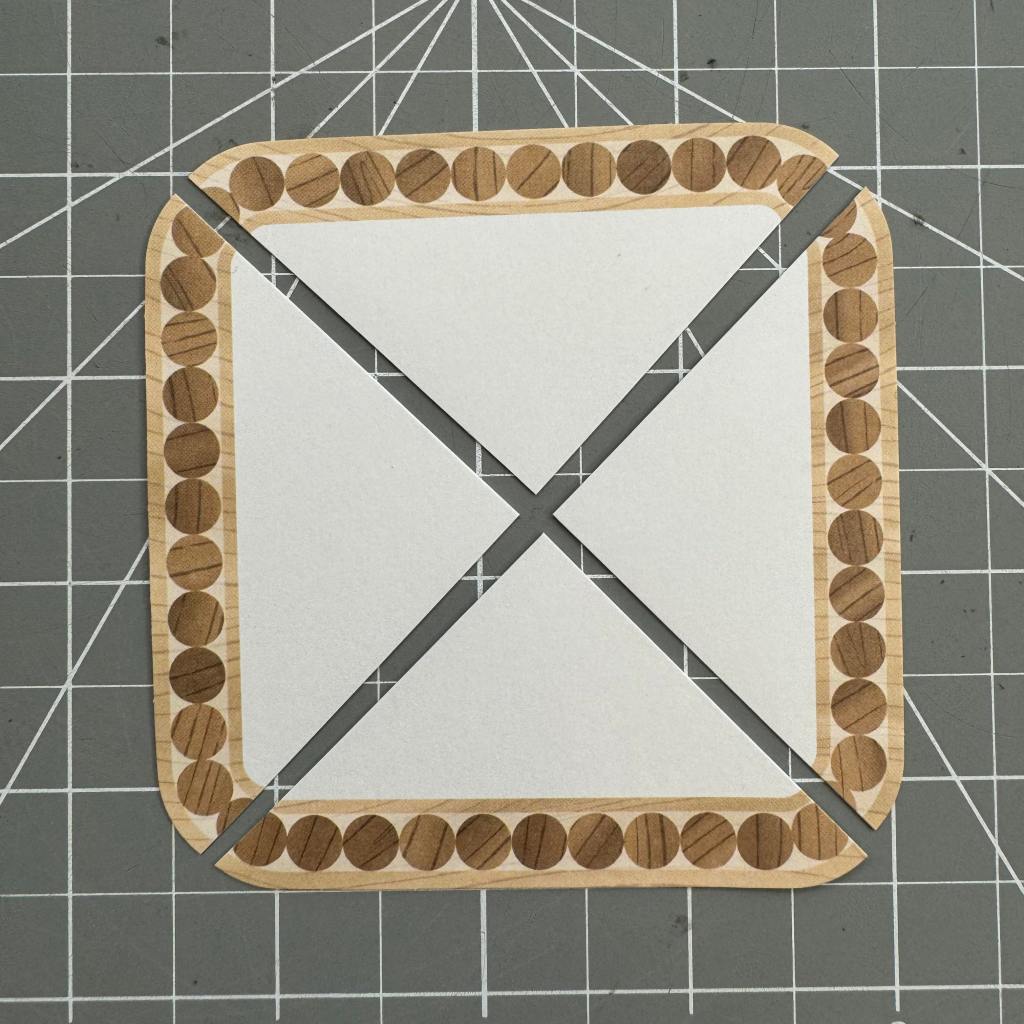
Step 4: Cut the embellishment into four triangles as shown. Add to the page.
Step 5: Cut three mats to measure 3-1/2” x 3-1/2” from a piece of Canary Solid Cardstock. Cut three mats to measure 3-3/8” x 3-3/8” from a piece of White Solid Cardstock. Adhere the white mats onto the canary mats to create double mats.
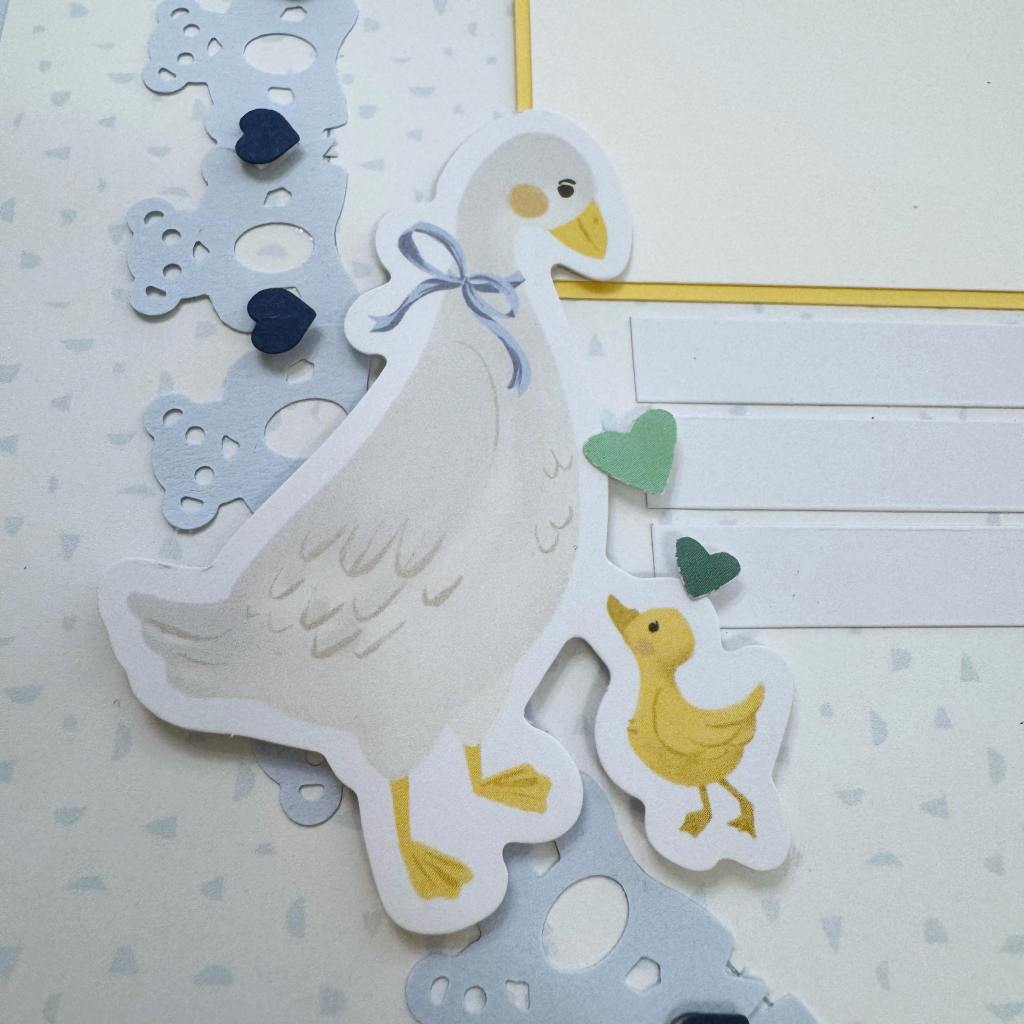

Step 6: Adhere the embellishments, stickers, Write On! Stickers and photo mats, using Foam
Squares on some for added dimension.
Will you use the Original Border Maker System to make other circular borders?
P.S. Are YOU a member of the Virtual Crop Facebook Group? It’s your go-to place for MONTHLY Virtual Crops, MONTHLY Completed Album Challenges, QUARTERLY Secret Box Openings with project tutorials and so much more! We hope you’ll join our community of more than 40,000 fellow memory-keeping enthusiasts — you’ll feel right at home!

Wonderful work!