September 27, 2024
First-class Border Projects
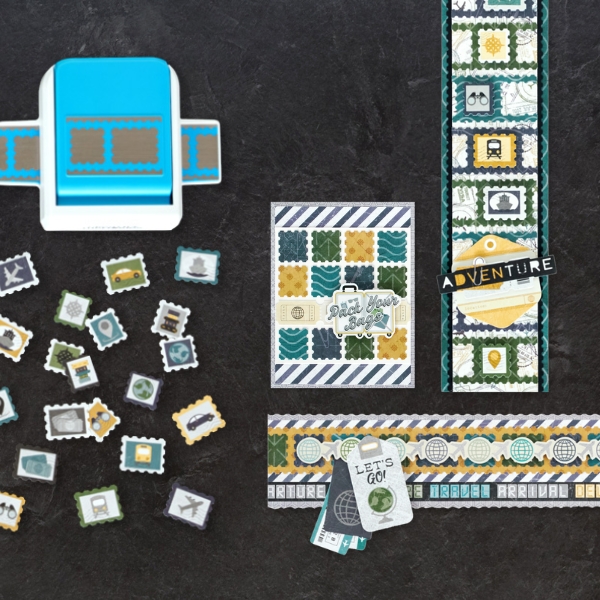
Get ready to board the flight to creativity! Whether you have travel plans coming up or just got back from your last vacation, your photos deserve details that are just as jetsetting as your adventures. Using the Postage Stamp Border Punch, you can recreate the three borders below and see if they get your stamp of approval!
To create the borders and card you will need:
- Passport to Adventure Paper Pack or (Shop Canada | Shop Australia)
- Passport to Adventure Embellishments or (Shop Canada | Shop Australia)
- Passport to Adventure Stickers or (Shop Canada | Shop Australia)
- Black & White Solid Cardstocks or (Shop Canada | Shop Australia)
- Postage Stamp Border Punch with BONUS Mini Embellishments (Shop Canada | Shop Australia)
- 12-inch Trimmer with Straight, Scoring and Stamping Blader or (Shop Canada | Shop Australia)
- Micro-Tip Scissors or (Shop Canada | Shop Australia)
- Tape Runner or (Shop Canada | Shop Australia)
- Repositionable Tape Runner or (Shop Canada | Shop Australia)
- Foam Squares Variety Pack or (Shop Canada | Shop Australia)

Let’s Go Border
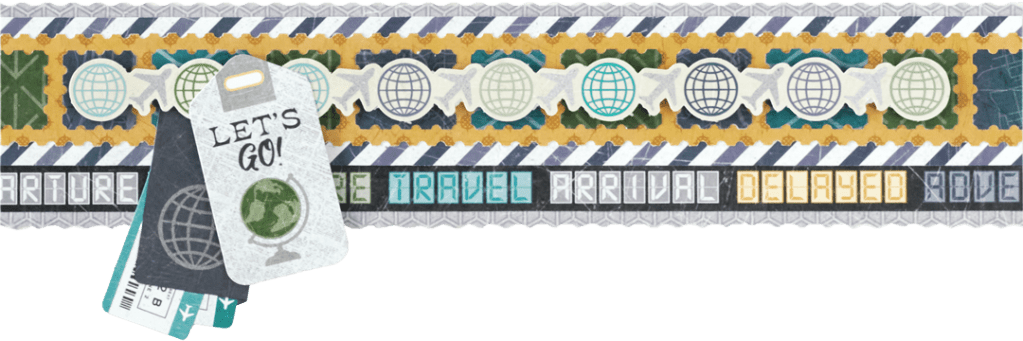
Step 1: Using the stamping blade, cut a 12″ x 2-5/8″ strip with gray geo paper for the base. Using the straight blade, cut a 12″ x 1-3/4″ strip with stripes paper and adhere on the base. Cut one row of words from the words paper (12″ x 1/2″) and adhere just below the stripes strip.
Step 2: Using the postage stamp border punch, punch a border with gold compass paper. (Tip: Turn the punch over and align the edge of the paper in the middle of a large stamp in order for the border pattern to match up on both ends.) Punch stamps with green, deep sea green and navy designer paper scraps and adhere the stamps on the gold border, alternating colors as shown. (Save the borders cut for the Adventure Border.)
Step 3: Trim a globes border sticker to 10-5/8″ and adhere it on the border using foam squares. Add ticket and title embellishments.
Adventure Border
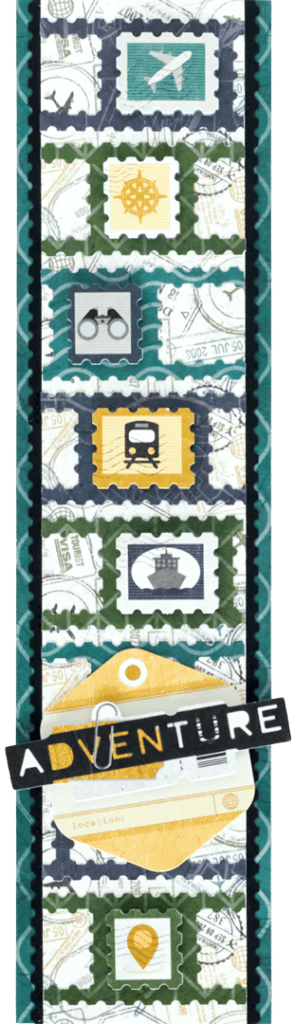
Step 1: Cut a 3″ x 12″ strip with deep sea green waves paper for the base.
Step 2: Cut a 2-3/8″ x 12″ strip with passport stamps paper. Using the postage stamp border punch, punch a border with black cardstock. Cut the strip in half lengthwise. Adhere halves behind the passport stamps strip so just the edges show and mount on the border.
Step 3: Punch postage stamp borders with deep sea green, green and navy designer papers (or use the borders leftover from the Let’s Go border). Trim to 2-3/8″ sections and adhere on the border as shown.
Step 4: Adhere postage stamp embellishments using foam squares. Add ticket and title embellishments.
Pack Your Bags Card
Step 1: Create the card base. Cut an 8-1/2″ x 5-1/2″ piece with white cardstock. Using the Scoring blade, score along the long edge at 4-1/4″ and fold in half.
Step 2: Cut a 4-1/4″ x 5-1/2″ piece with gray geo paper and adhere on the front of the card. Cut two 4″ x 5/8″ strips with stripes paper and adhere on the top and bottom of the card. Cut a 4″ x 4″ square with white cardstock and adhere on the center of the card.
Step 3: Using the postage stamp border punch, punch borders with deep sea green, green, navy and gold designer paper scraps. Adhere three rows of four stamps each on the white square.
Step 4: Adhere a 4″ sections of a ticket border sticker as shown. Add a title sticker using foam squares.
Did you try making all the borders? Which one matches your travel photos best?
P.S. Are YOU a member of the Virtual Crop Facebook Group? It’s your go-to place for MONTHLY Virtual Crops, MONTHLY Completed Album Challenges, QUARTERLY Secret Box Openings with project tutorials and so much more! We hope you’ll join our community of more than 40,000 fellow memory-keeping enthusiasts — you’ll feel right at home!
