June 17, 2025
Craft Happy Scrapbook Layout for Handmade Moments

Looking for a cozy, crafty one-page scrapbook layout that’s perfect for photos of knitting, sewing or handmade memories? This Craft Happy layout delivers big charm with bold diagonal cuts, adorable vellum embellishments and trendy stitched accents. It’s a joyful choice for showcasing your love of crafting or preserving photos from a DIY or creative retreat!
To create this layout you will need:
- Bright White Solid Cardstock (10/pk) or (Shop Canada | Shop Australia)
- Navy Solid Cardstock (10/pk) or (Shop Canada | Shop Australia)
- Craft Happy Paper Pack (12/pk) or (Shop Canada | Shop Australia)
- Craft Happy Mat Paper Pack (6/pk) or (Shop Canada | Shop Australia)
- Craft Happy Embellishments (42/pk) or (Shop Canada | Shop Australia)
- Craft Happy Stickers (3/pk) or (Shop Canada | Shop Australia)
- Rub-On Transfers or (Shop Canada | Shop Australia)
- Multi-Purpose Tool or (Shop Canada | Shop Australia)
- Foam Squares or (Shop Canada | Shop Australia)
- Tape Runner or ( Shop Canada | Shop Australia )
- Vellum Tape Runner Refill or (Shop Canada | Shop Australia)
- 12-inch Trimmer or ( Shop Canada | Shop Australia )
- 12-inch Trimmer Scallop Blade or ( Shop Canada | Shop Australia )

Step 1: Use Bright White Cardstock for the base of the layout.
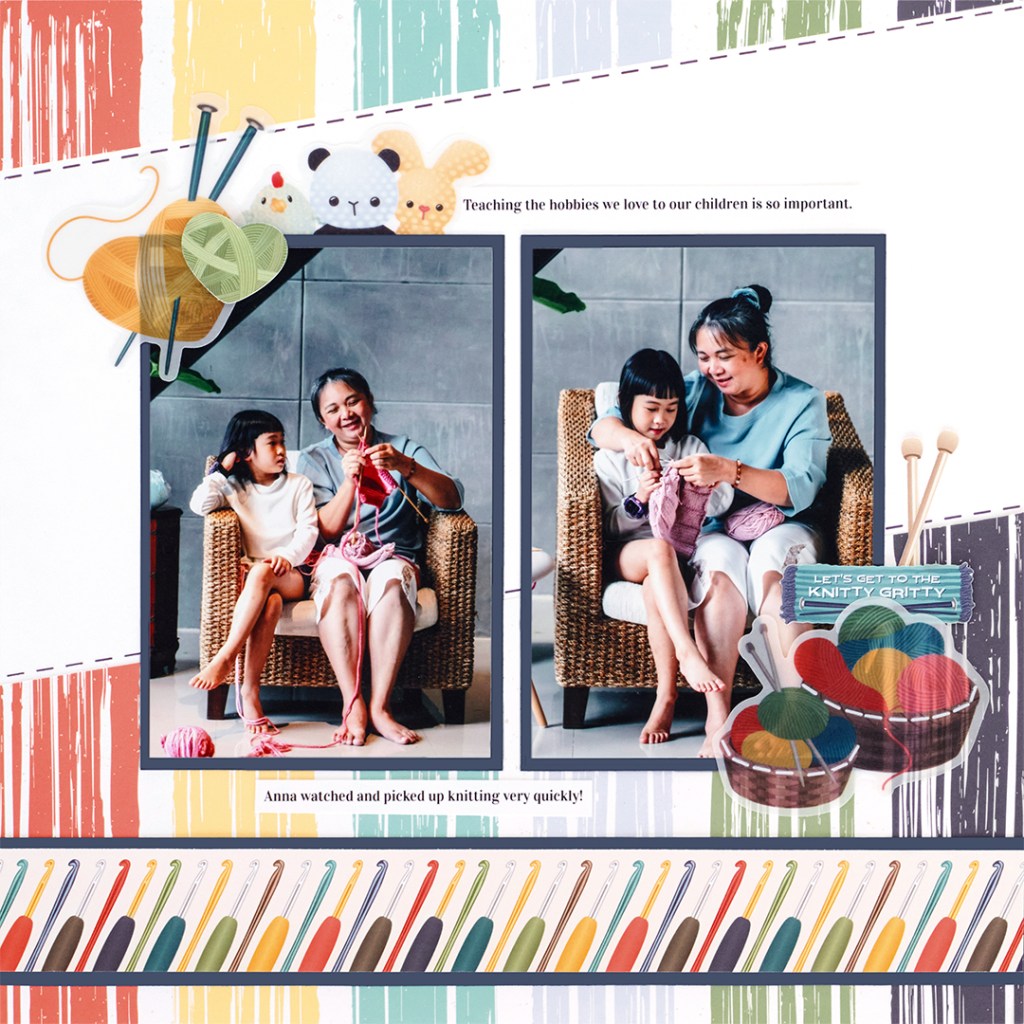
Step 2: Cut a piece of stripes designer paper to measure 12? x 6?. On the left side, mark at 4?. Cut diagonally from that mark to the top-right corner. Adhere the small triangle to the top, the large to the bottom.
Step 3: Add black rub-on straight stitches below the top diagonal and above the bottom one. Trim rub-ons off the sheet with a trimmer for easier application. Use the Multi-Purpose Tool to transfer.
Step 4: Cut a 12? x 1-3/4? Navy Cardstock strip. From the Mat Pack, cut a 12? x 1-1/2? crochet border. Layer on Navy Cardstock and adhere 1/2? from the bottom.
Step 5: Cut two 4-1/4? x 6-1/4? photo mats from Navy Cardstock. Place the left mat 3? from the bottom and 1-3/4? from the left edge. Place the right mat 3? from the bottom and 1-3/4? from the right edge.
Step 6: Tuck the stuffed animals vellum embellishment under the left photo, then add the yellow heart with knitting needles. Use Foam Squares to pop up the green yarn heart.
Step 7: Add the knitting baskets vellum embellishment to the lower right of the right photo. Decorate basket rims with white straight stitch rub-ons.
Step 8: Cross two knitting needle stickers next to the right photo with the tips tucked under the baskets. Place the sentiment sticker above the baskets.
Step 9: Journal as desired.
What photos from your craft corner would look perfect on this layout? Show off your creativity and tag us so we can see!
P.S. Are YOU a member of the Virtual Crop Group? It’s your go-to place for MONTHLY Virtual Crops, MONTHLY Completed Album Challenges, QUARTERLY Secret Box Openings with project tutorials and more. Join 46 000+ memory-keepers — you’ll feel right at home!

I like this layout. It actually has some white space, to rest the eyes and highlight the photos, yet lots of movement and color!