October 13, 2025
Baking Up Holiday Memories with the Gingerbread Fun Collection
Nothing says “holiday magic” like a cozy cookie-decorating day! The Gingerbread Fun collection captures every sprinkle, swirl, and smile with its delightfully detailed patterns and icing-inspired accents. Between the peppermint borders, sugary embellishments, and playful gingerbread designs, it’s impossible not to feel the joy (and smell the cookies!) as you craft.
To create this layout, you will need:
- Gingerbread Fun Designer Paper (Shop Canada | Shop Australia)
- Gingerbread Fun Stickers (Shop Canada | Shop Australia)
- Red Solid Cardstock (Shop Canada | Shop Australia)
- 12-inch Trimmer (Shop Canada | Shop Australia)
- Tape Runner (Shop Canada | Shop Australia)
- Repositionable Adhesive (Shop Canada | Shop Australia)
- Foam Squares (Shop Canada | Shop Australia)
- Micro-Tip Scissors (Shop Canada | Shop Australia)
- Photo Trimmer (Shop Canada | Shop Australia)
- White Write-On Stickers (Shop Canada | Shop Australia)
- Black Dual-Tip Pen (Shop Canada | Shop Australia)
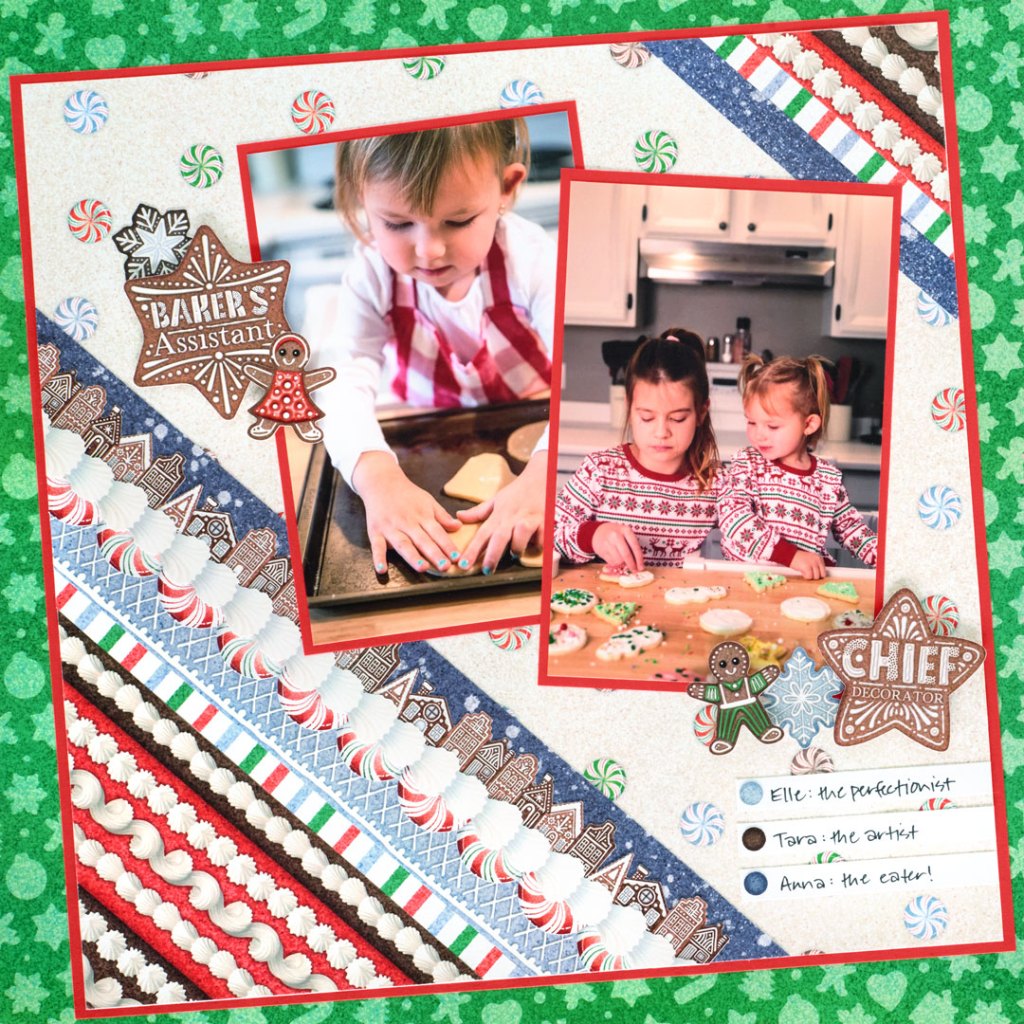

Step 1: Use a sheet of green tonal cookies designer paper as the base for this layout. Cut an 11” x 11” piece from Red Solid Cardstock and adhere at an angle on the base. (Tip: You may wish to remove the inside of the red cardstock to conserve paper and use for the mats in Step 8.)
Step 2: Cut a 10-3/4” x 10-3/4” piece from the peppermints designer paper. Cut a 3-1/4” corner off the frosted stripes designer paper. Cut a 1-5/8” corner off the opposite side of the paper sheet. Adhere the larger corner on the lower left of the peppermints piece and the smaller corner on the upper right.
Step 3: Cut a 3/8” x 12” strip from the stripes designer paper. Adhere just above the larger corner. Using scissors, snip off the excess. Adhere the excess under the smaller corner, trimming again as needed.
Step 4: Cut a 12” x 1-1/4” strip from the blue frosted decorative stripes designer paper. Adhere above the stripes strip as shown, cutting off the excess.
Step 5: Cut a 12” x 1” strip from blue gingerbread stars designer paper, using the sky area. Adhere above the blue frosted strip, cutting off the excess.
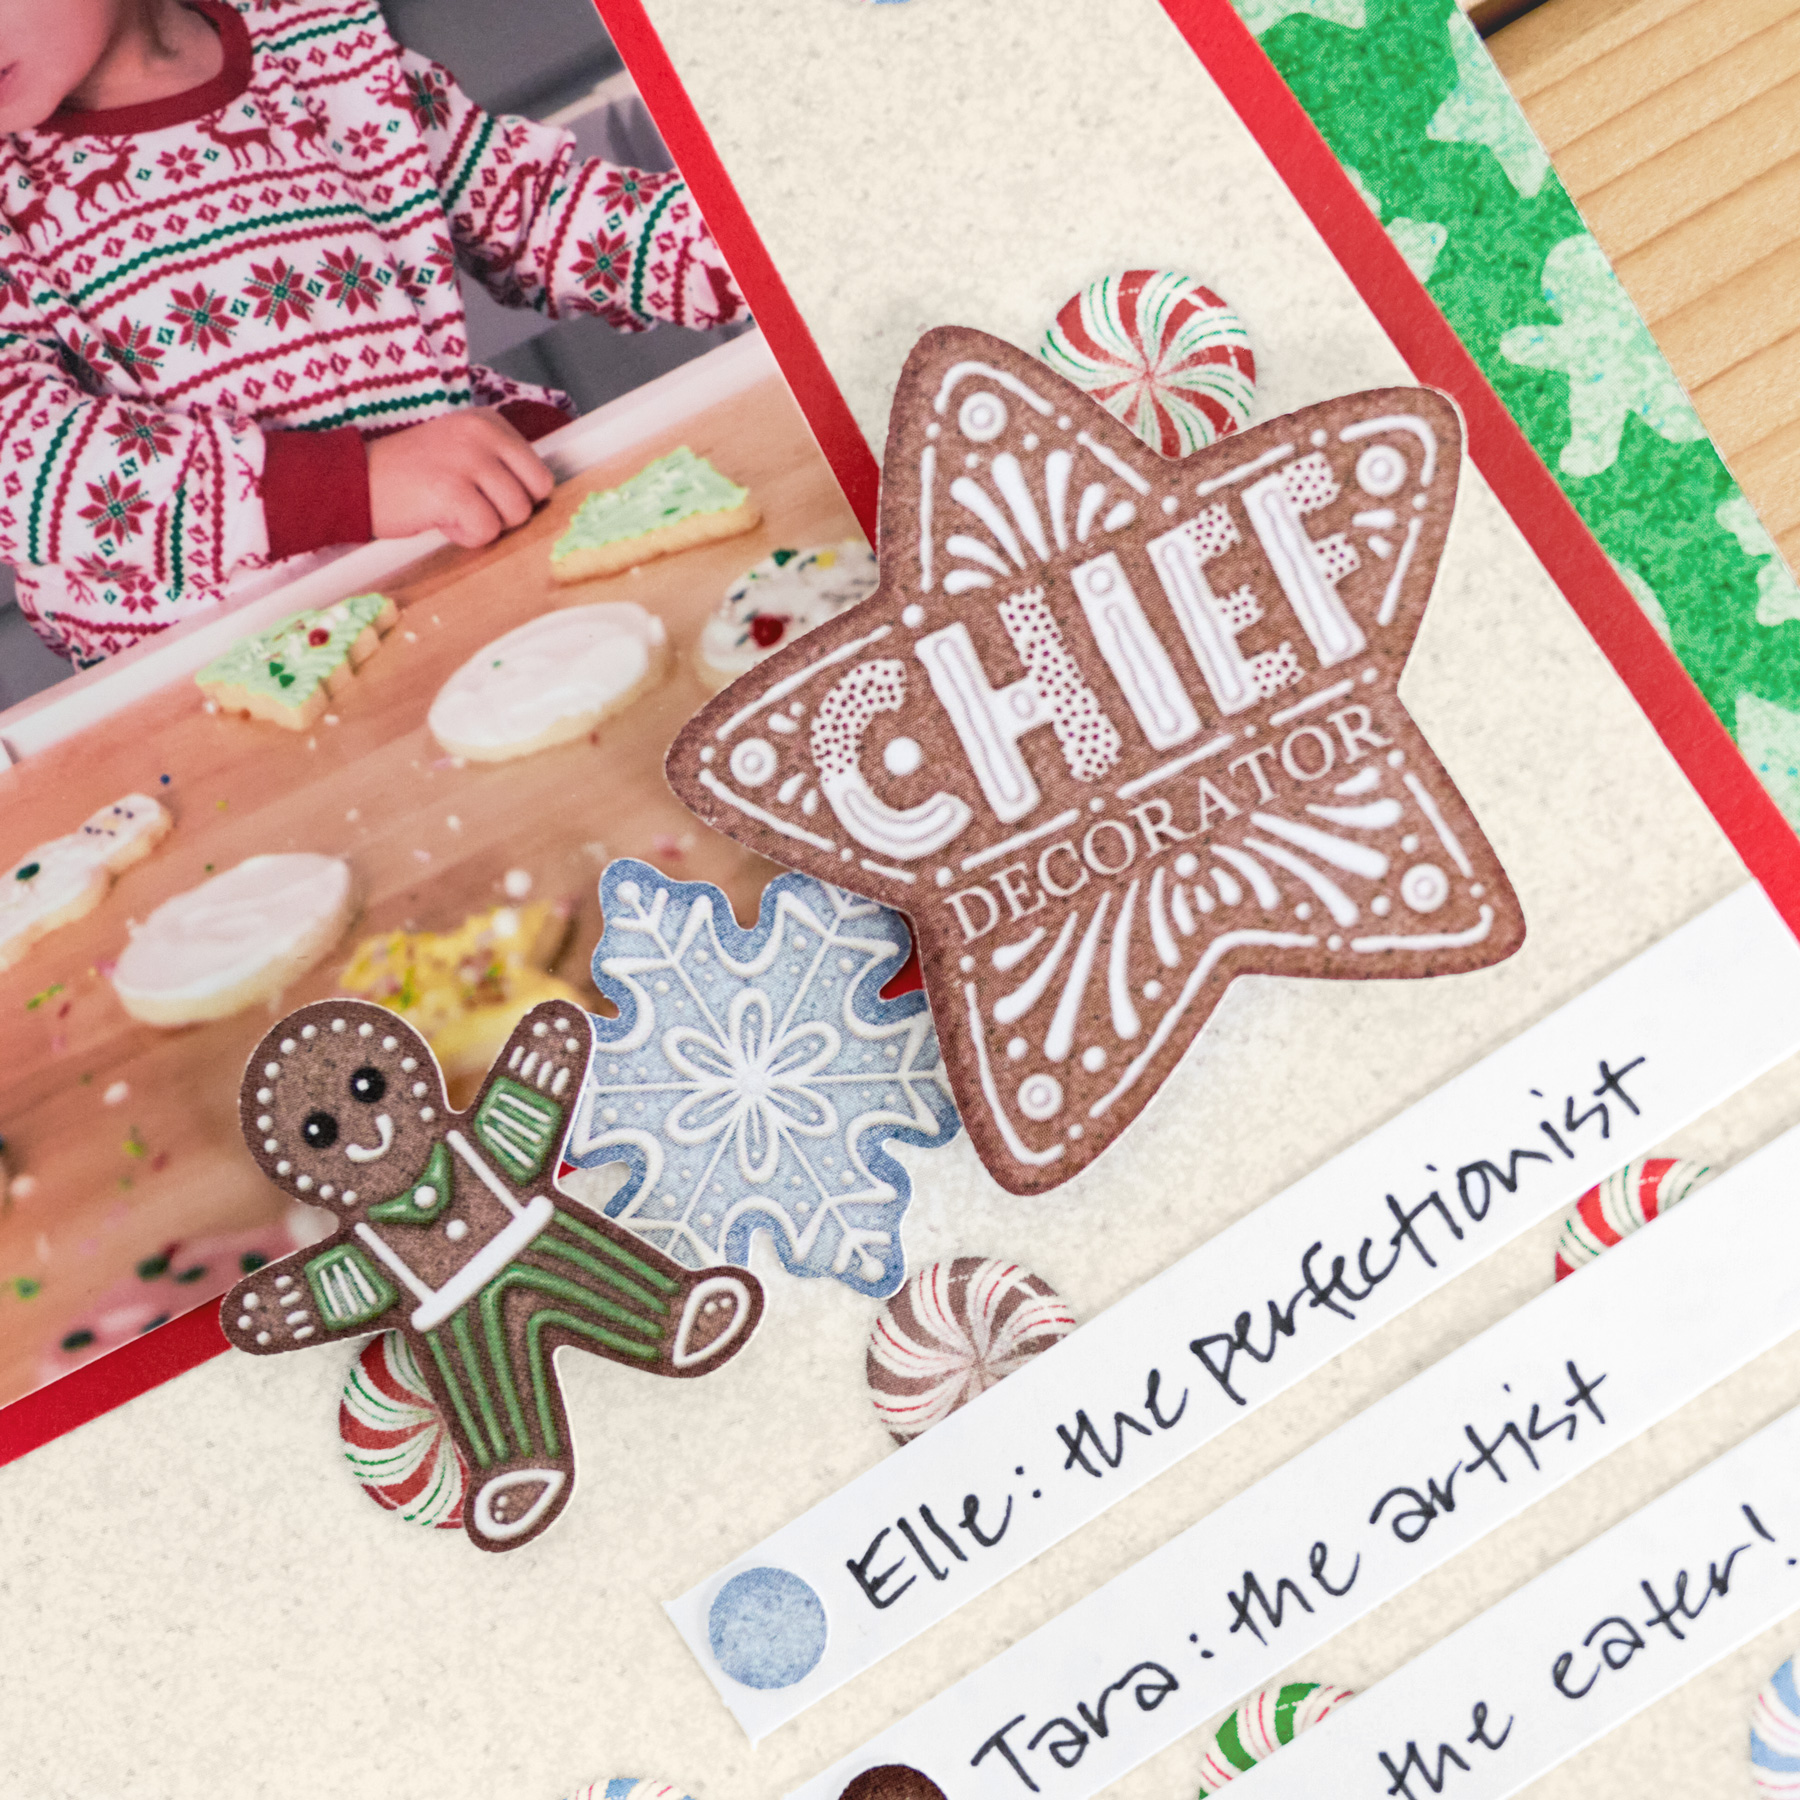
Step 6: Cut a 1/2” x 12” strip from the blue gingerbread stars designer paper, again using the sky area. Adhere below the stripes strip in the upper right corner, trimming off the excess. Adhere the gingerbread houses, peppermints and frosting border stickers as shown, trimming off the excess.
Step 7: Adhere the peppermints square on the red cardstock square.
Step 8: Cut two 4” x 6” mats from your red cardstock. Crop two photos to 3-3/4” x 5-3/4” and mount on top. Adhere the photos on the layout.
Step 9: Adhere stickers, popping some up with foam squares for dimension.
Step 10: Cut three Write-On Stickers to 3” and adhere to your layout as shown. Add dot stickers for bullets and journal as desired.
Whether you’re the baker, decorator, or official taste-tester, this layout is a sweet reminder that the best memories are made one cookie—and one page—at a time. 🍪✨
P.S. Are YOU a member of the Virtual Crop Group? It’s your go-to place for MONTHLY Virtual Crops, MONTHLY Completed Album Challenges, QUARTERLY Secret Box Openings with project tutorials and so much more! We hope you’ll join our community of more than 49,000 fellow memory-keeping enthusiasts — you’ll feel right at home!
