October 15, 2025
Capture the Spirit of Autumn with Grateful Harvest
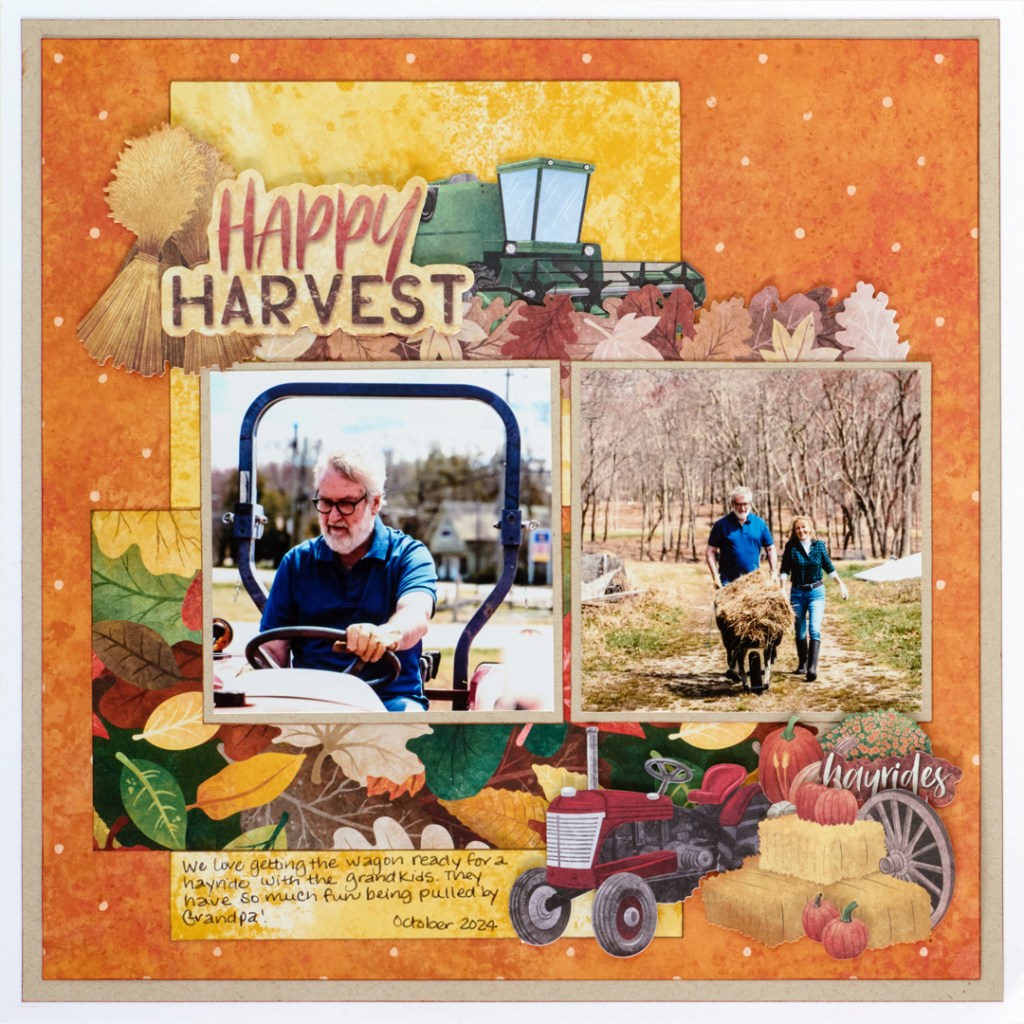
Celebrate the cozy colors of fall with this cheerful Grateful Harvest layout! With its mix of golden hues, rustic textures, and festive embellishments, it perfectly captures the spirit of autumn days spent outdoors. Whether you’re raking leaves, riding tractors, or just soaking in the crisp air, this layout is a beautiful way to preserve those seasonal moments that make you smile.
To create this layout, you will need:
- Grateful Harvest Tone-on-Tone Paper Pack (Shop Canada | Shop Australia)
- Grateful Harvest Sticker Pack (Shop Canada | Shop Australia)
- Grateful Harvest Mat Pack (Shop Canada | Shop Australia)
- Grateful Harvest Laser Border Embellishments (Shop Canada | Shop Australia)
- Grateful Harvest Harvesting Embellishments (Shop Canada | Shop Australia)
- Bright White Solid Cardstock (Shop Canada | Shop Australia)
- Medium Kraft Cardstock
- Rich Cocoa Ink Pad (Shop Canada | Shop Australia)
- 12-inch Trimmer (Shop Canada | Shop Australia)
- Micro-Tip Scissors (Shop Canada | Shop Australia)
- Tape Runner (Shop Canada | Shop Australia)
- Repositionable Tape Runner (Shop Canada | Shop Australia)
- Foam Squares Variety Pack (Shop Canada | Shop Australia)
- Dual-Tip Black Pen (Shop Canada | Shop Australia)
- Photo Trimmer (Shop Canada | Shop Australia
- Optional: Paintbrush

First Things First: Inking the Edges
As you cut each piece of paper, ink the edges with Potter’s Clay or Rich Cocoa ink. To do this, simply rub the ink pad directly on the paper. Memento Dew Drop ink is fade-resistant, archival-safe, and acid-free.
Step 1: Use Bright White Cardstock for the base of the layout. If desired, gut out a 10″ x 10″ piece from the center and reserve for another project. Next, cut an 11-1/2″ x 11-1/2″ piece of Medium Kraft Cardstock to layer on top of the Bright White. Before adhering, gut a 9″ x 9″ piece out of the center to use for photo mats. Cut two 4-1/4″ x 4-1/4″ photo mats and set aside. Cut an 11″ x 11″ piece of orange tone-on-tone paper and layer on top of the base.
Step 2: Cut one 6″ x 10″ piece of yellow wash designer paper and adhere 1″ from the bottom and 2″ from the left edge of the page. Follow by cutting a 9″ x 4″ piece of multi-colored leaves designer paper. Place 2″ from the bottom and 1″ from the left edge of the page.
Step 3: Place the left photo mat 3-1/2″ from the bottom and 2-1/4″ from the left edge. Follow by placing the second mat 1/8″ to the right of the first mat.
Step 4: Locate the leaf border that is tones of brown. Cut an 8″ piece and tuck it under the tops of the photos. Also add the wheat, Happy Harvest, and green farm equipment embellishments above the photos. Use 3-D foam as desired.
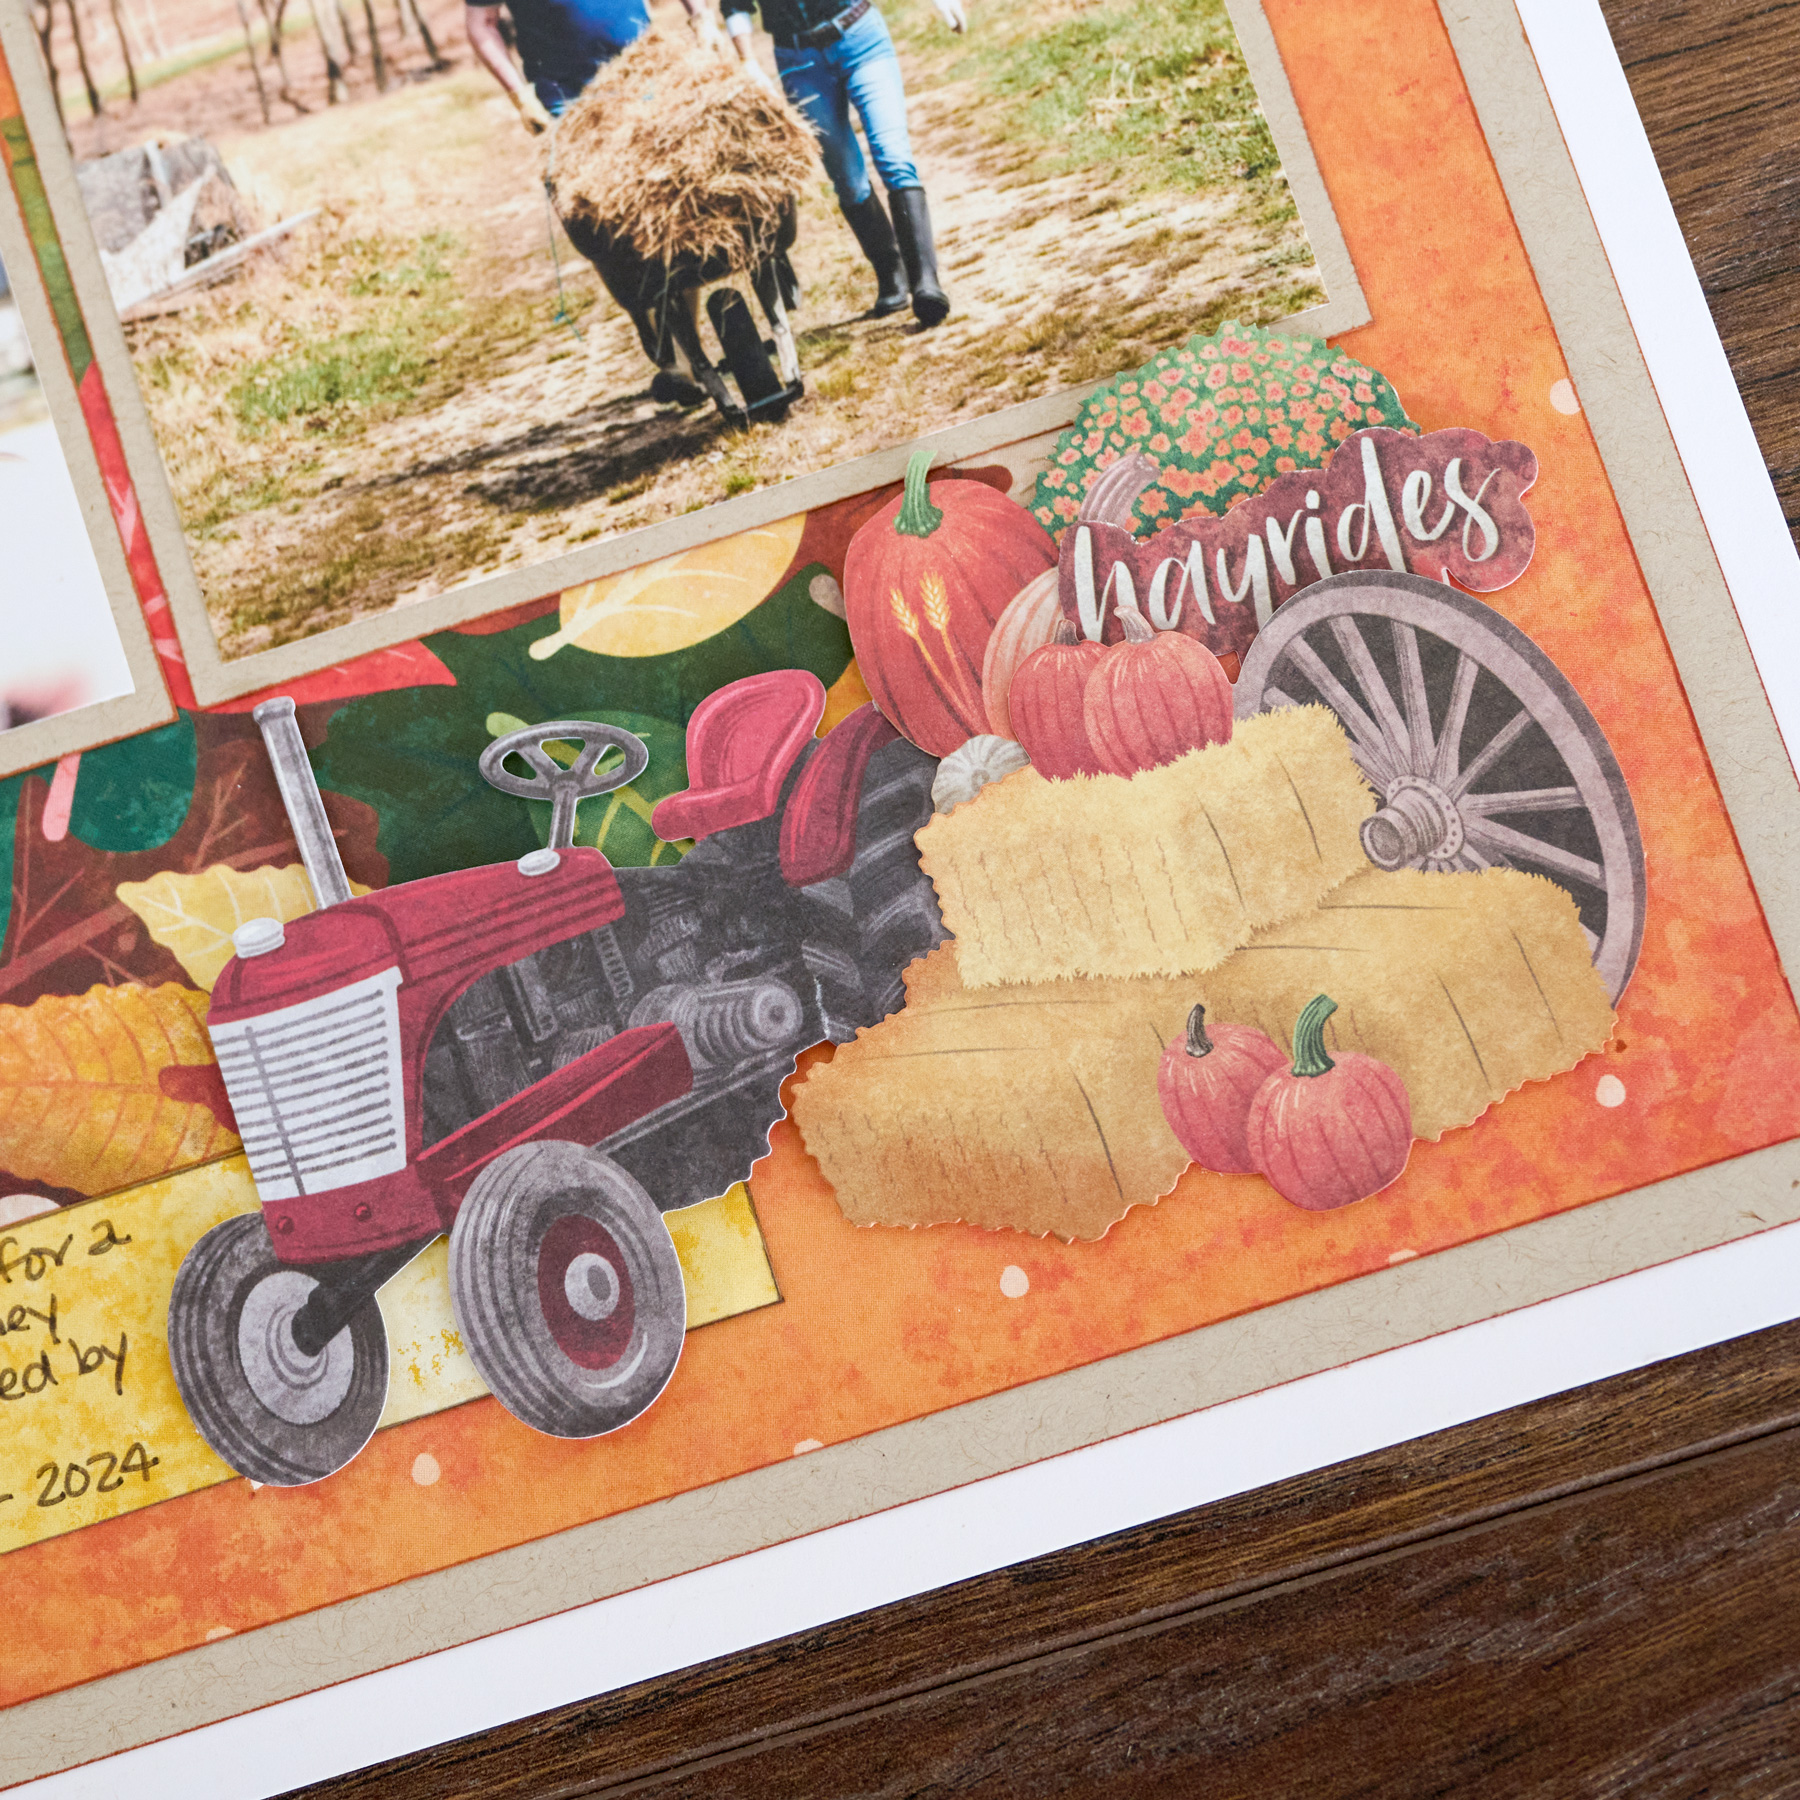
Step 5: Next, add the tractor and hay bales below the right photo. Find the border with mums and pumpkins and trim a portion of that border to tuck behind the hay bales. Trim “hayride” from an embellishment.
Step 6: Journal as desired.
From hayrides to harvests, every fall photo tells a story worth saving — and this layout makes it easy to share the warmth and wonder of the season. 🍂🚜
P.S. Are YOU a member of the Virtual Crop Group? It’s your go-to place for MONTHLY Virtual Crops, MONTHLY Completed Album Challenges, QUARTERLY Secret Box Openings with project tutorials and so much more! We hope you’ll join our community of more than 49,000 fellow memory-keeping enthusiasts — you’ll feel right at home!
