November 3, 2025
The Perfect Layout to Document Your Winter Wonderland Adventures
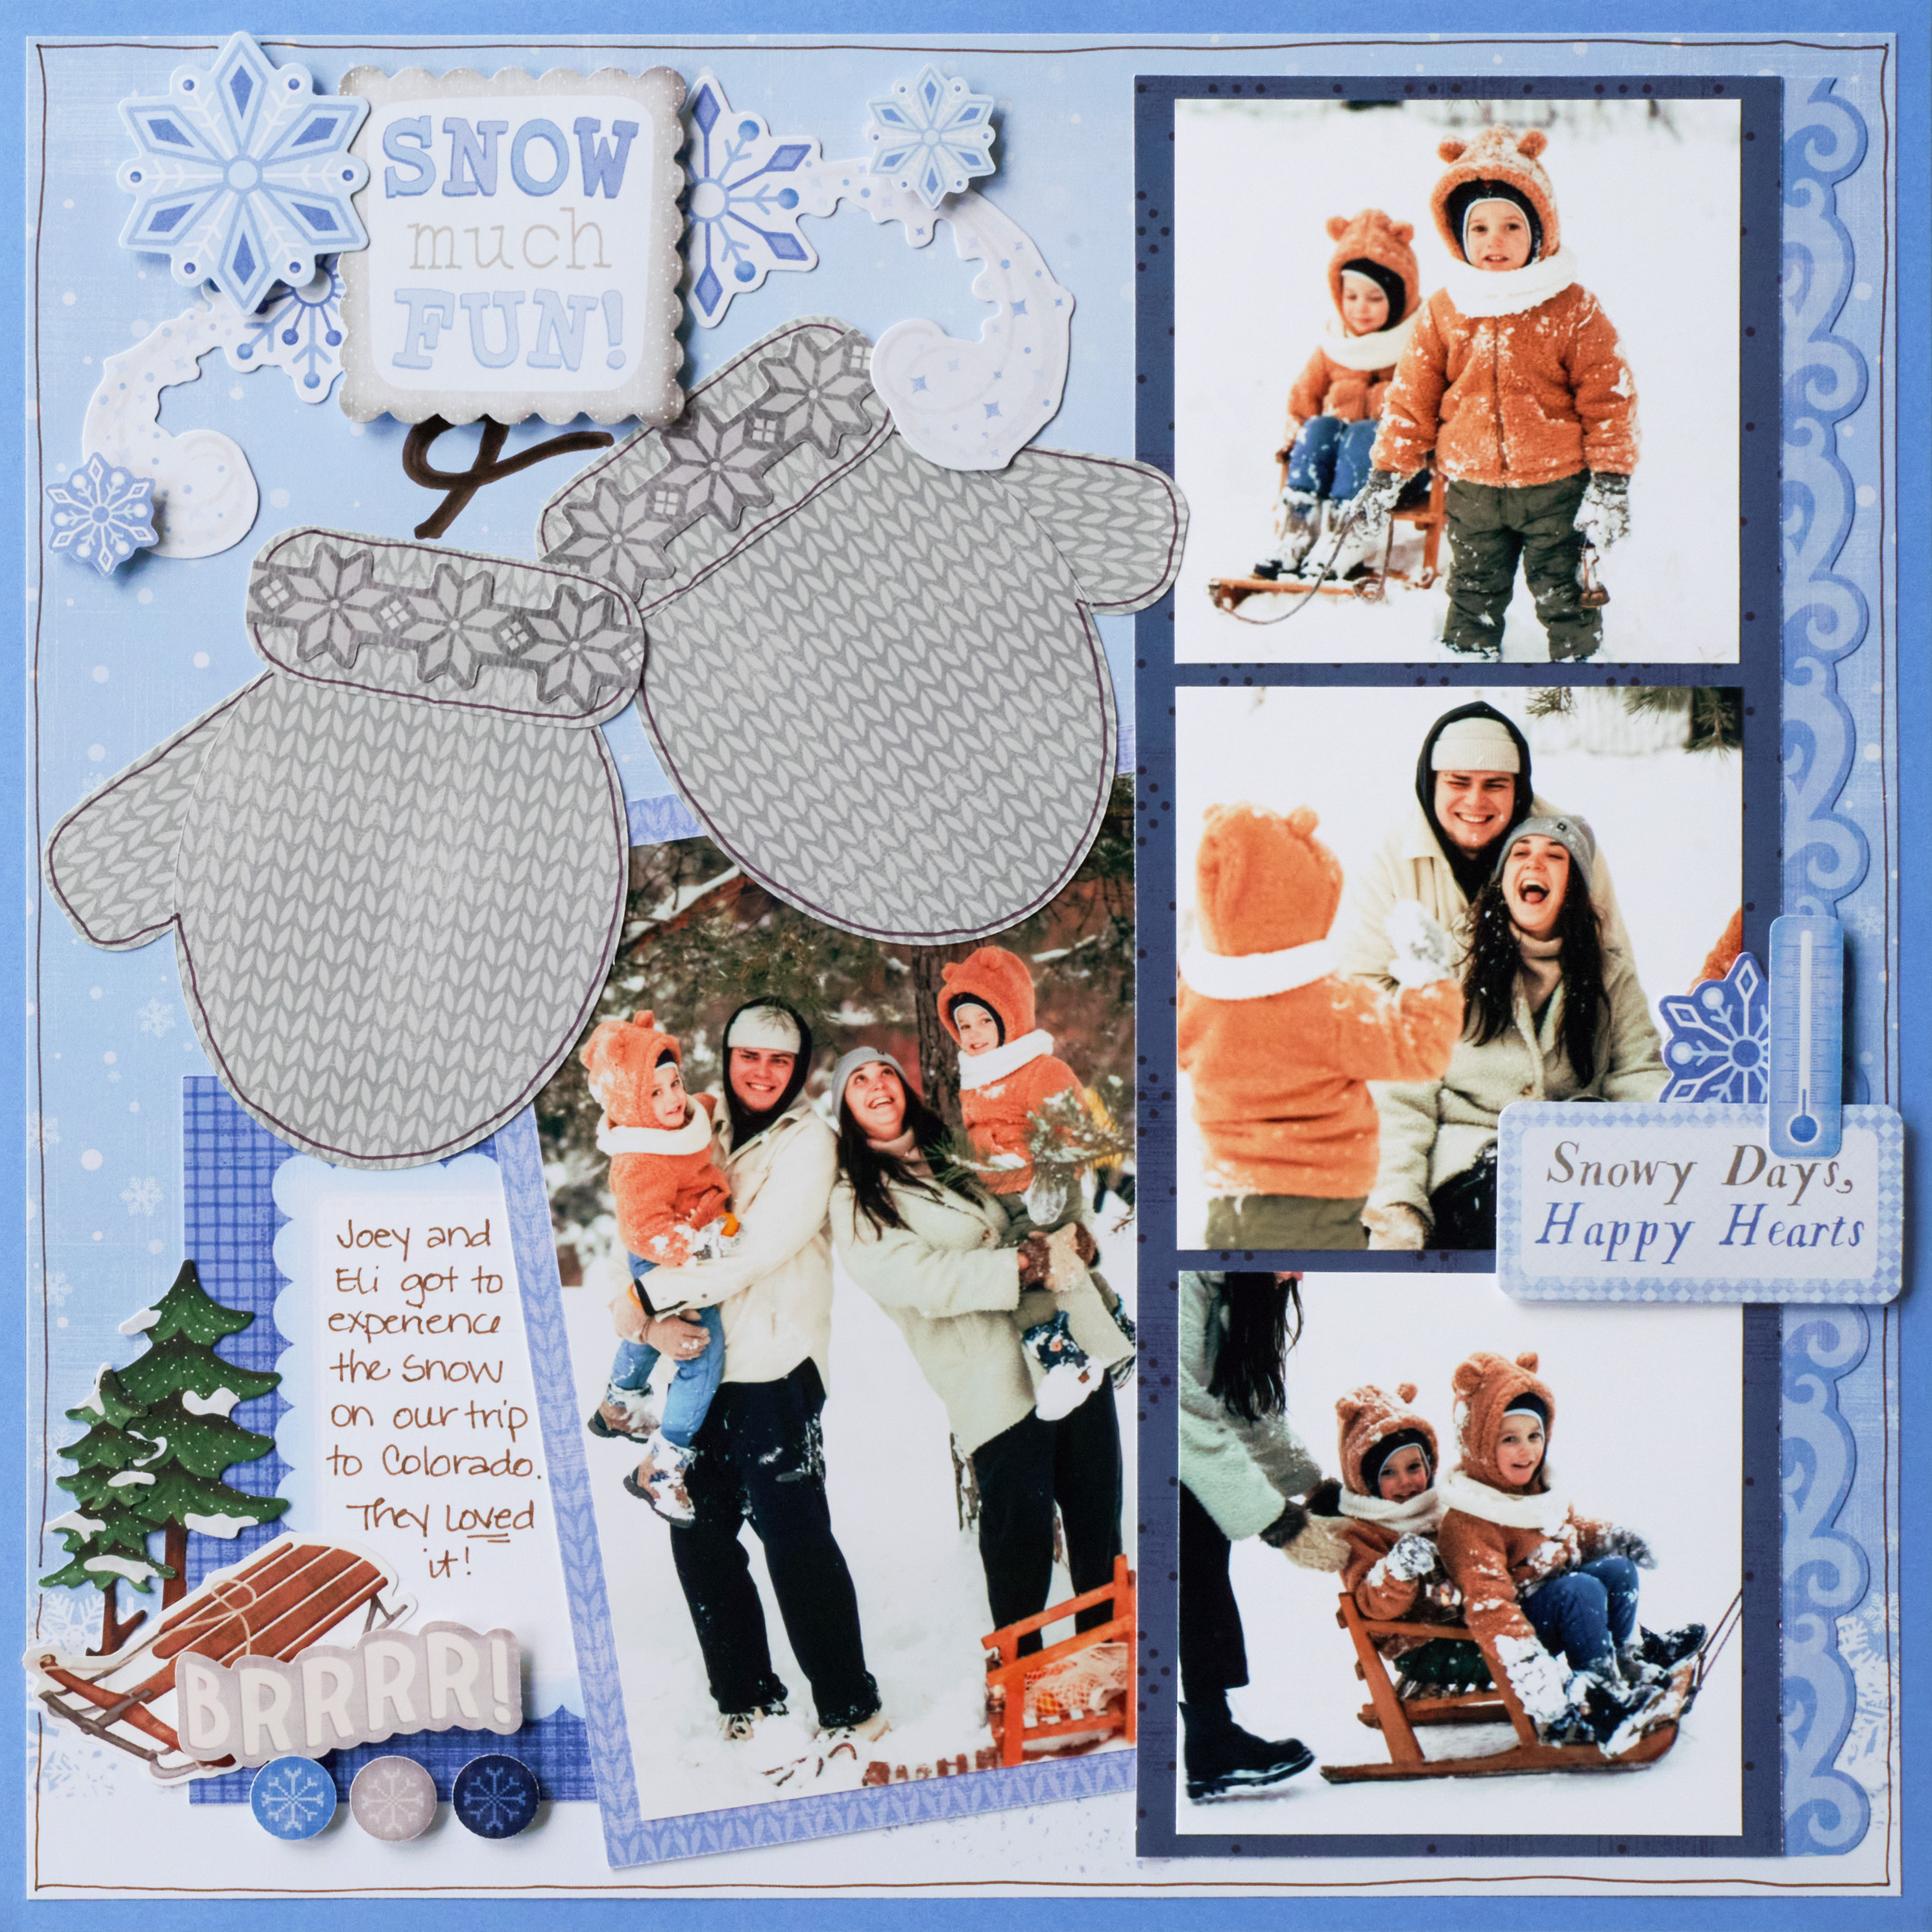
Bundle up and bring on the snowy smiles! This cozy winter layout from the brand new Winter Bliss collection layers frosty blues, playful patterns and charming mitten accents to capture all the giggles, snowflakes and rosy-cheeked fun of a day spent outside. From sledding adventures to snow-angel moments, it’s the perfect design to showcase the magic of winter memories with your favorite little snow buddies.
To create this layout, you will need:
- Winter Bliss Paper Pack (Shop Canada | Shop Australia)
- Winter Bliss Stickers (Shop Canada | Shop Australia)
- Winter Bliss Mat Pack (Shop Canada | Shop Australia)
- Winter Bliss Embellishments (Shop Canada | Shop Australia)
- Cornflower Cardstock (Shop Canada | Shop Australia)
- Custom Cutting System (Shop Canada | Shop Australia)
- Oval Pattern (Shop Canada | Shop Australia)
- 2-Way Corner Rounder (Shop Canada | Shop Australia)
- Foam Squares Variety Pack (Shop Canada | Shop Australia)
- 12-inch Trimmer (Shop Canada | Shop Australia)
- Tape Runner (Shop Canada | Shop Australia)
- Photo Trimmer (Shop Canada | Shop Australia)
- Brown Dual-Tip Pen (Shop Canada | Shop Australia)


Step 1: Use a piece of Cornflower Cardstock for the base of the layout.
Step 2: Cut a piece of the snowflake scene designer paper to measure 11-1/2″ x 11-1/2″. Adhere to the layout.
Step 3: Cut a piece of the navy pattern designer paper to measure 4″ x 11″. Adhere a border sticker behind the right edge, then trim any excess with scissors. Adhere this piece and border to the right side of the layout.
Step 4: Adhere a 4″ x 6″ photo to a vertical mat, then tuck it at an angle behind your navy piece.
Step 5: Cut three photos to measure 3-1/2″ x 3-1/2″. Adhere them to the navy paper.
Step 6: Cut a mat in half and adhere behind the angled photo & mat.
Step 7: To create the mittens, use the sweater patterned designer paper for all cuts. Using the inside of the largest CCS Oval Pattern, cut two ovals with the red blade. Trim 1/2″ off from one end of each oval.
Step 8: Cut two pieces of paper that measure 2-1/2″ x 1″. Round all corners using the 2-Way Corner Rounder. Adhere the gray snowflake border sticker along the top of each piece, then trim any excess with scissors. Adhere these strips to the top (cut) edge of the ovals.
Step 9 Cut two pieces of paper that measure 2″ x 1″. Round all four corners of each. Adhere from the back of the ovals at an angle to create the “thumbs.” Adhere the mittens to the layout. Then, use the Brown Dual-Tip Pen to draw lines along the outer edges of the mittens to give them dimension.
Step 10: Add stickers and embellishments to the layout, using Foam Squares on some for added dimension.
Step 11: Journal as desired.
Whether it’s tiny boots kicking up powder or mitten-clad hands tossing snowballs, these chilly-day moments deserve to shine. Keep the warmth of winter joy alive on your pages — long after the snow has melted.
P.S. Are YOU a member of the Virtual Crop Group? It’s your go-to place for MONTHLY Virtual Crops, MONTHLY Completed Album Challenges, QUARTERLY Secret Box Openings with project tutorials and so much more! We hope you’ll join our community of more than 49,000 fellow memory-keeping enthusiasts — you’ll feel right at home!

