January 7, 2026
Document Everyday Moments with the Your Own Way Collection
From spontaneous springtime picnics to cozy holiday gatherings, the Your Own Way collection is designed to celebrate life’s little (and big!) moments across every season. This cheerful layout captures a heartfelt family outing with rich textures, layered borders, and joyful tones — the perfect way to showcase meaningful memories your way.
To create this layout, you will need:
- Your Own Way Paper Pack (Shop Canada | Shop Australia)
- Your Own Way Tone-on-Tone Paper Pack (Shop Canada | Shop Australia)
- Your Own Way Stickers (Shop Canada | Shop Australia)
- Your Own Way Mat Pack (Shop Canada | Shop Australia)
- Your Own Way Embellishments (Shop Canada | Shop Australia)
- Decorative Waves BMC (Shop Canada | Shop Australia)
- Original Border Maker System (Shop Canada | Shop Australia)
- Bright White Solid Cardstock (Shop Canada | Shop Australia)
- 12-inch Trimmer (Shop Canada | Shop Australia)
- Photo Trimmer (Shop Canada | Shop Australia)
- Micro-Tip Scissors (Shop Canada | Shop Australia)
- Tape Runner (Shop Canada | Shop Australia)
- Repositionable Tape Runner (Shop Canada | Shop Australia)
- Foam Squares (Shop Canada | Shop Australia)
- Black Dual-Tip Pen (Shop Canada | Shop Australia)
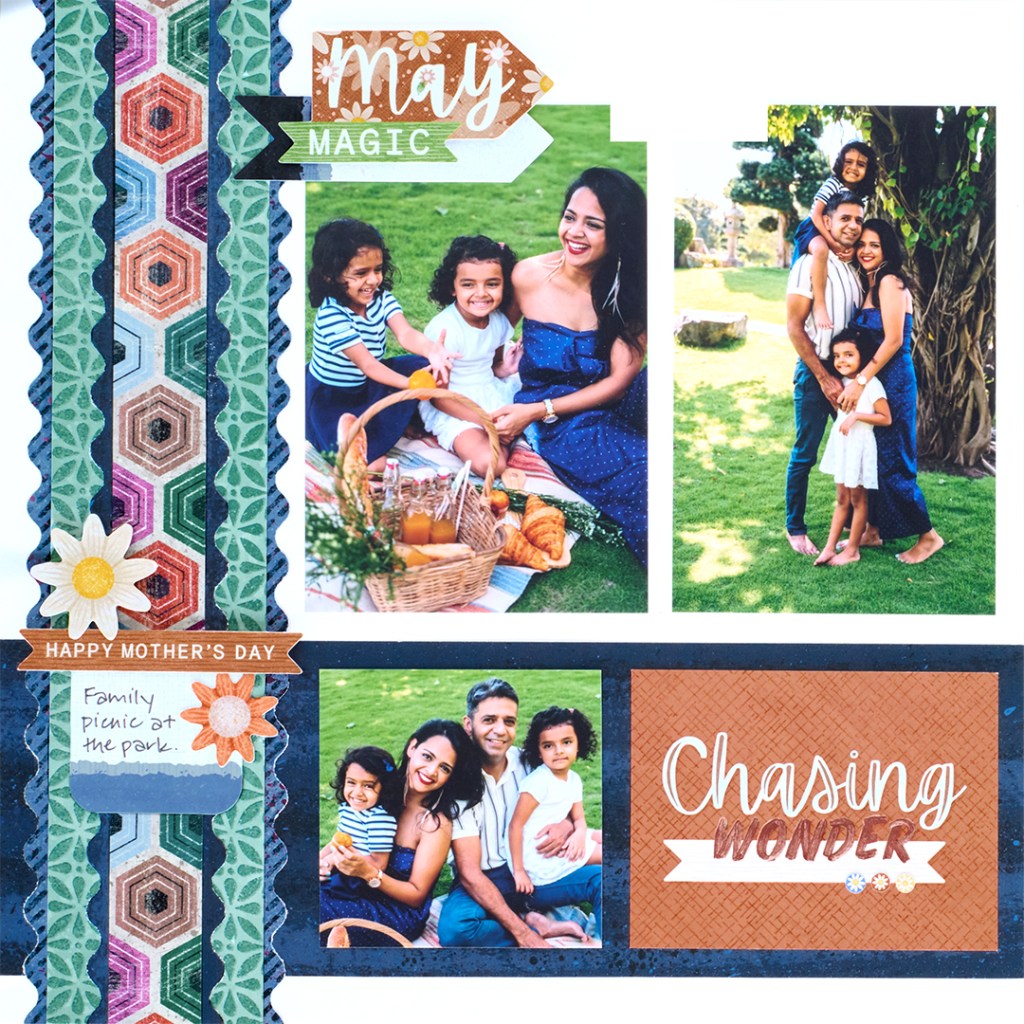

Step 1: Use a sheet of Bright White Solid Cardstock as the base for this layout. Cut a 12″ x 4″ strip with the navy brushstrokes tonal paper and adhere 1/2″ from the bottom edge of the base page.
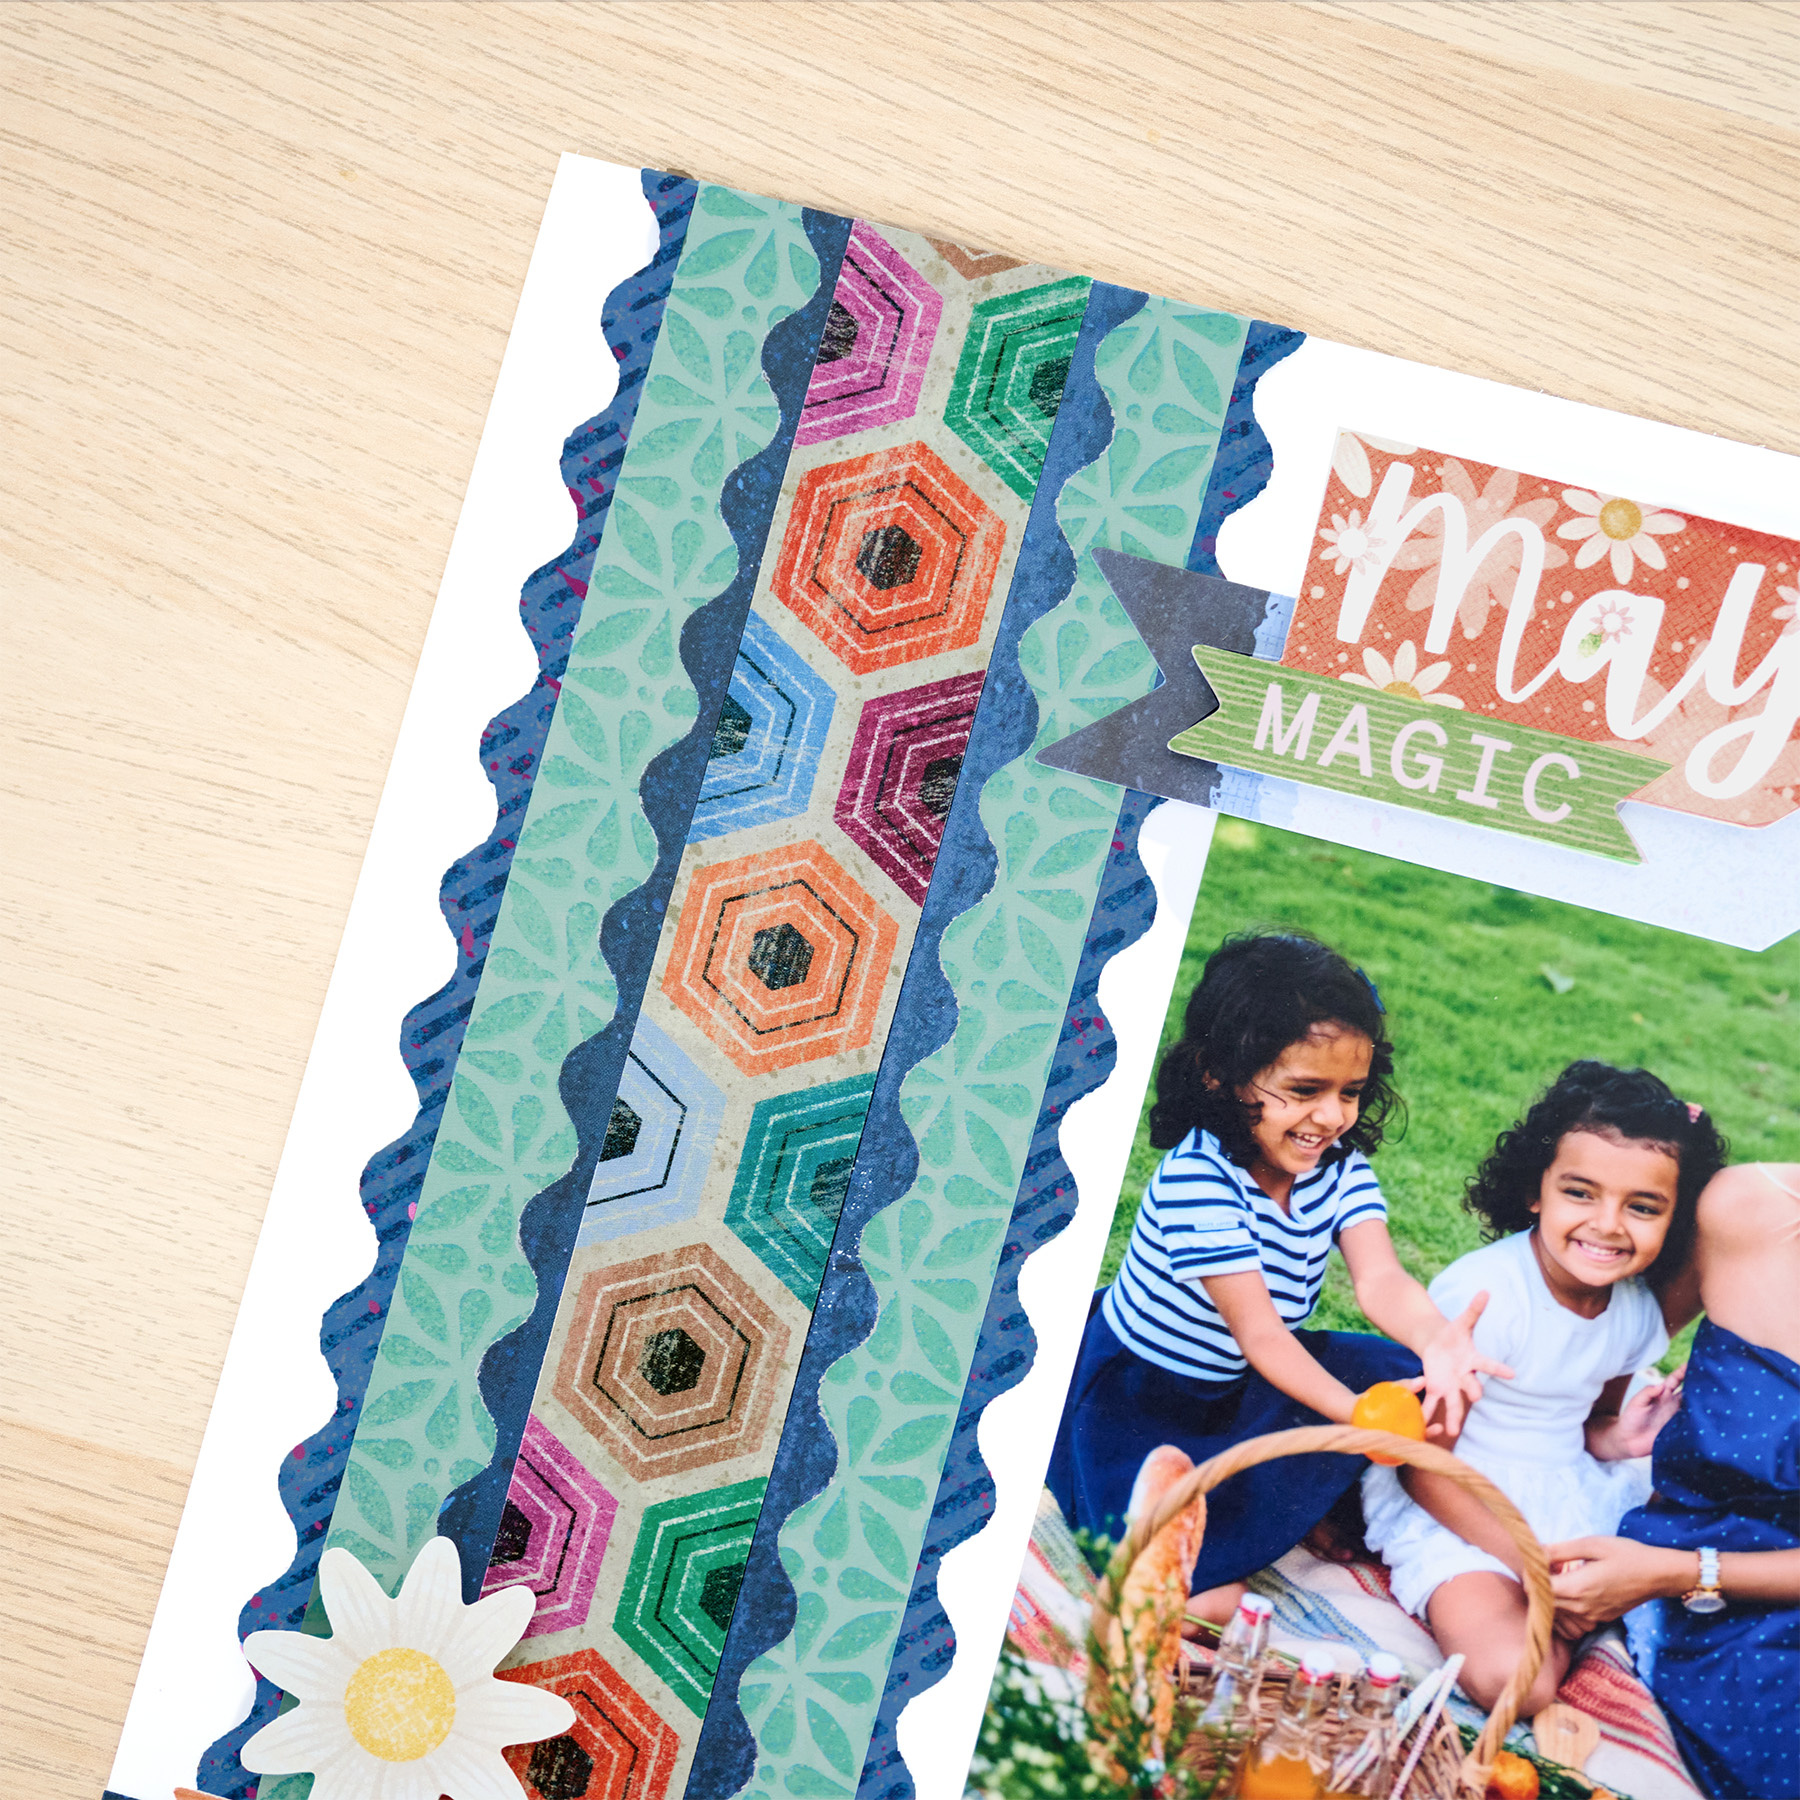
Step 2: Create the border by cutting a 4″ x 12″ strip with diagonal dash designer paper. Using the Decorative Waves BMC, punch both long sides. Cut a 2-1/2″ x 12″ strip with the fresh mint tile tonal paper and adhere on the punched strip. Cut a 2-1/2″ x 12″ strip with navy brushstrokes tonal paper. Using the Decorative Waves BMC, punch both long sides. (Tip: Adhere sticky notes to one edge to add width to the strip so it is secured in the paper holder.) Adhere the punched strip on the border. Cut a 1-1/16″ x 12″ strip with hexagons designer paper and mount on top. Adhere the border 1/2″ from the left edge of the layout.
Step 3: Cut the “Chasing Wonder” mat to 4-1/4″ x 3-1/4″ and adhere on the navy strip. Crop a photo to 3-1/4″ x 3-1/4″ and adhere on the navy strip. Adhere two 4″ x 6″ photos on the layout as shown.
Step 4: Adhere embellishments and stickers, popping some up with foam squares for dimension.
Step 5: Journal on the embellishment tag as desired.
Let us know in the comments how you would document your own everyday wonders with the Your Own Way collection!
P.S. Are YOU a member of the Virtual Crop Group? It’s your go-to place for MONTHLY Virtual Crops, MONTHLY Completed Album Challenges, QUARTERLY Secret Box Openings with project tutorials and so much more! We hope you’ll join our community of more than 49,000 fellow memory-keeping enthusiasts — you’ll feel right at home!


I love getting new layout ideas. Thank you for the layouts. Judy Morton