January 23, 2026
Bring Your Layout to the Bright Side!
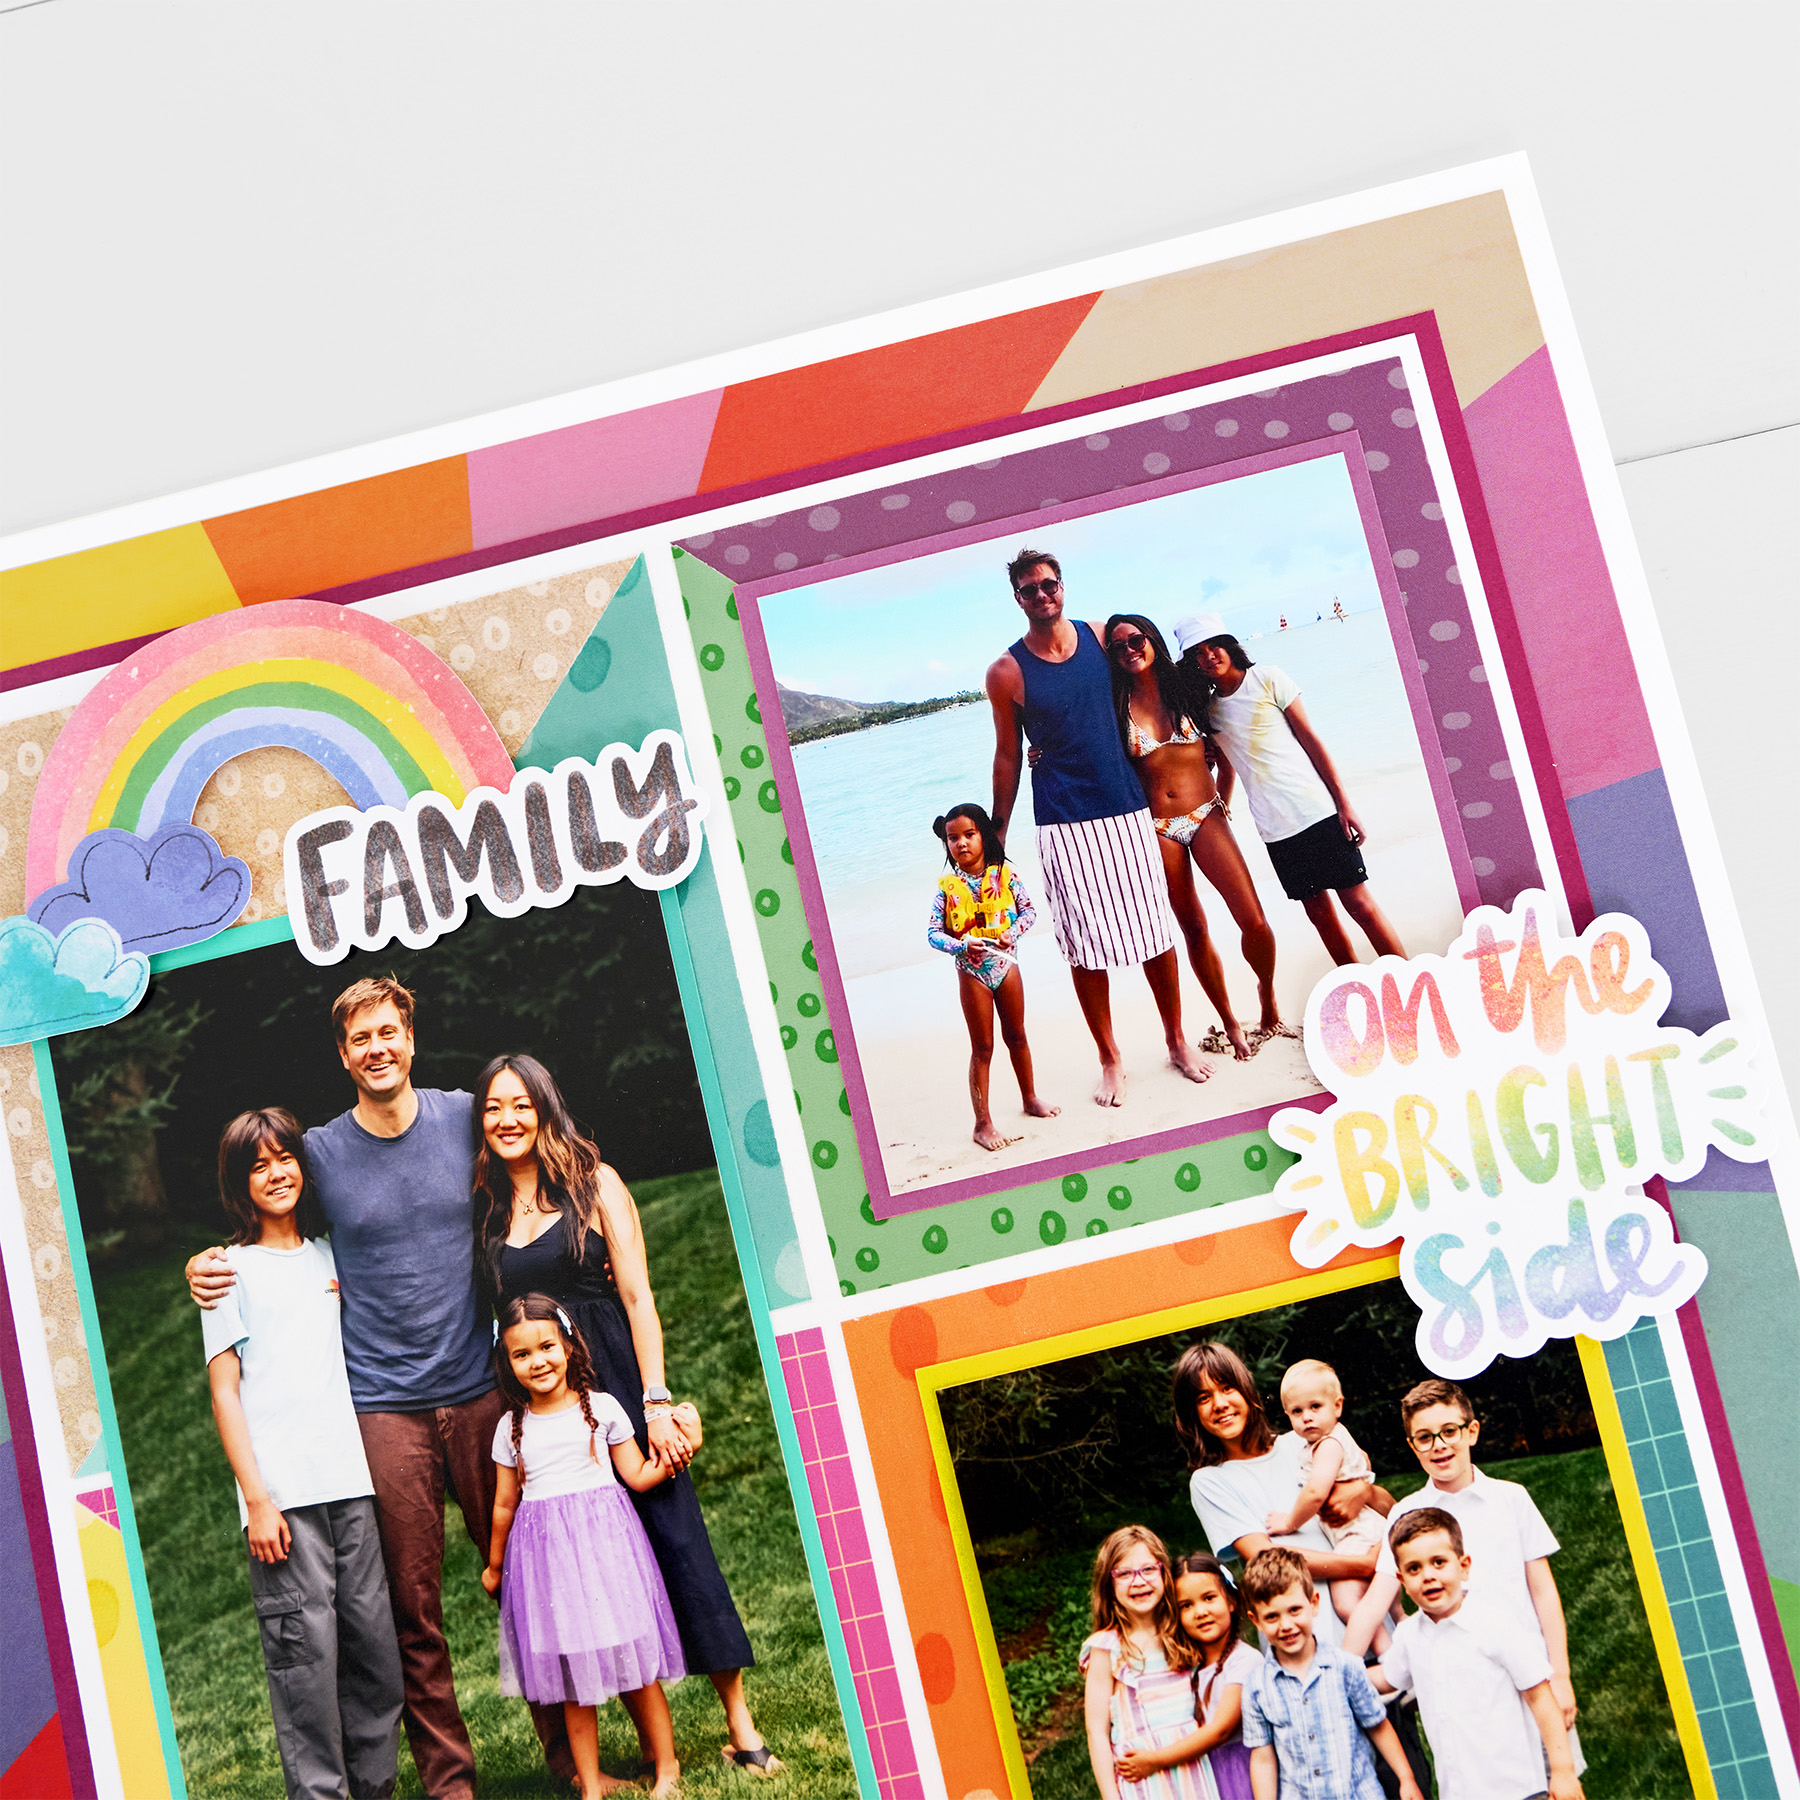
The On the Bright Side collection is full of bright colors, bold patterns and watercolor details that make scrapbooking fun and approachable. This layout is a great way to showcase family photos, everyday moments and all the little memories that make life feel special. With cheerful patterns and playful cuts, your pages come alive with energy and personality — because happy memories deserve bold color!
To create this layout, you will need:
- On the Bright Side Paper Pack (Shop Canada | Shop Australia)
- On the Bright Side Tone-on-Tone Paper (Shop Canada | Shop Australia)
- On the Bright Side Embellishments (Shop Canada | Shop Australia)
- On the Bright Side Variety Mat Pack (Shop Canada | Shop Australia)
- Bright White Solid Cardstock (Shop Canada | Shop Australia)
- Pink Razzleberry Solid Cardstock (Shop Canada | Shop Australia)
- Deep Orchid Solid Cardstock (Shop Canada | Shop Australia)
- Island Waters Solid Cardstock (Shop Canada | Shop Australia)
- Solar Yellow Solid Cardstock (Shop Canada | Shop Australia)
- 12-inch Trimmer (Shop Canada | Shop Australia)
- Repositionable Tape Runner (Shop Canada | Shop Australia)
- Foam Squares (Shop Canada | Shop Australia)
- Black Dual-Tip Pen (Shop Canada | Shop Australia)
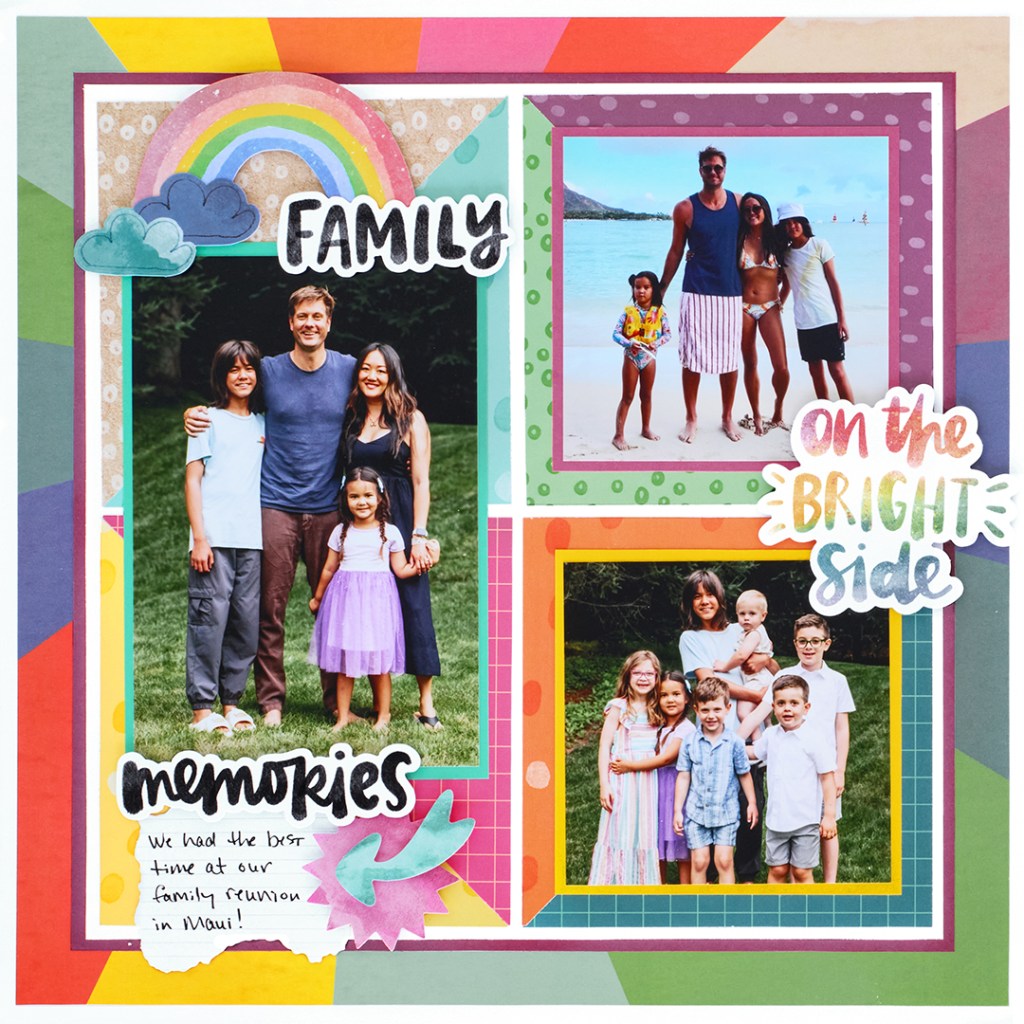

Step 1: Cut a piece of starburst designer paper to measure 11-1/2″ x 11-1/2″ and adhere it to the center of a piece of Bright White Solid Cardstock.
Step 2: Cut a piece of Deep Orchid Solid Cardstock to measure 11-1/4″ x 11-1/4″ and adhere it to the center of the layout.
Step 3: Cut a piece of Bright White Solid Cardstock to measure 10″ x 10″ and adhere it to the center of the layout.
Step 4: Cut 4″ x 4″ squares from (8) sheets of designer and tonal papers. Cut the squares in half on the diagonal, and adhere one triangle from each paper onto the center of the layout as shown.
Step 5: Cut 4-1/4″ x 4-1/4″ photo mats from Solar Yellow and Pink Razzleberry Solid Cardstock. Crop two photos to 4″ x 4″, adhere them to the mats, and adhere the matted photos to the layout as shown.
Step 6: Cut a 4-1/4″ x 6-1/4″ photo mat from a piece of Island Waters Solid Cardstock. Adhere a 4″ x 6″ photo to the mat, and adhere the matted photo to the layout as shown.
Step 7: Adhere embellishments as shown, popping some up with Foam Squares for added dimension.
Step 8: Use a Black Dual-Tip Pen to add journaling as desired.
Turning everyday moments into pages you’ll love to look back on.
P.S. Are YOU a member of the Virtual Crop Group? It’s your go-to place for MONTHLY Virtual Crops, MONTHLY Completed Album Challenges, QUARTERLY Secret Box Openings with project tutorials and so much more! We hope you’ll join our community of more than 49,000 fellow memory-keeping enthusiasts — you’ll feel right at home!

