January 29, 2026
Craft Along with the Natural Beginnings Collection
The Natural Beginnings collection offers a soft, neutral palette that works beautifully with almost any story you want to tell. This layout shows how those earthy tones come together on the page for a look that feels timeless and easy to use, with scalloped details that add just the right amount of charm.
This time, you’re invited to craft along with Melissa from the Creative Memories Design Team, as she creates the layout step by step and shares an up-close look at the Buy-It-All Bundle — scallops and all!
To create this layout, you will need:
- Natural Beginnings Designer Paper Pack (Shop Canada | Shop Australia)
- Natural Beginnings Tone-on-Tone Paper Pack (Shop Canada | Shop Australia)
- Natural Beginnings Clear Stickers (Shop Canada | Shop Australia)
- Natural Beginnings Monthly Title Embellishments (Shop Canada | Shop Australia)
- Natural Beginnings Embellishments (Shop Canada | Shop Australia)
- Natural Beginnings Mat Pack (Shop Canada | Shop Australia)
- Sunrise Scallop BMC (Shop Canada | Shop Australia)
- Original Border Maker System (Shop Canada | Shop Australia)
- 12-inch Trimmer (Shop Canada | Shop Australia)
- Photo Trimmer (Shop Canada | Shop Australia)
- Tape Runner (Shop Canada | Shop Australia)
- Repositionable Tape Runner (Shop Canada | Shop Australia)
- Foam Squares Variety Pack (Shop Canada | Shop Australia)
- Black Dual-Tip Pen (Shop Canada | Shop Australia)


Step 1: Use a sheet of the grid tonal paper as the base for this layout.
Step 2: Cut three strips of paper to measure 12″ x 1″ from the blue, light blue, and beige tonal papers. Adhere the blue strip 1″ from the bottom of the base page, the light blue strip 2-1/2″ from the bottom, and the beige strip 4″ from the bottom.
Step 3: Cut four 12″ x 2″ strips from the green tweed, green floral, navy dots, and green striped designer papers.
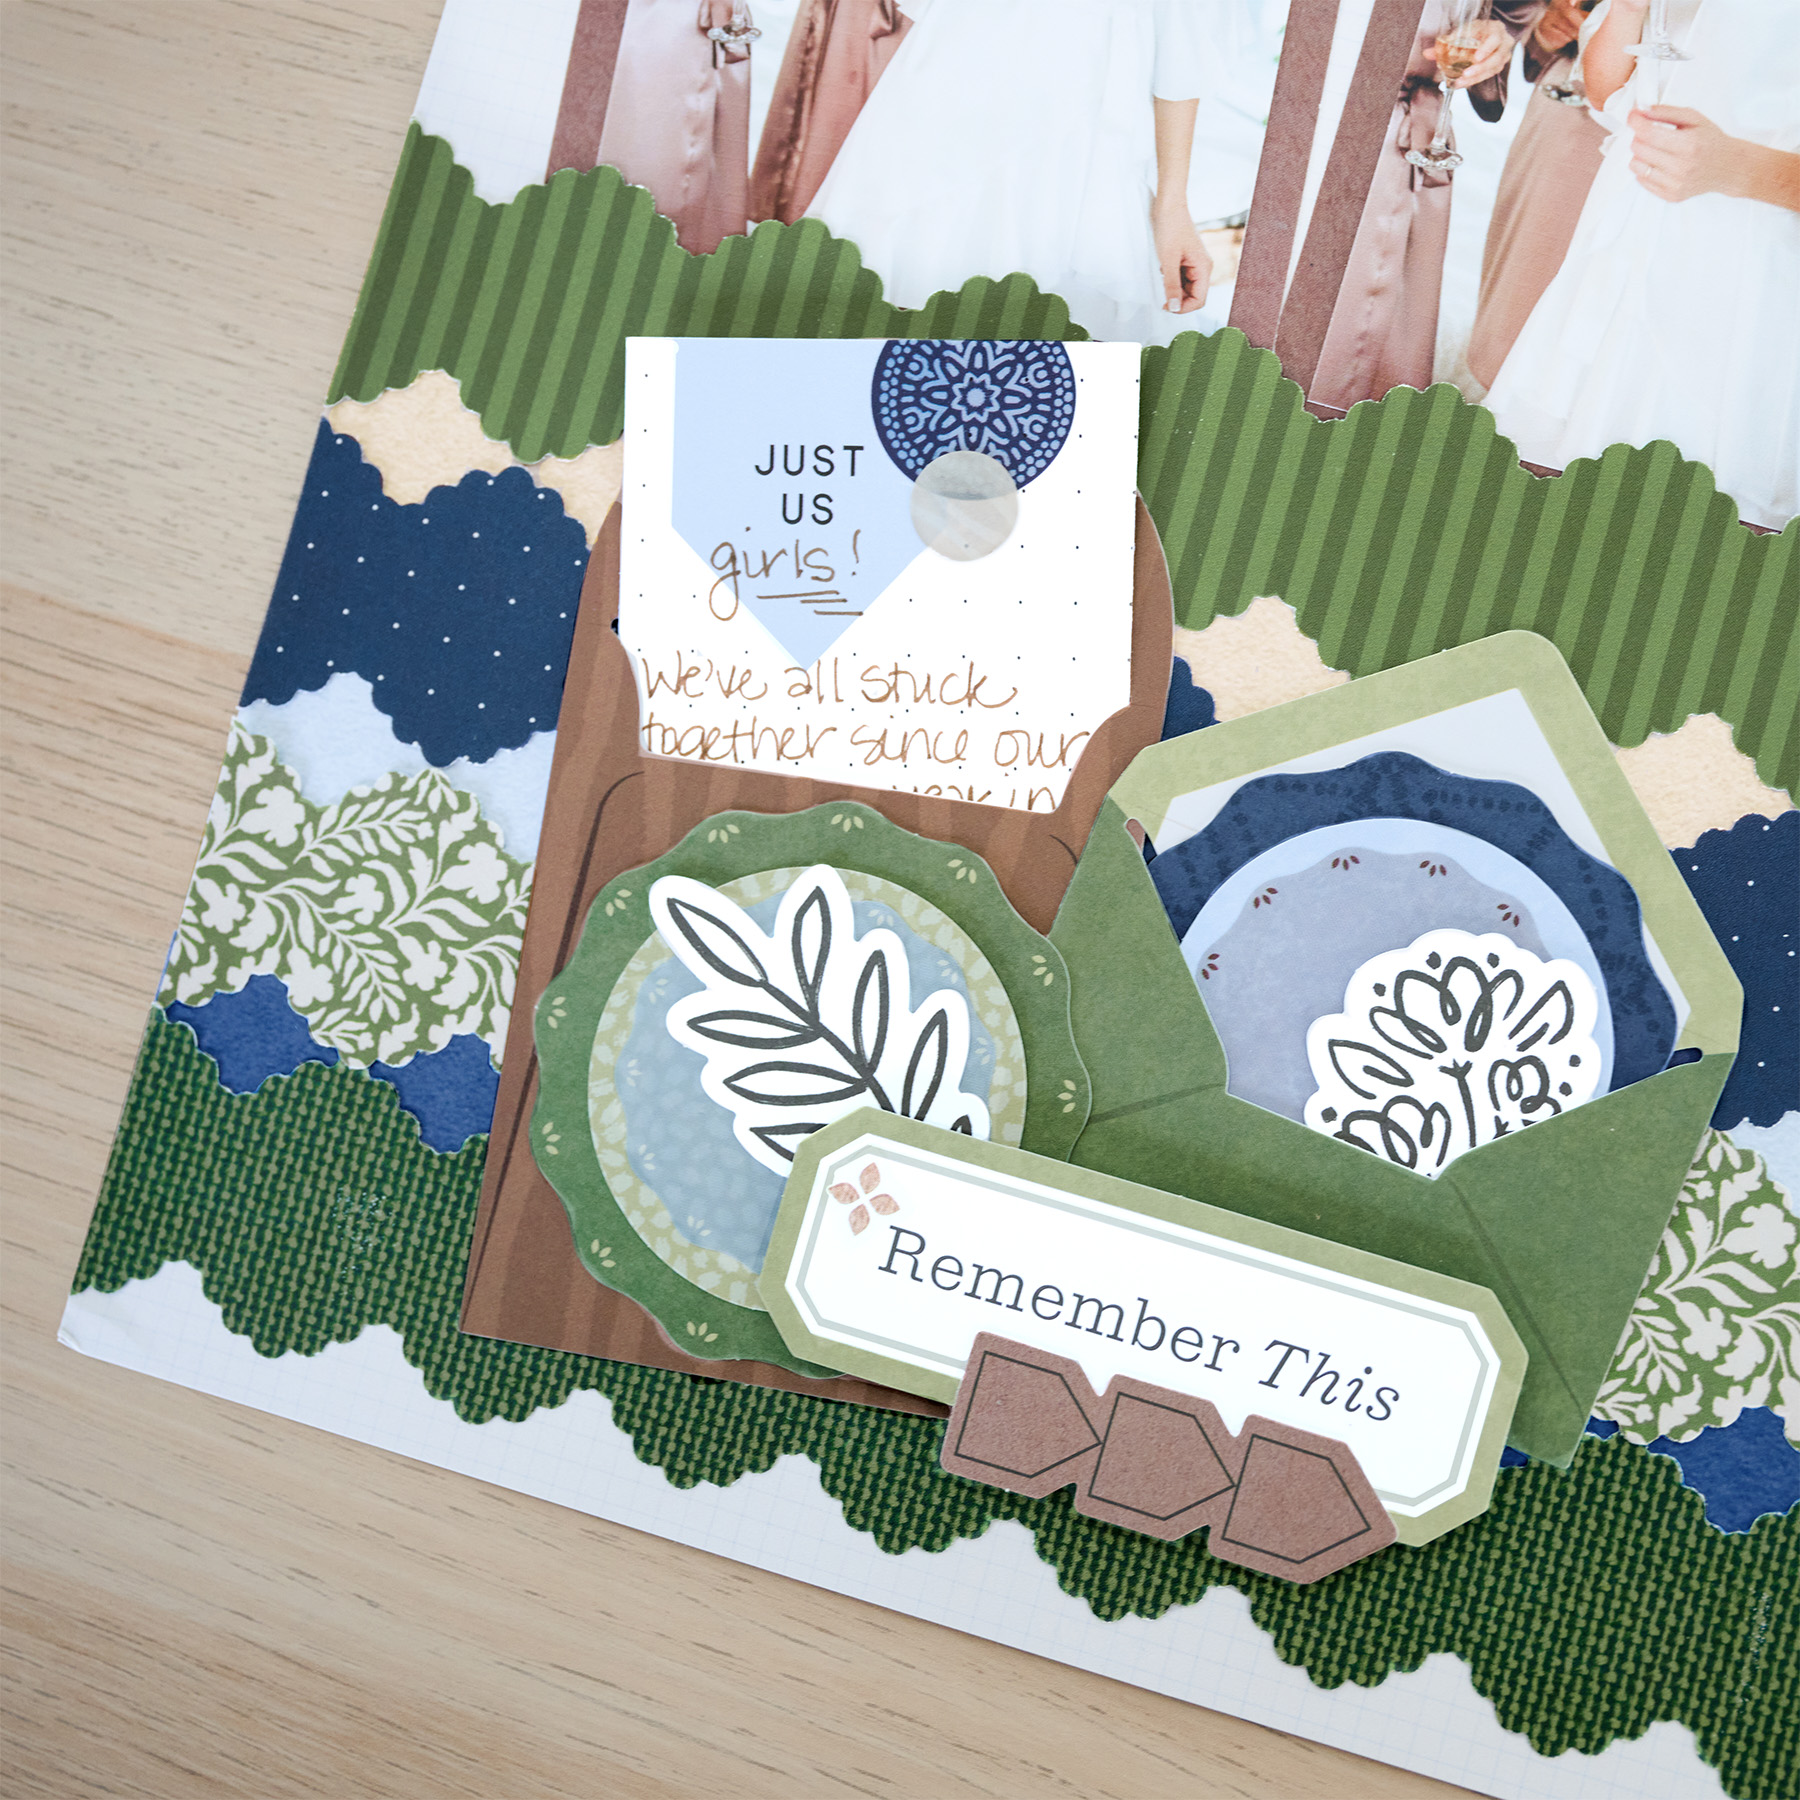
Step 4: Using the Border Maker System with the Sunrise Scallop BMC, punch the edges of both sides of the papers. (Tip: Use sticky notes to hold the border in place while punching the second edge.)
Step 5: Adhere the green tweed punched strip with the bottom edge starting 1/4″ from the bottom of the base page. Adhere the rest of the strips in the order shown, with the bottom edge just touching the top edge of the strip below it.
Step 6: Cut three photo mats from the dark brown kraft designer paper to measure 3-1/2″ x 5-1/2″. Crop three photos to 3″ x 5″and adhere them to the mats. Adhere the mats above the punched border pieces at an angle, as shown above. (Tip: You can apply some stickers at this point, tucking them behind the photo mats as desired.)
Step 7: Adhere the brown envelope embellishment above the punched strips at a slight angle. Trim down a half mat from the Variety Mat Pack or a piece of scrap paper to measure 2-3/8″ x 4″ for your journaling, inserting it into the brown envelope embellishment.
Step 8: Adhere the rest of your embellishments and stickers to the layout as shown, using Foam Squares on some for added dimension.
Step 9: Journal on your mat insert as desired.
This layout is a fun one to create, with plenty of room to make it your own along the way. Crafting along with our Creative Memories Design Team contributors makes it easy to follow each step and enjoy the process as the page comes together. Tell us what you think in the comments!
P.S. Are YOU a member of the Virtual Crop Group? It’s your go-to place for MONTHLY Virtual Crops, MONTHLY Completed Album Challenges, QUARTERLY Secret Box Openings with project tutorials and so much more! We hope you’ll join our community of more than 50,000 fellow memory-keeping enthusiasts — you’ll feel right at home!


Pre
Thanks for the ideas. It’s busier than I like to use so will pare down to fit my style. That’s what is great with CM blog ideas.