July 24, 2017
Serve Up a Slice of Summer
Make your summer pages reflect the colorful fun of the season! Here are a few borders served up with the beachy Slice of Summer Collection, Scallop Burst Border Punch, and Footprints and Sprout Border Maker Cartridges.
To make these borders you’ll need:
- Slice of Summer Paper Pack, Variety Mat Pack and Stickers
- Raspberry Cardstock
- Original Border Maker System with Sprout, Footprint and Scallop Dot Cartridges
- Scallop Burst Border Punch
- 12-inch Straight Trimmer
- Custom Cutting System with Circle Patterns
- Scissors
- Tape Runner with Repositionable Tape Runner Refill
- Foam Squares

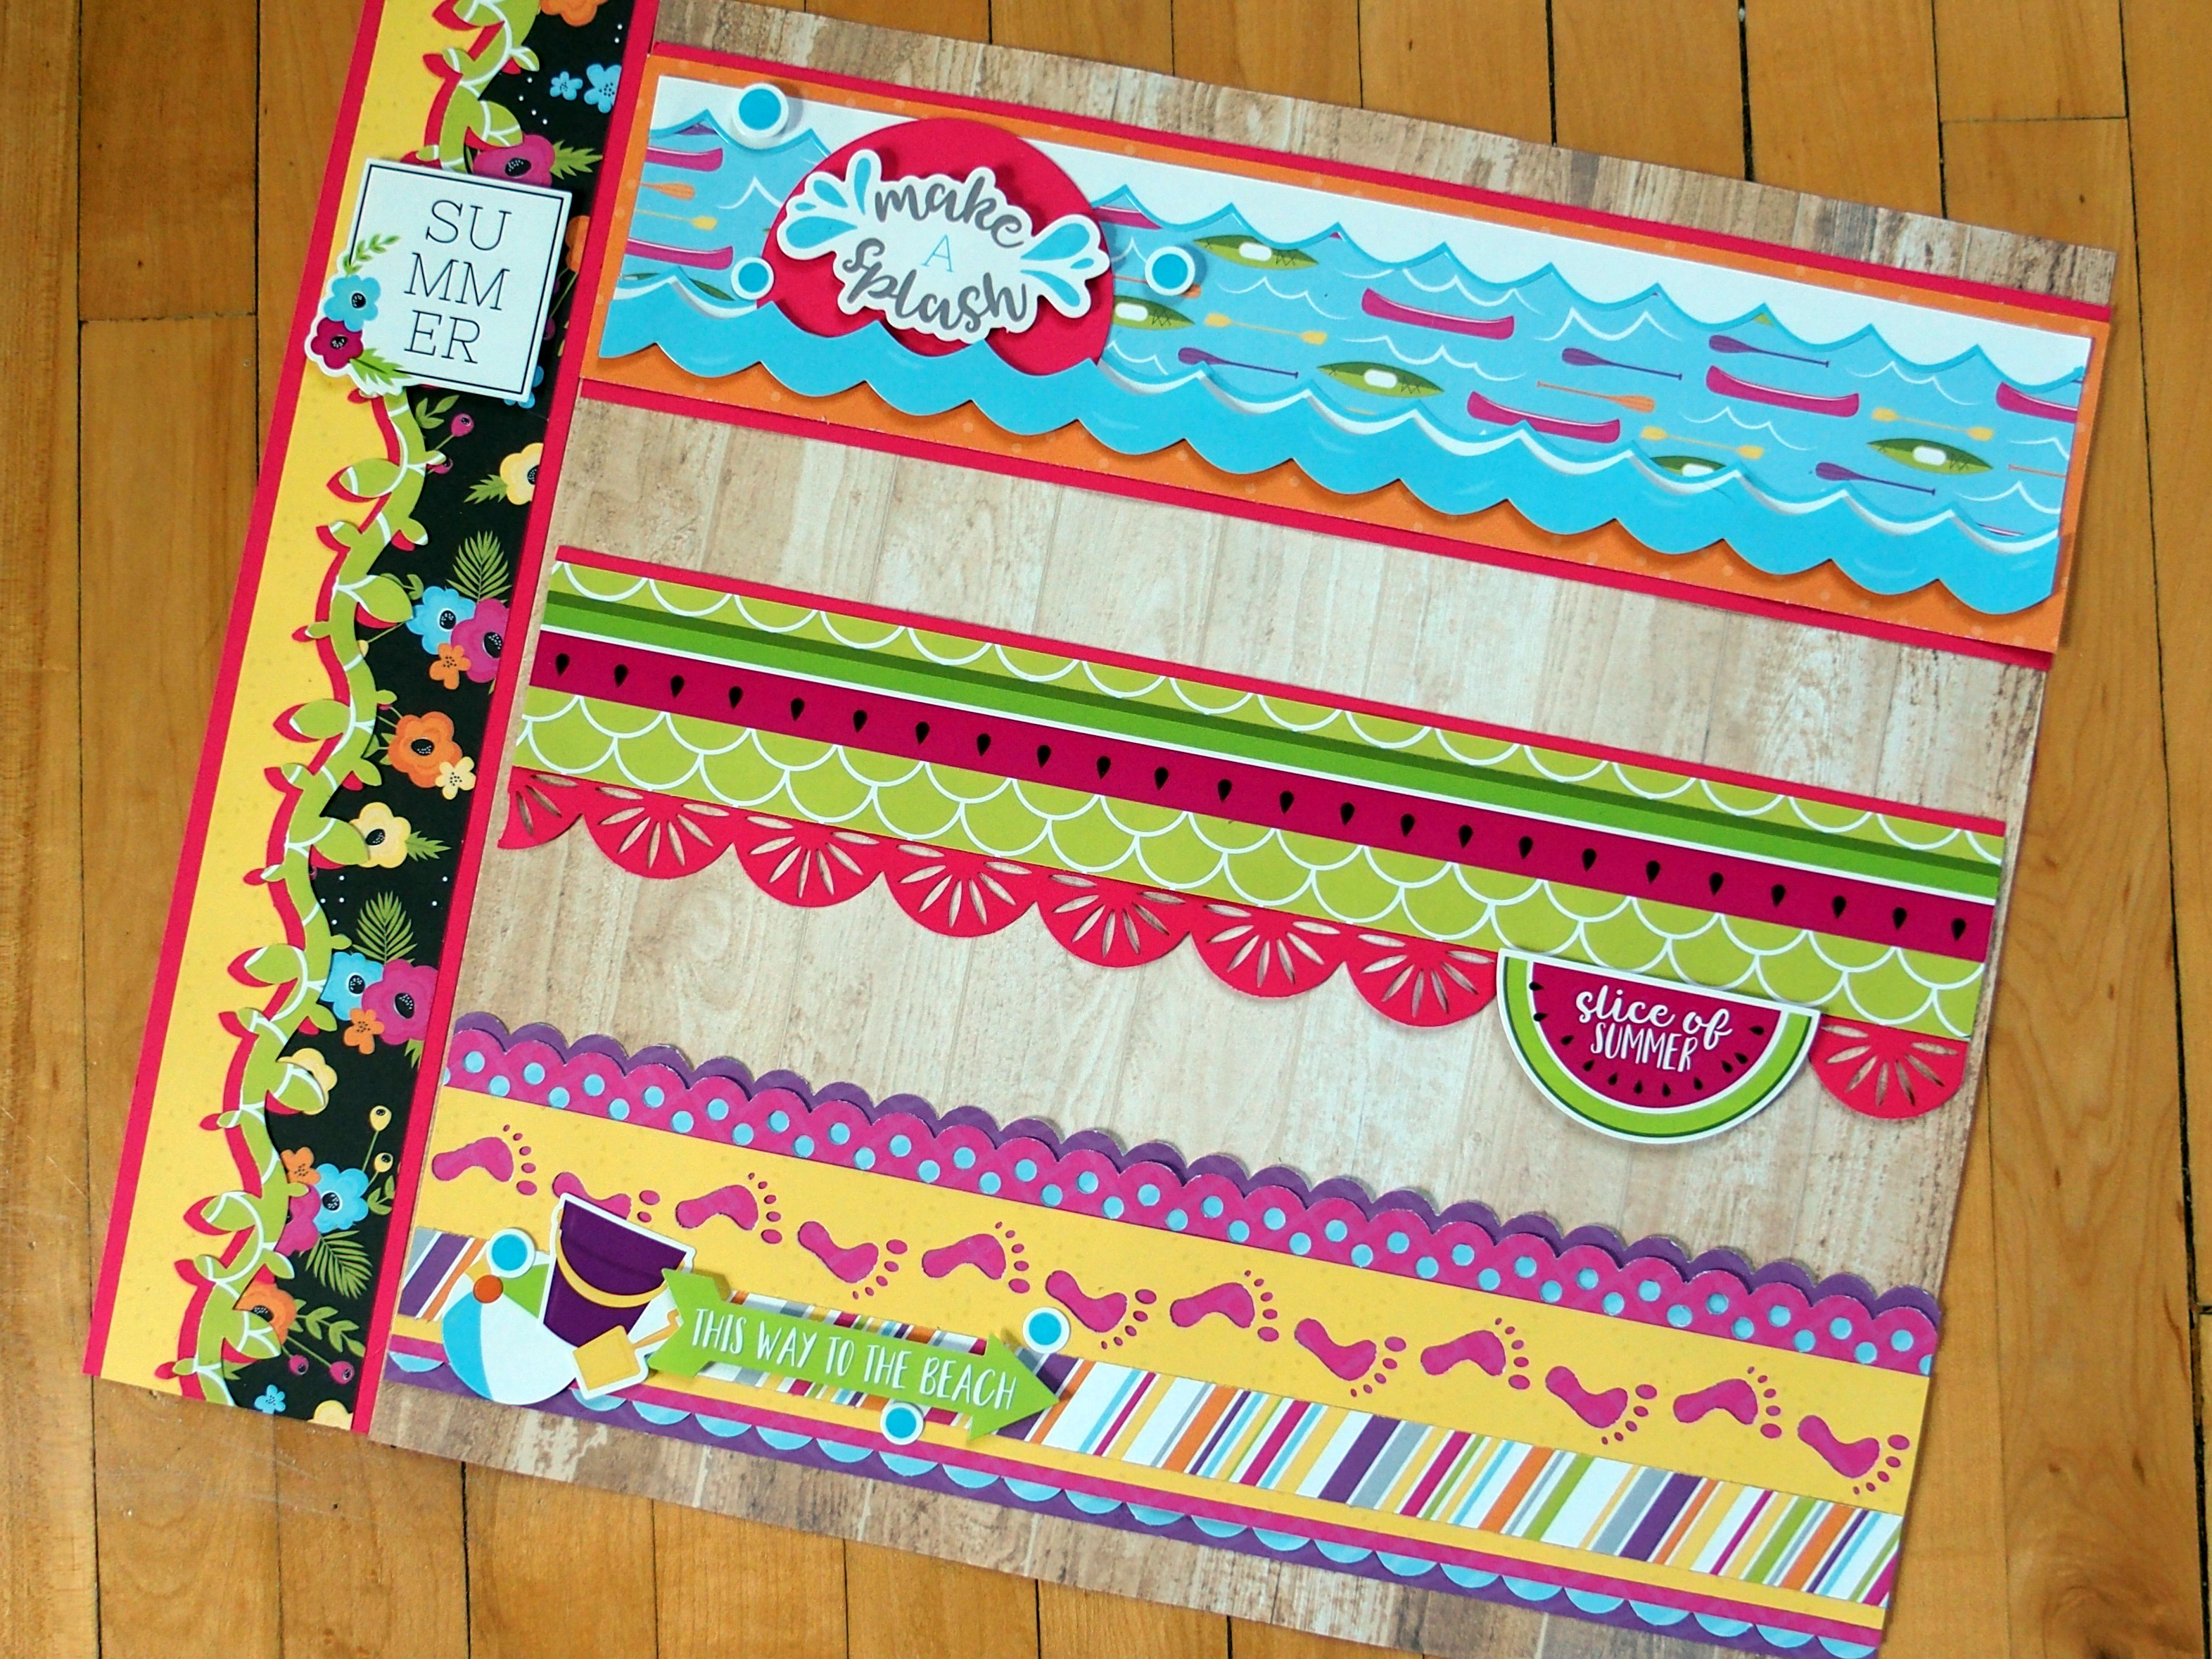
Summer
- Cut a 2-1/2″ x 12″ strip of raspberry cardstock for the base.
- Using the sprout cartridge, punch a border with each raspberry cardstock and green paper. Using one as a guide, lightly trace wavy shape onto yellow/black floral paper about 1″ in from the edge. Cut out yellow strip using the wavy line. Trim black floral side to about 1-1/4″ with the trimmer. Mount side by side on the base. Apply sprout borders down the middle on top as shown.
- Add “Summer” sticker with foam squares.
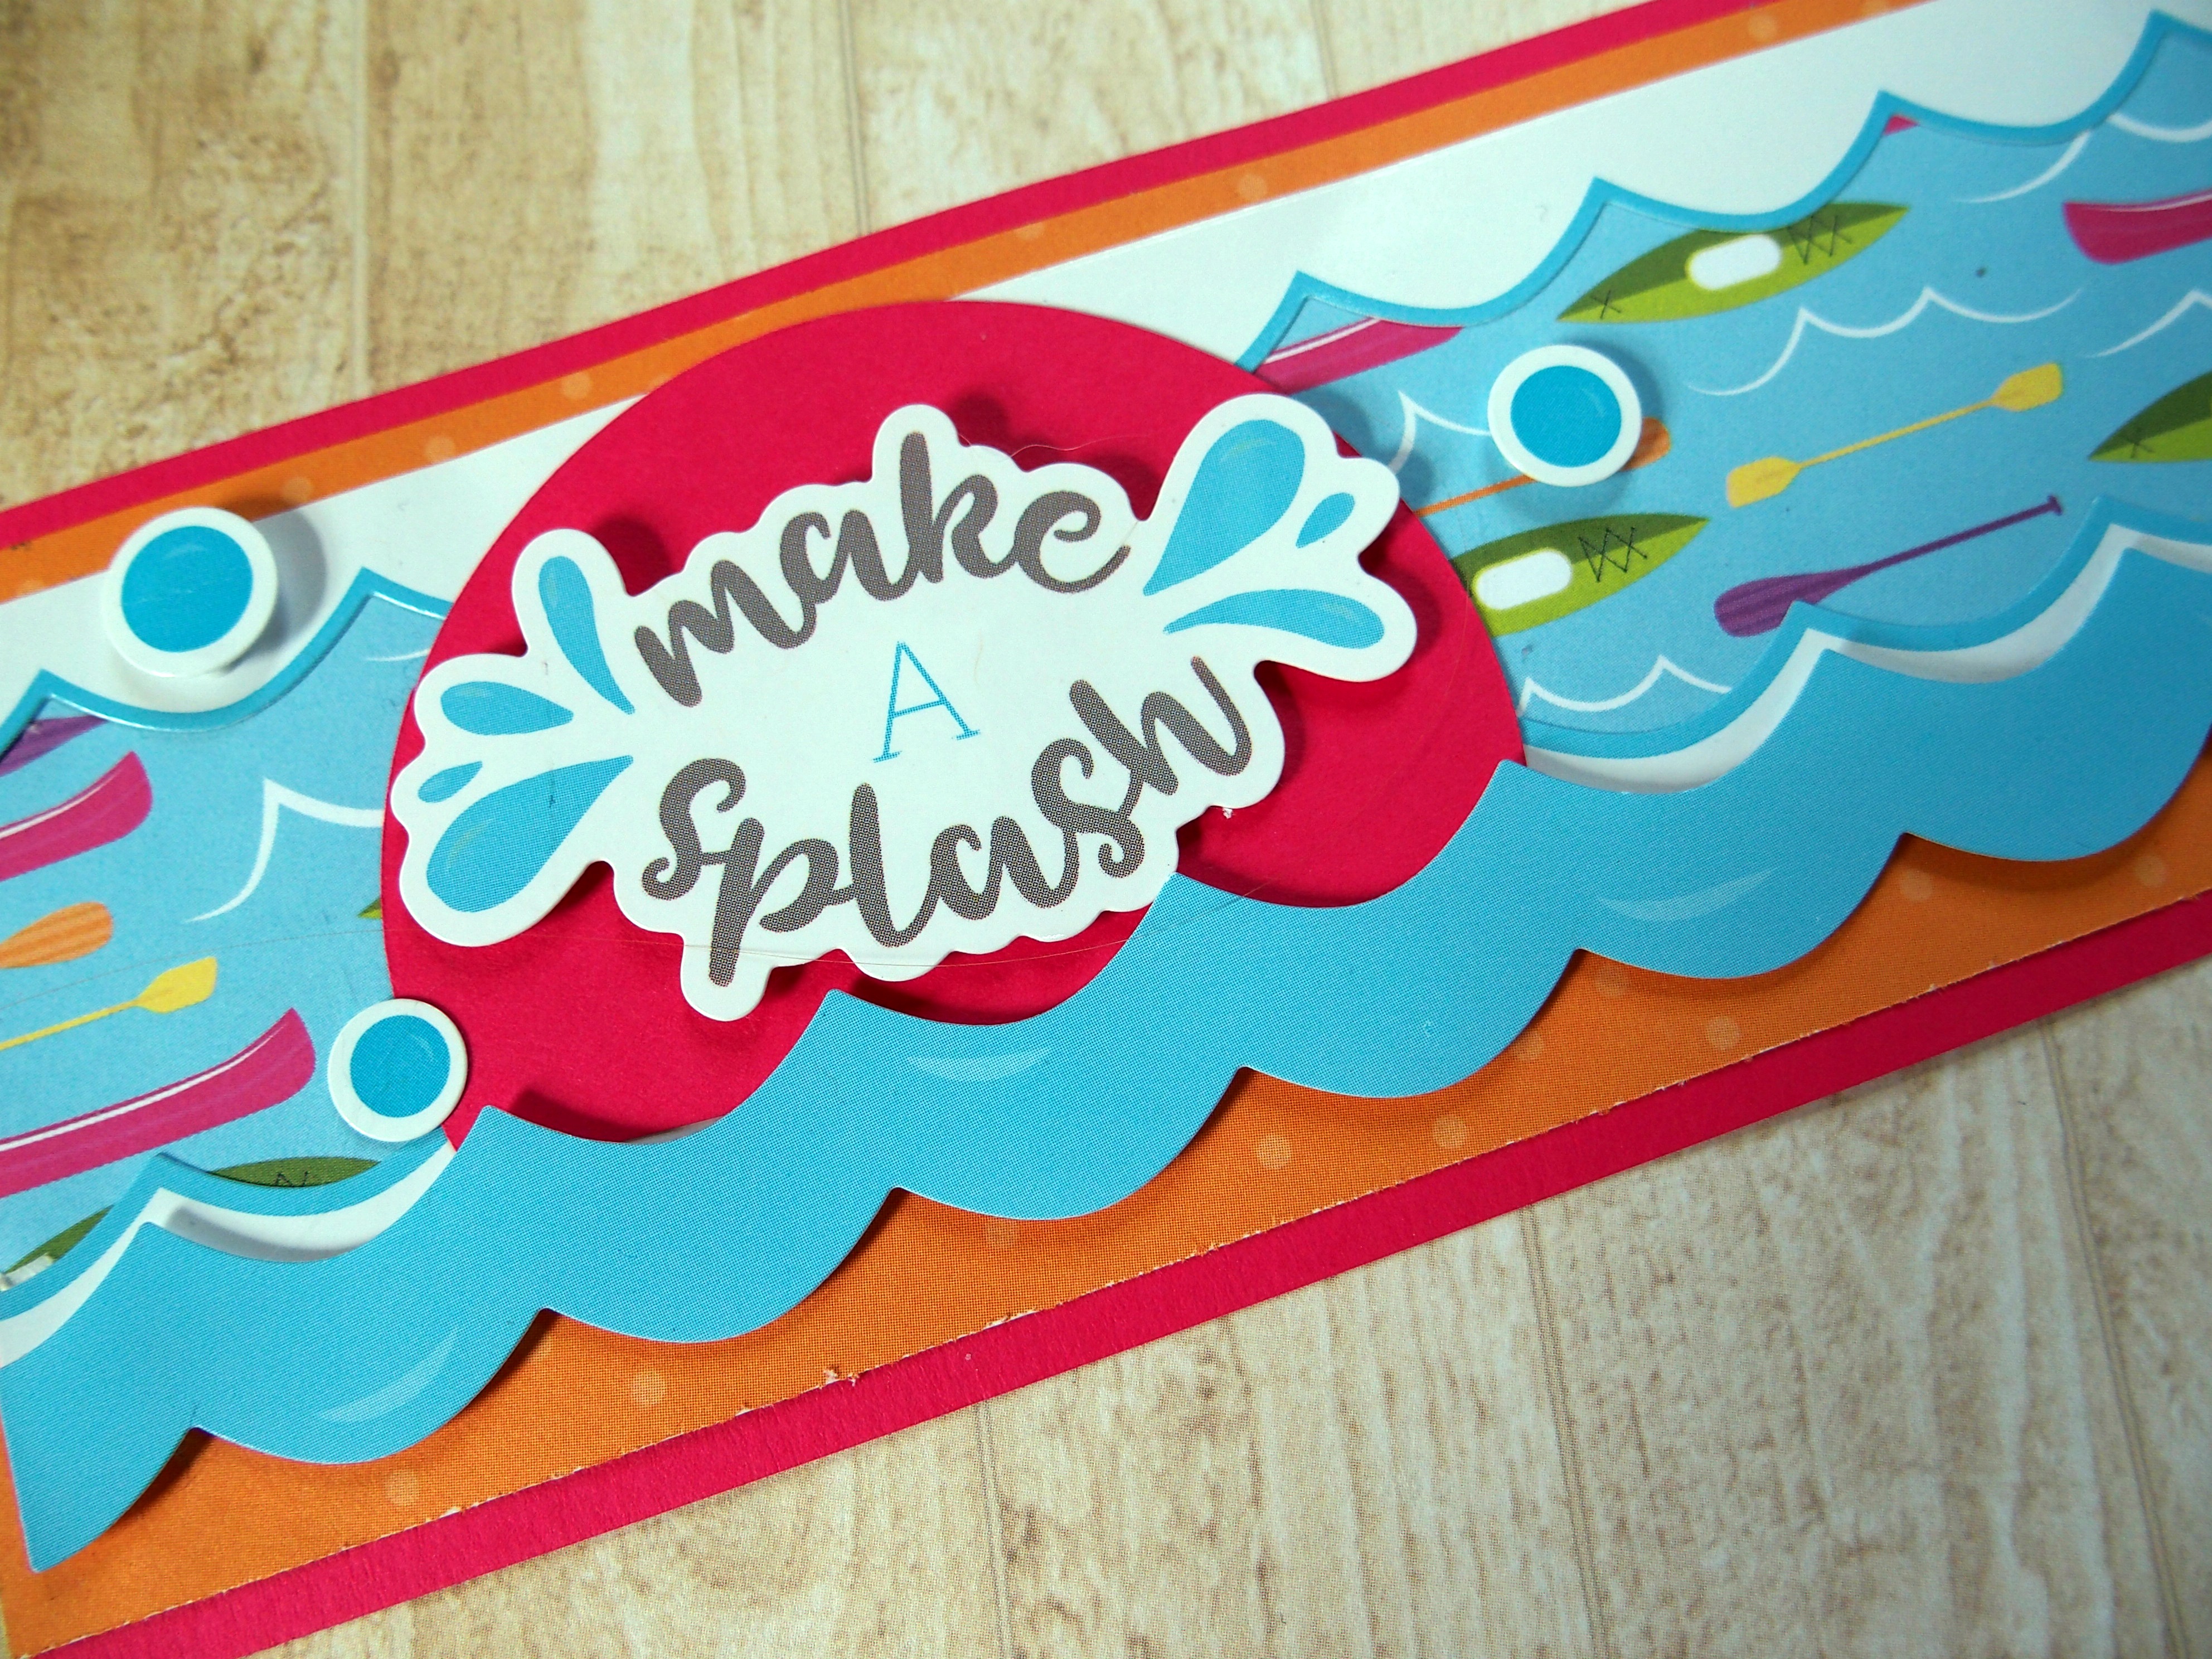
Make a Splash
- Cut a 3″ x 12″ strip of raspberry cardstock for the base. Cut a 2-3/4″ x 12″ strip of orange paper and add to the base. Cut a 2″ x 11-3/4″ strip of canoe/kayak paper and add to the border, 1/8″ down from the top of the orange strip.
- Remove the white sticker “leftovers” from around the wavy sticker. Cut apart. Apply top piece to the top of the canoe/kayak strip and the bottom piece to the bottom. Add wavy sticker with foam squares just beneath the bottom piece.
- Using the inside of the largest circle pattern and the blue blade, cut a circle with raspberry cardstock. Trim off 1/2″ and apply to the border as shown, tucking it behind the waves. Add “Make a Splash” sticker and bubbles with foam squares.

Slice of Summer
- Punch a doily border with raspberry cardstock. Trim to 2-1/2″ x 12″ for the base. Cut a 1-5/8″ x 12″ strip of green paper and add to the border. Top with a watermelon sticker strip.
- Add “Slice of Summer” sticker with foam squares.
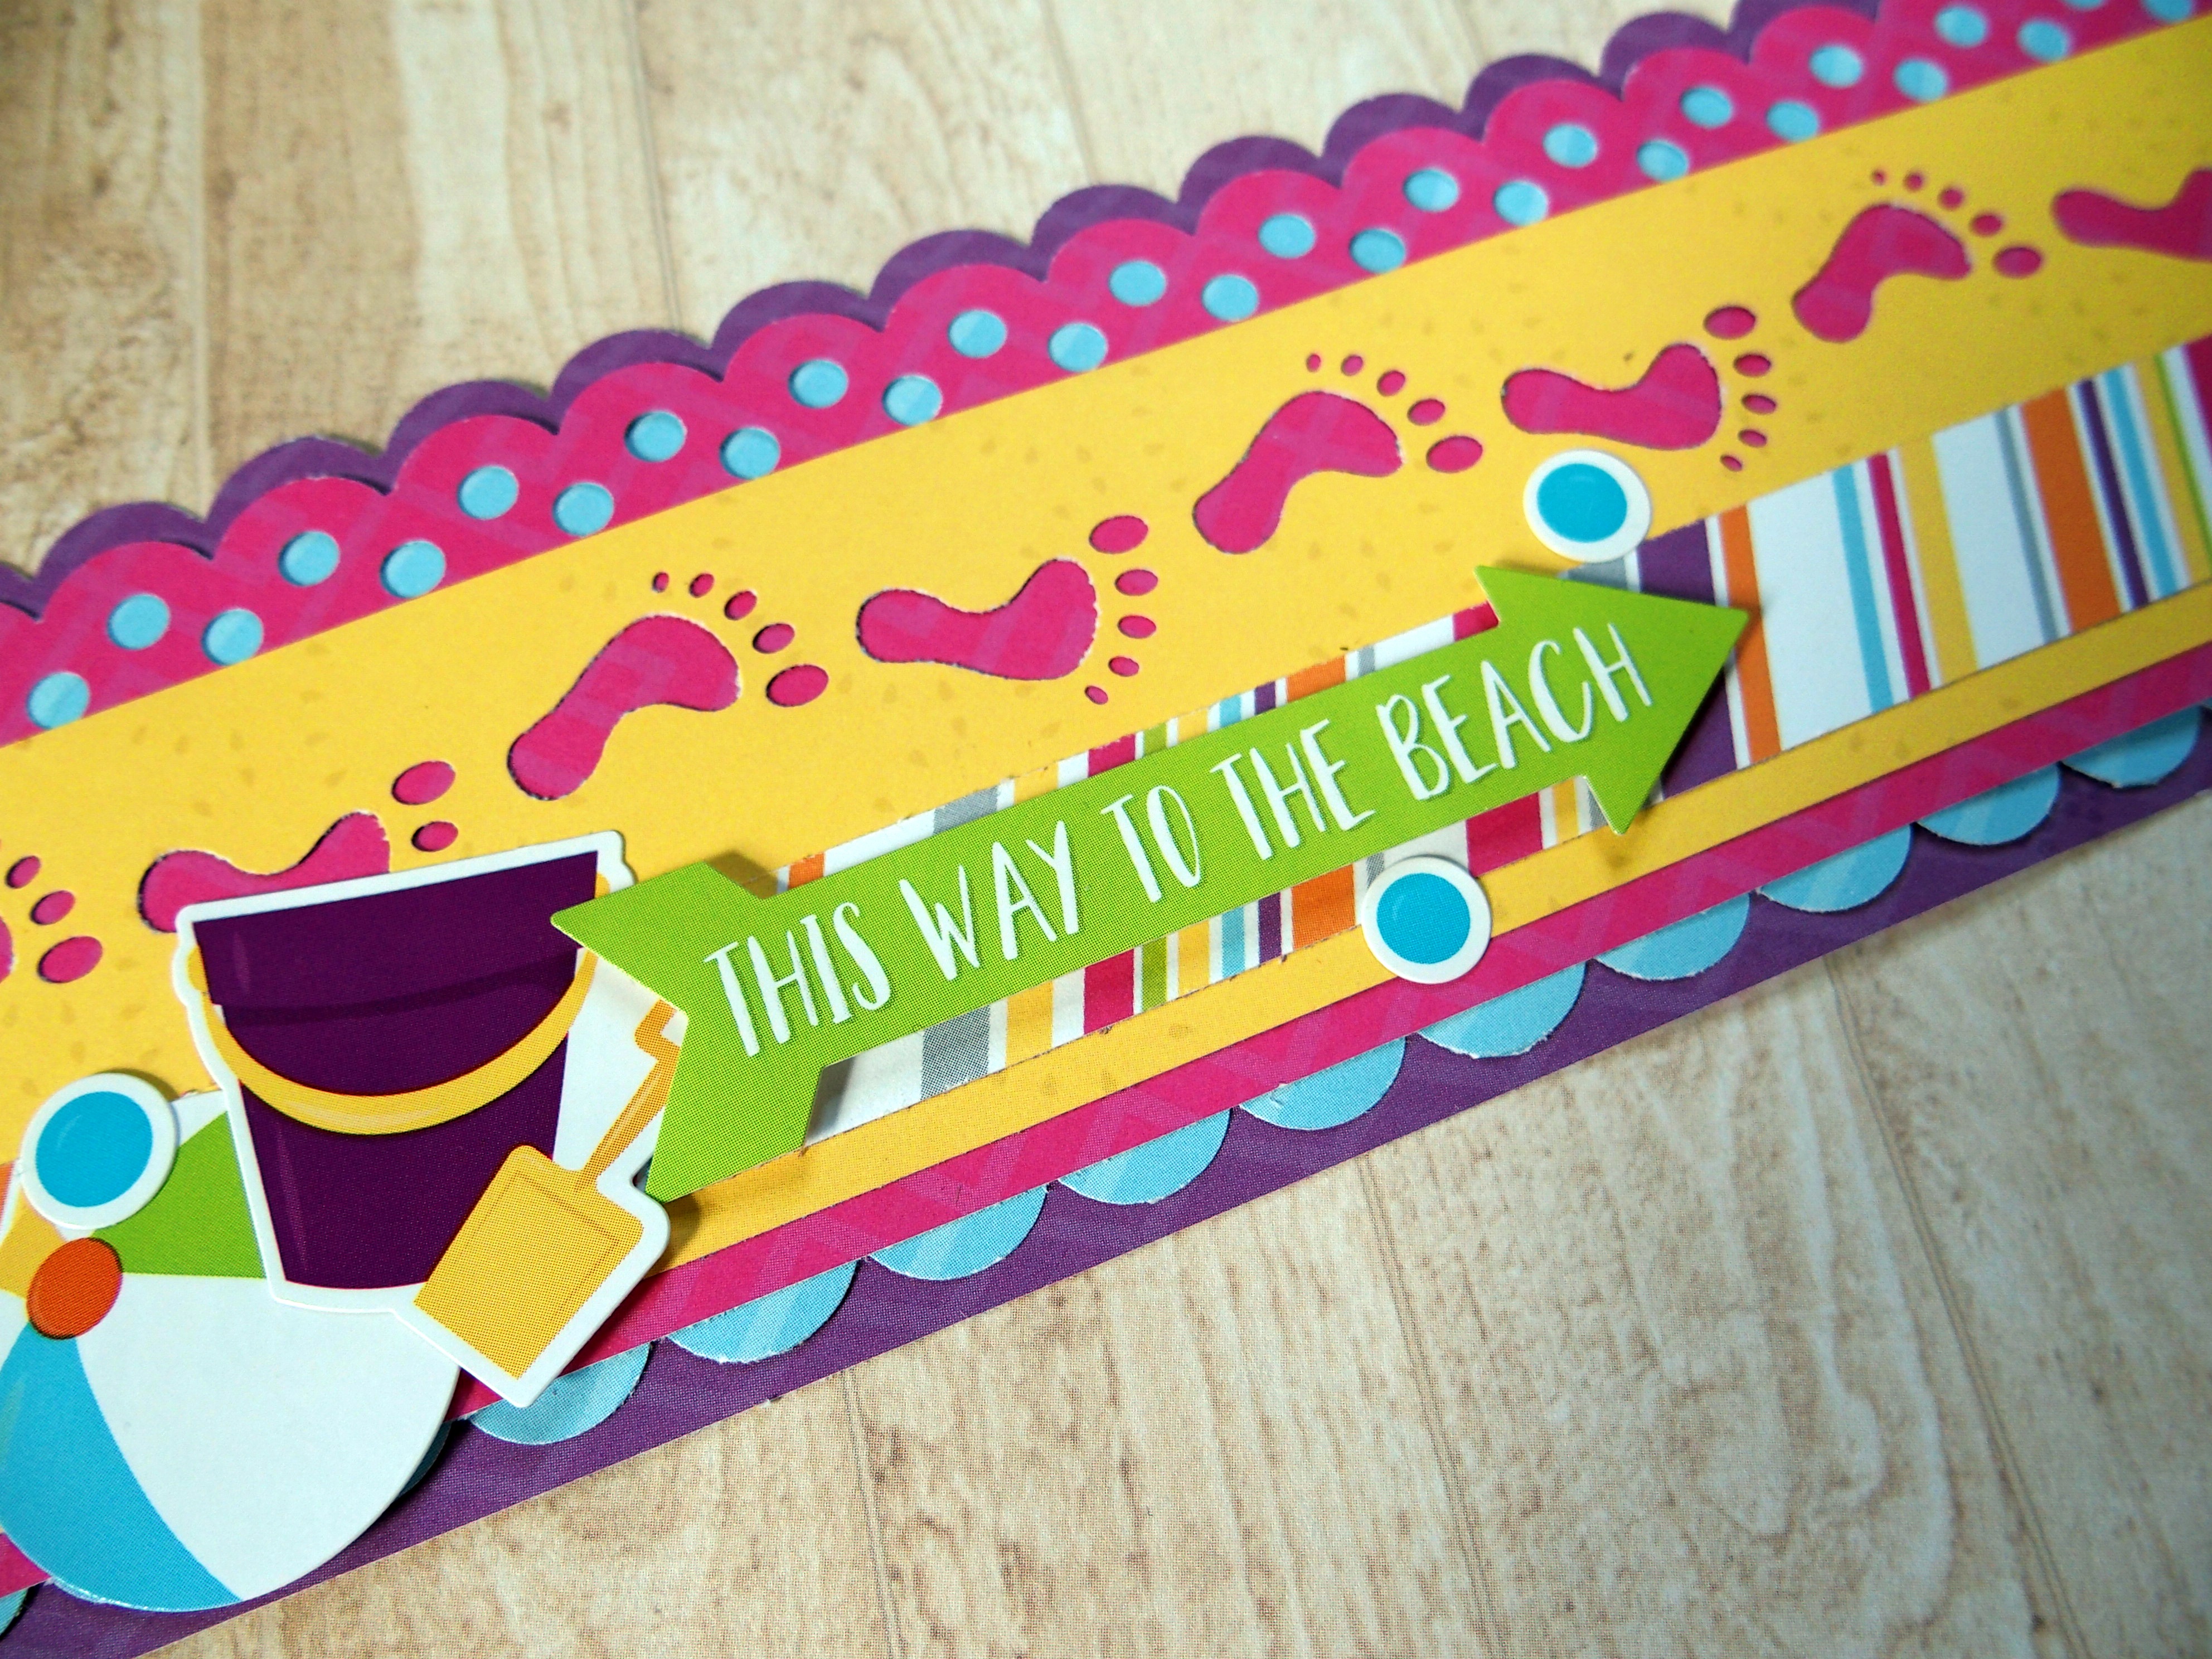
This Way to the Beach
- Using the scallop dot cartridge, punch a border with purple paper. Trim to 3″ x 12″ for the base. Punch another border with blue paper and trim to 2-5/8″ x 12″; flip it upside down so the scallops are on the straight side of the purple base and adhere. Punch a third border with raspberry paper, trim to 2-5/8″ x 12″ and mount just under the purple scallops (the blue paper should show through the dots).
- Using the footprints cartridge, punch a border with yellow paper. Trim to 2″ x 12″ and mount on top of raspberry piece.
- Cut a 3/4″ x 12″ strip of striped paper and add underneath the footprints on yellow piece. Add beach ball, pail and bubble stickers as shown. Add “This Way to the Beach” sticker with foam squares.

Want to combine your border with a whole-page design? Try using a large piece of paper for the base, as shown above. Punch along one side, then build your border as usual.


Loving these border ideas!
Fabulous, fun summer borders!
Thank you for some great ideas!!! Summer fun!!!
BEAUTIFUL
Love these- what fun!
Love these border ideas!
on the slice of summer border, the punch used is the scallop burst, not the doily. even though I was looking right at it, I used the wrong one. I go by the instructions!