January 29, 2019
Have Your Cake & Eat It Too with these Fun Birthday Craft Ideas

Giving gifts? The best! Eating cake? Yes, please! Singing the birthday song? We’ll lead the chorus. Finding unique ways to showcase the birthday memories made? Well, that can be tricky. That is, unless you have a collection like Happy BirthYAY, which makes all your birthday craft ideas come to life! Whether you’re celebrating your special day or helping your little one have the most memorable party ever, these two birthday crafts are the perfect way to add the icing onto the cake that is your birthday scrapbook layout!
To create this scrapbook border and card, you will need:
- Happy BirthYAY Paper Pack
- Happy BirthYAY Stickers
- Happy BirthYAY Embellishments
- Cloud Cardstock
- Banner Flag Punch
- 12-inch Straight Trimmer
- Foam Squares
- Tape Runner
Shop products by clicking your country’s icon below:


Step 1: Using your 12-inch Straight Trimmer, cut a sheet of Cloud Cardstock to measure 8-1/2″ x 5-1/2″, then score the paper straight down the center to create a card. Cut the a piece of patterned paper to measure 4-1/2″ x 3-1/2″ and adhere it to the center of the card using your Tape Runner.
Step 2: Adhere the decorative fans to the card as shown using your Tape Runner. Cover the back of the “Cheers to you!” sticker using a few Foam Squares, then adhere it to the fans as shown.
Step 3: To complete the card, add the flower gem for a little shimmer!
Step 1: Using your 12-inch Straight trimmer, cut the Cloud Cardstock to measure 12″ x 1″ 3/4″ and the rainbow pattered paper to measure 12″ x 1/4″. Using the Cloud strip as your base, mount the rainbow strip across the bottom of the base using your Tape Runner.
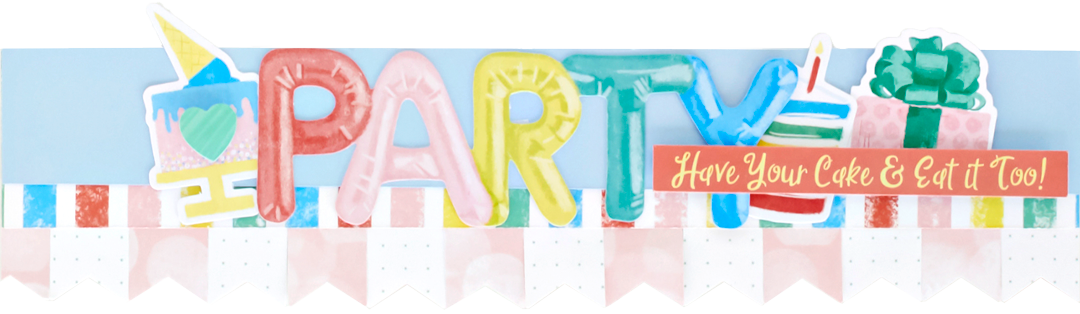
Step 2: Using the Banner Flag Punch, punch 14 flags from the pink patterned paper. Then, adhere the pieces to the back of the border base using your Tape Runner.
Step 3: Arrange the embellishments as shown. Once satisfied with the placement, adhere embellishments using your Tape Runner. To complete the border, adhere the heart sticker to the cake using a Foam Square. Then, add a few more Foam Squares to the “Have Your Cake & Eat it Too!” sticker and adhere the sticker to the far right-side of the border as shown.
Today might not be your birthday, but it’ll still be a party when you bring these birthday craft ideas to life! What other fun crafts do you like to make for birthday parties? Comment below and let us know!

[…] Want to create the Happy BirthYAY border shown above? Get instructions now! […]