September 13, 2021
Prepare for World Cardmaking Day: #CardBONUS Sketch Challenge

This past weekend was a September to remember — the Worldwide Virtual Crop was a huge success, and that’s all thanks to you and the thousands of crafters from the U.S., Canada, Australia and Japan! Want to keep the worldwide fun going? Well, you’re in luck, for World Cardmaking Day is the first Saturday of October! And to prepare for this global handicraft happening, we have a #CardBONUS challenge that you can take on in the Virtual Crop Facebook Group!
Check out the SIX sketches below and put your own spin on delightful DIY designs and great greetings for birthdays, anniversaries, the upcoming Christmas season and more (AND tell us who you’ll be sending the card to as well when you post your projects on the Facebook Group!), and you might just be a lucky prize winner!
#CardBONUS Challenge
This challenge has SIX sketches with example completed cards using all different collections!
How to Participate:
- Review the six sketches below in this post and/or in the Virtual Crop Facebook Group. (You can also refer to the step-by-step instructions below if you’d prefer to do it that way instead of following the sketch!)
- Create the card(s) using whatever products you have on-hand. Complete as many challenges as you wish, but the more you complete, the more chances you have to win!
- Snap a picture of your finished project(s) and post it in the Virtual Crop Facebook Group by Sunday, Oct. 3, at 11:59pm CT (Australia: 4 Oct. at 3:59pm AEDT) with hashtag #CardBONUS1, #CardBONUS2, etc., and who you will be sending it to, for the chance to win a prize. We’ll have 6 lucky winners total — 1 winner per sketch.
- Winners will be announced in the Virtual Crop Facebook Group on Oct. 7 at noon CT.
And what can you win?

NOTE: The Prize Pack will be awarded to 1 participant for each sketch. We will award the prizes randomly, but to win, it must be evident you used the sketch we provided as inspiration to create a project using predominantly Creative Memories products. Prize winners will be announced on Thursday, Oct. 7, at noon CT.
Sketch 1 — #CardBONUS1

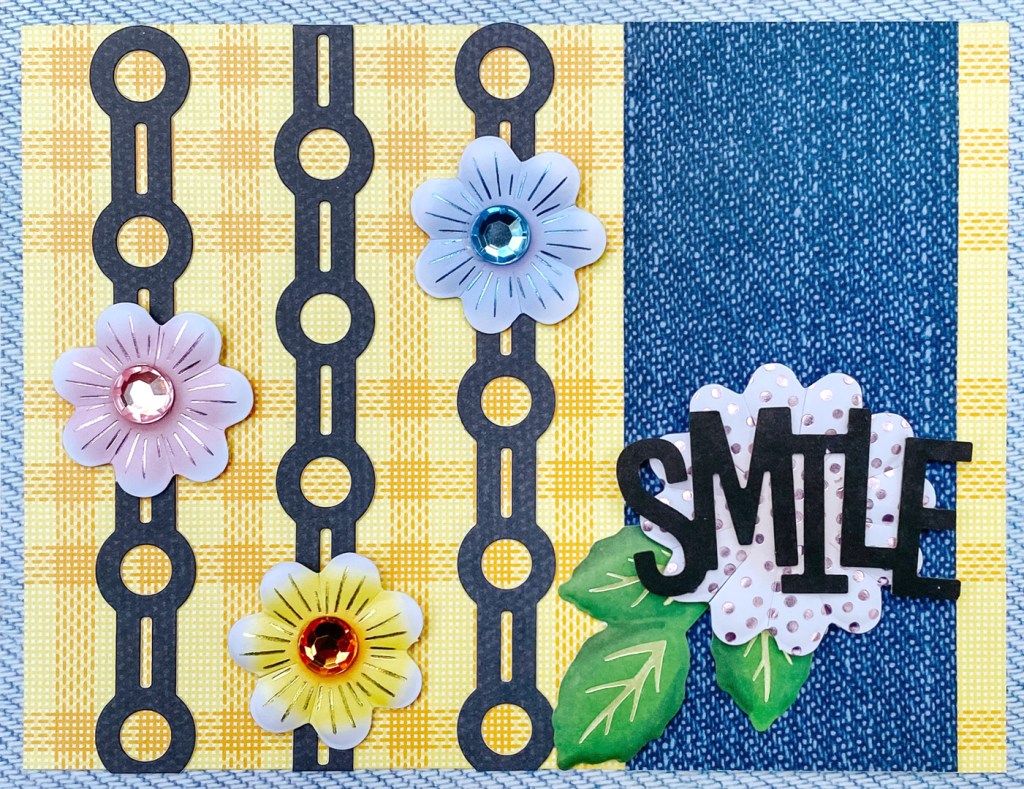
Product used: Botanical Burst collection, Denim Texture Tone-on-Tone Paper Pack & Happy Camper collection
Want step-by-step instructions for creating this card? Scroll down to the bottom of this blog post!
Sketch 2 — #CardBONUS2


Product used: Full Moon Fun collection & Summertime collection
Want step-by-step instructions for creating this card? Scroll down to the bottom of this blog post!
Sketch 3 — #CardBONUS3


Product used: Sparks of Magic collection & Happy Camper collection
Want step-by-step instructions for creating this card? Scroll down to the bottom of this blog post!
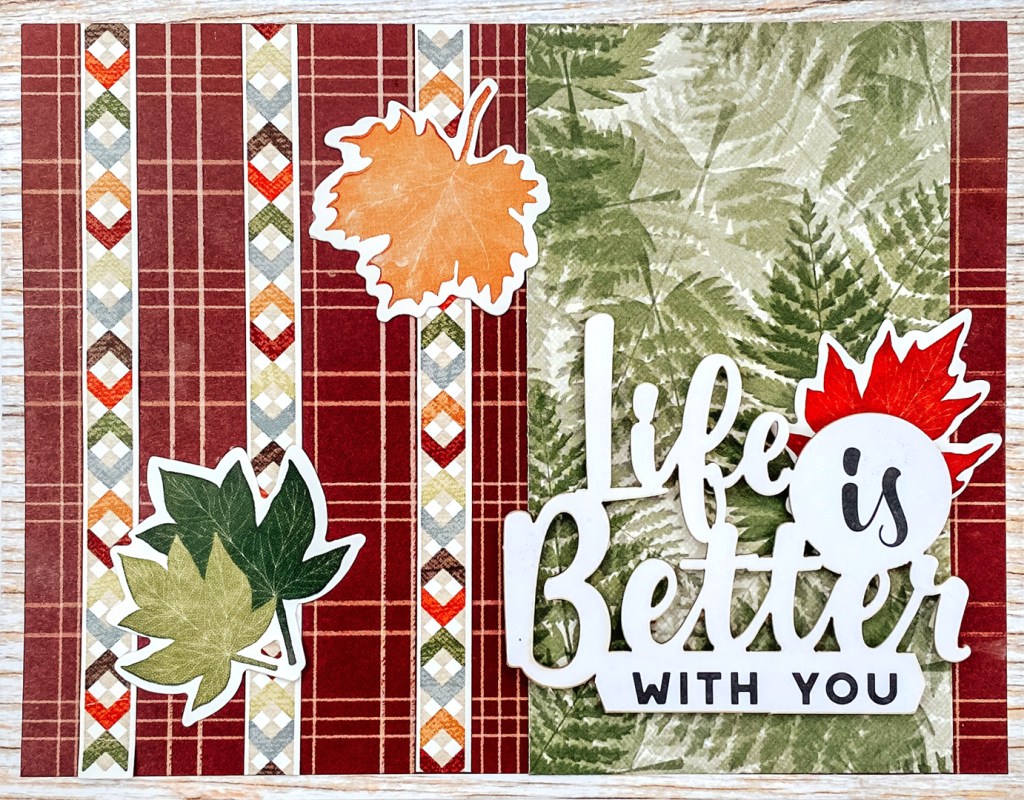
Sketch 4 — #CardBONUS4

Product used: It’s Fall, Y’all collection & You Got This collection
Want step-by-step instructions for creating this card? Scroll down to the bottom of this blog post!
Sketch 5 — #CardBONUS5


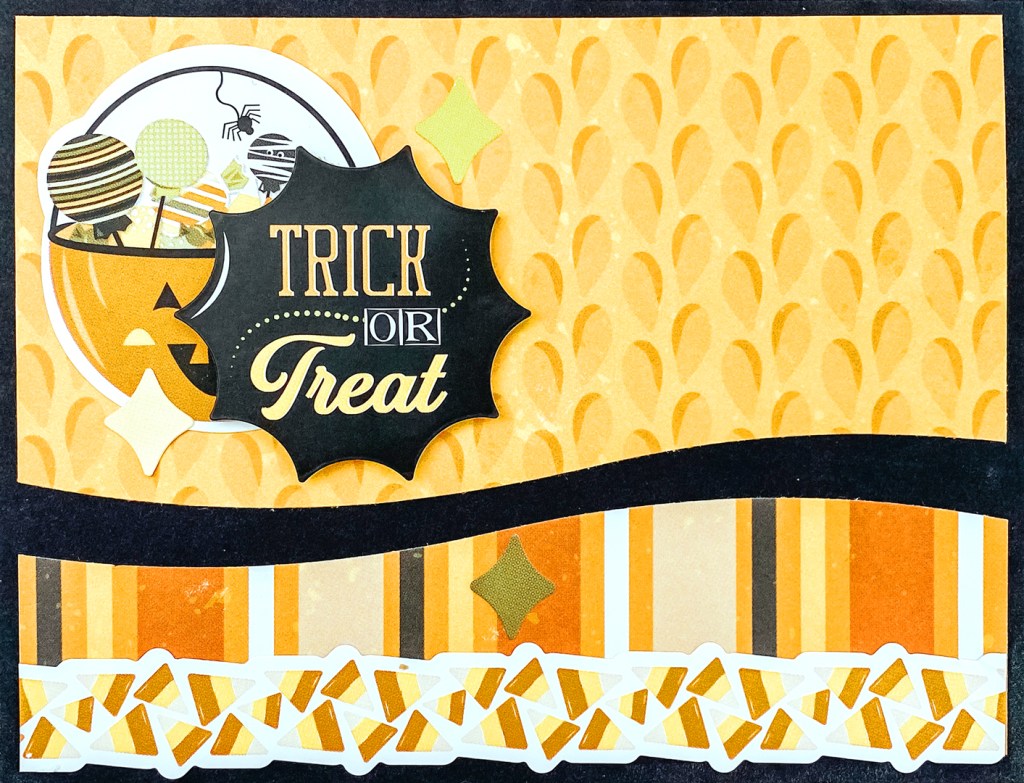
Promo product used: Sparks of Magic collection & Full Moon Fun collection
Want step-by-step instructions for creating this card? Scroll down to the bottom of this blog post!
Sketch 6 — #CardBONUS6


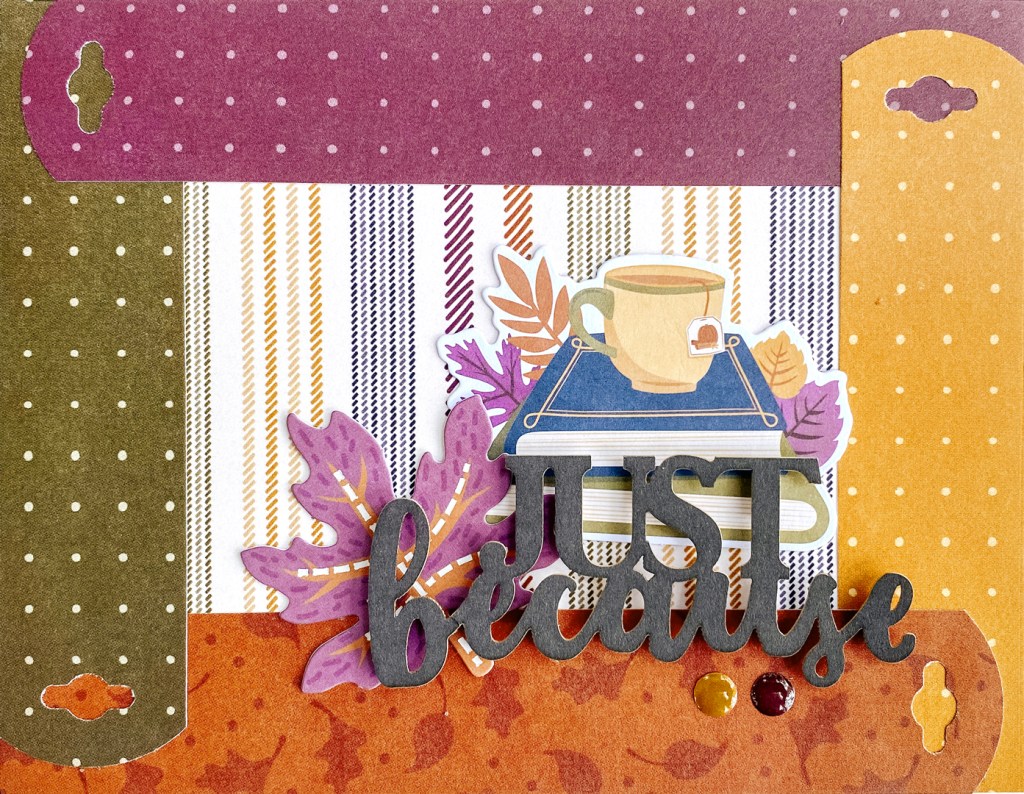
Promo product used: Sparks of Magic collection & It’s Fall, Y’all collection
Want step-by-step instructions for creating this card? Scroll down to the bottom of this blog post!
Instructions for #CardBONUS1
Step 1: Create the card base. Cut an 8-1/2″ x 5-1/2″ piece of White Solid Cardstock. Using the 12-inch Trimmer with the Scoring Blade, score along the long edge at 4-1/4″ and fold in half. (Alternatively, use a card from the Blank Card Kit.)
Step 2: Cut a 5-1/2″ x 4-1/4″ piece of paper and adhere to the front of the card. Cut a 5-1/4″ x 4″ piece of paper and adhere on top.
Step 3: Cut a 1-3/4″ (or 2-1/4″) x 4″ strip of paper and adhere it to the right side of the card. Cut a border sticker or laser-cut border into three 4″ pieces. Adhere to the left side of the card.
Step 4: Add embellishments.
Instructions for #CardBONUS2
Step 1: Create the card base. Cut an 8-1/2″ x 5-1/2″ piece of White Solid Cardstock. Using the 12-inch Trimmer with the Scoring Blade, score along the long edge at 4-1/4″ and fold in half. (Alternatively, use a card from the Blank Card Kit.)
Step 2: Cut four 1-1/16″ x 5-1/2″ strips of paper and adhere to the front of the card.
Step 3: Cut three 1-1/16″ x 3-1/2″ strips of paper. Using scissors, cut a notch in one end of each at different lengths. Adhere to the card.
Step 4: Embellish as desired.
Instructions for #CardBONUS3
Step 1: Create the card base. Cut an 8-1/2″ x 5-1/2″ piece of White Solid Cardstock. Using the 12-inch Trimmer with the Scoring Blade, score along the long edge at 4-1/4″ and fold in half. (Alternatively, use a card from the Blank Card Kit.)
Step 2: Cut a 5-1/4″ x 4″ piece of paper and adhere to the front of the card.
Step 3: Using the Starry Border Maker Cartridge, punch a border with Black Solid Cardstock. Trim to 5-1/2″ x 1-3/4″ and punch the other side.
Step 4: Cut a 5-1/2″ x 2″ piece of paper. Using the inside edge of the smallest Custom Cutting System Circle Pattern and the Red Blade, cut three circles at regular intervals along the middle of the strip. Adhere over the starry border and mount on the card. Cut two 5-1/2″ x 1/4″ strips of striped paper. Adhere along top and bottom of the strip.
Step 5: Embellish as desired.
Instructions for #CardBONUS4
Step 1: Create the card base. Cut an 8-1/2″ x 5-1/2″ piece of White Solid Cardstock. Using the 12-inch Trimmer with the Scoring Blade, score along the long edge at 4-1/4″ and fold in half. (Alternatively, use a card from the Blank Card Kit.)
Step 2: Cut a 4-1/4″ x 5-1/2″ piece of paper and adhere to the front of the card. Cut a 4″ x 5-1/4″ piece of paper and adhere on top.
Step 3: Using the inside edge of the large Custom Cutting System Circle Pattern and the Green Blade, cut a circle from paper. Cut another circle from a different paper using the Blue Blade. Adhere the larger circle on the card and top with the smaller circle.
Step 4: Punch two 4-1/4″ border strips with different papers. Adhere to the border.
Step 5: Embellish as desired.
Instructions for #CardBONUS5
Step 1: Create the card base. Cut an 8-1/2″ x 5-1/2″ piece of White Solid Cardstock. Using the 12-inch Trimmer with the Scoring Blade, score along the long edge at 4-1/4″ and fold in half. (Alternatively, use a card from the Blank Card Kit.)
Step 2: Cut a 5-1/4″ x 2-3/4″ piece of paper and use the swell edge of the 12-inch Decorative Trimmer to cut the bottom edge. Cut a 5-1/4″ x 1-1/2″ strip of paper and use the swell edge of the 12-inch Decorative Trimmer to cut the top edge. Adhere both to the border, leaving a swell space between as shown.
Step 3: Add stickers and embellishments as desired.
Instructions for #CardBONUS6
Step 1: Create the card base. Cut an 8-1/2″ x 5-1/2″ piece of White Solid Cardstock. Using the 12-inch Trimmer with the Scoring Blade, score along the long edge at 4-1/4″ and fold in half. (Alternatively, use a card from the Blank Card Kit.)
Step 2: Cut a 5-1/2″ x 4-1/4″ piece of paper and adhere to the front of the card.
Step 3: Cut two 1″ x 5-3/8″ strips of paper and two 1″ x 4-1/8″ strips of paper. Punch one short end of each using the 3-in-1 Bevel Tag Punch. Adhere to the edges of the card, overlapping as shown.
Step 4: Embellish as desired.
Remember, you have until Sunday, Oct. 3, at 11:59pm CT (Australia: 4 Oct. at 3:59pm AEDT) to complete your card(s) and post them in the Virtual Crop Facebook Group (with hashtag #CardBONUS1, #CardBONUS2, etc., and who you will be sending it to) to be eligible to be one of the lucky winners!

I can’t wait to try all of these. They look like fun.
This looks like so much fun! I was looking for new card ideas and these are great!