November 18, 2021
Bring On the #2021BlackFridayBONUS Challenge & Black Friday Bundles
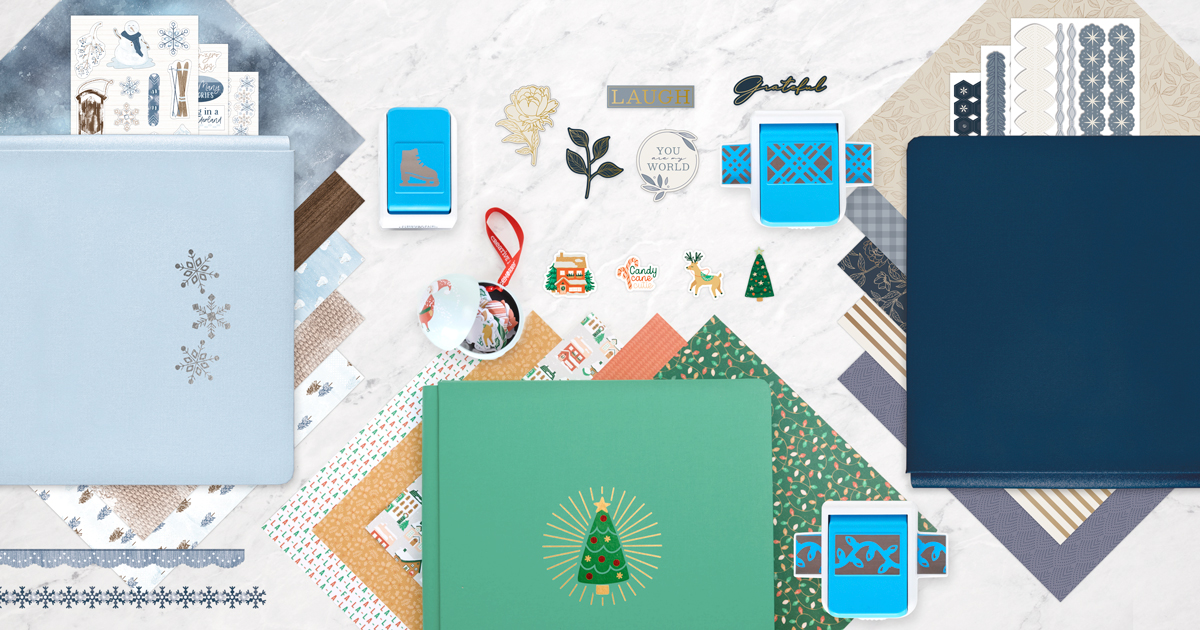
A whisk of Winter Days whimsy + a sweet sprinkling of Candy Cane Lane + an effervescent mixture of Blue & Gold… why, that’s a recipe for an AWESOME batch of Black Friday bundles! For a limited time while supplies last, you can earn up to 3 exclusive bundles FREE with qualifying orders! There is also a Digital Artwork version of this, too! Talk about a Black FriYAY!
For more details, visit: US | CA | AU
And with these three bundles of holi-dazzling delight, it’s only fitting to give you three sketch challenges — aka, your #2021BlackFridayBONUS challenge! Take on the challenge, which features products from each of the packed parcels in this limited-time promo, in the Virtual Crop Facebook Group.
Take a Look at the Black Friday Bundles You Can Earn FREE!
#2021BlackFridayBONUS Challenge
This pop-up challenge has THREE sketches with example completed layouts using the Black Friday bundles!
How to Participate:
- Review the three sketches below in this post and/or in the Virtual Crop Facebook Group. (You can also refer to the step-by-step instructions below if you’d prefer to do it that way instead of following the sketch!)
- Create the layout(s) using whatever products you have on-hand; you do not need to use the Black Friday bundles to be eligible to win. Complete as many challenges as you wish, but the more you complete, the more chances you have to win!
- Snap a picture of your finished project(s) and post it in the Virtual Crop Facebook Group by Thursday, Dec. 9, at 11:59pm CT (Australia: 10 Dec. at 4:59pm AEDT) with hashtag #2021BlackFridayBONUS1, #2021BlackFridayBONUS2 and/or #2021BlackFridayBONUS3 for the chance to win a prize. We’ll have 6 lucky winners total — 1 winner per sketch, PLUS 3 bonus winners who complete the challenge using the Black Friday bundles.
- Winners will be announced in the Virtual Crop Facebook Group on Dec. 16 at noon CT.
And what can you win?
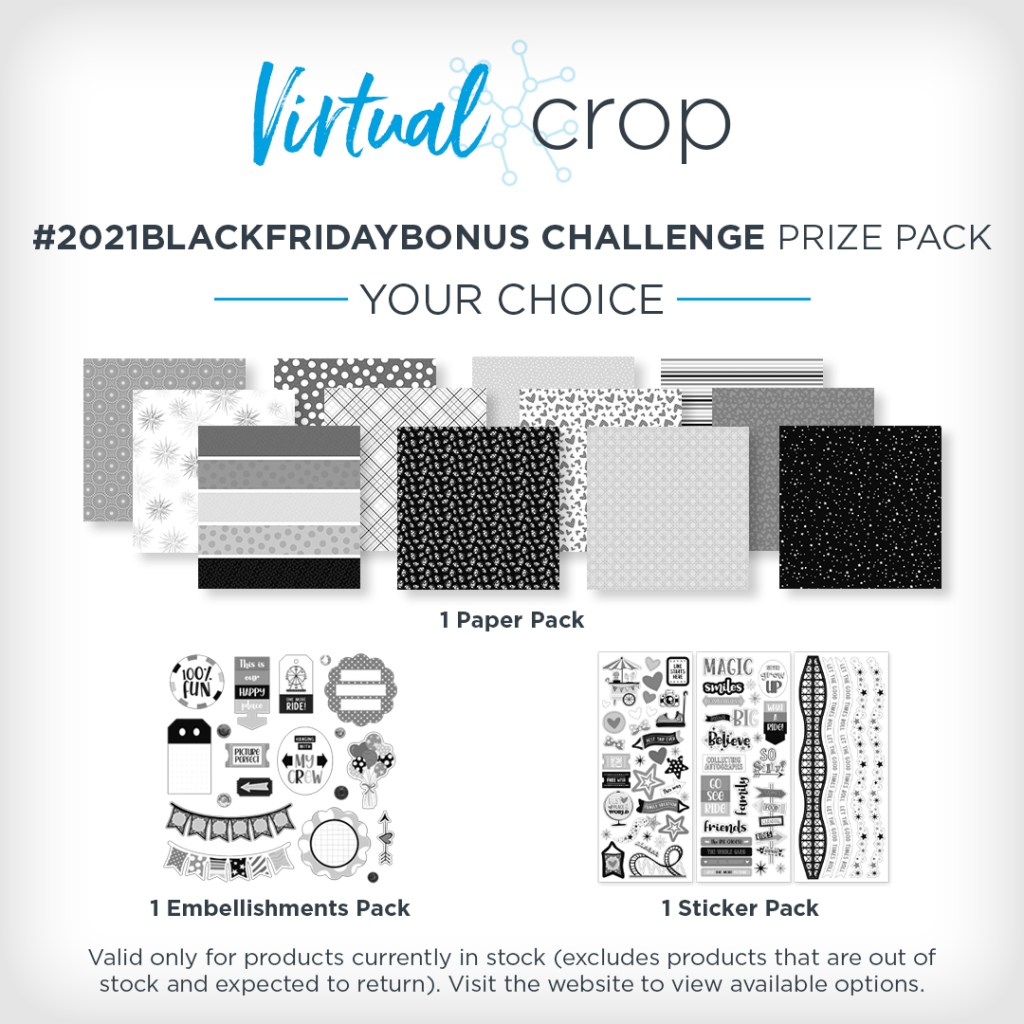
Winners will get to pick THEIR CHOICE of 1 Paper Pack + 1 Embellishment Pack + 1 Sticker Pack!
NOTE: The Prize Pack will be awarded to 1 participant for each sketch, PLUS 3 bonus winners who complete the challenge using the Black Friday bundles. We will award the prizes randomly, but to win, it must be evident you used the sketch we provided as inspiration to create a project using predominantly Creative Memories products. Prize winners will be announced on Thursday, Dec. 16, at noon CT.
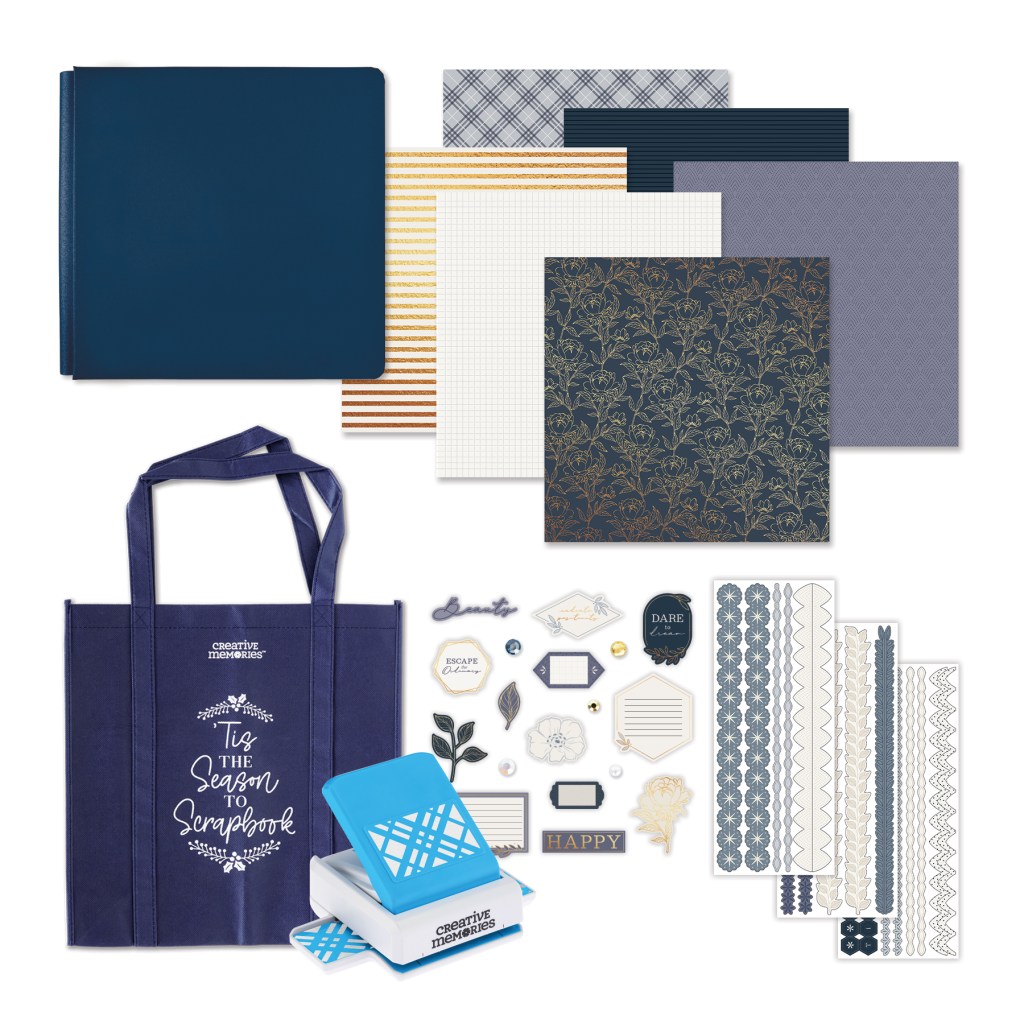
Sketch 1 — #2021BlackFridayBONUS1
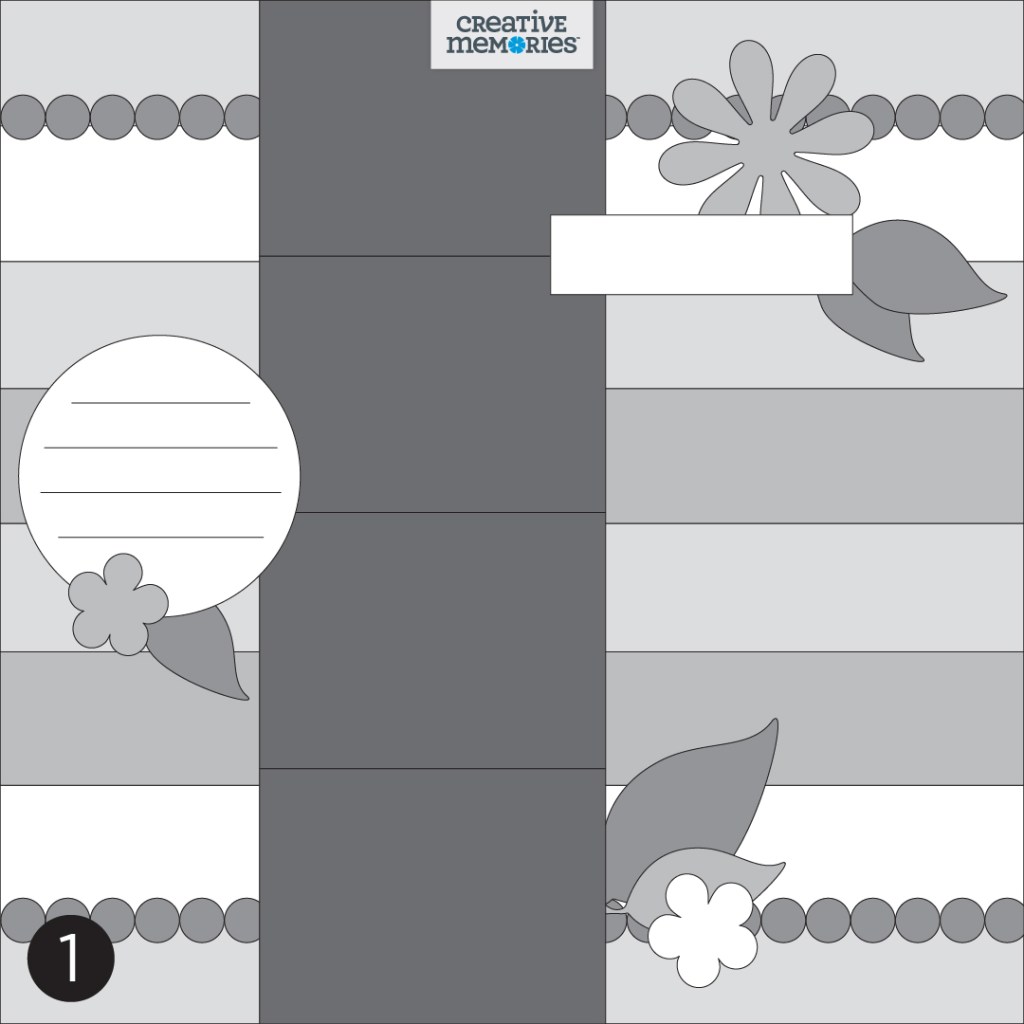
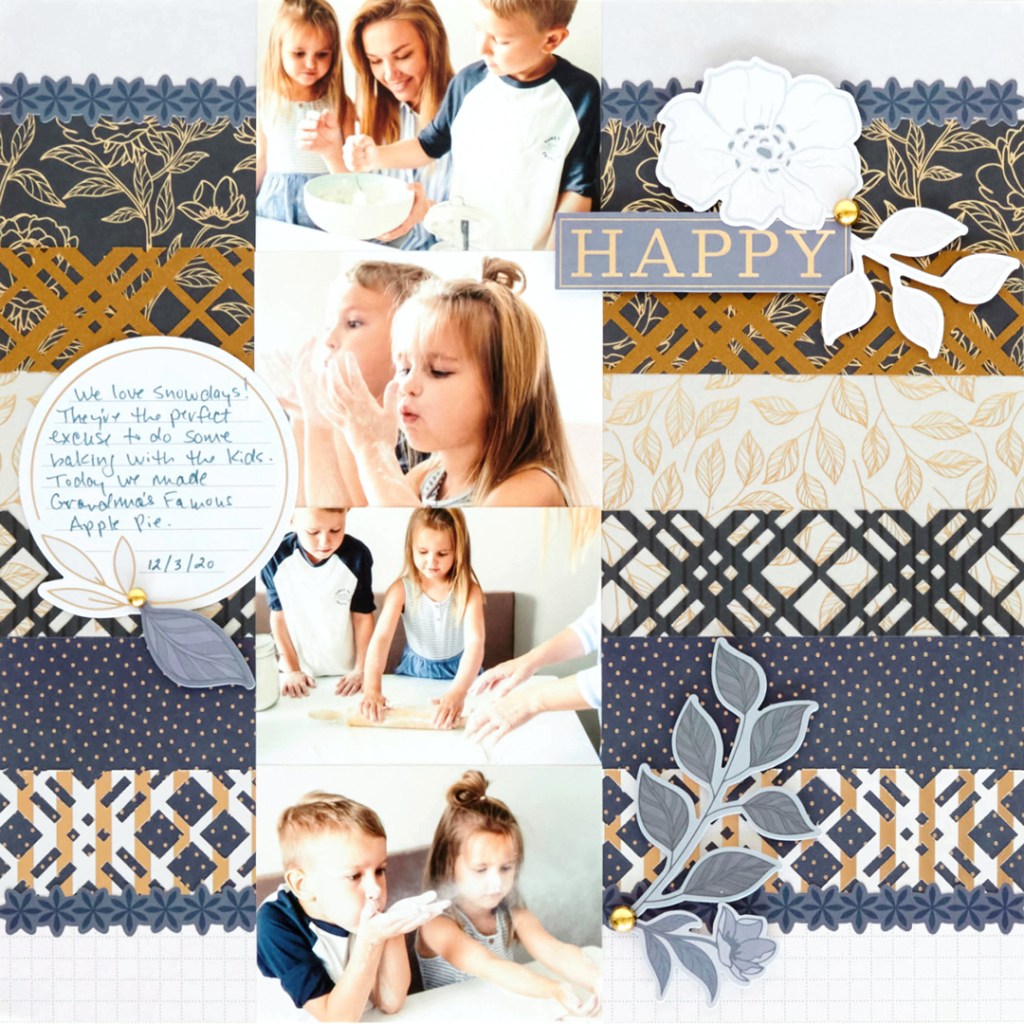
Promo product used: Blue & Gold Bundle | CA | AU
Want step-by-step instructions for creating this layout? Scroll down to the bottom of this blog post!
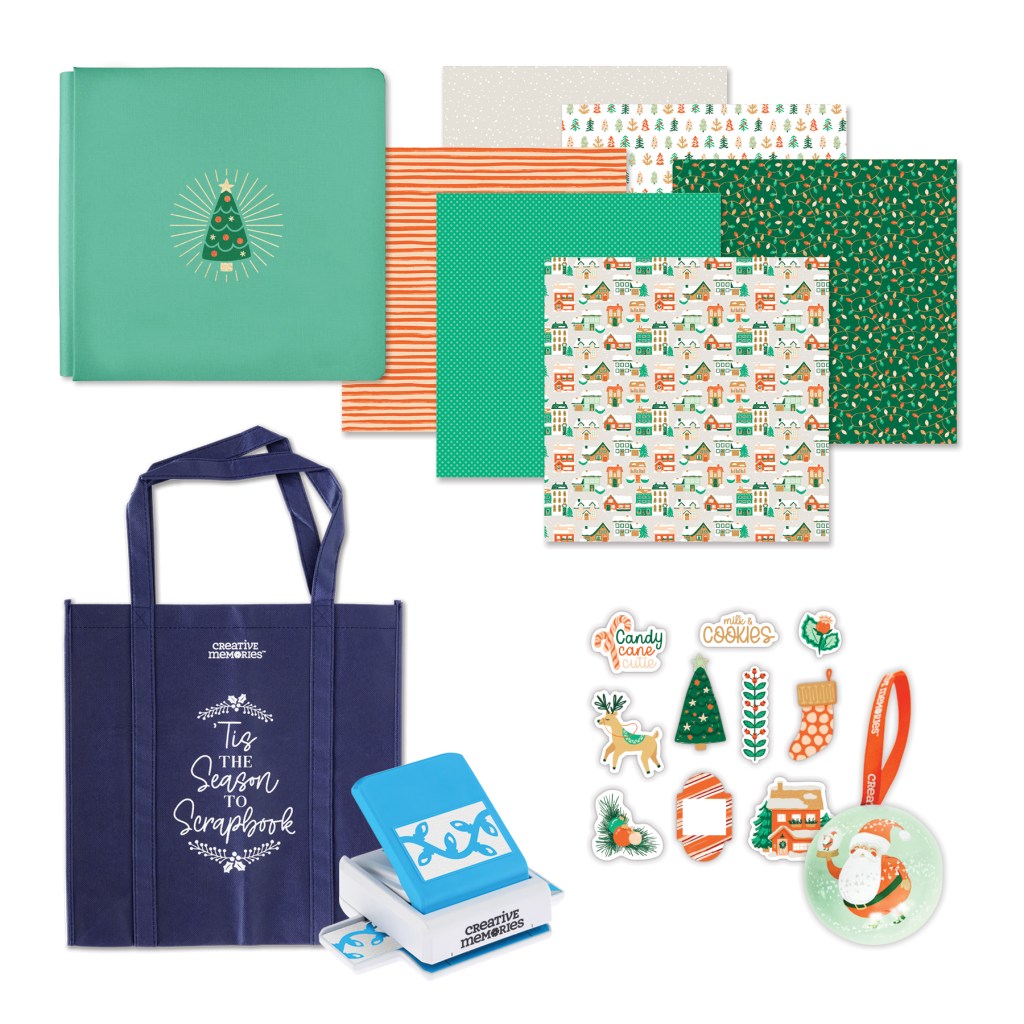
Sketch 2 — #2021BlackFridayBONUS2


Promo product used: Candy Cane Lane Bundle | CA | AU
Want step-by-step instructions for creating this layout? Scroll down to the bottom of this blog post!
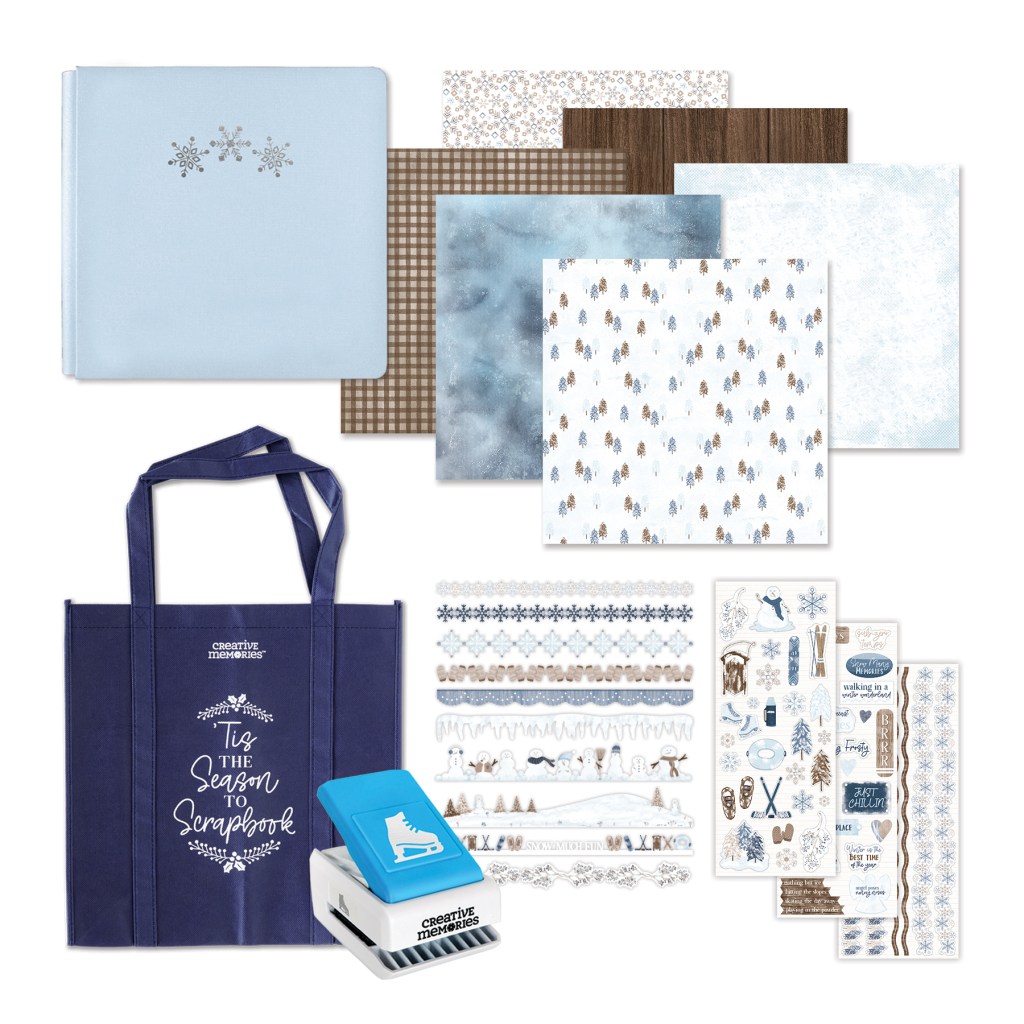
Sketch 3 — #2021BlackFridayBONUS3
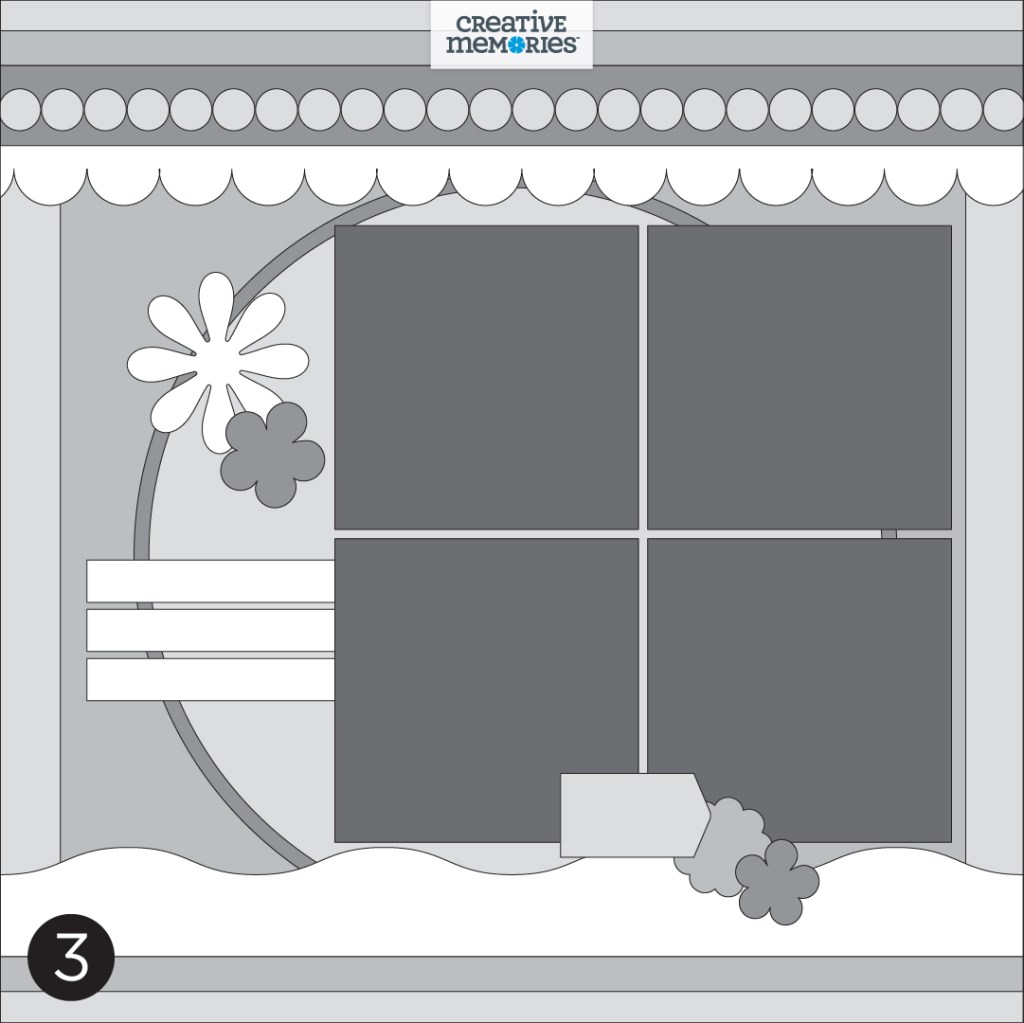

Promo product used: Winter Days Bundle | CA | AU
Want step-by-step instructions for creating this layout? Scroll down to the bottom of this blog post!
Remember, you have until Thursday, Dec. 9, at 11:59pm CT (Australia: 10 Dec. at 4:59pm AEDT) to complete your layout(s) and post them in the Virtual Crop Facebook Group (with hashtag #2021BlackFridayBONUS1, #2021BlackFridayBONUS2 and/or #2021BlackFridayBONUS3) to be eligible to be one of the lucky winners!
Instructions for #2021BlackFridayBONUS1
To create this layout you will need:
- Blue & Gold Bundle — Exclusive in the Black Friday promotion
- Blue & Gold Foiled Accent Paper Pack
- Blue & Gold Foiled Embellishments
- Blue & Gold Border Stickers
- Diagonal Plaid Border Punch
- Bronze Shimmer Solid Cardstock or (Shop Canada | Shop Australia)
- 12-inch Trimmer or (Shop Canada | Shop Australia)
- Repositionable Tape Runner or (Shop Canada | Shop Australia)
- Foam Squares or (Shop Canada | Shop Australia)
- Navy Dual-Tip Pen or (Shop Canada | Shop Australia)

Step 1: Use a piece of powder blue ditsy floral paper for the base of this layout.
Step 2: From grid dot paper, cut a 12″ x 1-1/2″ strip.
Step 3: From foiled confetti dots, champagne gold foiled leaves and navy foiled roses papers (or any 3 patterned papers), cut 12″ x 3″ strips. Or if you want more strips on your layout like shown in the sketch, cut (6) 12″ x 1-1/2″ strips.
Step 4: Adhere all strips to powder blue ditsy floral paper as shown.
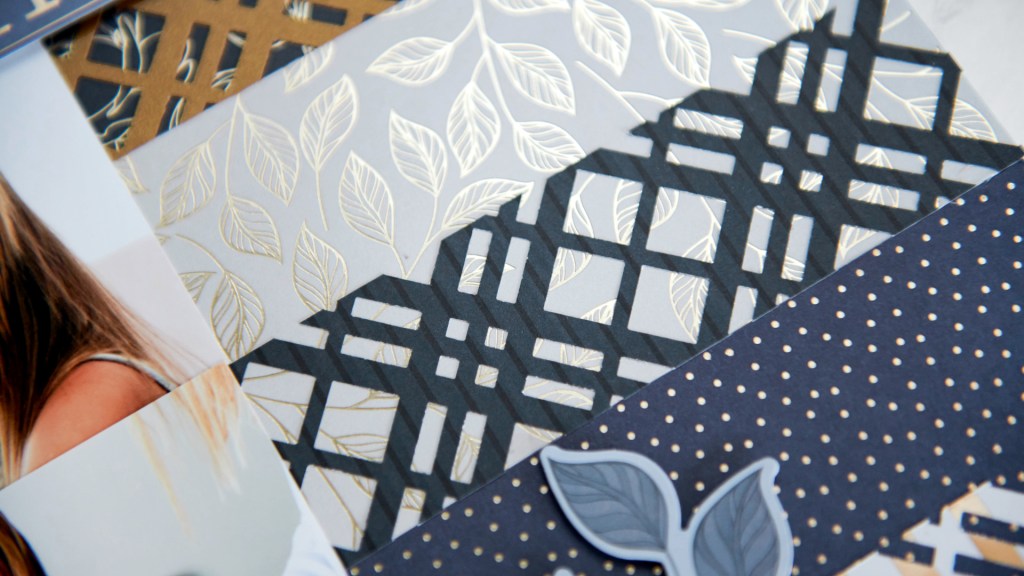

Step 5: Use the Diagonal Plaid Border Punch to punch borders from the champagne and tan stripes paper, navy stripes paper and Bronze Shimmer Solid Cardstock. Adhere pieces as shown.
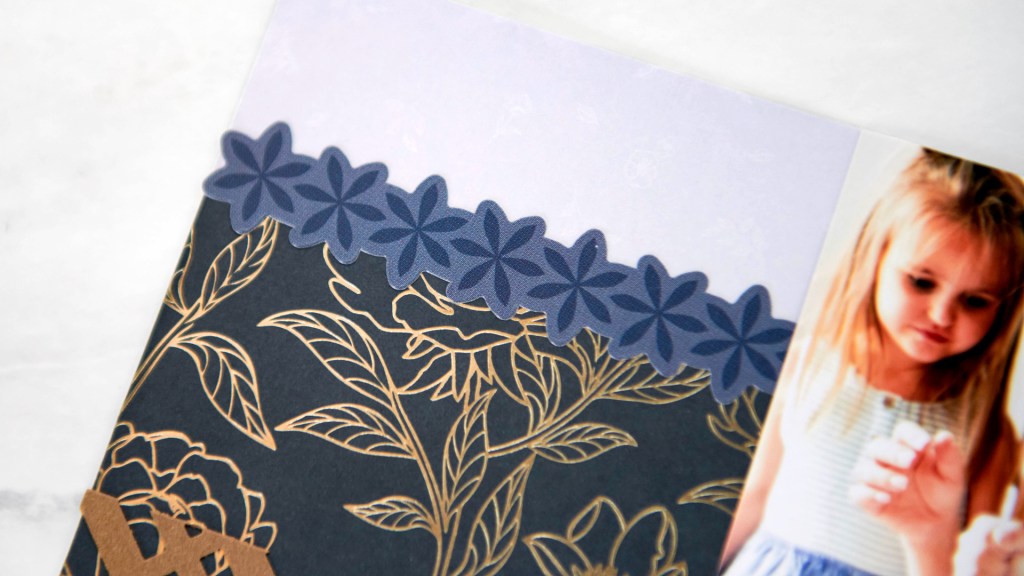
Step 6: Add sticker strips to the top and bottom paper strips.
Step 7: Crop photos to measure 4″ x 3″ and adhere as shown.
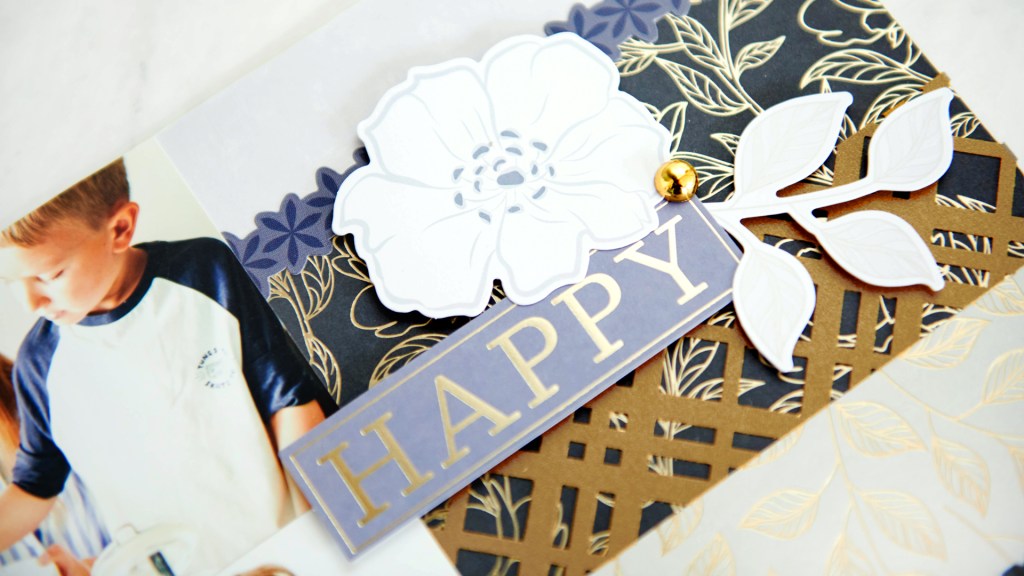
Step 8: Add embellishments with Foam Squares as shown.
Step 9: Journal on the circle lined embellishment.
Instructions for #2021BlackFridayBONUS2
To create this layout you will need:
- Candy Cane Lane Bundle — Exclusive in the Black Friday Promotion
- Candy Cane Lane Paper Pack
- Candy Cane Lane Embellishments
- Twinkling Lights Border Punch
- 12-inch Trimmer or (Shop Canada | Shop Australia)
- Repositionable Tape Runner or (Shop Canada | Shop Australia)
- Foam Squares or (Shop Canada | Shop Australia)
Step 1: Use the various Christmas trees paper for the base of this layout.
Step 2: Cut a piece of the off-white snow paper to measure 11-1/2″ x 11-1/2″ and adhere to the base.
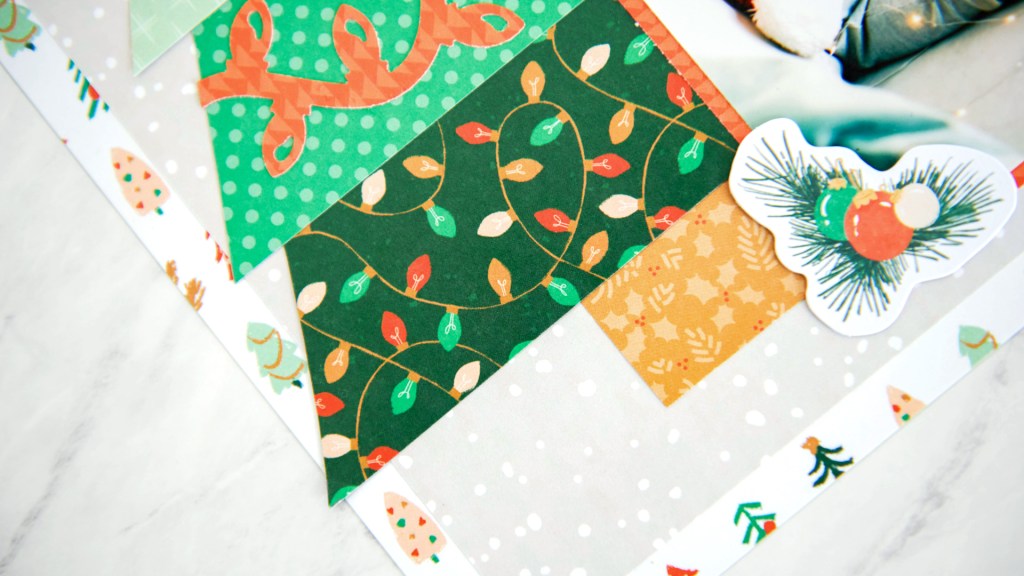
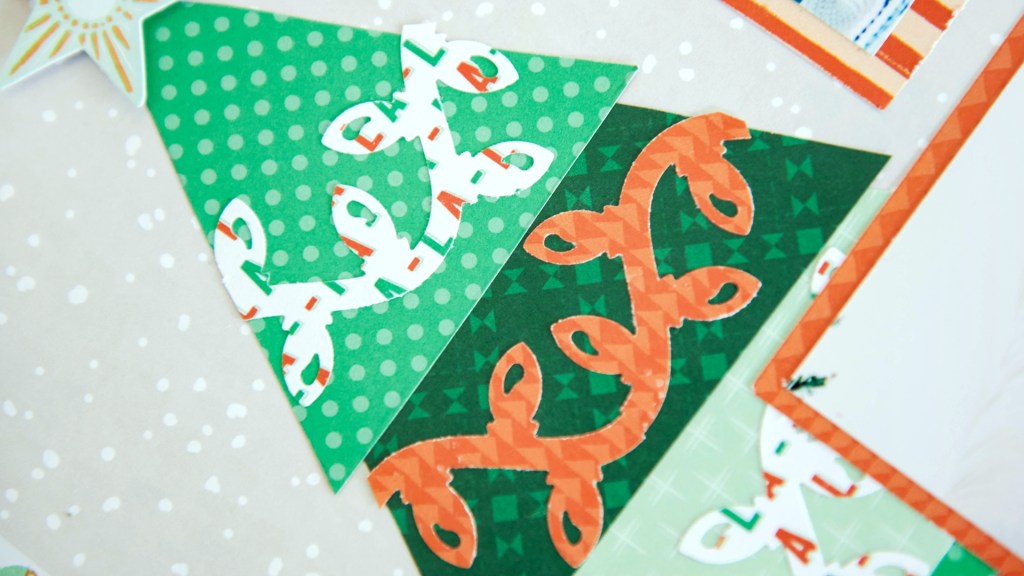
Step 3: To create the tree:
- Cut a piece of orange holly paper to measure 2″ x 1-1/4″ for the tree trunk.
- Select five pieces of various green papers and cut triangles with bases that measure:
- 6-3/4″
- 5-1/2″
- 5″
- 3-3/4″
- 3″
- Use the Twinkling Lights Border Punch, cut two borders with the “Fa-la-la-la-la-la-la-la-la” word art and tomato red triangles papers. Add to the top four sections of the tree and trim off any excess.
- Adhere the triangles stacked on top of each other to the layout as shown.
Step 4: Cut three photo mats from the stripes paper that measure (2) 3-3/4″ x 5-3/4″ and (1) 4-1/2″ x 4-1/2″. Add photos to these mats that measure (2) 3-1/2″ x 5-1/2″ and (1) 4″ x 4″. Adhere to the layout.
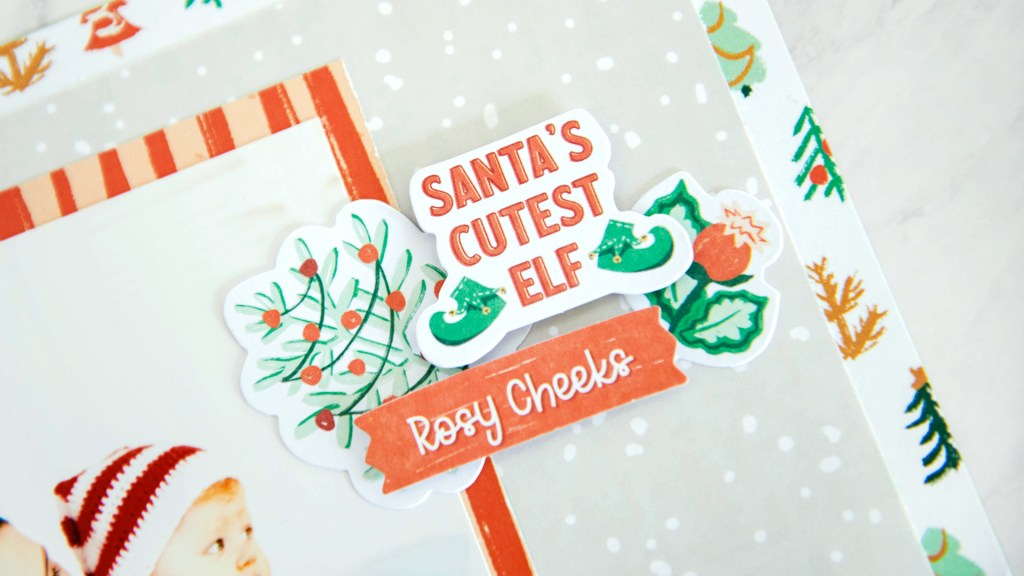
Step 5: Add embellishments as desired, popping some up with Foam Squares for added dimension. (Don’t forget to add a star embellishment to the top of the tree!)
Instructions for #2021BlackFridayBONUS3
To create this layout you will need:
- Winter Days Bundle — Exclusive in the Black Friday Promotion
- Winter Days Paper Pack
- Winter Days Stickers
- Winter Days Laser Cut Borders
- Ice Skate Punch
- White Solid Cardstock or (Shop Canada | Shop Australia)
- Custom Cutting System with the Jumbo Circle Pattern or (Shop Canada | Shop Australia)
- 12-inch Trimmer or (Shop Canada | Shop Australia)
- Tape Runner or (Shop Canada | Shop Australia)
- Foam Squares or (Shop Canada | Shop Australia)
- Brown Dual-Tip Pen or (Shop Canada | Shop Australia)
Step 1: With the inside edge of the Custom Cutting System Jumbo Circle Pattern and the Red Blade, cut a circle from the middle of the cabin blanket paper.
Step 2: Cut icy snowflakes paper to measure 10-1/2″ x 9-1/2″ and adhere to the middle of the cabin blanket paper, covering the hole in the middle.
Step 3: With the inside edge of the Custom Cutting System Jumbo Circle Pattern and the Green Blade, cut a circle from the middle of blue wash paper. Adhere the blue wash circle to the wood flooring paper circle (the backside cut-out of the cabin blanket paper from Step 1).

Step 4: Adhere the circle piece to the middle of the icy snowflakes paper.
Step 5: From wood flooring paper cut a 12″ x 1″ strip.
Step 6: From the large snowflakes paper, cut two 12″ x 1/2″ strips. Adhere one of the strips behind the top of the wood flooring paper strip, leaving about 1/4″ showing, and adhere this strip to the top of the layout with Foam Squares as shown. Adhere the second strip to the bottom of the layout with Foam Squares as shown.
Step 7: Crop photos to measure 3-1/2″ x 3-1/2″ and adhere as shown.


Step 8: Add laser-cut borders and stickers as shown, adhering some with Foam Squares.
Step 9: Use the Ice Skate Punch to punch two ice skates from White Solid Cardstock. Cut 1/8″ strips for laces. Adhere the pieces with Foam Squares as shown.

Step 10: Cut three 3″ x 1/2″ strips from White Solid Cardstock and adhere as shown. Journal with a Brown Dual-Tip Pen.
We can’t wait to see what you make! And again, if you want more info on the Black Friday Promos, visit: US | CA | AU

I can’t see the Winter Days Whimsy gift as a choice. I only get the other 2? Is it coming back or is it gone already?
[…] https://blog.creativememories.com/2021/11/18/bring-on-the-2021blackfridaybonus-challenge-black-frida… […]
[…] kicking off this Sketch Round-Up with this stunning and elegant layout. Click here to find out how to make this standout […]
[…] I’m sharing some new versions of a layout that I first created for the Creative Memories Blog last year. My original layout featured the Diagonal Plaid Border Punch and Blue & Gold […]