June 29, 2022
From Naptime To Scrap Time: Baby Scrapbook Borders
Decisions on wallpaper patterns or paint shades, furniture, artwork and toys on display are just a few things to think about when planning and decorating a nursery… and that includes the overall theme of the room, too! Themes can vary from a sweet dreams appeal with wispy cloud designs, perfectly pretty florals, zoo animals or cutesy woodland creatures, nautical notes or even just a monochromatic, naturally neutral aesthetic, just to name a few. Another classic theme? Baby duckies! Well, if you want to take that element from naptime to scrap time, then take a look at these baby scrapbook borders that feature darling duck designs!
To create these borders you will need:
- Lullaby Lane Paper Pack or (Shop Canada | Shop Australia)
- Lullaby Lane Girl Paper Pack or (Shop Canada | Shop Australia)
- Lullaby Lane Boy Paper Pack or (Shop Canada | Shop Australia)
- Lullaby Lane Embellishments or (Shop Canada | Shop Australia)
- Lullaby Lane Stickers or (Shop Canada | Shop Australia)
- Lullaby Lane Border Stickers or (Shop Canada | Shop Australia)
- Black & White Shimmer Solid Cardstocks or (Shop Canada | Shop Australia)
- Rubber Duck Punch or (Shop Canada | Shop Australia)
- Piece by Piece Mini Trio Punch Set or (Shop Canada | Shop Australia)
- Or Hole Punches
- Custom Cutting System with Circle Patterns or (Shop Canada | Shop Australia)
- 12-inch Trimmer with Straight & Scallop Blades or (Shop Canada | Shop Australia)
- Micro-Tip Scissors or (Shop Canada | Shop Australia)
- Tape Runner or (Shop Canada | Shop Australia)
- Repositionable Tape Runner Refill or (Shop Canada | Shop Australia)
- Foam Squares or (Shop Canada | Shop Australia)
- Precision Point Adhesive Pen or (Shop Canada | Shop Australia)
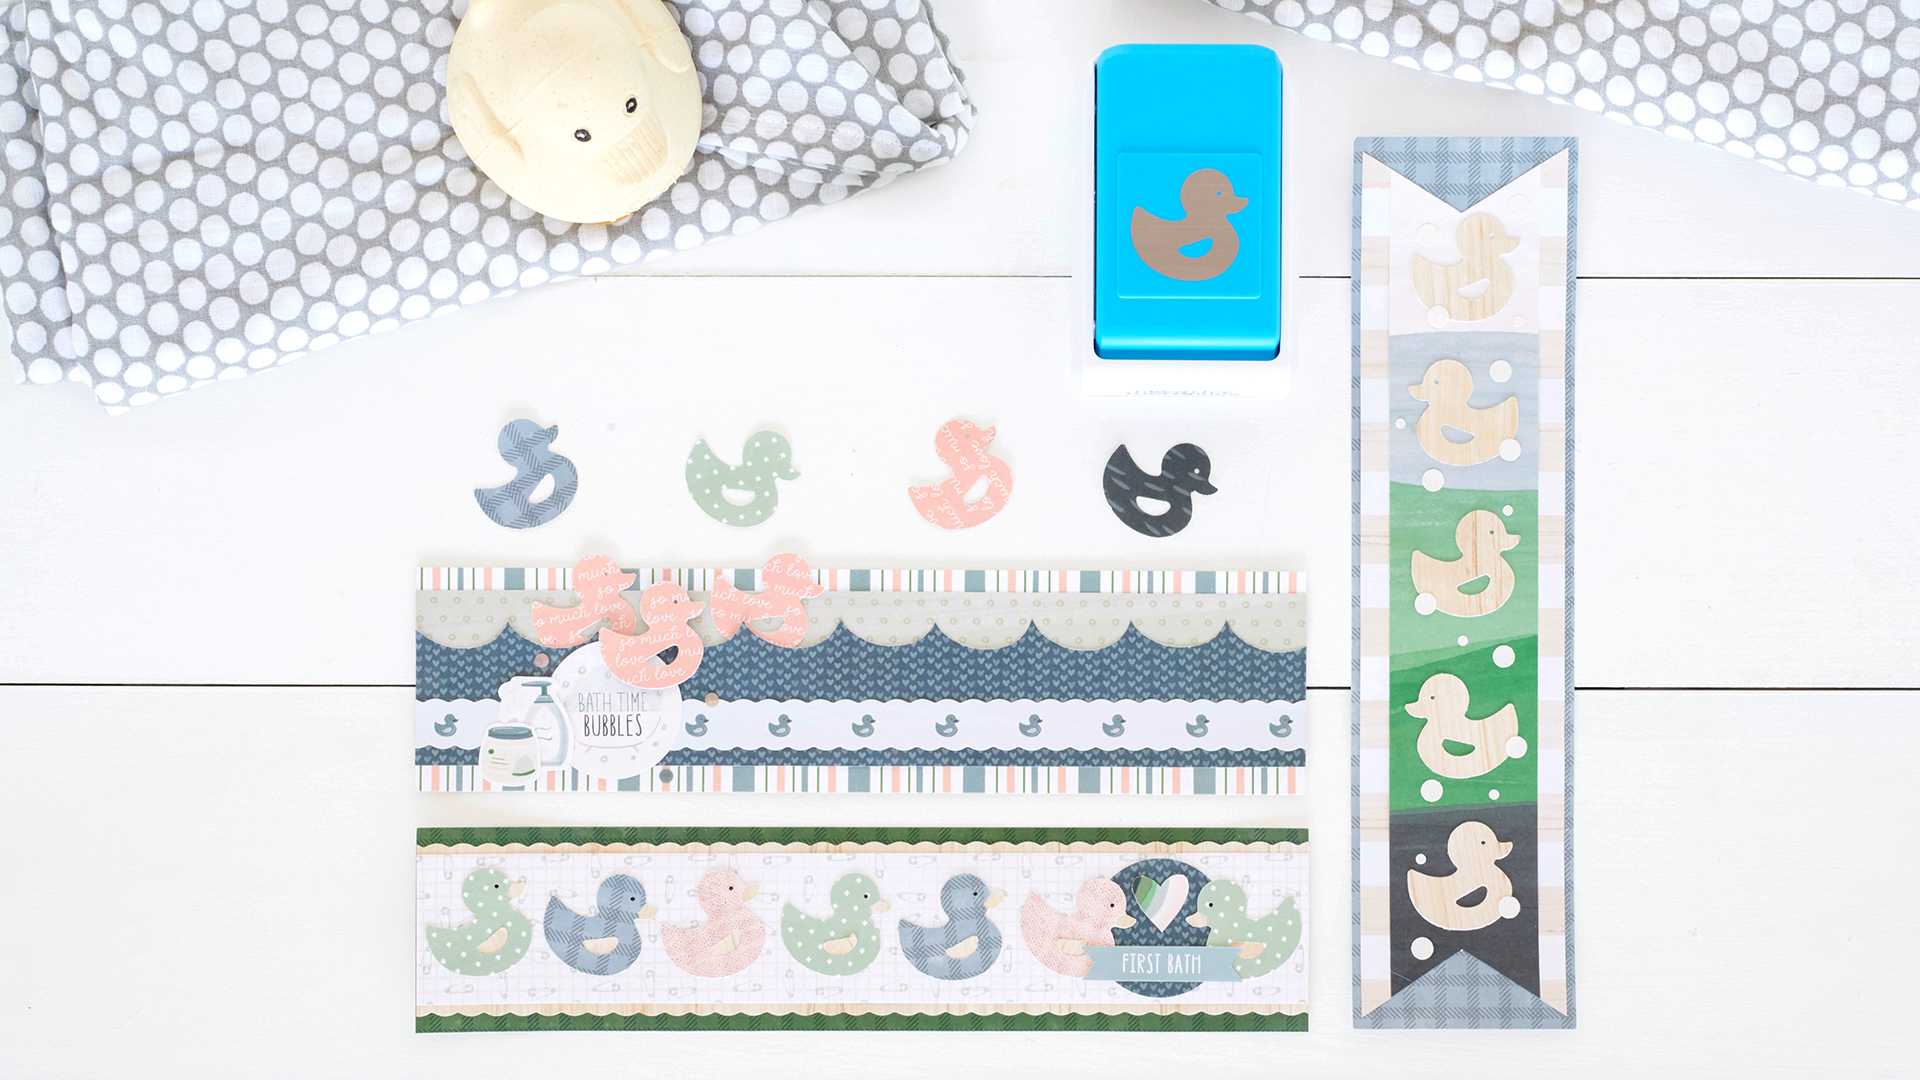
First Bath Border
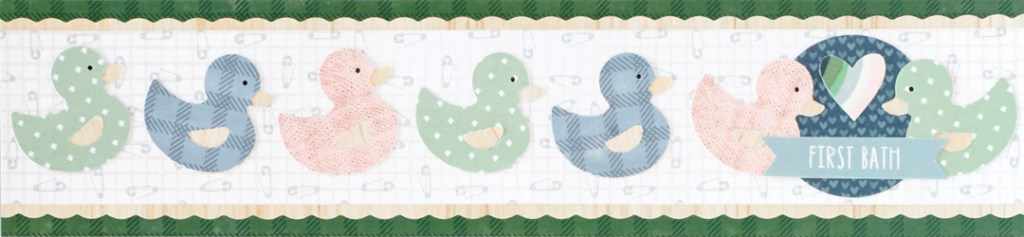
Step 1: Cut a 12” x 2-3/4” strip of Kelly green plaid designer paper for the base. Using the 12-inch Trimmer and the Scallop Blade, cut a 12″ x 2-1/4″ strip of wooden floor designer paper and adhere to the base. With the 12-inch Trimmer and the Straight Blade, cut a 12” x safety pin grid designer paper and mount on top.


Step 2: Punch seven rubber ducks using various papers. Trim off the beaks of each of these shapes. Punch seven rubber ducks with wooden floor designer paper. Adhere the ducks on top of the wooden floor ducks. Adhere a tiny scrap of Black Solid Cardstock for the eyes. Mount on the border as shown. Place wooden floor wings on each.
Step 3: Using the inside edge of the medium Custom Cutting System Circle Pattern and the Blue Blade, cut a circle with blue hearts boy paper. Adhere the circle to the border as shown. Top with stickers, popping them up with Foam squares for added dimension.
Bath Time Bubbles Border
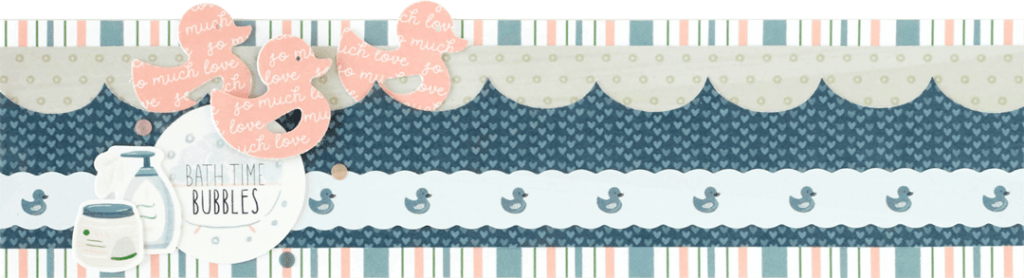
Step 1: Cut a 12” x 3” strip of receiving blanket stripes designer paper for the base. Cut a 12” x 1” strip of snackable cereal designer paper and adhere to the border, about 1/4″ from the top edge.
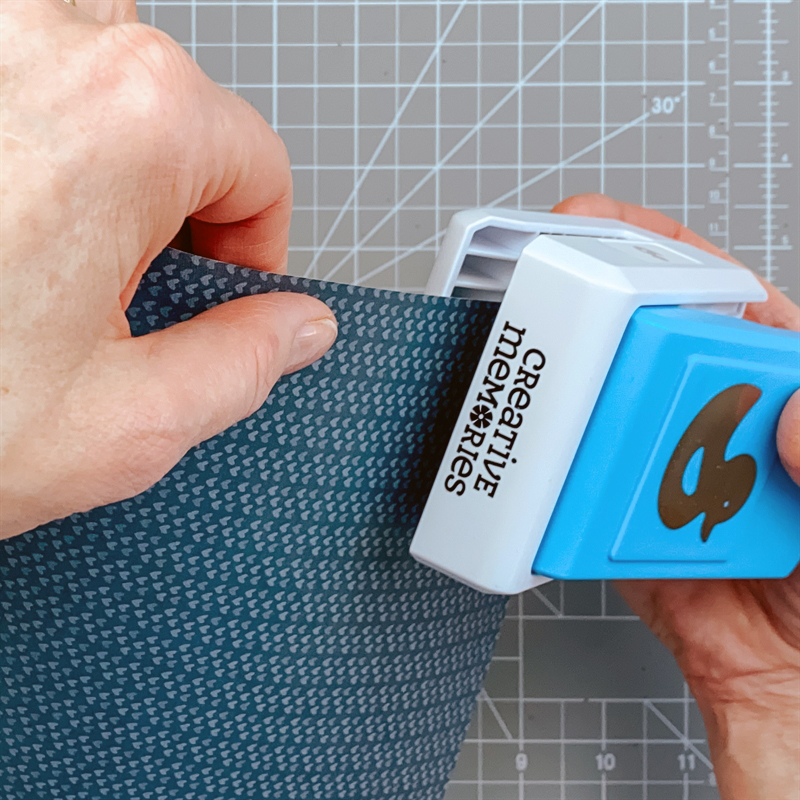

Step 2: Using the Rubber Duck Punch, punch multiple times across the length of a piece of blue hearts boy paper to create the scallop waves. Trim the piece to 12” x 2” and mount on the border, about 1/4″ from the bottom edge.
Step 3: Using the 12-inch Trimmer and the Scallop Blade, cut a 12” x 3/4” strip of blue rubber duckies boy paper. Adhere to the border. Adhere the stickers, popping some up with Foam Squares for added dimension.
Step 4: Punch three rubber ducks from “So much love” girl paper. Adhere tiny pieces of Black Solid Cardstock behind the eyes. Adhere to the border as shown.
Rubber Ducky Border
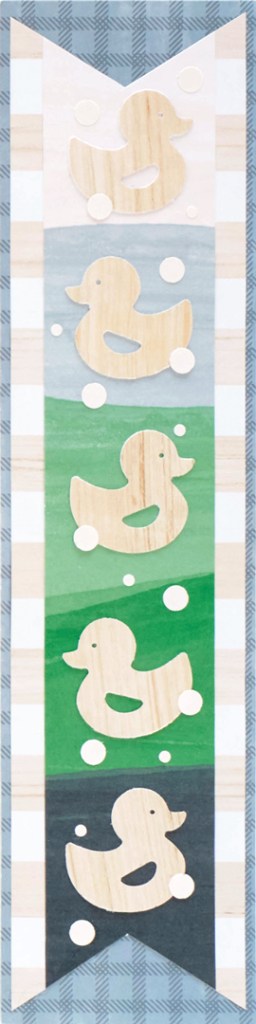
Step 1: Cut a 3″ x 12″ strip of blue plaid boy paper for the base.
Step 2: Cut a 2-3/4″ x 11-5/8″ strip of wooden crib bars boy paper. Cut a 2″ x 11-5/8″ strip of scenic landscape designer paper and adhere to the wooden crib bars piece. Cut a notch in both ends. Adhere to the base.
Step 3: Punch three rubber ducks with wooden floor designer paper. Flip the paper to the back side and punch two more (so they face the opposite direction). Adhere to the border as shown.
Step 4: Punch a bunch of small “bubbles” with White Shimmer Solid Cardstock using the Piece by Piece Mini Trio Punch Set or hole punches. Adhere randomly to the border.
What do you these of these adorable and pastel baby scrapbook borders? Have you been making projects with the Rubber Duck Punch? Give your answer to these questions in the comments section!
