January 10, 2024
Capture Life’s Smallest And Biggest Blessings With This Rainbow Scrapbook Page

There’s something truly special about capturing the laughter, the shared glances and the joy that family brings. But what’s even more special is creating scrapbooks that turn into heirlooms for the future. Sure, scrolling through hundreds of photos is nice, but printed photos — curated in a vibrant rainbow scrapbook page — just hits differently. So, print out those photos, prepare your scrapbooking space and piece together this rainbow scrapbook layout!
To create this layout you will need:
- This Life Paper Pack or (Shop Canada | Shop Australia)
- This Life Tone-on-Tone Paper Pack or (Shop Canada | Shop Australia)
- This Life Variety Mat Pack or (Shop Canada | Shop Australia)
- This Life Stickers or (Shop Canada | Shop Australia)
- This Life ABC/123 Letters Stickers or (Shop Canada | Shop Australia)
- Custom Cutting System with Circle Patterns or (Shop Canada | Shop Australia)
- 12-inch Trimmer with Straight & Scallop Blades or (Shop Canada | Shop Australia)
- Tape Runner or (Shop Canada | Shop Australia)
- Repositionable Tape Runner or (Shop Canada | Shop Australia)
- Foam Squares Variety Pack or (Shop Canada | Shop Australia)
- Black Dual-Tip Pen or (Shop Canada | Shop Australia)


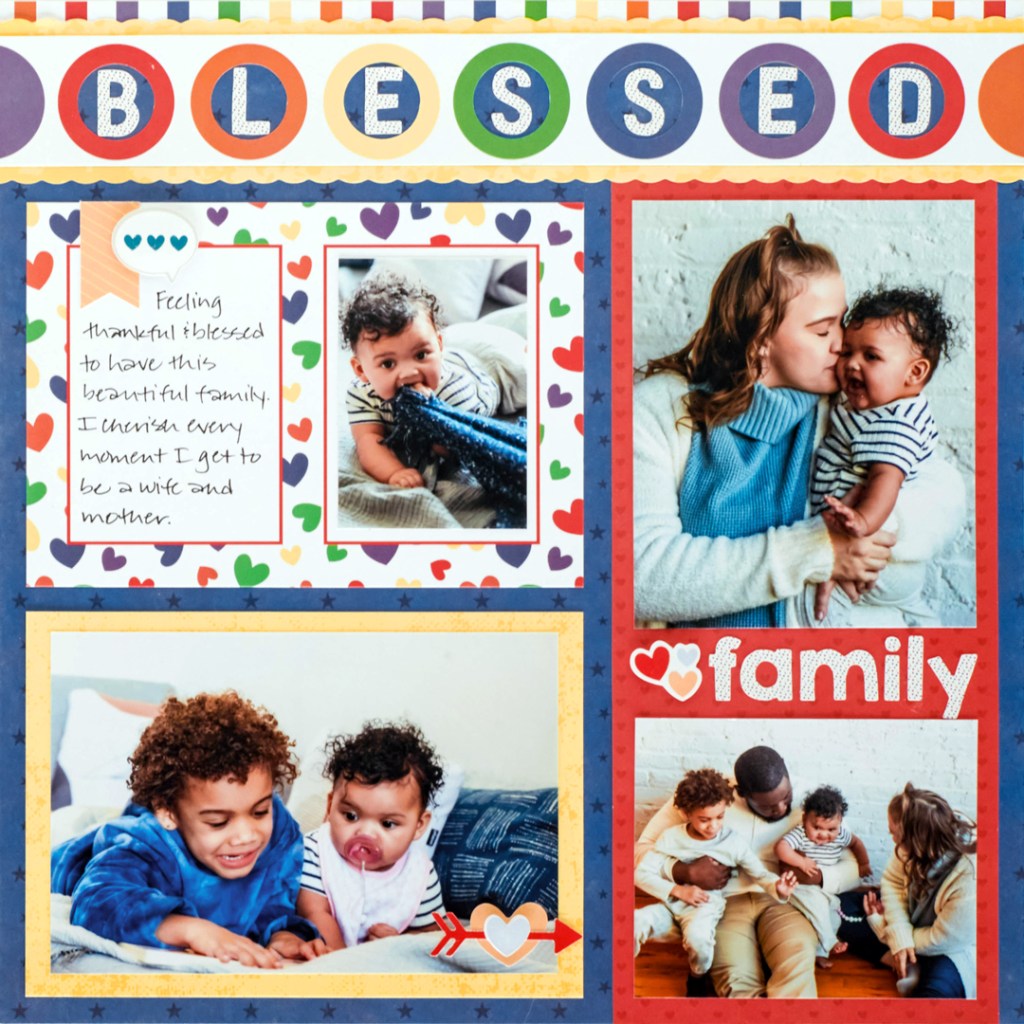
Step 1: Use a piece of blue starry nights designer paper as the base for this layout. Cut a 12” x 1/2″ strip with stripes paper and adhere on the top edge.
Step 2: Cut a 4-1/2” x 10” piece with red hearts paper and adhere about 3/8” from the right edge and flush with the bottom edge. Crop one photo to 4” x 5” and one to 4” x 3-1/4” and mount on the layout, leaving space in between them.
Step 3: Mount a 6” x 4” photo on a 6-1/2” x 4-1/2” canary variety mat and adhere near the bottom left edge of the layout. Adhere a 6-1/2” x 4-1/2” hearts journal mat with two boxes on the layout as shown. Crop a photo to 2-1/4” x 3-1/4” and mount on the right-most box.
Step 4: Make the border. Cut a 12” x 1-1/2” strip of dots paper (cutting out a full row of circles). Using the inside edge of the small Custom Cutting System Circle Pattern and the Blue Blade, cut a circle from the middle of each circle in the dots strip (you’ll be cutting 7 circles total). Then, cut a 12” x 1” strip of blue starry nights paper and adhere behind the dots strip, so that the blue paper peeks through each circle. Using the Scallop Blade and the 12-inch Trimmer, cut a 12” x 2” strip of canary canvas paper. Adhere the canary strip on the layout and top with the circles strip. Using the ABC/123 Letter Stickers, fill the circles with a 7-letter title, such as “Blessed”.
Step 5: Adhere more stickers and ABC/123 Letter Stickers. Journal as desired.
What type of photos will you be using with our year-round rainbow scrapbook collection? Let us know below!
P.S. Are YOU a member of the Virtual Crop Facebook Group? It’s your go-to place for MONTHLY Virtual Crops, MONTHLY Completed Album Challenges, WEEKLY LIVE STREAMING of Fast & Fun Projects with Noreen, LIVE QUARTERLY Secret Box Openings with project tutorials and so much more! We hope you’ll join our community of more than 37,000 fellow memory-keeping enthusiasts — you’ll feel right at home!

I love the pages shown with the bright primary colors. I already sold the Jan paper kit. I loved the power palettes with additions for Valentines Day, Fall, Smer, winter, Christmas with the match colors to the palette. I hope you will bring our 2 or 3 other color palettes to add to our line for a whole year & then add kits to coordinate each month.