May 7, 2024
Keep the NSD Fun Going!

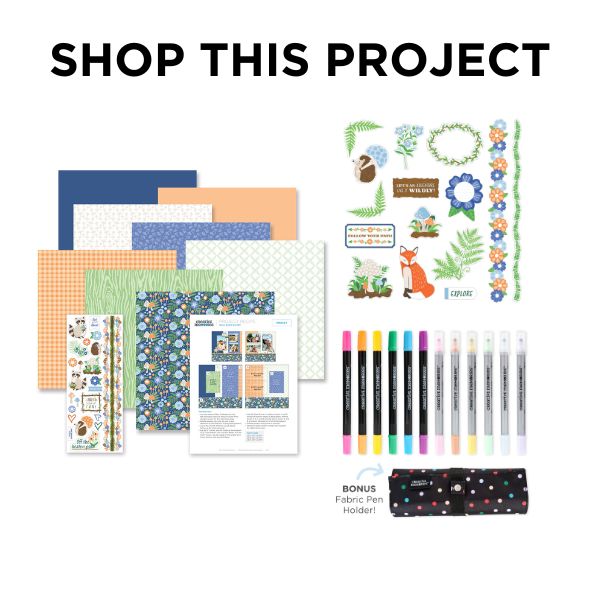
We hope you had an AMAZING NSD season this year! If you have any NSD 2024 products remaining and would like to make the most of them, you can scrapbook those memories you made last weekend and try your hand at this layout created by blog contributor Kylie Kingham. To make this layout, she used the pens included in the Rainbow Pens Bundle, which pair BEAUTIFULLY with this collection. Keep reading to see how she created it.
Psst! If you would like to attend an Advisor-held event (virtual, in-person or hybrid), you can connect with an Advisor near you using our handy Event search on the website: US | CA | AU
Kylie’s Inspiration
I’m so in love with the cute little critters and the floral themes in the NSD 2024 collection. They were the inspiration to create my own little nature scene. You could document a variety of events with this layout — birthdays, anniversaries, Mother’s Day or even a fun vacation! The Rainbow Pens were perfect for creating my very own ‘watercolor’ inspired border strip, which was the backdrop for my flowers.

To create this layout you will need:
- NSD 2024 Project Recipe™ Kit or (Shop Canada | Shop Australia)
- NSD 2024 Embellishments or (Shop Canada | Shop Australia)
- Rainbow Pens Bundle or (Shop Canada | Shop Australia)
- White Solid Cardstock or (Shop Canada | Shop Australia)
- 12-inch Trimmer or (Shop Canada | Shop Australia)
- Custom Cutting System with Circle Patterns or (Shop Canada | Shop Australia)
- Repositionable Tape Runner or (Shop Canada | Shop Australia)
- Foam Squares Variety Pack or (Shop Canada | Shop Australia)
- Circle Punch or (Shop Canada | Shop Australia)
- CM Zero-Centering Ruler or (Shop Canada | Shop Australia)

Step 1: Trim a sheet of tangerine gingham paper to measure 11-3/4” x 11-3/4”. Adhere this piece over a sheet of the Blue Solid Cardstock included in the Project Recipe™ Kit. Set aside for now. (Tip: To conserve paper, you can ‘gut’ or remove the middle of the cardstock first.)

Step 2: Trim a strip of White Solid Cardstock to measure 3” x 11-3/4”. Place this strip straight and horizontally over the top of some scrap paper. Using the CM Zero Centering Ruler and Rainbow Pen Bundle, begin ruling some vertical lines neatly across the strip. They do not need to be evenly spaced. The tone of each pen can be deepened by pressing firmer, as can the width of the stroke. Make some strokes thicker than others, alternate each color, as well as using both the bold and fine tip ends of the pens to create a fun, striped effect.
Step 3: Trim a 1/2” x 11-3/4” strip from this striped border so you now have two border strips.
Step 4: Adhere the wider strip to the base of the background page 3/4” up from the bottom edge. Adhere the 1/2” wide strip 1-3/4” down from the top edge of the page.
Step 5: Adhere a border embellishment to the top and bottom edge of the wider border strip.
Step 6: Adhere a sticker border to the top edge of the top border strip and another embellishment border to the bottom edge.
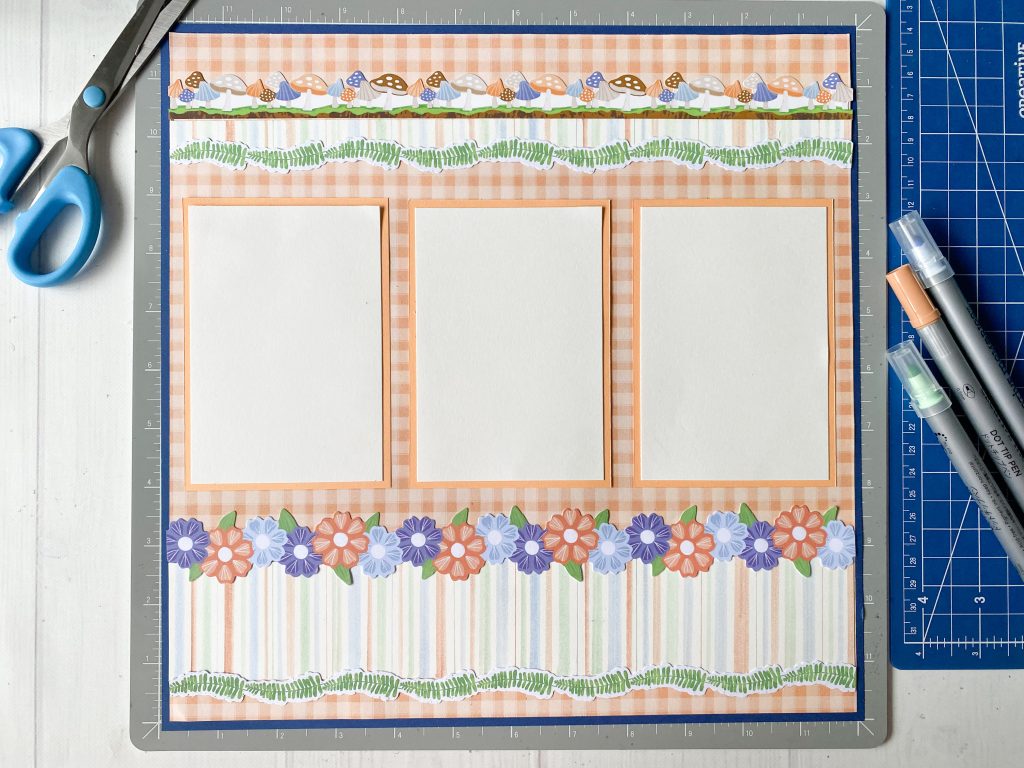
Step 7: Using the Tangerine Solid Cardstock included with the Project Recipe™ Kit, cut three photo mats to measure 5” x 3-1/2”. Adhere these to the page. Photos can be trimmed to 4-3/4” x 3-1/4”.
Step 8: Create the paper blooms.
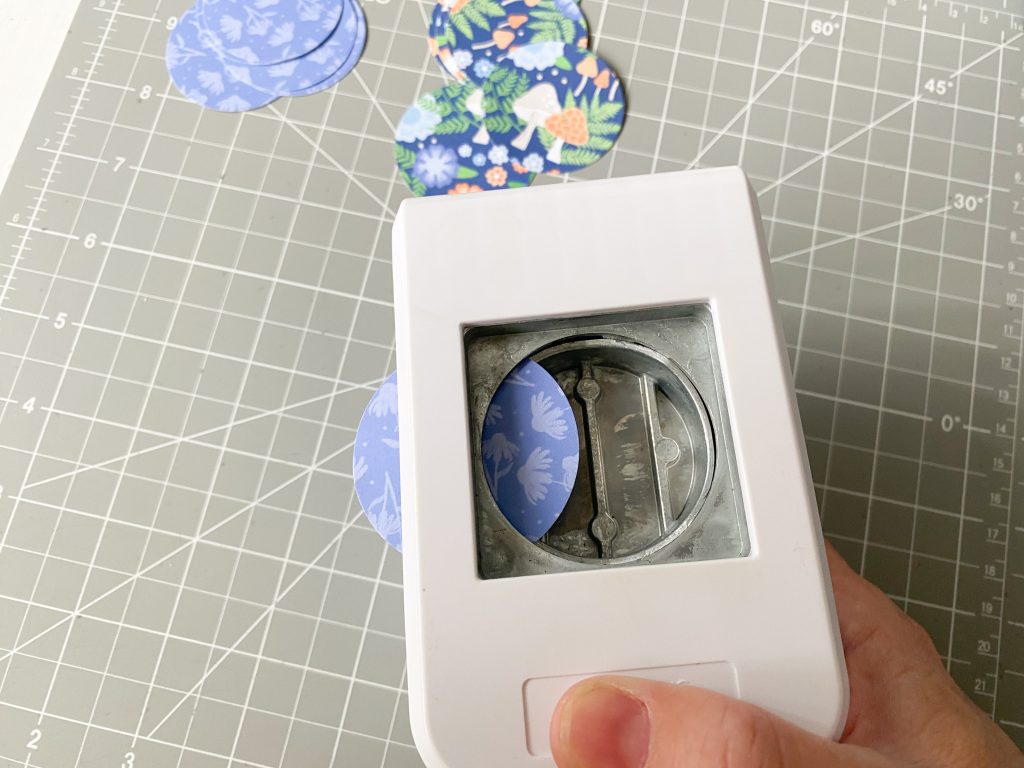
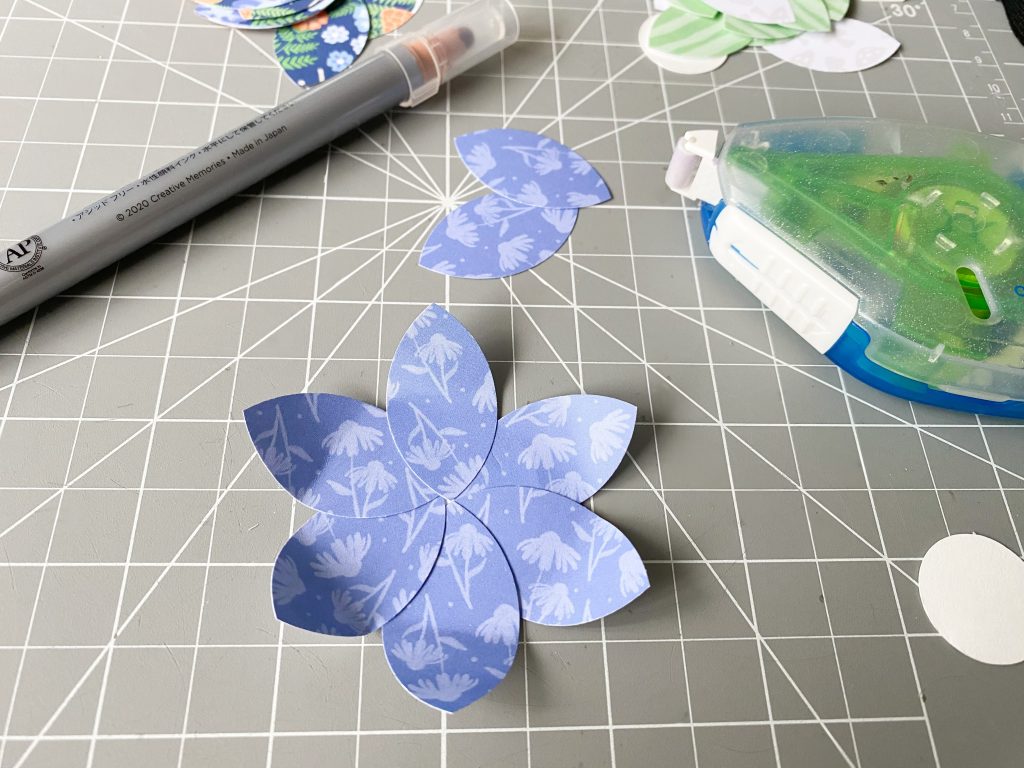
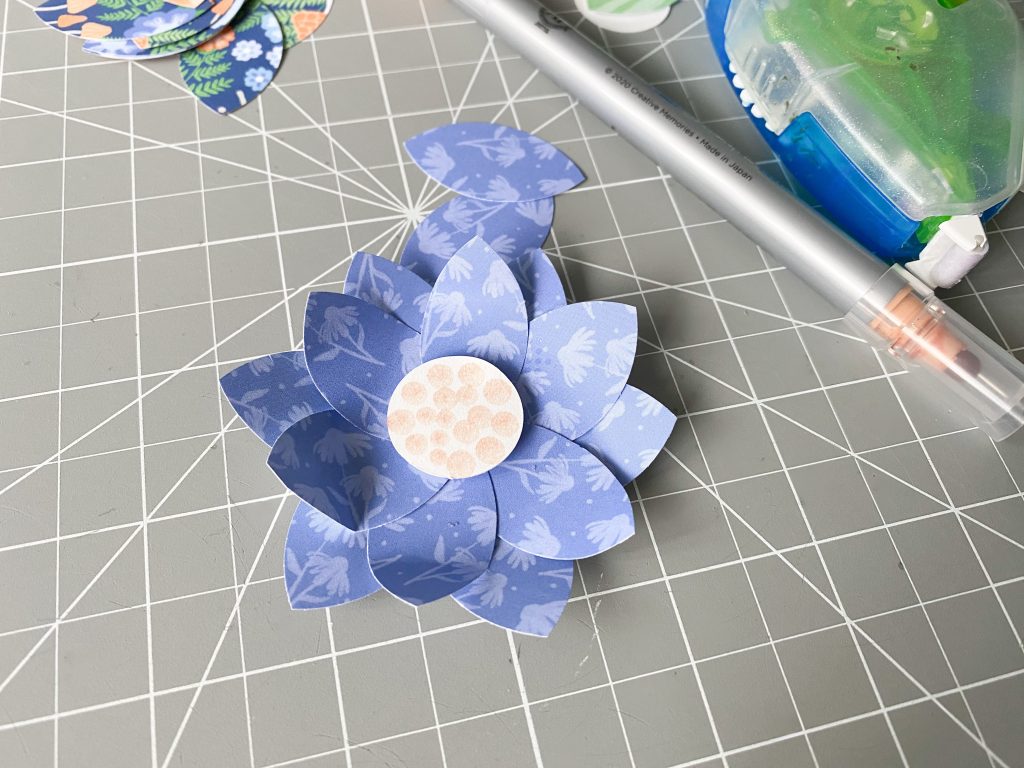
- Using the Circle Punch, punch 5-6 circles for each flower. Turn the punch over and insert a circle back into it to form a ‘petal’ shape and punch. (Note: You will be able to punch 2 petals from each circle.)
- Punch a circle from scrap paper to anchor the petals to. Cover it in Repositionable Tape and adhere the petals around the circle, covering the scrap ‘anchor’ circle completely. Add a second layer of petals behind the first layer in between each petal.
- Using the inside edge of the smallest Custom Cutting System Circle Pattern and the Blue Blade, cut a circle from White Solid Cardstock. Adhere it as a flower center using a Foam Square. Add dotted detail to the middle using a pen from the Rainbow Pens Bundle.
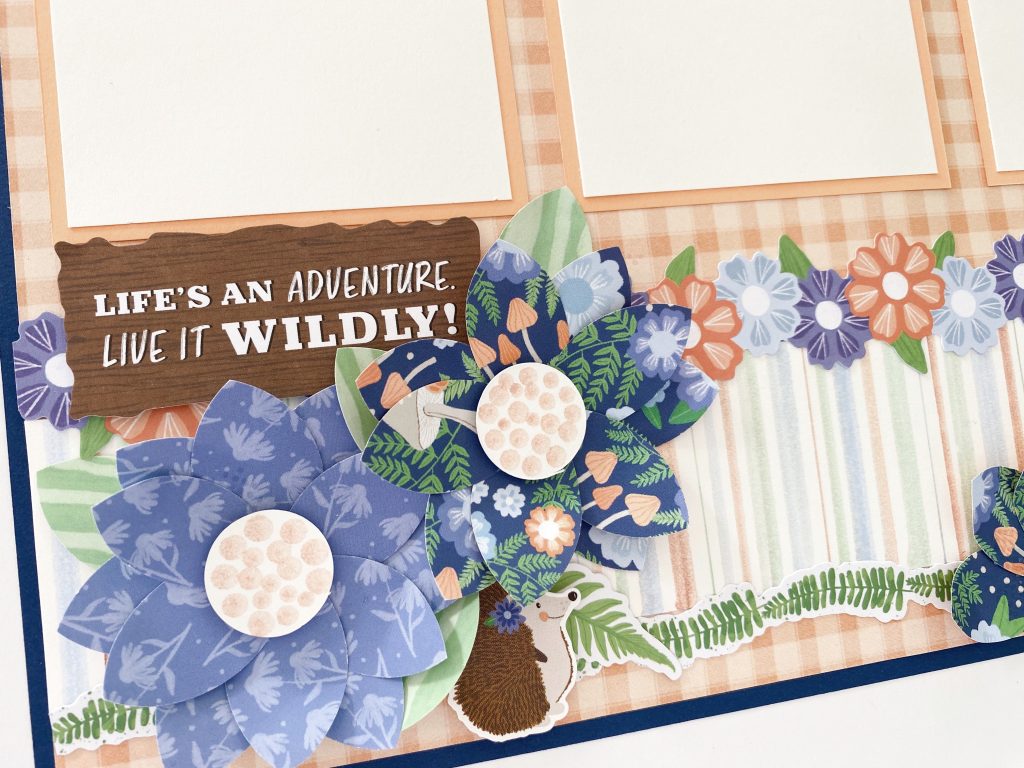
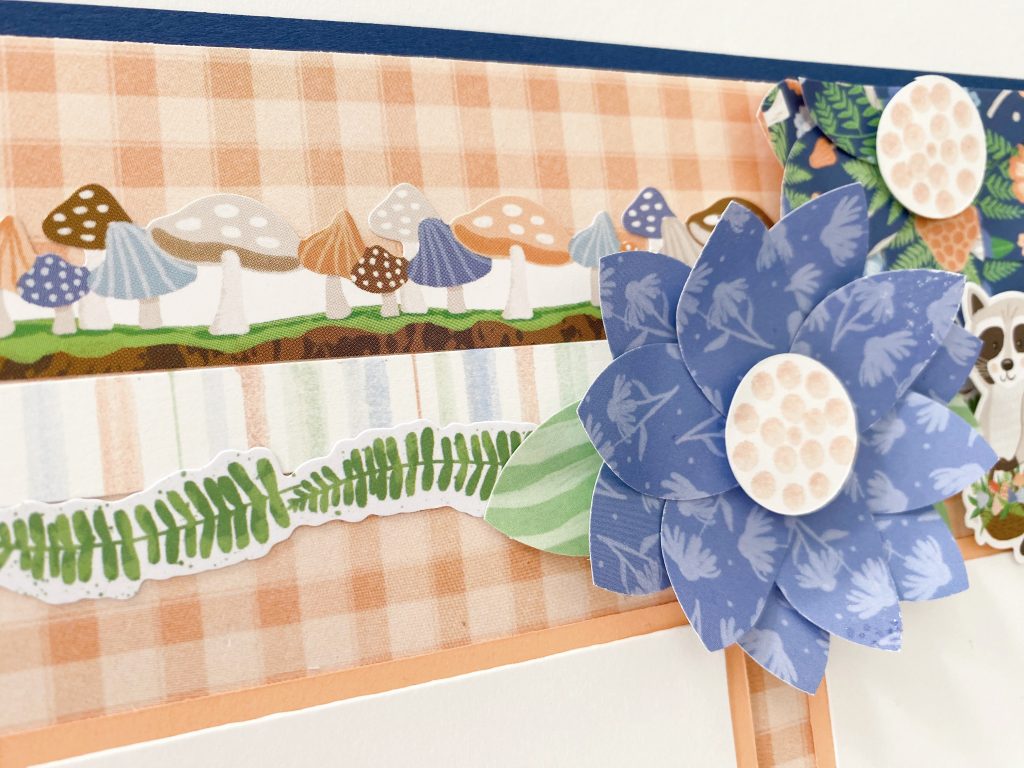
- Create some punched leaves in the same manner as you created the petals. Adhere the flowers to the page, as well as the punched leaves, and some stickers and embellishments.
- Tip: Cut a straight edge on some of the flowers and adhere to the edge of the layout to give the effect of blending into the page.


How did you spend NSD this year?
P.S. Are YOU a member of the Virtual Crop Facebook Group? It’s your go-to place for MONTHLY Virtual Crops, MONTHLY Completed Album Challenges, WEEKLY STREAMING of Fast & Fun Projects with Noreen, QUARTERLY Secret Box Openings with project tutorials and so much more! We hope you’ll join our community of more than 39,000 fellow memory-keeping enthusiasts — you’ll feel right at home!

beautiful! question = with the 3D embellishments, i presume you don’t use page protectors. how do you keep them from snagging, getting ripped, etc?
Hello, I still use page protectors when I have thicker embellishments. Something like this would probably flatten out a little bit but that’s okay too. If it’s a really special page with nicer pictures you can put it in 12×12 scrapbook frame that is a little deeper. They sell them at Michaels.
Love this Kylie. Great idea and its good to try new things. Always love your pages.
That is simply gorgeous!