October 17, 2024
Embrace Winter With This Nordic Layout
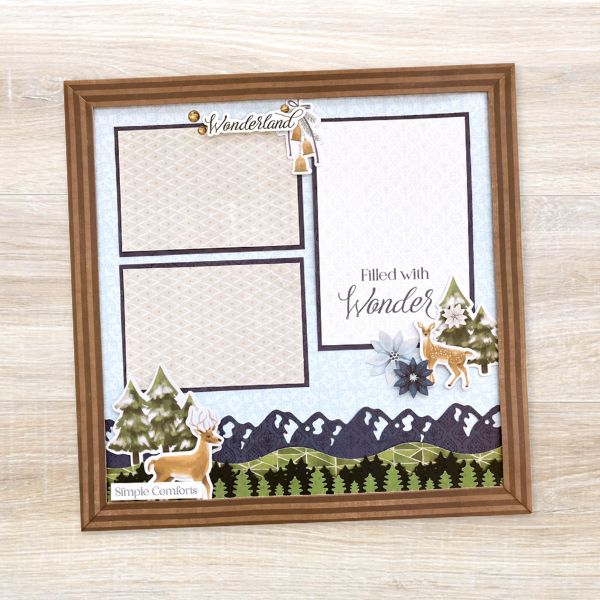
As the weather turns colder, it’s the perfect time to get comfy inside and start a new scrapbook layout! This layout by blog contributor Sachiyo Omitsu is perfect for remembering days out sledding, nights by the fire and snow days. Plus, you can create a frame easily by using designer papers and Foam Squares.
To create this layout you will need:
- Nordic Winter Paper Pack or (Shop Canada | Shop Australia)
- Nordic Winter Embossed Embellishments or (Shop Canada | Shop Australia)
- Nordic Winter Stickers or (Shop Canada | Shop Australia)
- Black Solid Cardstock or (Shop Canada | Shop Australia)
- 12-inch Trimmer or (Shop Canada | Shop Australia)
- 12-inch Decorative Trimmer or (Shop Canada | Shop Australia)
- Original Border Maker System with Treeline Border Maker Cartridge or (Shop Canada | Shop Australia)
- Snow Capped Mountains Border Punch or (Shop Canada | Shop Australia)
- Tape Runner or (Shop Canada | Shop Australia)
- Repositionable Tape Runner or (Shop Canada | Shop Australia)
- Foam Squares Variety Pack or (Shop Canada | Shop Australia)
- All-Purpose Scissors or (Shop Canada | Shop Australia)

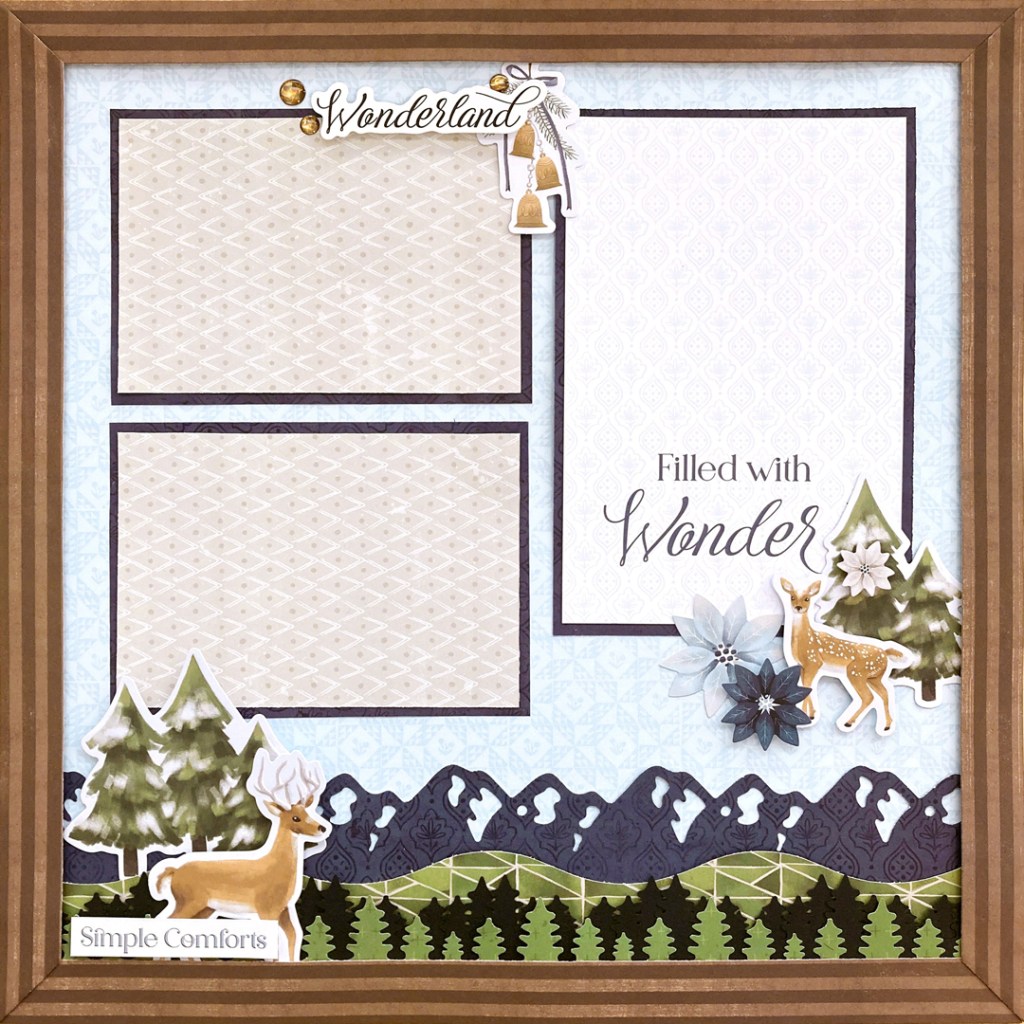
Step 1: Use the quilt paper as the base of this layout.
Step 2: Use the Snow Capped Mountains Border Punch to punch a border from the trellis paper. Cut the border at 3” height.
Step 3: Align the end of the tiles paper at 0” mark of the 12-inch Decorative Trimmer as shown and cut waves.

Step 4: Using the Original Border Maker System with the Treeline Border Maker Cartridge, punch two borders from Black Solid Cardstock and one border from the pluses paper. Cut the black borders at 1-3/4” height. Cut the pluses border at 1-1/2” height.


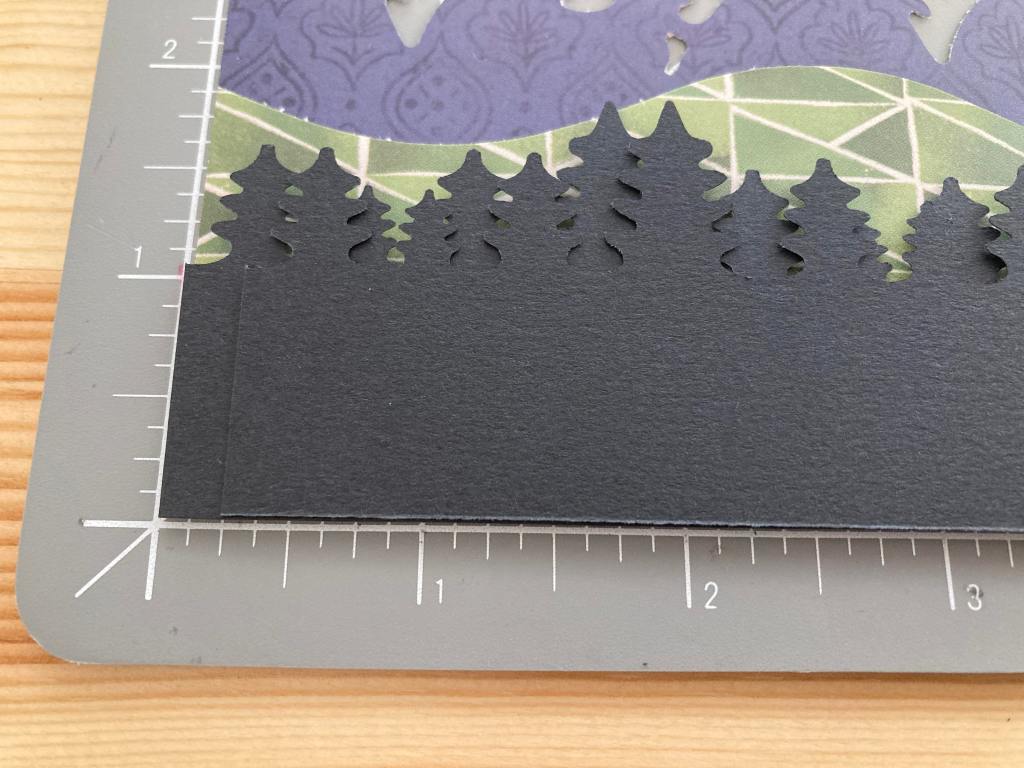
Step 5: Add some Foam Squares and the regular Tape Runner on the back of the tiles border as shown in Process 1 image. Adhere to the Snow Capped Mountains border. Add some Foam Squares to the bottom of the border as shown in Process 2 image. Adhere one of the black borders. Add another black border starting from 1/4” from the left edge (Process 3 image). Adhere the pluses border to the bottom of the border.
Step 6: Adhere the border to the bottom of the base. Trim the excess with scissors. Cut four strips to measure 3/4” x 12” from stripes paper. Fold the corners of two of the strips as shown and add to the page, using Foam Squares for added dimension.
Step 7: Cut two 3-1/2” x 5” mats and one 4-1/4” x 6-1/4” mat from trellis paper. Cut two 3-1/4” x 4-3/4” mats from Vs paper and add to the trellis mats. Add “Filled with Wonder” mat to the trellis mat.


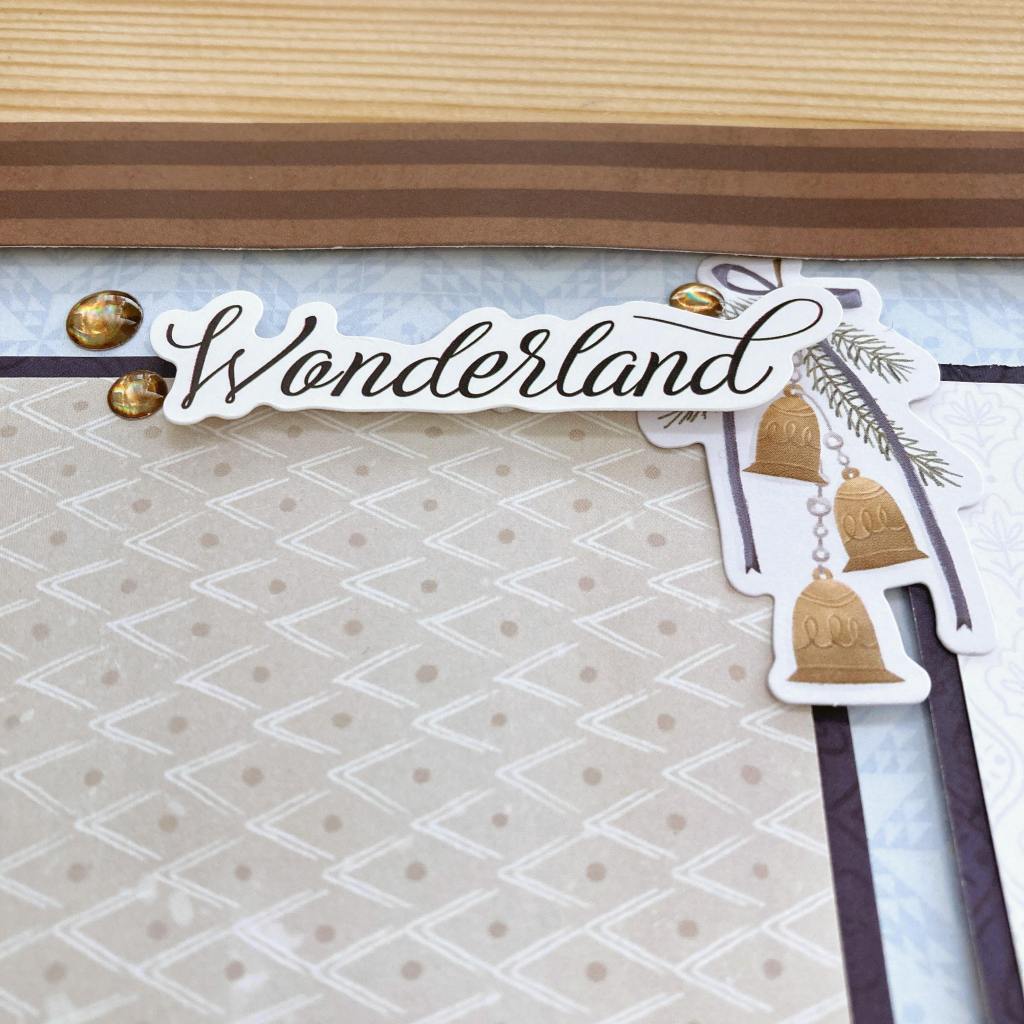
Step 8: Adhere the stickers, embellishments and mats, using Foam Squares on some for added dimension.
What’s your favorite thing to do on a cold winter day?
P.S. Are YOU a member of the Virtual Crop Facebook Group? It’s your go-to place for MONTHLY Virtual Crops, MONTHLY Completed Album Challenges, QUARTERLY Secret Box Openings with project tutorials and so much more! We hope you’ll join our community of more than 40,000 fellow memory-keeping enthusiasts — you’ll feel right at home!
