October 22, 2024
A Layout That’ll Always Be a Classic

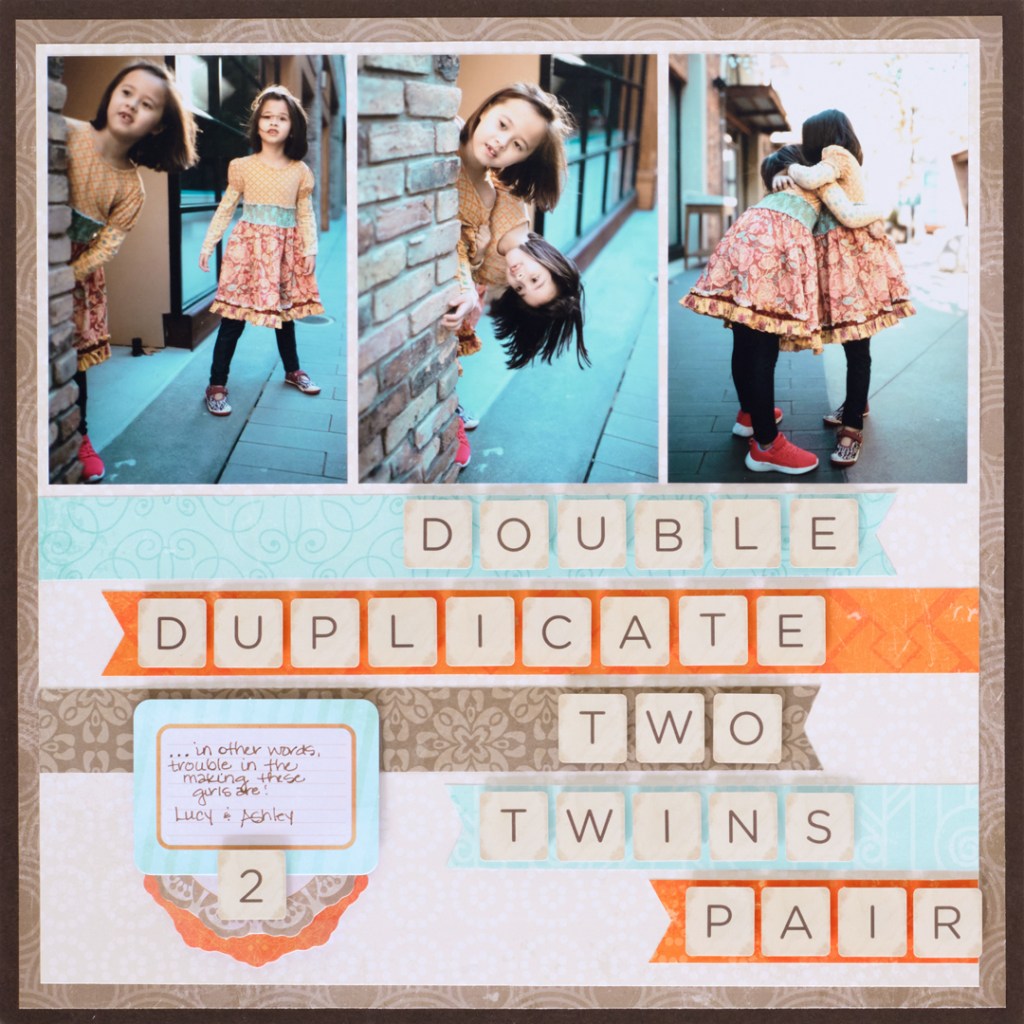
Step back in time with this timeless layout featuring the Vintage Chic collection! You can make your titles and captions stand out with its designer papers and ABC/123 Tile Stickers. Keep reading to see how you can make your own ribbon-inspired designs that are the perfecty place for words and letters.
To create this layout you will need:
- Vintage Chic Paper Pack or (Shop Canada | Shop Australia)
- Vintage Chic Tone-on-Tone Paper Pack or (Shop Canada | Shop Australia)
- Vintage Chic Embellishments or (Shop Canada | Shop Australia)
- Vintage Chic ABC/123 Tile Stickers or (Shop Canada | Shop Australia)
- Hot Fudge Solid Cardstock or (Shop Canada | Shop Australia)
- 12-inch Trimmer or (Shop Canada | Shop Australia)
- Tape Runner or (Shop Canada | Shop Australia)
- Repositionable Tape Runner or (Shop Canada | Shop Australia)
- Foam Squares Variety Pack or (Shop Canada | Shop Australia)
- All-Purpose Scissors or (Shop Canada | Shop Australia)
- Black Dual-Tip Pen or (Shop Canada | Shop Australia)

Step 1: Use a piece of Hot Fudge Cardstock as the base for this layout.
Step 2: Cut a piece of brown circles paper to 11-1/2” x 11-1/2”. Adhere to the cardstock.
Step 3: Cut a piece of cream dotted circles to measure 11” x 11”. Adhere to the previous piece.
Step 4: Cut three photos to measure 3-1/2” x 5”. Adhere to the layout on the dotted circle paper.
Step 5: Cut a strip from light blue medallion paper to measure 10” x 1”. Gently fold the ends together, then place the scissors at an angle, cutting from the gentle fold to the outside points to create the “v” into the end for a banner look. Adhere below the photos.
Step 6: Cut a strip from the orange wedge paper to measure 10-1/4” x 1”. Cut a “v” into the ends with scissors. Adhere below the previous piece from the opposite side.
Step 7: Cut a strip from the brown damask paper to measure 9” x 1”. Cut a “v” into the ends with scissors. Adhere below the previous piece on the opposite side.
Step 8: Cut a strip from the light blue swirls paper to measure 6-1/4” x 1”. Cut a “v” into the ends with scissors. Adhere below the previous piece from the opposite side.
Step 9: Cut a strip from orange dotted circles paper to measure 4” x 1”. Cut a “v” into the ends with scissors. Adhere below the previous piece.
Step 10: Adhere ABC stickers to the banner strips on the layout, using descriptive words of the photos. Use Foam Squares for added dimension.
Step 11: Adhere embellishments as desired, using Foam Squares on some for added dimension.
Step 12: Journal as desired.
Will you use the tile stickers for other layouts of yours?
P.S. Are YOU a member of the Virtual Crop Facebook Group? It’s your go-to place for MONTHLY Virtual Crops, MONTHLY Completed Album Challenges, QUARTERLY Secret Box Openings with project tutorials and so much more! We hope you’ll join our community of more than 40,000 fellow memory-keeping enthusiasts — you’ll feel right at home!
