February 27, 2025
The Sweet Smell of Spring Borders

Bring the beauty of spring flowers into your scrapbooks with these fresh spring borders! By using the Floral Ribbon Border Punch and the Springtime Soiree collection, you can recreate the three beautiful borders below. Get ready to let your creativity bloom!
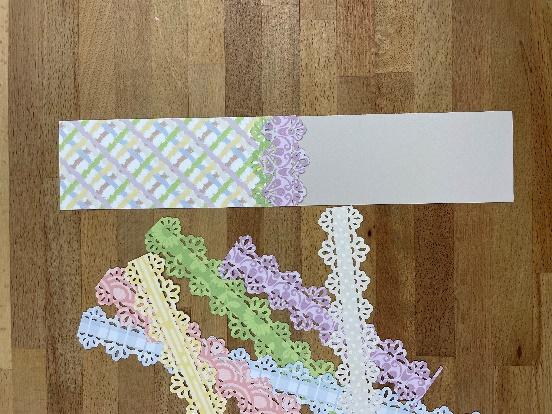
To create these borders you will need:
- Springtime Soiree Designer Paper or (Shop Canada | Shop Australia)
- Springtime Soiree Stickers or (Shop Canada | Shop Australia)
- Springtime Soiree Layered Borders or (Shop Canada | Shop Australia)
- Canary, Avocado, and Eggplant Solid Cardstock or (Shop Canada | Shop Australia)
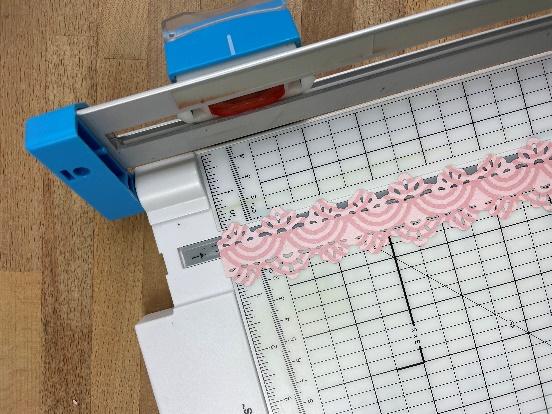
- 12-inch Trimmer with Straight, Scoring and Decorative Blades or (Shop Canada | Shop Australia)
- Floral Ribbon Border Punch or (Shop Canada | Shop Australia)
- Circle Punch or (Shop Canada | Shop Australia)
- Tape Runner or (Shop Canada | Shop Australia)
- Repositionable Tape Runner or (Shop Canada | Shop Australia)
- Foam Squares Variety Pack or (Shop Canada | Shop Australia)
- Foam Tape or (Shop Canada | Shop Australia)
- All-Purpose Scissors or (Shop Canada | Shop Australia)

Flowers Forever
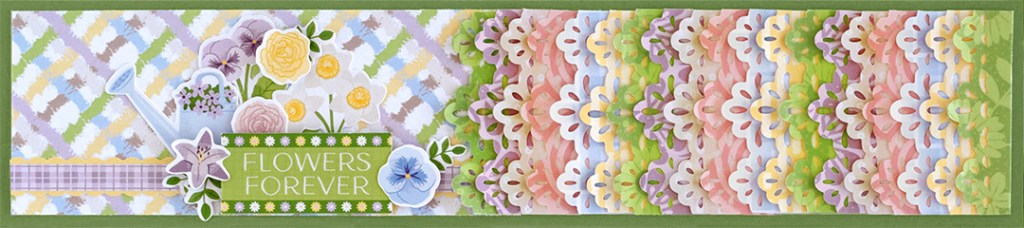
Step 1: Cut a piece of Avocado Solid Cardstock to measure 12” x 2-3/4” for the base of the border.
Step 2: Cut a piece of cardstock (any color — you wont see it) to measure 11-3/4” x 2-5/8”.
Step 3: Cut a piece of diagonal plaid paper to measure 6” x 2-5/8”. Adhere to the previous piece on the left side.
Step 4: Using the Floral Ribbon Border Punch, punch a border from the following papers: blue plaid, beige dots, pink scallops, yellow lines, purple petals and green floral. Cut each border into 2-5/8” segments. Adhere the first one along the edge of the diagonal plaid paper edge, then overlap the remaining segments from there. Adhere segments until you are at the end. Use a scissors to cut off any overhang.
Step 5: Adhere a 6” section of the purple plaid border sticker about ½” from the bottom of the diagonal plaid section.
Step 6: Adhere this 11-3/4” x 2-5/8” piece to the base of the border.
Step 7: Adhere stickers, using Foam Squares on some for added dimension.
Happy Spring

Step 1: Using the Colonial Blade on the Trimmer, cut a piece of Canary Solid Cardstock to measure 12” x 2-1/4”. Use this as the base for the border.
Step 2: Cut a piece of purple petals paper to measure 12” x 2”. Adhere to the cardstock.
Step 3: Using the Floral Ribbon Border Punch, punch a border from Eggplant Solid Cardstock.
Step 4: Using the Floral Ribbon Border Punch, punch two borders from yellow lines paper. Adhere the yellow lines borders behind the eggplant cardstock border slightly offset to the top and bottom.
Step 5: Using the Circle Punch, punch a circle from the eggplant cardstock. Adhere from the backside of the border on the right side.
Step 6: Adhere this entire punched border piece to the base of the border using Foam Tape.
Step 7: Adhere a layered border piece to the top center of the Floral Ribbon Border.
Step 8: Adhere the “Happy spring” sticker to the top of the section above the eggplant cardstock circle.
Let Love Bloom

Step 1: Cut a piece of Eggplant Solid Cardstock for the base of the border to measure 12” x 1-3/4”.
Step 2: Cut a piece of yellow lines paper to measure 12” x 1”. Adhere to the center of the cardstock strip.
Step 3: Using the Floral Ribbon Border Punch, punch two borders using the pink scallops paper.
Step 4: Place the punched borders vertically in the trimmer, and score ½” from the right edge of each border. Fold over the edge and adhere back. Adhere each of these folded piece along the top and bottom of the yellow lines paper leaving the eggplant cardstock showing slightly.
Step 5: Adhere the floral sticker border to the top center of the yellow lines paper using Foam Squares.
Step 6: Adhere the “Let love bloom” sticker to the border for the title.
Do you have a favorite flower? ?
P.S. Are YOU a member of the Virtual Crop Facebook Group? It’s your go-to place for MONTHLY Virtual Crops, MONTHLY Completed Album Challenges, QUARTERLY Secret Box Openings with project tutorials and so much more! We hope you’ll join our community of more than 44,000 fellow memory-keeping enthusiasts — you’ll feel right at home!

can i purchase border maker cartridges for my Border Maker system?