June 10, 2025
Create a Peaceful Forest Scene with This Woodsy Layout
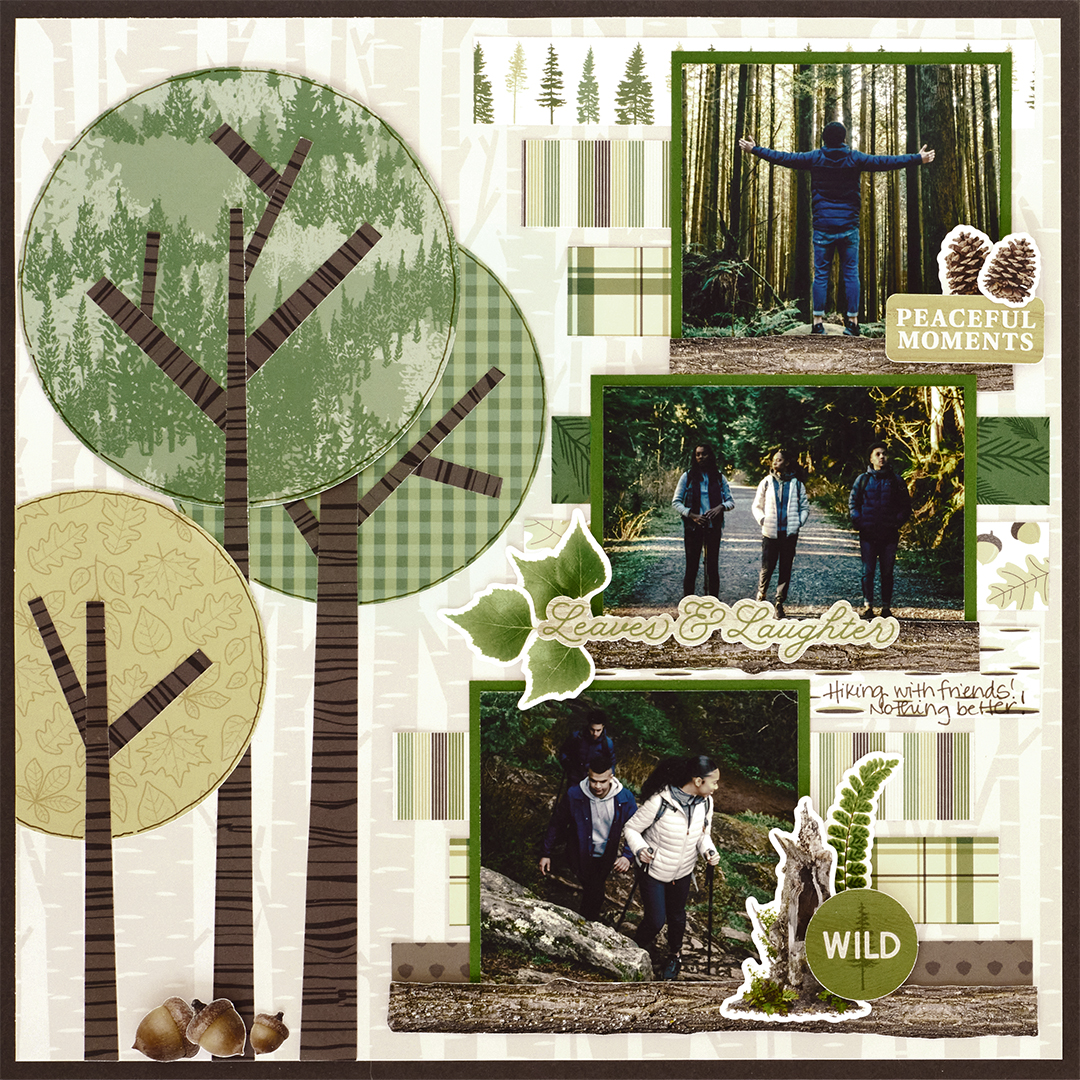
“Leave the road, take the trails.” This layout invites you to do just that — escape into the peaceful beauty of the forest and relive your favorite outdoor adventures. Featuring earthy tones, layered textures and charming woodland embellishments, this page is crafted with the Deeper in the Woods collection and a few simple tools. Whether you’re scrapping a hike with friends or your latest family nature walk, this layout brings the wild to life with rustic charm and layered dimension.
To create this layout you will need:
- Deeper in the Woods Paper Pack (12/pk) or (Shop Canada | Shop Australia)
- Deeper in the Woods Stickers (3/pk) or (Shop Canada | Shop Australia)
- Hot Fudge Solid Cardstock or (Shop Canada | Shop Australia)
- Avocado Solid Cardstock or (Shop Canada | Shop Australia)
- Bright White Solid Cardstock or (Shop Canada | Shop Australia)
- Custom Cutting System with Circle Patterns, Blades and Mat or (Shop Canada | Shop Australia)
- 12-inch Trimmer or (Shop Canada | Shop Australia)
- Photo Trimmer or (Shop Canada | Shop Australia)
- Tape Runner or (Shop Canada | Shop Australia)
- Repositionable Tape Runner or (Shop Canada | Shop Australia)
- Foam Squares Variety Pack or (Shop Canada | Shop Australia)
- Brown Dual-Tip Pen or (Shop Canada | Shop Australia)


Step 1: Use a piece of Hot Fudge Cardstock for the base of the layout.
Step 2: Cut a piece of the birch trees paper to measure 11-1/2? x 11-1/2?. Adhere to layout.
Step 3: Using the CCS Small Circle Pattern on the outside with the Blue Blade, cut a circle from gingham paper.
Step 4: Using the CCS Medium Circle Pattern on the outside with the Red Blade, cut a circle from forest paper.
Step 5: Using the CCS Small Circle Pattern on the outside with the Red Blade, cut a circle from leaves paper.
Step 6: Adhere the circles to the left side of the layout.
Step 7: Cut angled strips of the woodgrain paper for the branches/tree trunks. Adhere over the circles, cutting to desired lengths with scissors.
Step 8: From a variety of papers/patterns cut nine strips that are 1? varied by lengths. Adhere to the right side of the layout.
Step 9: Cut photo mats from Avocado Cardstock to measure: (2) 3-3/4? x 3-3/4? and (1) 4-1/4? x 3-1/4?. Adhere photos that measure (2) 3-1/2? x 3-1/2? and (1) 4? x 3?. Adhere to the layout.
Step 10: Adhere stickers to the layout, using Foam Squares on some for added dimension. Journal as desired.
So, are you ready to create your own scenic escape? With just a few circles, strips and woodland stickers, this layout is a walk in the park to recreate. Gather your favorite forest photos and let your creativity run wild — because the best memories are made off the beaten path.
P.S. Are YOU a member of the Virtual Crop Group? It’s your go-to place for MONTHLY Virtual Crops, MONTHLY Completed Album Challenges, QUARTERLY Secret Box Openings with project tutorials and so much more! We hope you’ll join our community of more than 46,000 fellow memory-keeping enthusiasts — you’ll feel right at home!

Loved this page! The trees can be done with fall or spring colors as well. This collection is BEAUTIFUL!!! Though, I didn’t see where the Bright White paper was used?
Great layout. Inspiring.