By Creative Memories
September 23, 2025

Virtual Crop Group x Create Room Family Community-Swap Giveaway

Join both… Win BIG! We’re teaming up with our friends at Create Room for a Cross-Community Giveaway — and you don’t want to miss it! Imagine the joy of crafting in a space that inspires your creativity. This giveaway celebrates both the stories you bring to life though crafting, and the space you create them in, with an incredible prize pack!

Join both communities to earn a chance to win a Croptoberfest Prize Bundle and a DreamCart 2!

Step 1: Head over to the Virtual Crop Group and check out the Featured Post. If you know you are already a member of the Virtual Crop Group, you can go straight to the Create Room Family and join the group!

Step 2: When you answer the membership questions, enter the secret code word: CRxCM Win Big

Bonus: Once you’re approved, drop a hello on that group’s Giveaway Post to let the community welcome you!

The Giveaway ends Monday, September 29 at 11:59pm CT (AU: Tuesday, September 30 at 2:59pm AET). At the end of the week, we’ll randomly select two winners to review an incredible prize pack:

Create Room DreamCart 2 + Creative Memories Croptoberfest Prize Bundle

Prize includes:

Now that’s a prize haul worth celebrating! 💙 So, are you in? Remember to drop the code word “CRxCM Win Big” in your membership questions when you request to join the group and let’s grow — and create — together.

FAQs:

Q: Do I need to be a member of both groups to win?
A: Yes! The whole fun of this giveaway is joining both communities. You’ll need to be a member of both the Creative Memories Virtual Crop Group and the Create Room Family Group to qualify.

Q: How do I enter the giveaway?
A: Easy! Follow the steps in the giveaway post (join & answer the membership questions with the code word). Make sure you complete all steps before the deadline.

Q: What if I’m already a member of both groups?
A: You can still enter! Just drop a comment on the giveaway post (either group) letting us know you already have been a member – let us know how much you love the groups!

Q: How will the winners be chosen?
A: Winners will be randomly selected after the giveaway closes and announced in both groups.

Q: How will I know if I’ve won?
A: Winners will be tagged in the winner announcement post and contacted via email for shipping details.

Q: What if I live outside the U.S.?
A: If you are selected as a winner and there are any shipping or prize restrictions, we’ll work with you to find a prize alternative.

Q: Are Creative Memories and Create Room combining in any way shape or form?
A: No! This is just a friendly giveaway to get more exposure for our incredible communities to other like-minded crafters.


P.S. Are YOU a member of the Virtual Crop Group? It’s your go-to place for MONTHLY Virtual Crops, MONTHLY Completed Album Challenges, QUARTERLY Secret Box Openings with project tutorials and so much more! We hope you’ll join our community of more than 47,000 fellow memory-keeping enthusiasts — you’ll feel right at home!

September 22, 2025

A Paw-sitively Adorable Ruffin’ It Layout

If your four-legged companion fills your life with cuddles, chaos and unconditional love, then this scrapbook layout using the Ruffin’ It collection is just the treat you need! Whether your pup is a playful puppy or a wise old tail-wagger, you’ll love how this layout helps you celebrate the moments that make pet parenthood unforgettable.

To create this layout you will need:

Ruffin’ It layout by Karyn McDermaid‑Rolfe
Layout by Karyn McDermaid‑Rolfe, Creative Memories Design Team Contributor
Instructions graphic

Step 1: Cut the brown paw print designer paper to 11‑1/2″ x 11‑1/2″ and adhere to the center of a sheet of Bright White Cardstock.

Step 2: Use the Custom Cutting System — with the smallest heart pattern from the Gemstone Cutting Patterns — and the Red Blade on the outside edge to cut hearts from red bone designer paper and light blue striped designer paper. Using the Green Blade on the outside edge of the same heart pattern, cut two hearts from Bright White Cardstock. Adhere the designer paper hearts to the cardstock hearts.

Step 3: Use the Custom Cutting System — with the smallest heart pattern from the Gemstone Cutting Patterns — and the Red Blade on the inside edge to cut eight eggs from Bright White Cardstock. Use the Green Blade on the inside edge to cut four eggs from red bone designer paper and four eggs from light blue striped designer paper. Adhere the paper eggs to the cardstock eggs.

Step 4: Arrange and adhere the heart and egg shapes at the top of the layout to create two large paw prints.

Step 5: Cut your Red Cardstock to 12″ x 4‑3/4″ and the paw print / bone designer paper to 12″ x 4‑1/2″. Layer and adhere the pieces to the bottom center of the layout as shown.

Step 6: Cut three 4″ x 4″ photo mats from Cornflower Cardstock. Crop three photos to 3‑3/4″ x 3‑3/4″. Adhere the photos to the mats and adhere to the center of the layout.

Step 7: Cut three 4″ x 3/4″ pieces from Cornflower Cardstock and three 3‑3/4″ x 1/2″ pieces from Bright White Cardstock. Layer and adhere the strips as shown to use as journaling boxes.

Step 8: Layer and adhere stickers and embellishments as shown using Foam Squares on some.

Step 9: Using a Brown‑Dual Tip Pen, add journaling as desired.

We’d love to hear what you think — how would you adapt this layout for your own pet pages?

P.S. Are YOU a member of the Virtual Crop Group? It’s your go‑to place for MONTHLY Virtual Crops, MONTHLY Completed Album Challenges, QUARTERLY Secret Box Openings with project tutorials and so much more! We hope you’ll join our community of more than 47,000 fellow memory‑keeping enthusiasts — you’ll feel right at home!

September 19, 2025

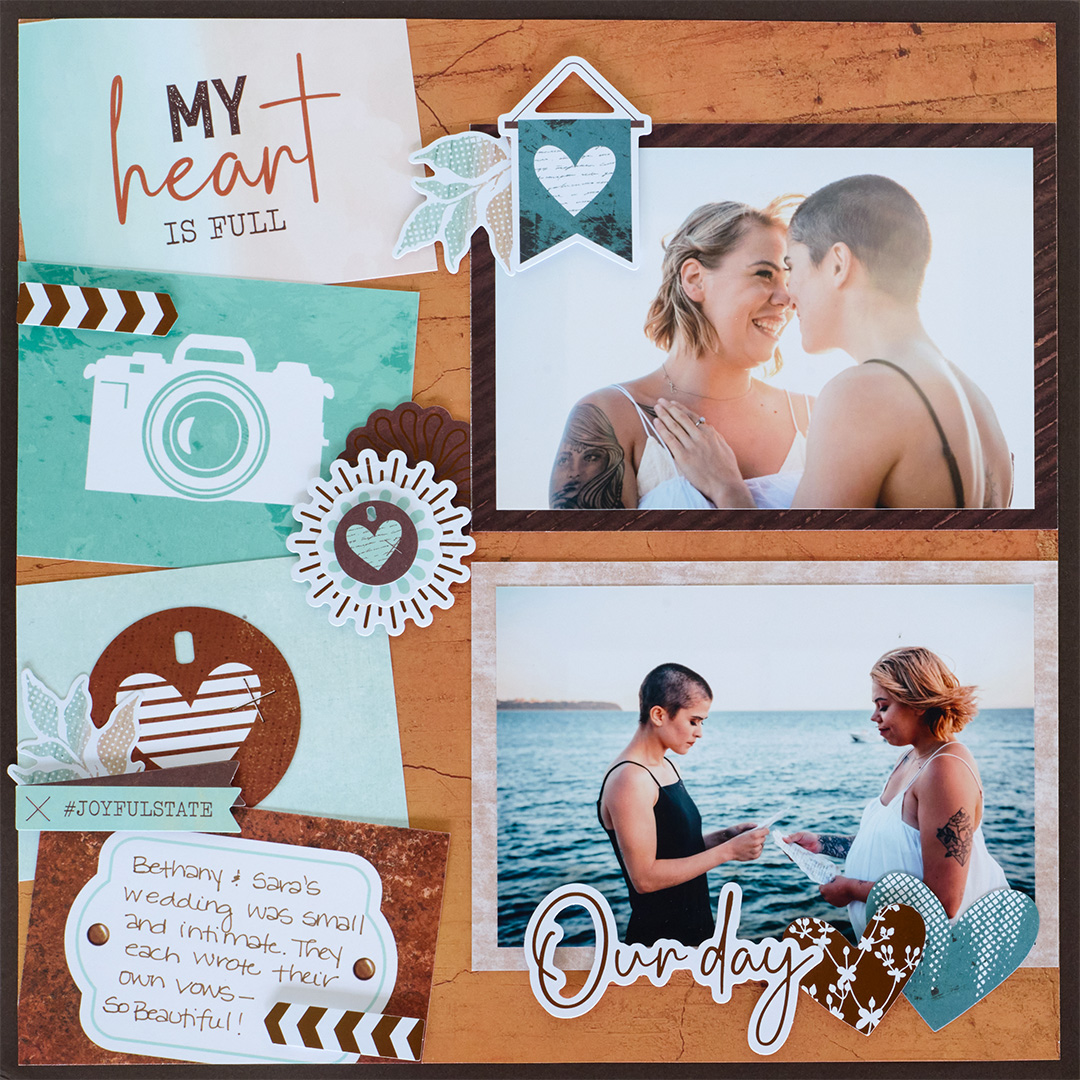
Heartfelt Memories with Copper Canyon 2

Here’s a simple layout to recreate with your favorite Copper Canyon 2 mats and embellishments! Mixing warm and cool tones from the collection, this design is perfect for outdoor or rustic photos.

To create this layout you will need:

Copper Canyon 2 layout by Melissa Ullman
Layout by Melissa Ullman, Creative Memories Design Team Contributor
Project Instructions

Step 1: Use a piece of Hot Fudge Cardstock for the base of the layout.

Step 2: Cut a piece of the rust designer paper to measure 11-1/2″ x 11-1/2″.

Step 3: Cut apart the mats so that you have four mats that measure 4-1/2″ x 3-1/4″. Slightly angle each one along the left edge of the rust designer paper. Cut off any excess with either a scissors or your trimmer.

Step 4: Using the large dark brown and cream mats, adhere them along the right edge of the rust designer paper. Adhere your photos that measure 6″ x 4″.

Step 5: Adhere the rust designer paper with mats on the cardstock base.

Step 6: Adhere your chosen embellishments to the layout using Foam Squares for some for added dimension.

Step 7: Journal as desired.

We’d love to see how your Copper Canyon pages turn out — and let us know which part you loved most about this layout!


P.S. Are YOU a member of the Virtual Crop Group? It’s your go-to place for MONTHLY Virtual Crops, MONTHLY Completed Album Challenges, QUARTERLY Secret Box Openings with project tutorials and so much more! We hope you’ll join our community of more than 47,000 fellow memory-keeping enthusiasts — you’ll feel right at home!

September 16, 2025

Scrap Your Everyday Joys in Teal and Copper Tones

Looking for a way to make your photos shine with depth and rustic elegance? This layout blends the earthy richness of designer paper with playful sticker accents to create a design that’s both timeless and fun to make. Whether you’re capturing everyday adventures or special getaways, this page offers the perfect backdrop for your stories.

To create this layout you will need:


Copper Canyon 2 layout
Layout by Melissa Ullmann, Creative Memories Design Team Contributor
Instructions

Step 1: Use dark teal designer paper for the base of the layout.

Step 2: Using the light aqua designer paper with the Jumbo Circle-CCS pattern, cut on the outside with the red blade. Adhere the circle to the layout base, centered.

Step 3: Using a 12″ x 12″ piece of the brown/aqua grunge designer paper, cut out the center leaving a 3/4″ frame. Cut the frame into fourths.

Step 4: Using a pencil and ruler, draw horizontal pencil lines across the layout at 5-7/8″ and 6-1/8″.

Step 5: Using a pencil and ruler, draw vertical pencil lines across the layout at 5-7/8″ and 6-1/8″. Place the corners from the fourths of the frame along the pencil lines so that there is 1/4″ in between vertically and horizontally. Trim off any excess along the edges with a scissors.

Step 6: Using the CCS-large circle cut a circle from the aqua designer paper on the outside with the red blade. Cut into fourths. Adhere a fourth of the circle in each corner of the layout.

Step 7: From the dark rust designer paper, cut four strips that measure 3-1/2″ x 1″. Place along the 45-degree line with the point at the top cutting line, then cut. Flip over and repeat. Place each segment over the fourth of the circles in the corner, lining up with the edges of the paper.

Step 8: Using the rust designer paper, cut four photo mats that measure 4″ x 4″. Adhere slightly overlapping the frame pieces.

Step 9: Using Hot Fudge Solid Cardstock with the inside of the large CCS-circle and the green blade cut a circle.

Step 10: Using the beige and aqua designer paper, cut a circle using the inside of the large CCS-circle and the blue blade.

Step 11: Adhere to the cardstock circle then adhere to the center of the layout using Foam Squares.

Step 12: Using the teal border stickers, adhere along the strips in each corner of the layout, trimming with a scissors.

Step 13: Adhere the remaining stickers to the center of the layout, layering some with Foam Squares for additional dimension.

Step 14: Journal as desired!

This layout combines warm tones and subtle accents to give your photos a polished backdrop. It’s a design that works just as well for everyday moments as it does for special occasions. What stories will you tell with your Copper Canyon 2 pages?


P.S. Are YOU a member of the Virtual Crop Group? Virtual Crop Group? It’s your go-to place for MONTHLY Virtual Crops, MONTHLY Completed Album Challenges, QUARTERLY Secret Box Openings with project tutorials and so much more! We hope you’ll join our community of more than 47,000 fellow memory-keeping enthusiasts — you’ll feel right at home!

September 12, 2025

The September 2025 Virtual Crop is HERE!

It’s officially time for the September Virtual Crop! You’re in for a weekend packed with fresh inspiration, connection and scrap-happy fun. Get excited for four brand-new sketch challenges designed to make scrapbooking your memories a breeze.

If this is your first time participating in a Virtual Crop and you would like a quick step-by-step guide of what to expect before you jump in, you can get ALL the details about Virtual Crops in this blog post, including how to participate (in our Virtual Crop Group)supplies you’ll needexamples of challengestypes of prizes and more.

(more…)