October 24, 2025
In the Great Outdoors: Capturing Rustic Autumn Adventures

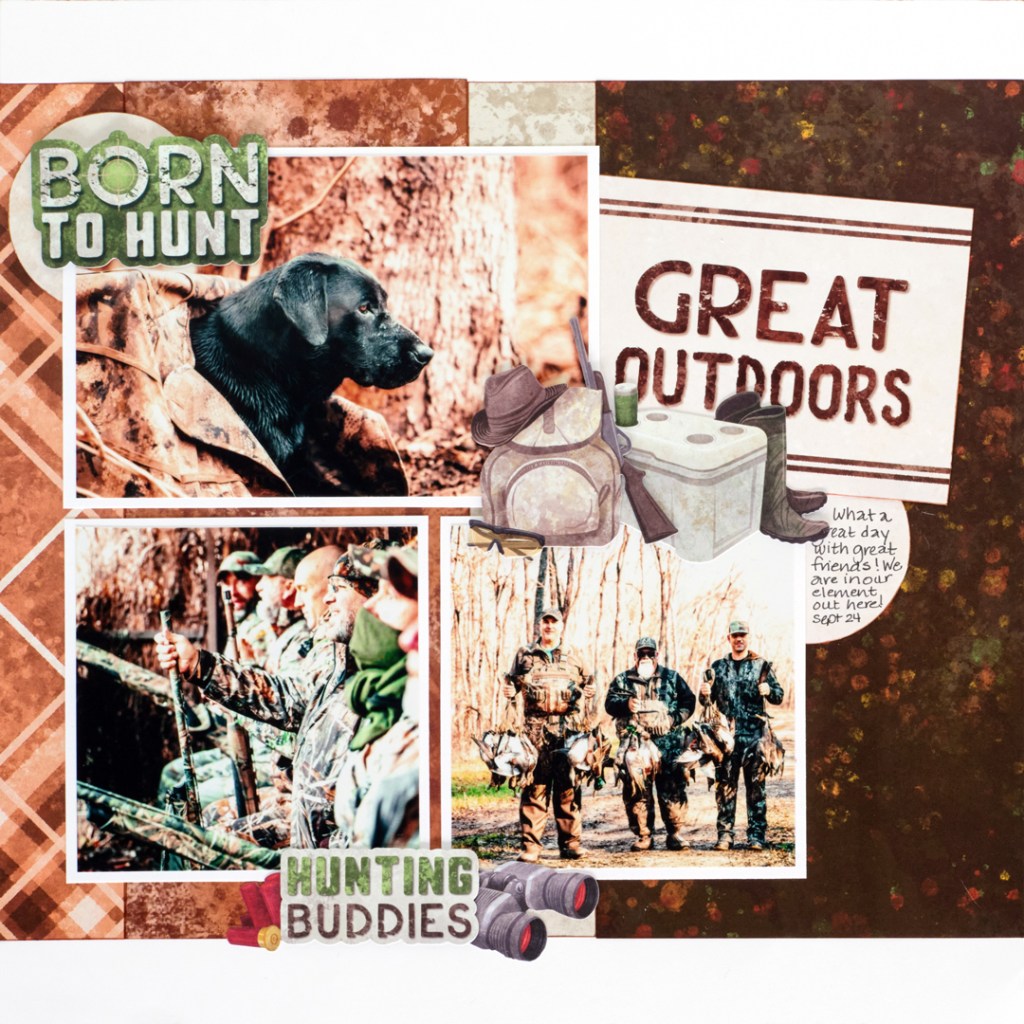
Whether it’s time spent exploring the great outdoors or enjoying cozy moments with loved ones, this layout beautifully brings those memories to life. Featuring the Grateful Harvest Collection, it combines rich autumn hues, layered textures, and coordinating accents for a design that feels both rustic and refined — perfect for preserving your favorite outdoor adventures and seasonal moments.
To create this layout, you will need:
- Grateful Harvest Tone-on-Tone Paper Pack (Shop Canada | Shop Australia)
- Grateful Harvest Designer Paper (Shop Canada | Shop Australia)
- Grateful Harvest Mat Pack (Shop Canada | Shop Australia)
- Grateful Harvest Hunting Embellishments (Shop Canada | Shop Australia)
- Bright White Solid Cardstock (Shop Canada | Shop Australia)
- Potter’s Clay ink (Shop Canada | Shop Australia)
- Custom Cutting System (Shop Canada | Shop Australia)
- Foam Squares (Shop Canada | Shop Australia)
- 12-Inch Trimmer (Shop Canada | Shop Australia)
- Tape Runner (Shop Canada | Shop Australia)
- Photo Trimmer (Shop Canada | Shop Australia)
- Black Dual-Tip Pen (Shop Canada | Shop Australia)

Inking the Edges: As you cut each piece of designer paper, ink the edges with Potter’s Clay ink. To do this simply rub the ink pad directly on the paper. Memento Dew Drop ink is fade-resistant, archival safe, and acid-free.
Step 1: Use Bright White Cardstock for the base of the layout.
Step 2: Cut one 1-1/2″ × 10″ piece of burnt orange plaid tonal paper and adhere 1″ from the bottom and next to the left edge of the page. Follow by cutting and adding 4″ × 10″ burnt orange wash tonal paper, 1-1/2″ × 10″ tan wash tonal, and 5″ × 10″ autumn brown designer paper.
Step 3: For the photo mats, cut two 4-1/4″ × 4-1/4″ and one 6-1/4″ × 4-1/4″ pieces of Bright White Cardstock. Adhere the largest mat 1-3/4″ from the top and 3/4″ from the left edge of the page. The lower left mat is 3/4″ from the left edge of the page and 1/8″ below the top mat. Place the lower right mat 1/8″ to the right of the left mat.
Step 4: Using the CCS Medium Circle Pattern, cut two 2-1/4″ circles from the mat card that says, “what a day.” Use the medium circle cutting inside the circle with the green blade. Place one circle under the left top corner of the large photo mat. Tuck the other on the upper right of the lower right mat.
Step 5: Locate the mat card that says, “the great outdoors.” Cut the brown ends off the card making it 4-1/2″ × 3-1/2″. Tuck at an angle to the right of the large photo mat. Finish with the Grateful Harvest Hunting Embellishments using Foam Squares as desired.
There’s something special about looking back on the adventures that bring us together. This layout captures that feeling perfectly — a cozy tribute to time spent in nature and the memories that warm our hearts.
P.S. Are YOU a member of the Virtual Crop Group? It’s your go-to place for MONTHLY Virtual Crops, MONTHLY Completed Album Challenges, QUARTERLY Secret Box Openings with project tutorials and so much more! We hope you’ll join our community of more than 49,000 fellow memory-keeping enthusiasts — you’ll feel right at home!

