January 13, 2026
Capture Life “On the Bright Side”
Created in partnership with designer and artist Amy Tangerine, the On the Bright Side collection brings together vibrant color, expressive artwork, and joyful storytelling. Inspired by Amy’s signature style, this collection infuses memory keeping with painterly details and handwritten touches that feel both creative and personal. Whether you’re documenting everyday joys, creative adventures, or milestone moments, this collection makes it easy to scrapbook your memories with vibrant personality. This bright, feel-good layout captures that spirit, helping your stories truly shine.
To create this layout, you will need:
- On the Bright Side Paper Pack (Shop Canada | Shop Australia)
- On the Bright Side Tone-on-Tone Paper (Shop Canada | Shop Australia)
- On the Bright Side Embellishments (Shop Canada | Shop Australia)
- On the Bright Side Variety Mat Pack (Shop Canada | Shop Australia)
- Whimsical Scallop Border Punch (Shop Canada | Shop Australia)
- Pink Razzleberry Solid Cardstock (Shop Canada | Shop Australia)
- Black Solid Cardstock (Shop Canada | Shop Australia)
- 12-Inch Trimmer (Shop Canada | Shop Australia)
- The Tape Runner (Shop Canada | Shop Australia)
- Foam Squares Variety Pack (Shop Canada | Shop Australia)
- Black Dual-Tip Pen (Shop Canada | Shop Australia)
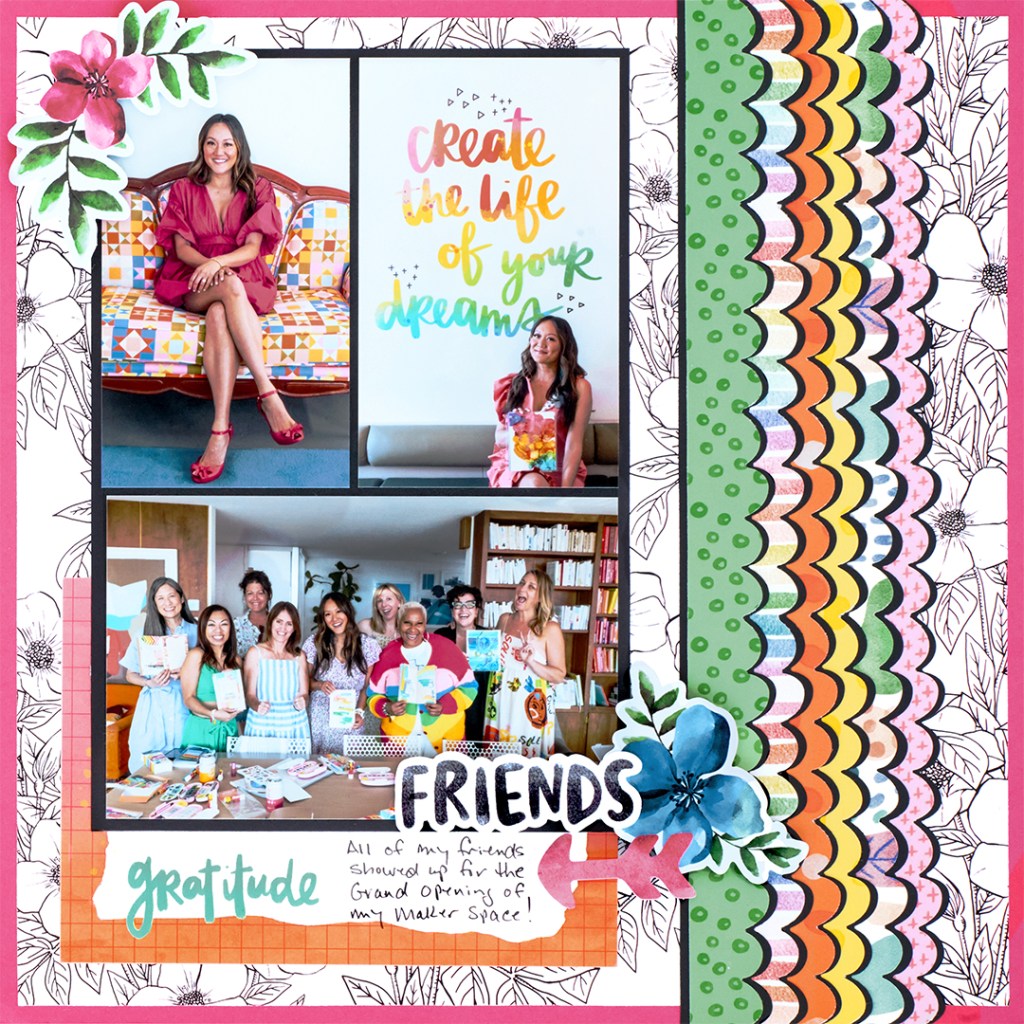

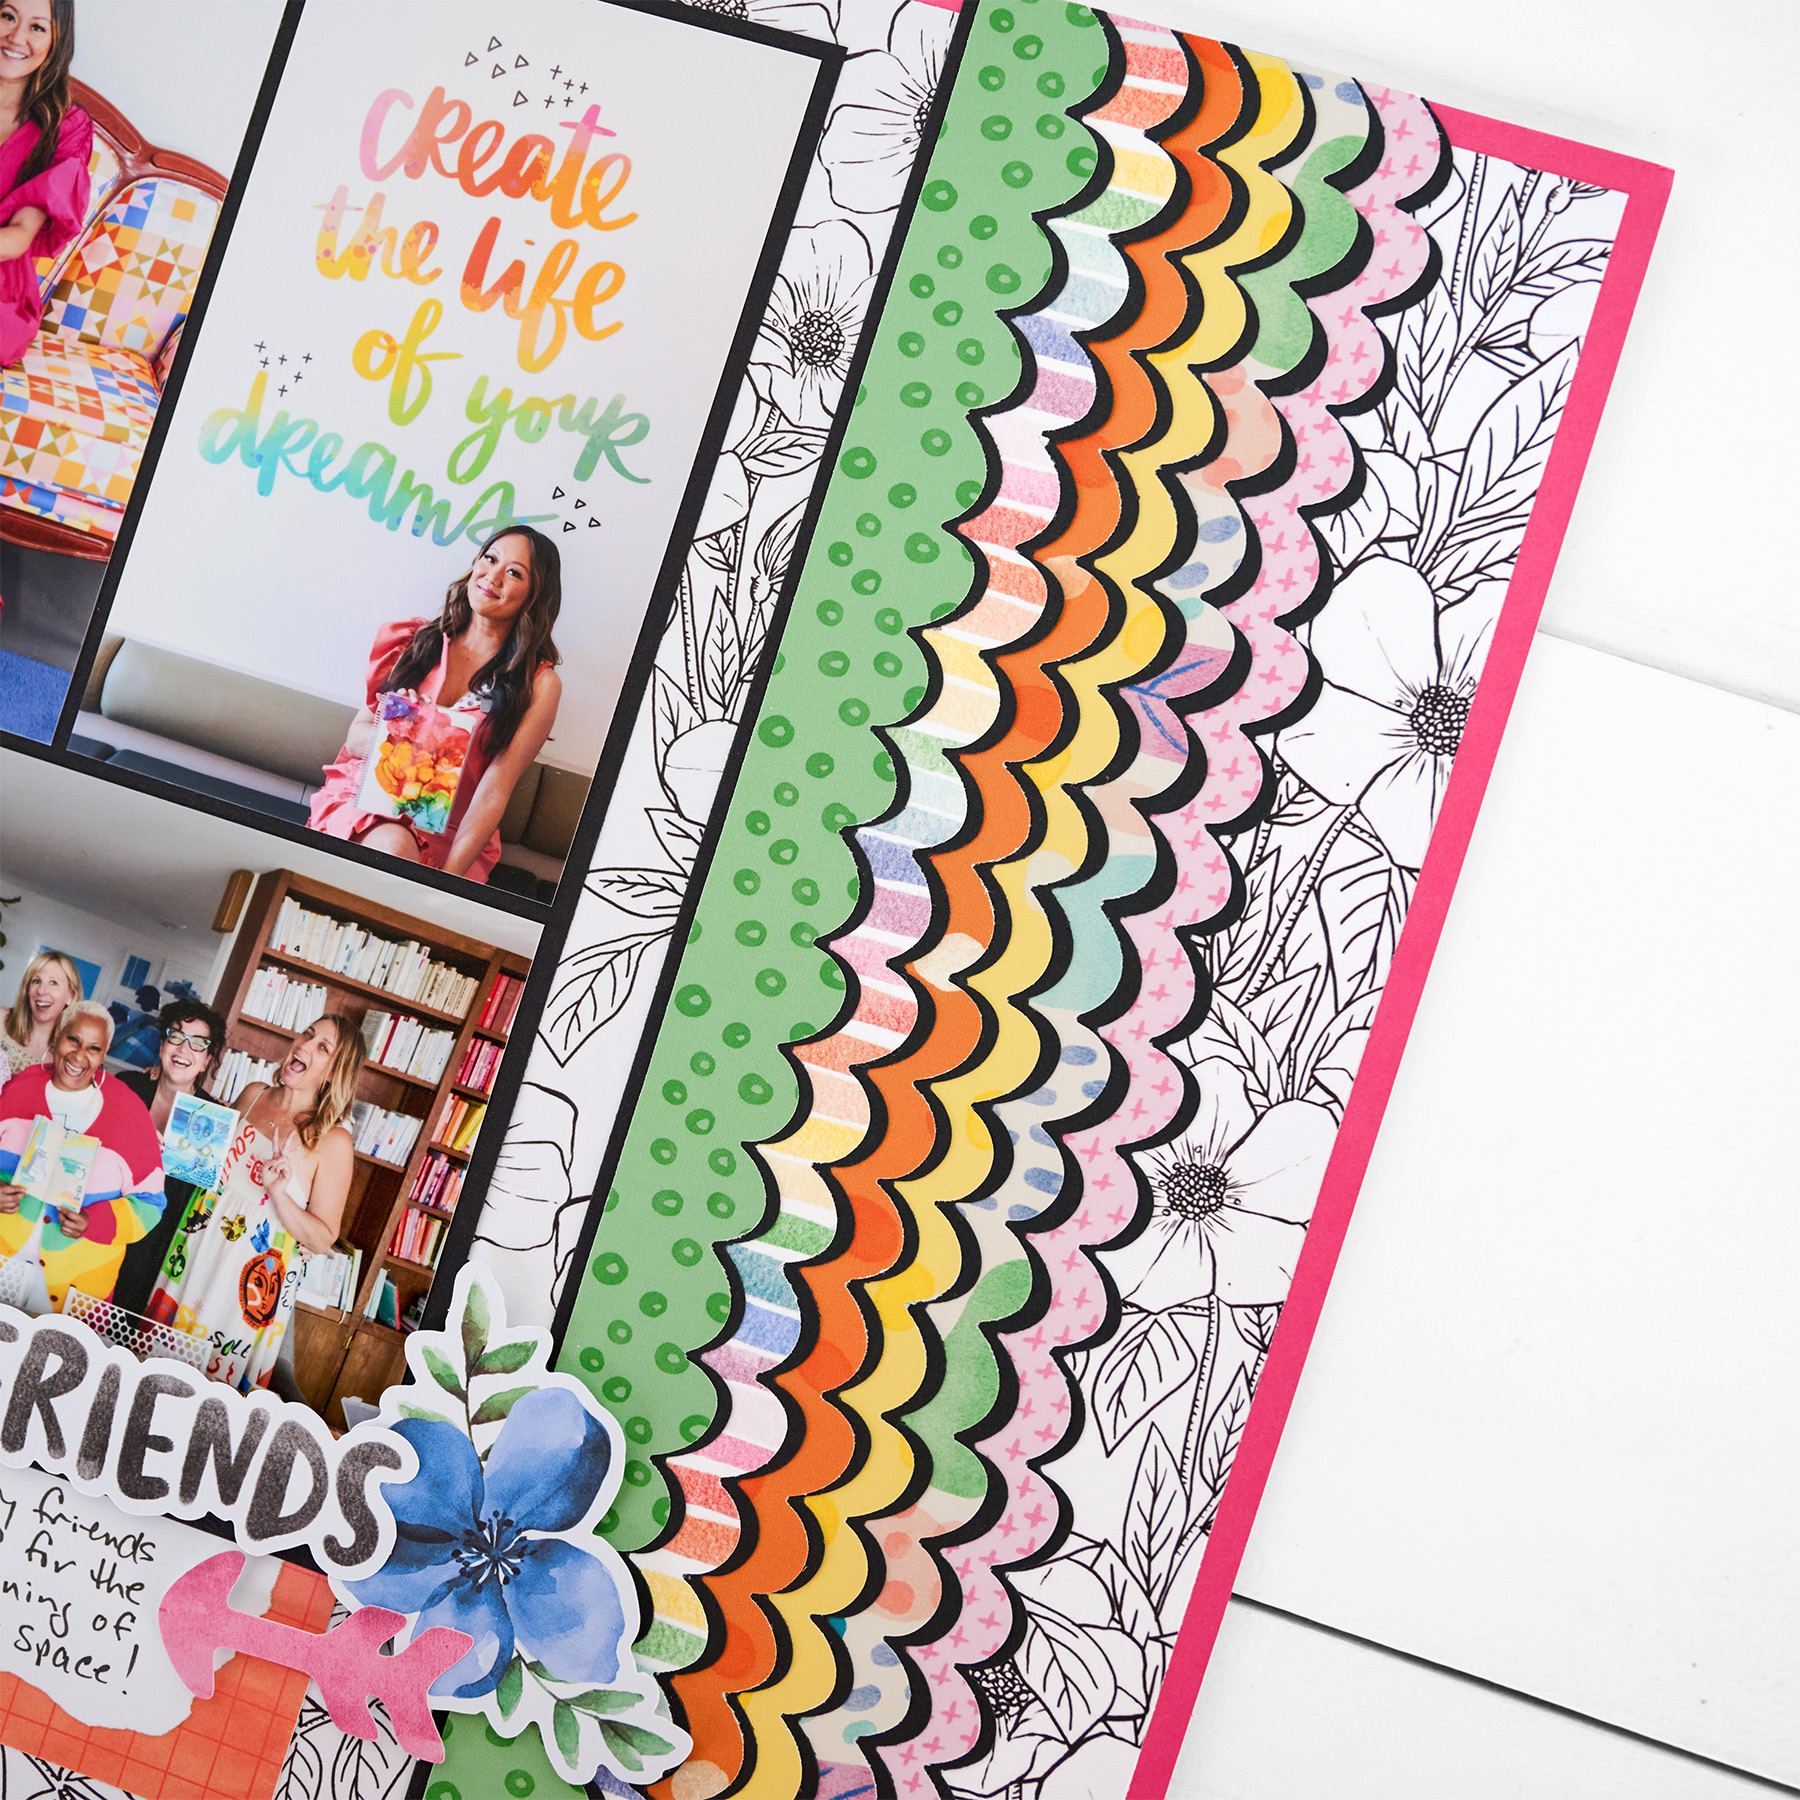
Step 1: Cut a piece of the black and white designer paper to 11-1/2″ x 11-1/2″ and adhere it to the center of a sheet of Pink Razzleberry Solid Cardstock.
Step 2: Use the Whimsical Scallop Border Punch to punch (6) 12″ x 1″ borders from a piece of the Black Solid Cardstock and (6) 12″ x 1″ borders from a variety of designer and tonal papers.
Step 3: Adhere the designer and tonal paper borders onto the cardstock borders leaving 1/8″ of the cardstock showing. Adhere the borders together to create one large border piece. Cut a 3/4″ x 12″ piece of Black Solid Cardstock and adhere it underneath the left edge of the combined border. Adhere the layered border to the right side of the layout as shown.
Step 4: Cut a 6-1/4″ x 9-1/8″ mat from the Black Solid Cardstock. Crop photos to 3″ x 5″ and 6″ x 4″. Cut a variety mat with a title to 3″ x 5″. Adhere the photos and title mat to the cardstock piece and adhere them to the bottom right of a 6-1/2″ x 4-1/2″ variety mat. Adhere the layered piece to the left side of the layout.
Step 5: Adhere embellishments using Foam Squares.
Step 6: Use a Black Dual-Tip Pen to add journaling.
This layout is all about color, creativity, and celebrating the moment. Where will that energy take your memory keeping next?
P.S. Are YOU a member of the Virtual Crop Group? It’s your go-to place for MONTHLY Virtual Crops, MONTHLY Completed Album Challenges, QUARTERLY Secret Box Openings with project tutorials and so much more! We hope you’ll join our community of more than 49,000 fellow memory-keeping enthusiasts — you’ll feel right at home!


Love the colors.
Can’t wait for new releases