February 17, 2026
Scrapbook Your Unplanned Adventures
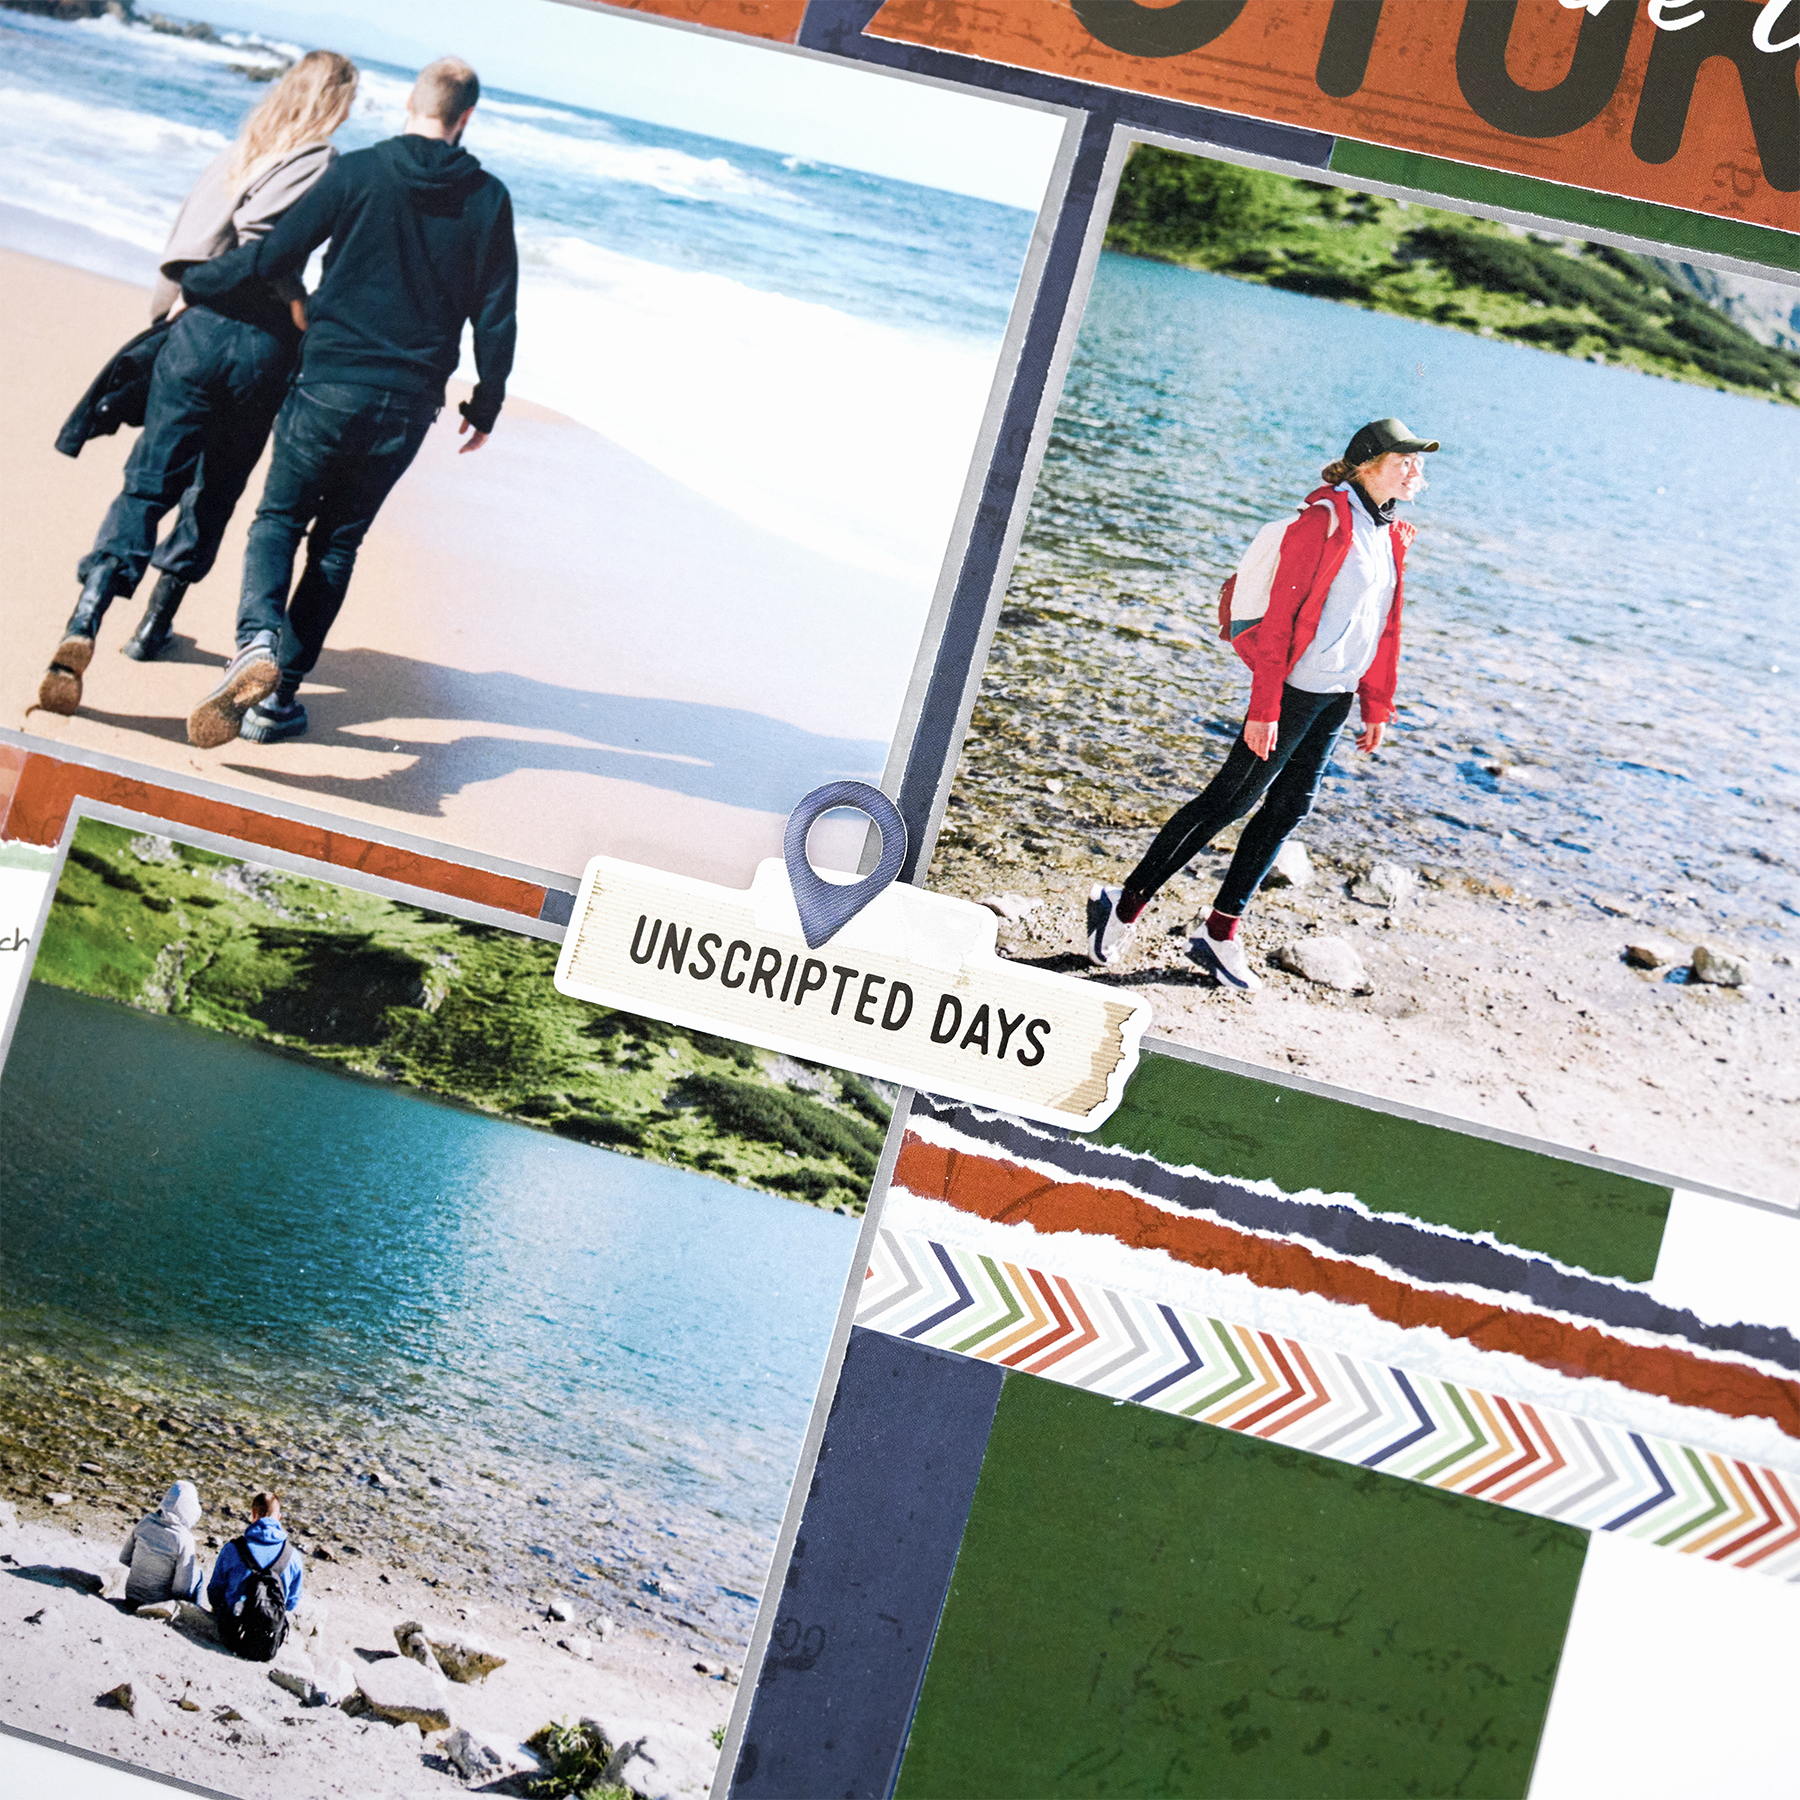
Not every memorable moment comes from a perfectly planned itinerary. The Global Getaway collection celebrates those unscripted days, the unexpected stops, and the snapshots that quickly become favorite memories. This layout is a reminder that every photo has a story to tell and gives those moments a place to shine on the page. Gather the memories from your latest adventures and turn them into a layout you’ll reach for again and again.
To create this layout, you will need:
- Global Getaway Designer Paper Pack (Shop Canada | Shop Australia)
- Global Getaway Tone-on-Tone Paper Pack (Shop Canada | Shop Australia)
- Bright White Solid Cardstock (Shop Canada | Shop Australia)
- Global Getaway Stickers (Shop Canada | Shop Australia)
- Global Getaway Mat Cards (Shop Canada | Shop Australia)
- Black Micro-Tip Pen (Shop Canada | Shop Australia)
- 12-inch Trimmer (Shop Canada | Shop Australia)
- Micro-Tip Scissors (Shop Canada | Shop Australia)
- Repositionable Tape Runner (Shop Canada | Shop Australia)
- Foam Squares Variety Pack (Shop Canada | Shop Australia)
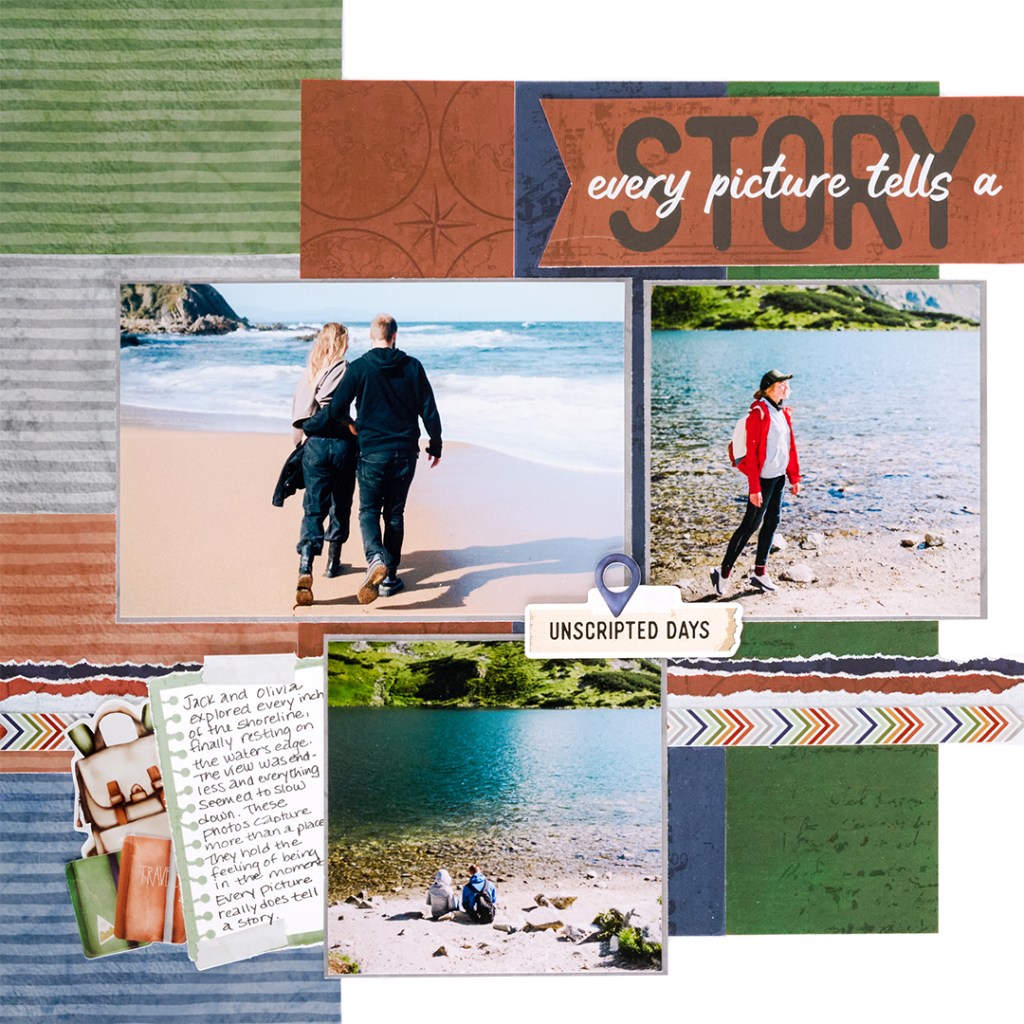

Step 1: Use a sheet of Bright White Solid Cardstock as the base for this layout.
Step 2: Cut 4″ x 3″ pieces from the green, gray, dark orange, and blue striped tonal papers. Adhere them to the left edge of the paper as shown.
Step 3: Cut a 2-1/2″ x 10″ piece from the dark orange compass designer paper. Adhere it 3-1/2″ from the left edge and 1″ from the bottom. Following that piece, place 2-1/2″ x 10″ pieces from both the navy map tonal paper and dark green map designer paper.
Step 4: Cut (3) 12″ x 3/4″ pieces from the navy ABC, dark orange compass, and light blue map designer papers. Tear the top edge of the papers. Adhere the navy ABC piece 4″ from the bottom and then stack the other pieces on the page showing a small amount of the previous. Finish this step by embellishing with the chevron sticker.
Step 5: Cut (1) 6″ x 4″ and (2) 4″ x 4″ pieces from the compass designer paper to use as photos mats. Place the top mats 4-3/4″ from the bottom with the right mat 1/2″ from the right edge. The bottom mat is 1/2″ from the bottom and 4-1/4″ from the right edge.
Step 6: Find the “Every Picture Tells a Story” mat card. Cut 1-1/4″ from the top and bottom and then 5/8″ from the left and right edges of the card. Dovetail the left edge and adhere it above the photo mats and against the right edge of the layout.
Step 7: Find the mat card with the notebook paper on the light green background. Trim the card down leaving a small green edge on the left side. Use open scissors to distress all the edges of the card. Tuck it under the left edge of the bottom photo.
Step 8: Finish by adding stickers using foam squares as desired.
Where have your unscripted days taken you lately?
P.S. Are YOU a member of the Virtual Crop Group? It’s your go-to place for MONTHLY Virtual Crops, MONTHLY Completed Album Challenges, QUARTERLY Secret Box Openings with project tutorials and so much more! We hope you’ll join our community of more than 50,000 fellow memory-keeping enthusiasts — you’ll feel right at home!

