March 16, 2026
Spring Equinox Borders in Bloom

The Spring Equinox collection includes a couple of tools that make creating spring-inspired details especially fun. With the Spring Blooms Build-A-Punch and the Dragonfly Border Maker Cartridge, you can add florals, fluttering accents and layered touches that bring movement to the page. These borders show just how easily those tools can add charm and personality to your spring layouts.
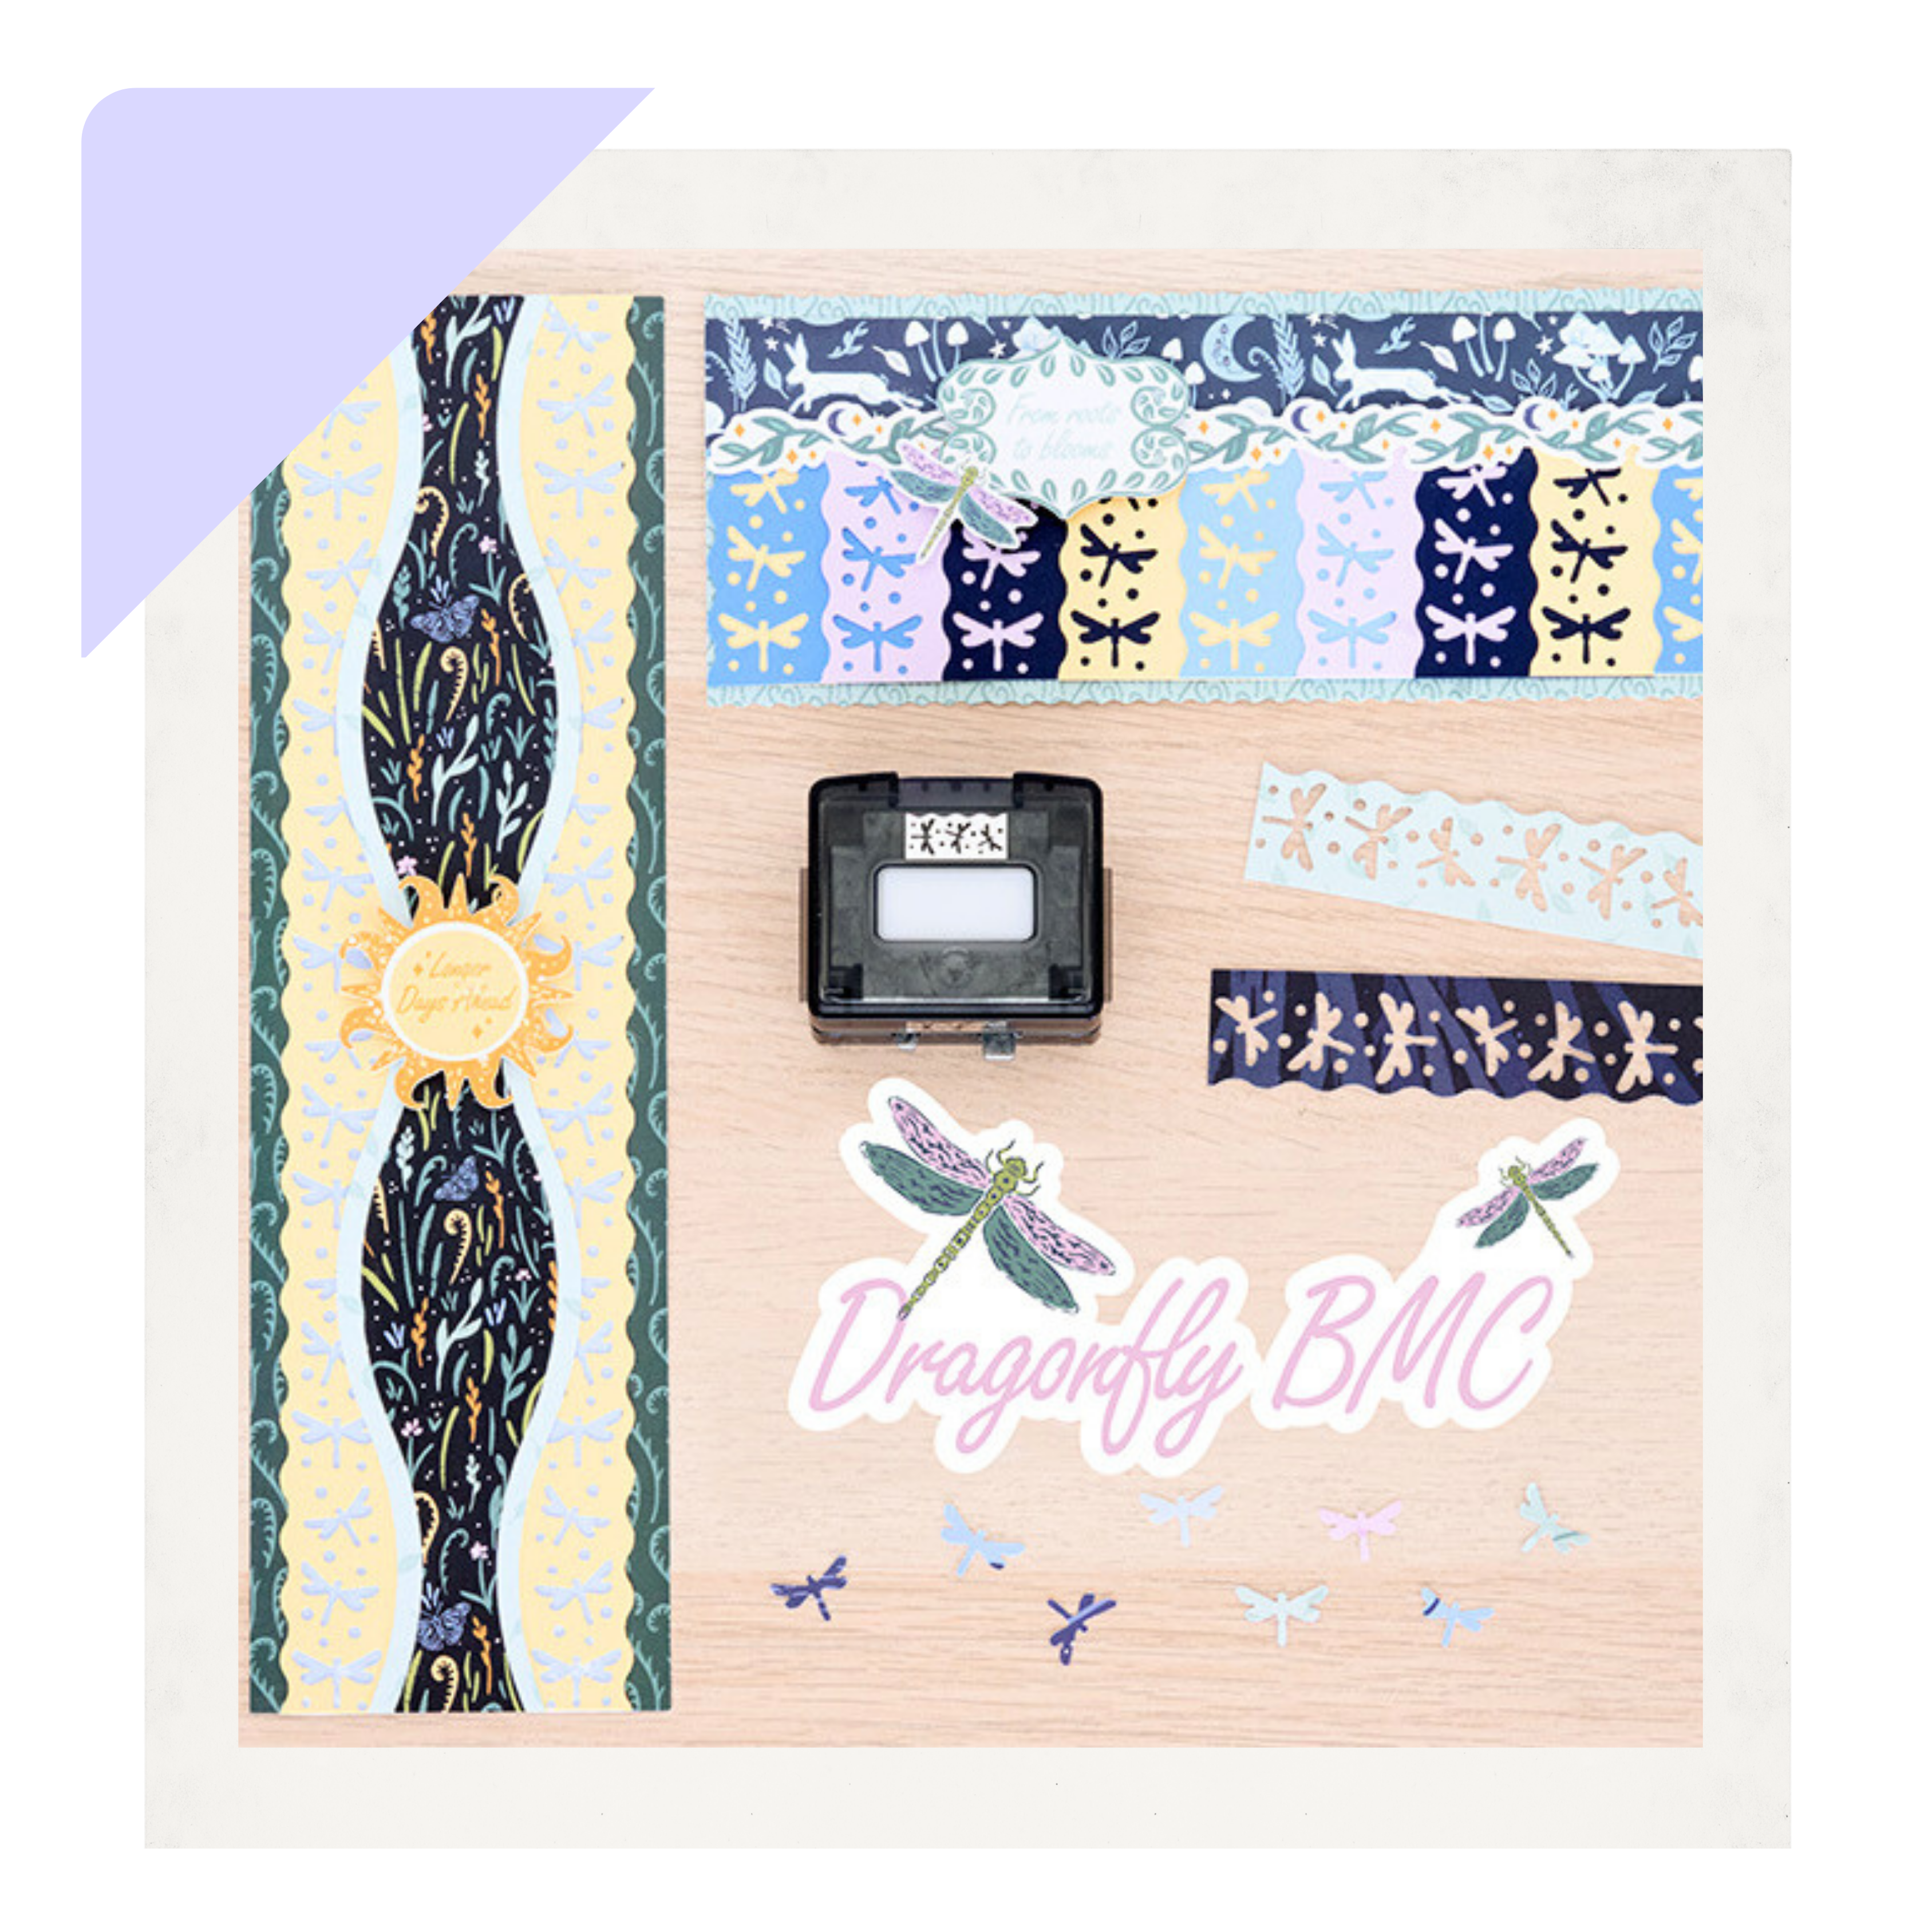
Dragonfly BMC Borders:
To create these borders, you will need these general products:
- Spring Equinox Designer Paper Pack
- Spring Equinox Fast2Fab™ Inspired Designer Paper
- Spring Equinox Stickers
- Spring Equinox Embellishments
- Songbird Blue Solid Cardstock
- Purple Ice Solid Cardstock
- Cornflower Blue Solid Cardstock
- Navy Solid Cardstock
- Canary Solid Carstock
- 12-inch Trimmer
- Wave Blade Cartridge
- Repositionable Tape Runner
- Foam Squares Variety Pack
- Custom Cutting System Border Cutting Tools and Red Blade
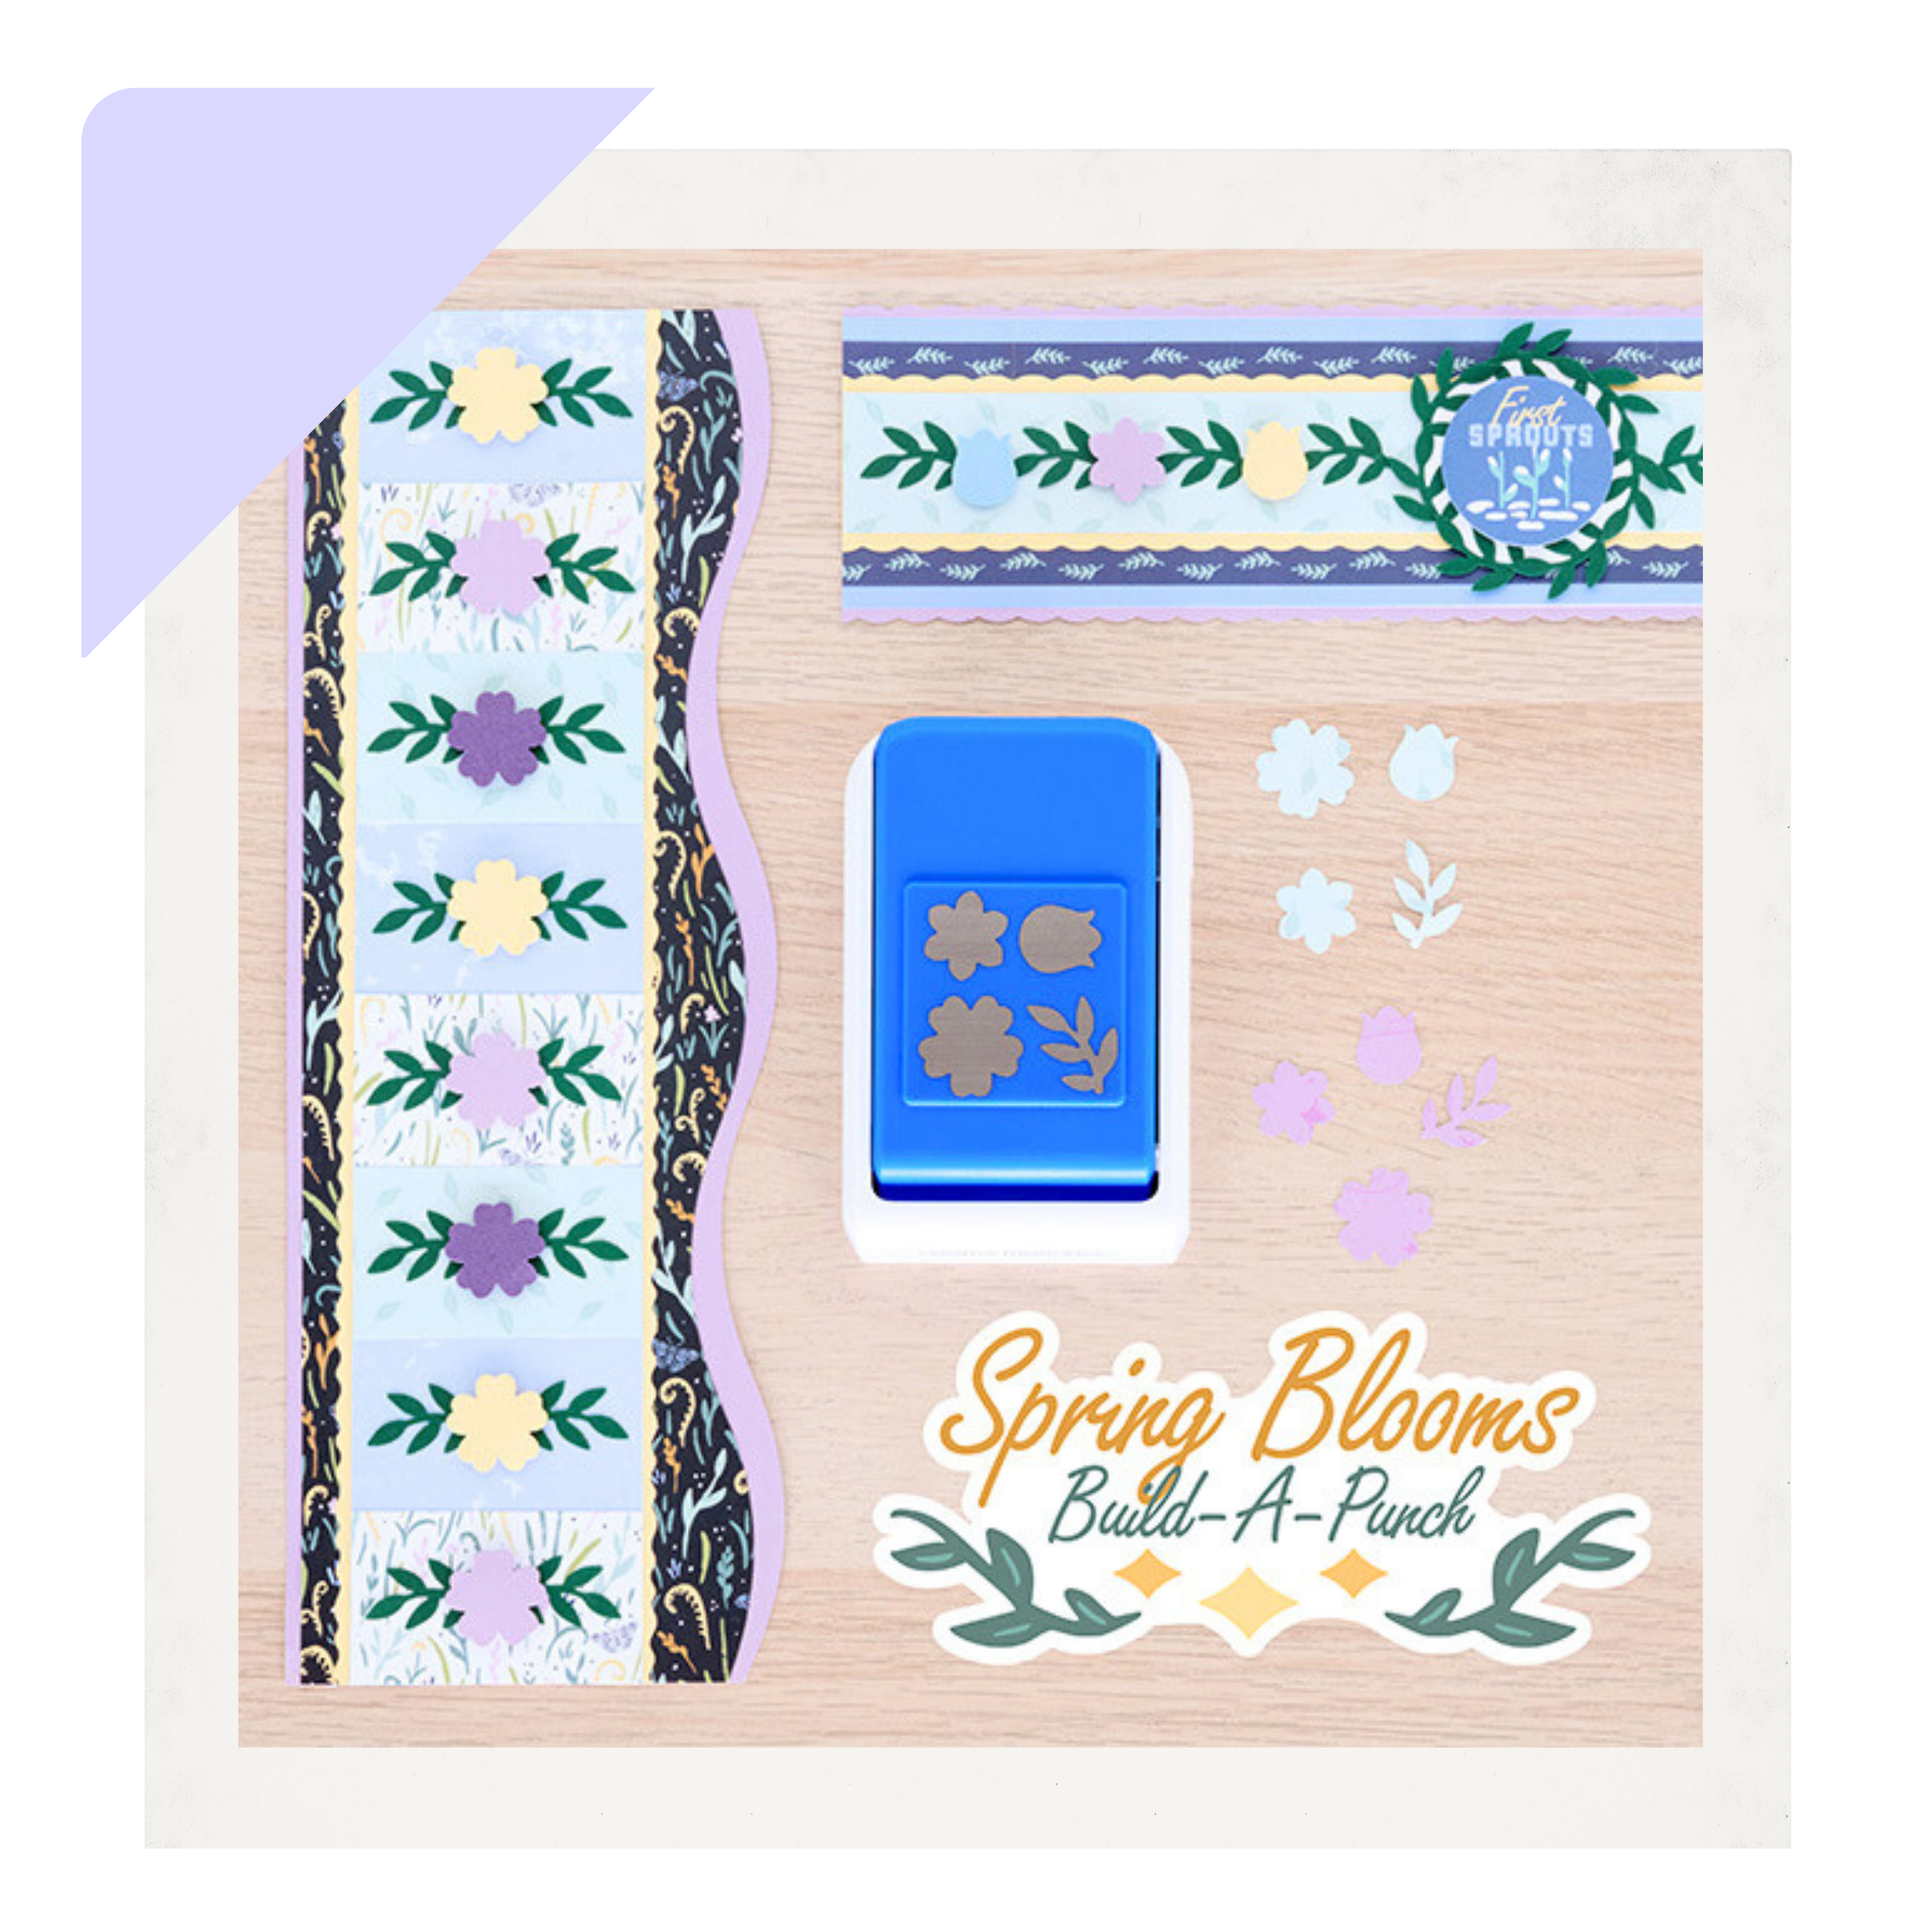
Spring Blooms Build-a-Punch Borders:
To create these borders, you will need these general products:
- Spring Equinox Designer Paper Pack
- Spring Equinox Fast2Fab™ Inspired Designer Paper
- Spring Equinox Stickers
- Spring Equinox Embellishments
- Bright White Solid Cardstock
- Custom Cutting System Bundle
- Songbird Blue Solid Cardstock
- Purple Ice Solid Cardstock
- Dark Green Solid Cardstock
- Canary Solid Cardstock
- Eggplant Solid Cardstock
- 12-inch Trimmer
- 12-inch Trimmer Scallop Blade
- Repositionable Tape Runner
- Foam Squares Variety Pack


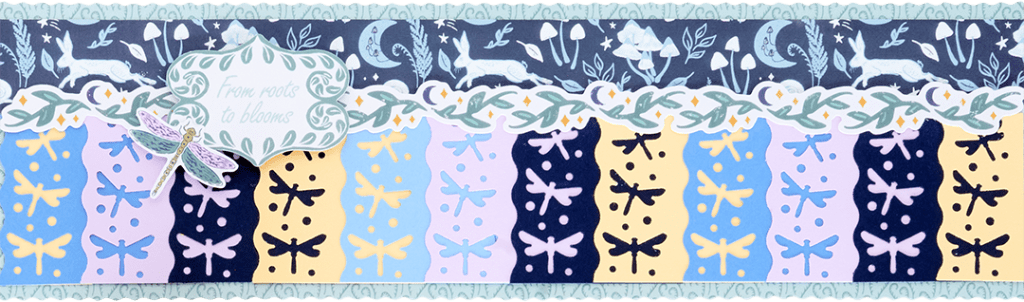
Step 1: Using the wave blade, cut a 12″ x 3-1/2″ strip with the light green F2F-inspired paper for the base. (With the straight blade) cut a 12″ x 1″ strip with blue forest animals F2F-inspired paper and adhere it near the top of the base.
Step 2: Using the Dragonfly BMC, punch borders with each Songbird Blue, Cornflower Blue, Navy, Purple Ice and Canary Solid Cardstock, trimming each border off at 2″. Cut the borders apart into 2″ sections. Layer and adhere the sections as shown on the bottom section of the base, working from left to right. After adhering the final canary piece on the right, trim it off at 1″ and adhere the solid (unpunched) piece underneath the first section on the left side of the border.
Step 3: Adhere a foliage border sticker along the seam. Adhere title and dragonfly stickers using foam squares for added dimension.

Step 1: Cut a 3-1/2″ x 12″ strip with ferns designer paper for the base. Cut a 2-3/4″ X 12″ strip with the blue tonal paper and adhere it onto the base.
Step 2: Cut a 3-1/4″ x 12″ strip with Canary Solid Cardstock. Using the Dragonfly BMC, punch both long sides of the strip. Adhere on top of the blue tonal paper.
Step 3: Using the Ripple edge of the CCS Border Cutting Tools and the red blade, cut a 2″ x 12″ strip with the little leaves designer paper; then cut a 1-5/8″ x 12″ strip with forest foliage paper. Layer and adhere both strips onto the border as shown.
Step 4: Adhere the title sticker using foam squares for added dimension.

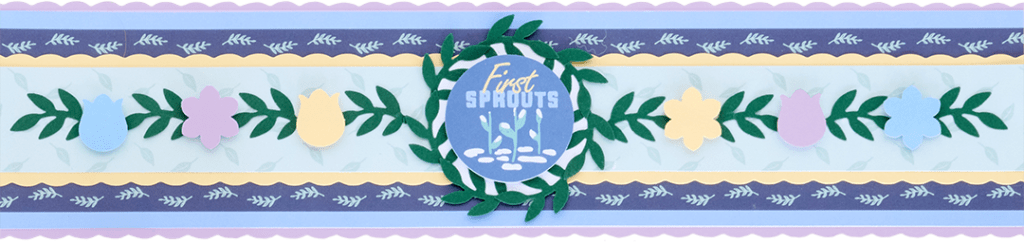
Step 1: Using the scallop blade, cut a 12″ x 2-3/4″ strip with Purple Ice Solid Cardstock for the base. (With the straight blade) cut two 12″ x 5/8″ strips with stripes designer paper and adhere it 1/8″ from the top and bottom of the border.
Step 2: Using the scallop blade, cut a 12″ x 1-1/2″ strip with the Canary Solid Cardstock. Adhere the strip onto the border. (With the straight blade) cut a 12″ x 1-1/4″ strip with the little leaves designer paper and mount it on top.
Step 3: Using the Spring Blooms Build-a-Punch, punch shapes with Songbird Blue, Purple Ice and Canary Solid Cardstock. Cut a 1″ strip with the Dark Green Solid Cardstock. Feed it into the leaves area of the punch and punch just the leaves. Repeat to punch 15 leaves shapes. Adhere eight of the leaves onto the border, adhering small flowers (using foam squares) in between, as shown. Leave a space in the center.
Step 4: Using the inside of the medium CCS circle pattern and the blue blade, cut a circle with Bright White Solid Cardstock. Adhere 7 leaves shapes around the outside of the circle, overlapping slightly, to form a wreath. Adhere it on the center of the border. Adhere the “First Shoots” embellishment using foam squares.

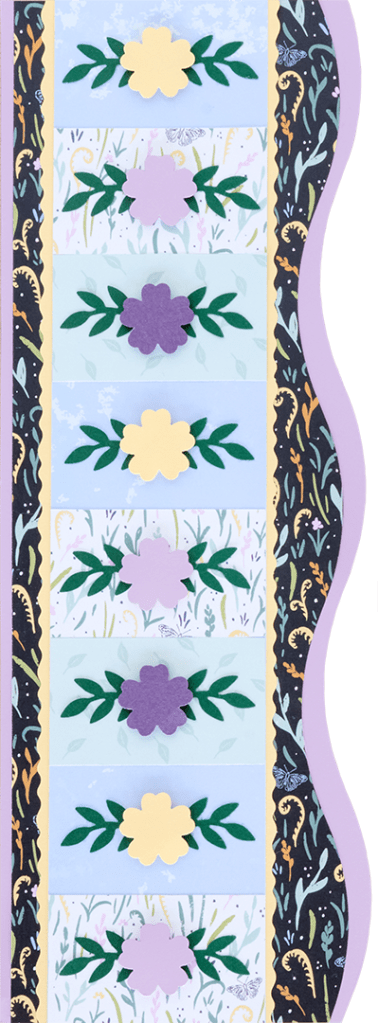
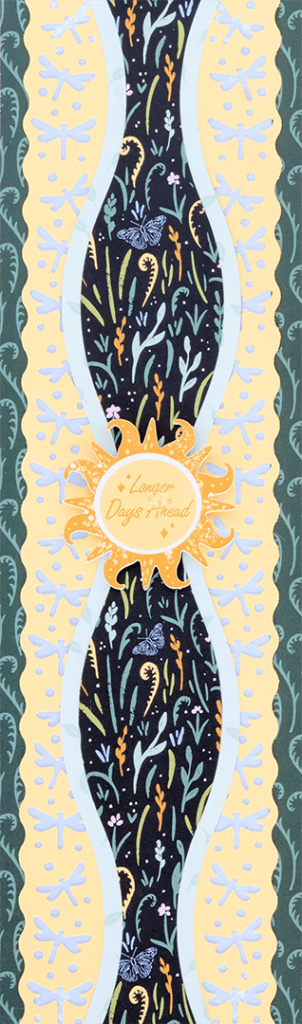
Step 1: Using the Ripple edge of the CCS Border Cutting Tools and the red blade, cut a 4-1/4″ x 12″ strip with Purple Ice Solid Cardstock for the base. Using the same edge and blade, but placing the paper slightly lower on the cutting mat, cut a 3-3/4″ x 12″ strip with forest foliage designer paper and adhere it onto the base.
Step 2: Using the twist blade, cut a 2-3/4″ x 12″ strip with Canary Solid Cardstock and adhere it onto the border, 1/2″ from the left edge. (With the straight blade) cut a 2-1/2″ x 12″ strip with the blue tonal paper and adhere on top of the border.
Step 3: Cut three 2-1/2″ x 1-1/2″ pieces with white foliage F2F-inspired paper and two pieces with the little leaves designer paper. Adhere on the blue tonal paper strip as shown.
Step 4: Using the Spring Blooms Build-a-Punch, punch out 8 of the larger flower shapes with Canary, Purple Ice and Eggplant Solid Cardstock. Cut 1″ strips with the Dark Green Solid Cardstock and punch out 16 of the leaves shapes. Adhere the shapes as shown on each of the sections, popping the flowers up with foam squares.
A few blooms and a dragonfly or two can go a long way. Try these borders on your spring pages and watch your layouts take flight!
P.S. Are YOU a member of the Virtual Crop Group? It’s your go-to place for MONTHLY Virtual Crops, MONTHLY Completed Album Challenges, QUARTERLY Secret Box Openings with project tutorials and so much more! We hope you’ll join our community of more than 49,000 fellow memory-keeping enthusiasts — you’ll feel right at home!

