September 13, 2016
Study Buddies Scrapbooking Border Ideas
Just like clean notebooks and sharpened pencils, the new Study Buddies Collection is fresh, new and fun for all your Back-To-School pics!
To create these borders, you’ll need:
- Study Buddies Paper Pack, Slide-In Pack, Stickers and Embellishments
- Black Cardstock
- Original Border Maker System with Circle Weave, Chevron, Star, Picket Fence, Film Strip and Crown Cartridges
- Custom Cutting System
- 12″ Straight Trimmer
- Tape Runner and Repositionable Tape Runner Refill
- Foam Squares

School Days Bus Border
- Cut a strip of plaid paper to 2.5″ x 12″. Cut a strip of white ruled paper to 1″ x 12″ and adhere to border as shown.
- Using the Circle Weave cartridge, punch 1 border with green paper and 2 borders with red paper. With Repositionable Tape Runner, adhere green border down middle of ruled strip. Tuck 1 red border behind plaid border as shown.
- Cut the Notes circle out of a Slide-In card using the inside of the largest circle pattern and the red blade. Adhere school bus sticker with foam squares and add to the border.
- To make the School Days title box, tuck 1 red border behind the plaid Slide-In card and trim to 6″. Add the School Days sticker.
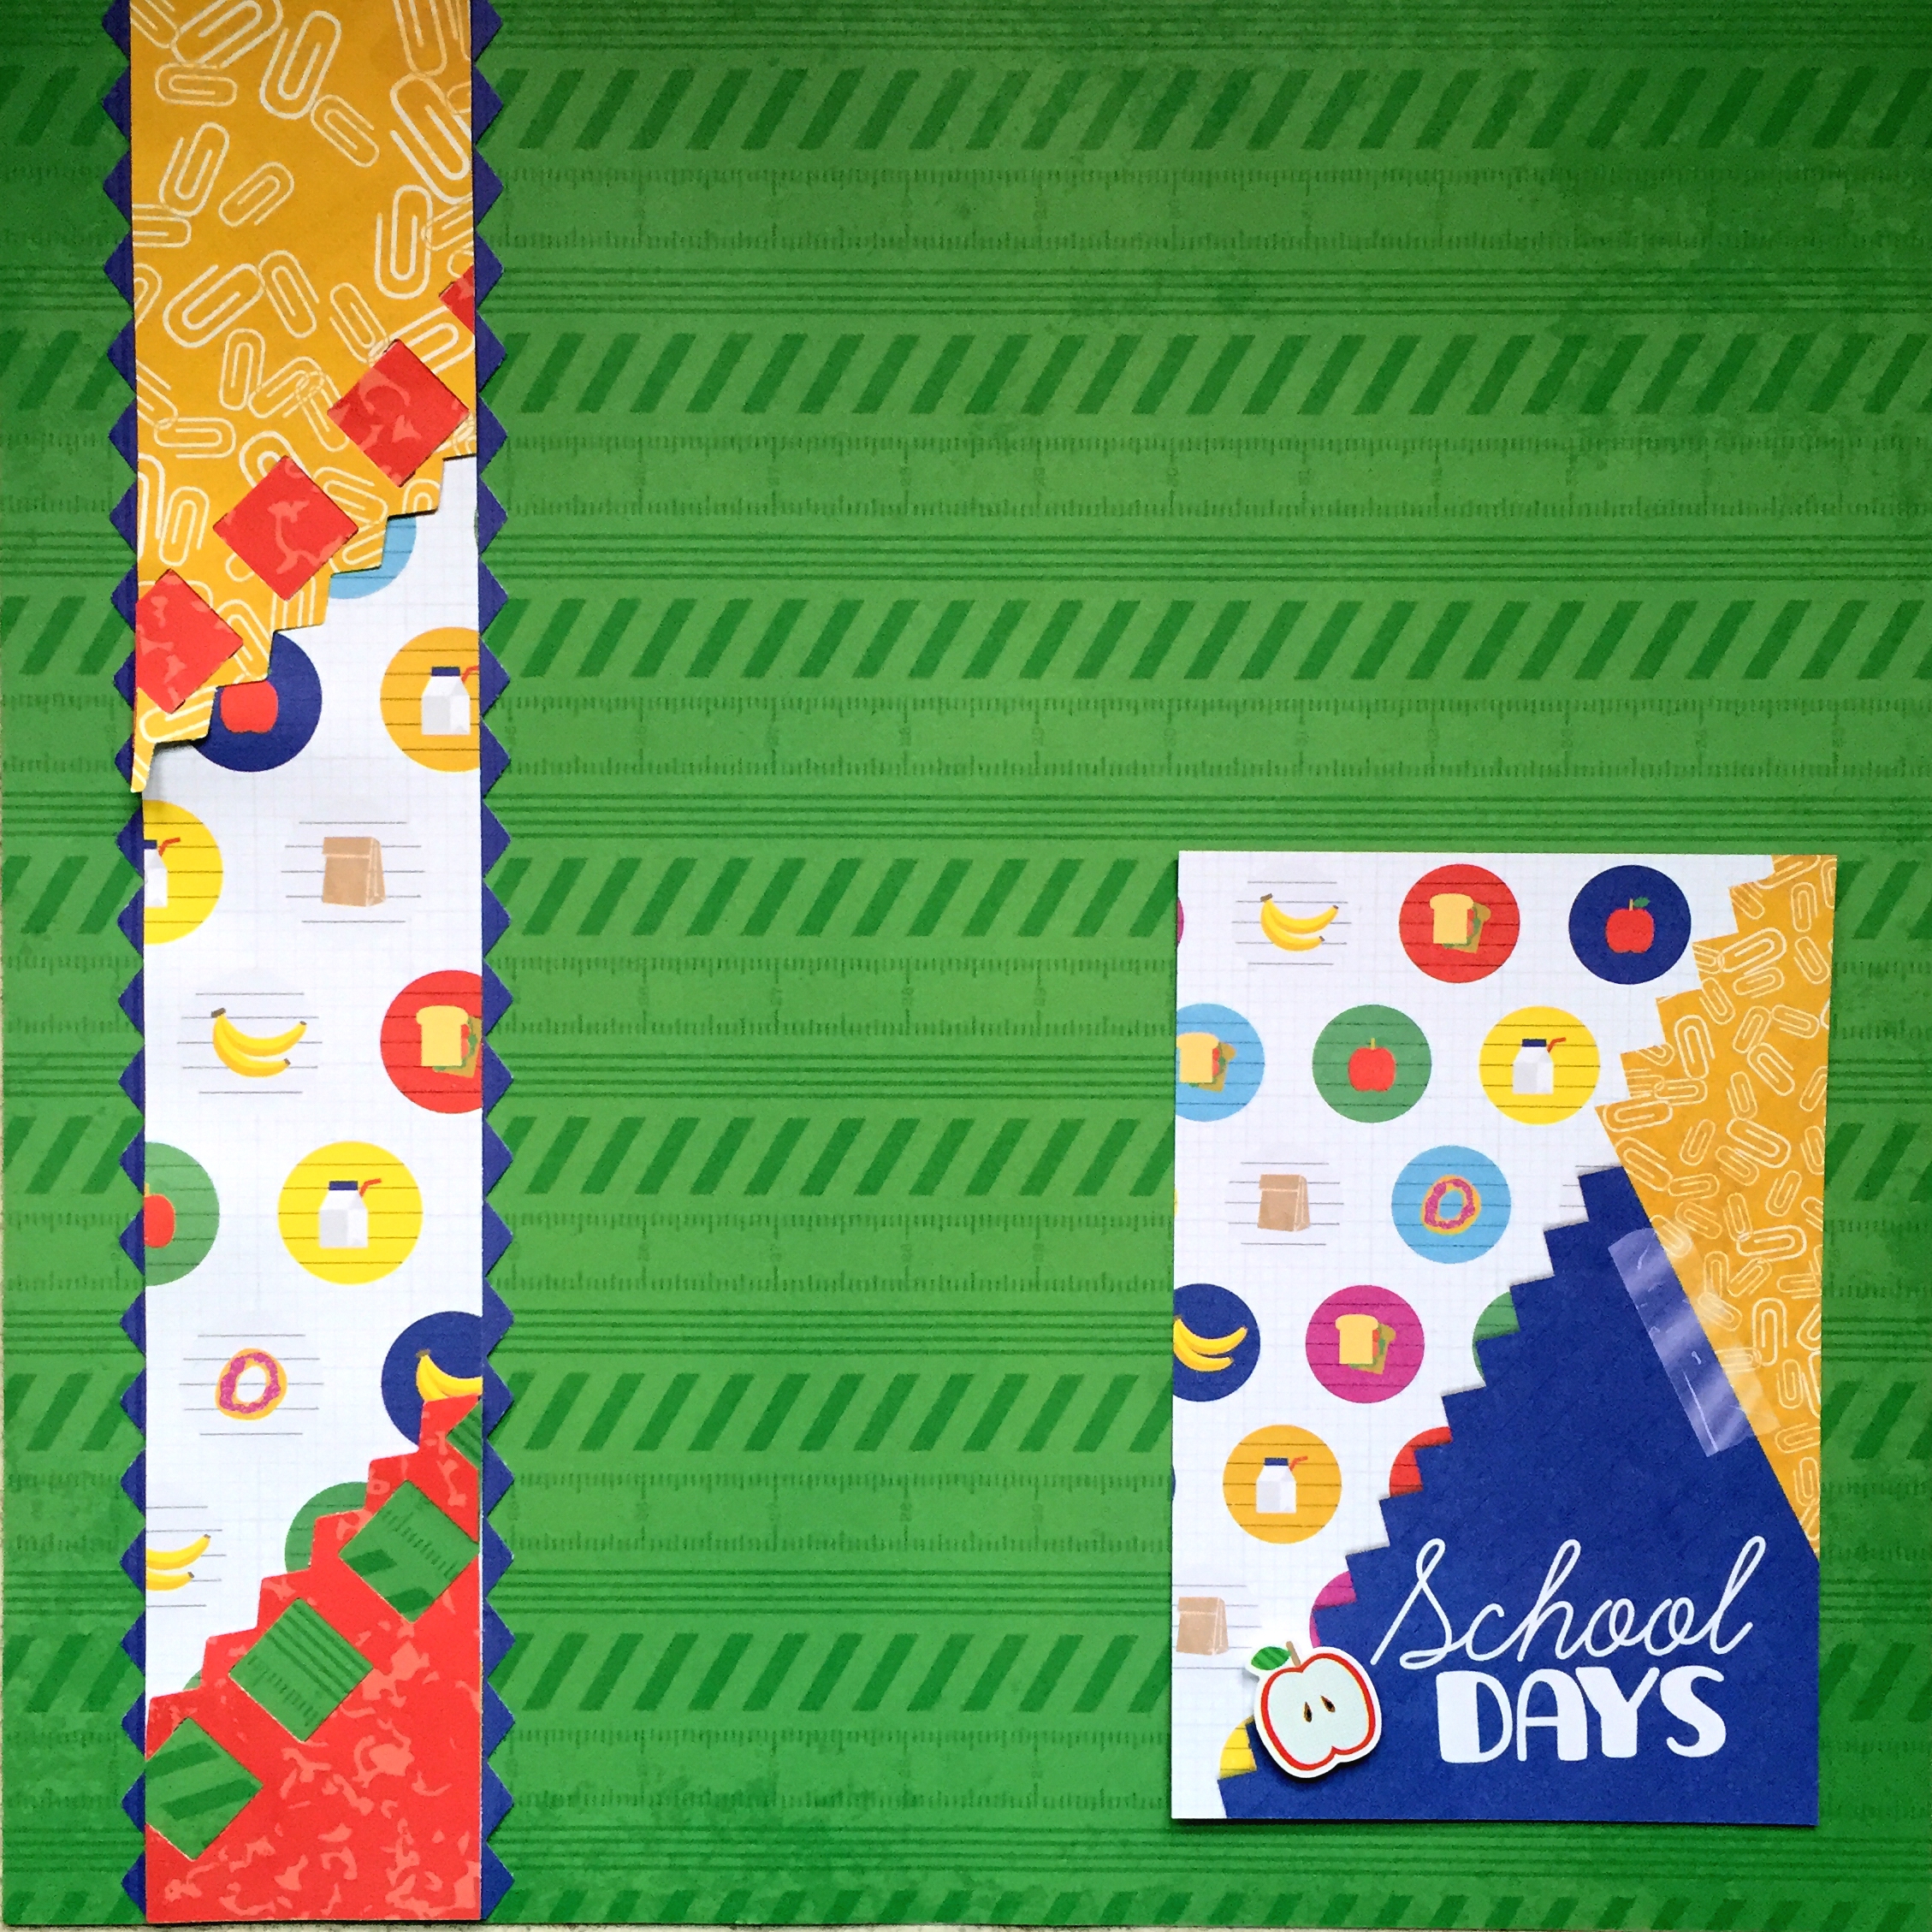
Lunchtime School Days Border
- Cut a piece of lunchtime paper to 2″ x 12″.
- Using the Picket Fence cartridge, punch 2 borders out of royal blue paper. Adhere behind above border as shown.
- Cut a scrap of both gold paper clip paper and red paper to 2″ wide and 3.5″-5″ long. Trim one end of each strip at an angle and punch the angled ends with the Picket Fence cartridge. Cut a scrap of both red and green papers to 5/8″ wide, thread through angled borders and add to border as shown.
- To make School Days title box, add an apple sticker with a foam square to the School Days Slide-In card.
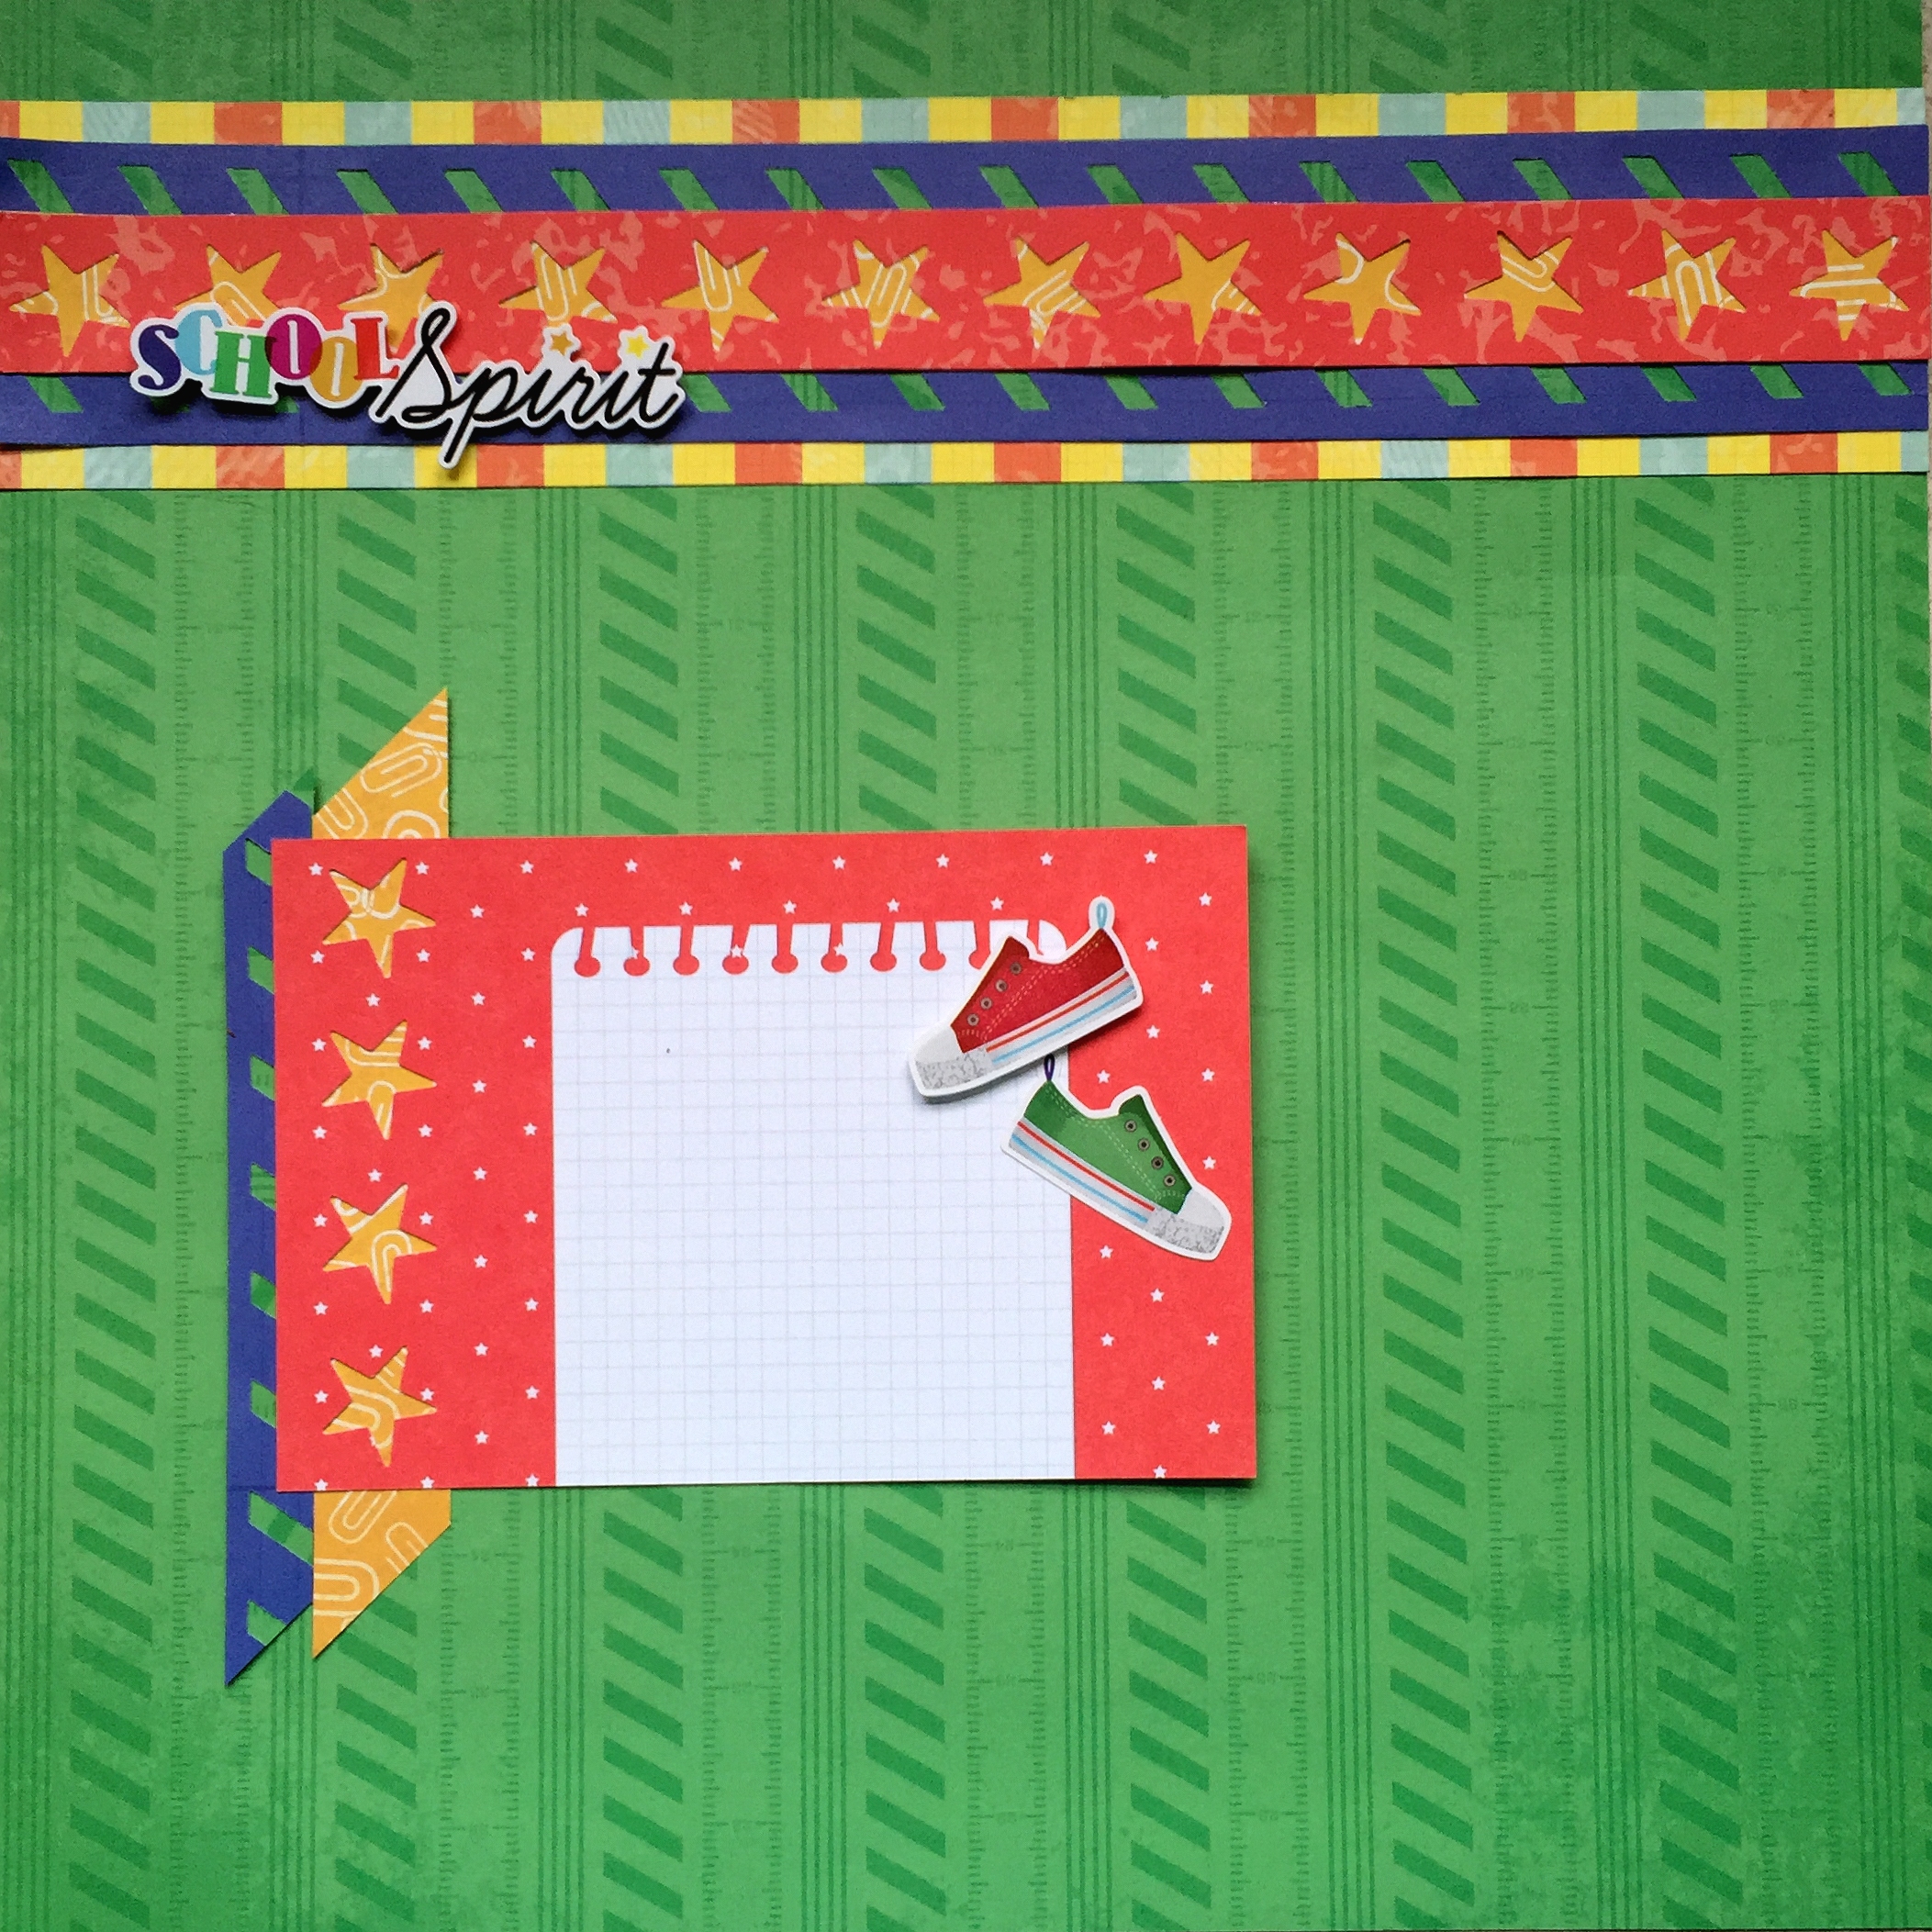
School Spirit Border
- Cut a piece of plaid paper to 2.5″ x 12″. Cut a piece of green paper to 2″ x 12″ and adhere to plaid border.
- Using Chevron cartridge, punch 2 borders out of royal blue paper. Cut in half lengthwise. Adhere each half down the edges of green strip as shown.
- Cut a strip of gold paper clip paper to 1″ x 12″. Using the Star cartridge, punch a border out of red paper. Trim to 1″ x 12″ and adhere to top of gold strip. Add to center of border.
- Add School Spirit sticker with foam squares.
- To make journal box, punch a star border along one edge of the red star Slide-In card as shown. Using scraps of paper and leftover punched borders, embellish as desired. Add sneaker stickers.
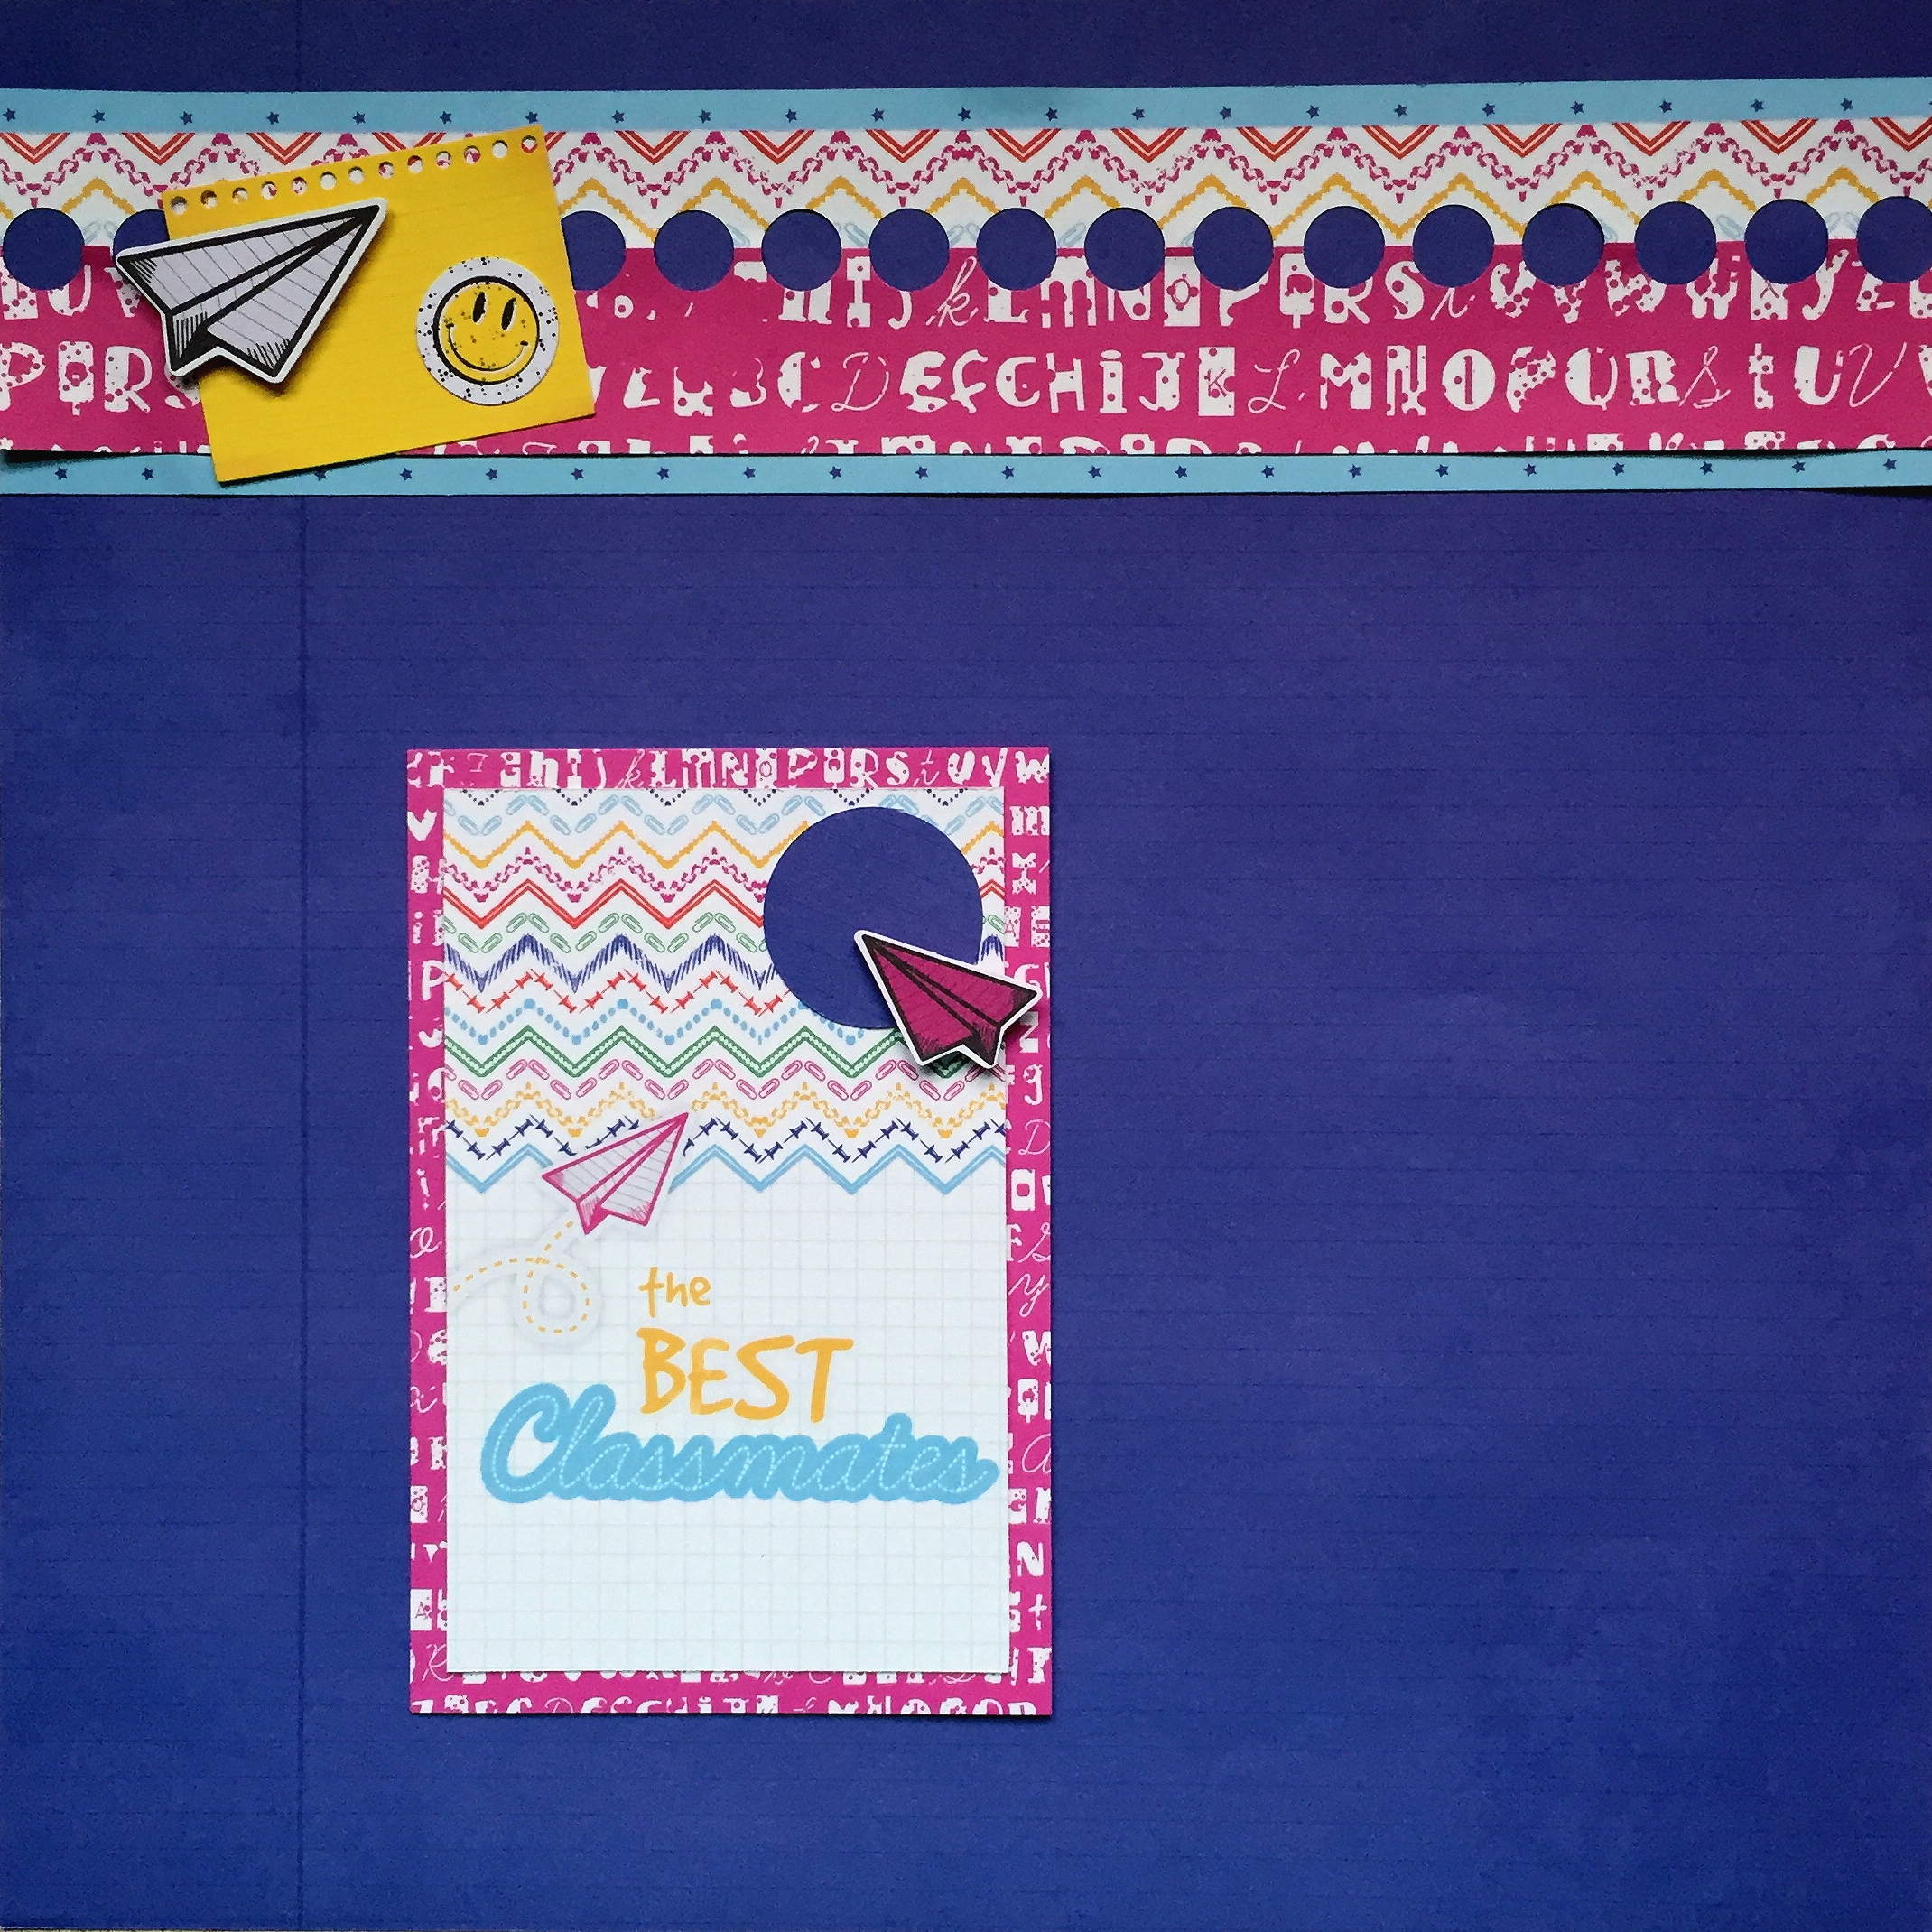
Best Classmates Border
- Cut a piece of light blue star paper to 2.5″ x 12″. Cut a piece of royal blue paper to 1″ x 12″ and adhere slightly off-center to border.
- Using the Crown cartridge, punch a border with pink ABC paper and again with zigzag paper. Using the trimmer, cut the tops off each border. Arrange borders as shown, creating circles with royal blue paper peeking out behind.
- Add note card, smiley face and paper airplane embellishments and stickers as desired.
- To make title box, trim 1/4″ off each side of The Best Classmates Slide-In card. Adhere to pink ABC Slide-In card. Cut a royal blue circle with the inside of the smallest pattern and the red blade. Add paper airplane embellishment with a foam square.

Back 2 the Books Border
- Cut a piece of light blue star paper to 2″ x 12″. Cut a piece of gold paper clip paper to 1″ x 12″ and adhere down center of border. Trim a 1″ strip of books out of Slide-In card and adhere to middle of border on gold strip.
- Using the Filmstrip cartridge, punch a border with black cardstock and another with red paper. Adhere black filmstrip over gold/books strip. Adhere red filmstrip at an angle over border as shown and trim.
- Add star embellishment with a foam square.
- To make title box, add Back 2 the Books sticker to black Slide-In card. Adhere scraps of red filmstrip at an angle as shown and trim. Apply books embellishment with a foam square.

The borders are simply the best ever. Your designers are the greatest. Thank you for making scrapbooking so much fun.
Thank you Krislyn Mattei!! These border are great!!
Can’t wait to try out these fantastic border ideas with my daughter’s school photos!
The Study Buddies collection looks great!