March 15, 2018
Connecting Traditional Scrapbook Pages and Fast2Fab™ Pages
What is the fastest way to a fabulous, complete scrapbook album? Fast2Fabs™ Albums of course! If you haven’t tried them for yourself, you will want to take a look at this post to see how one of our contributors, Karen, creatively integrated traditional pages with Fast2Fab™ pages.
When Fast2Fab™ Pages were released, I loved them but I wasn’t “sold” on them. I used them exclusively in albums but never mixed them with traditional pages or Pocket Pages because I didn’t know how to make them flow. Well, fast forward to today and my albums are filled with all the different page options that CM offers now and I LOVE THEM! I have discovered ways to connect traditional pages with Fast2Fab™ pages using borders and coordinating papers.
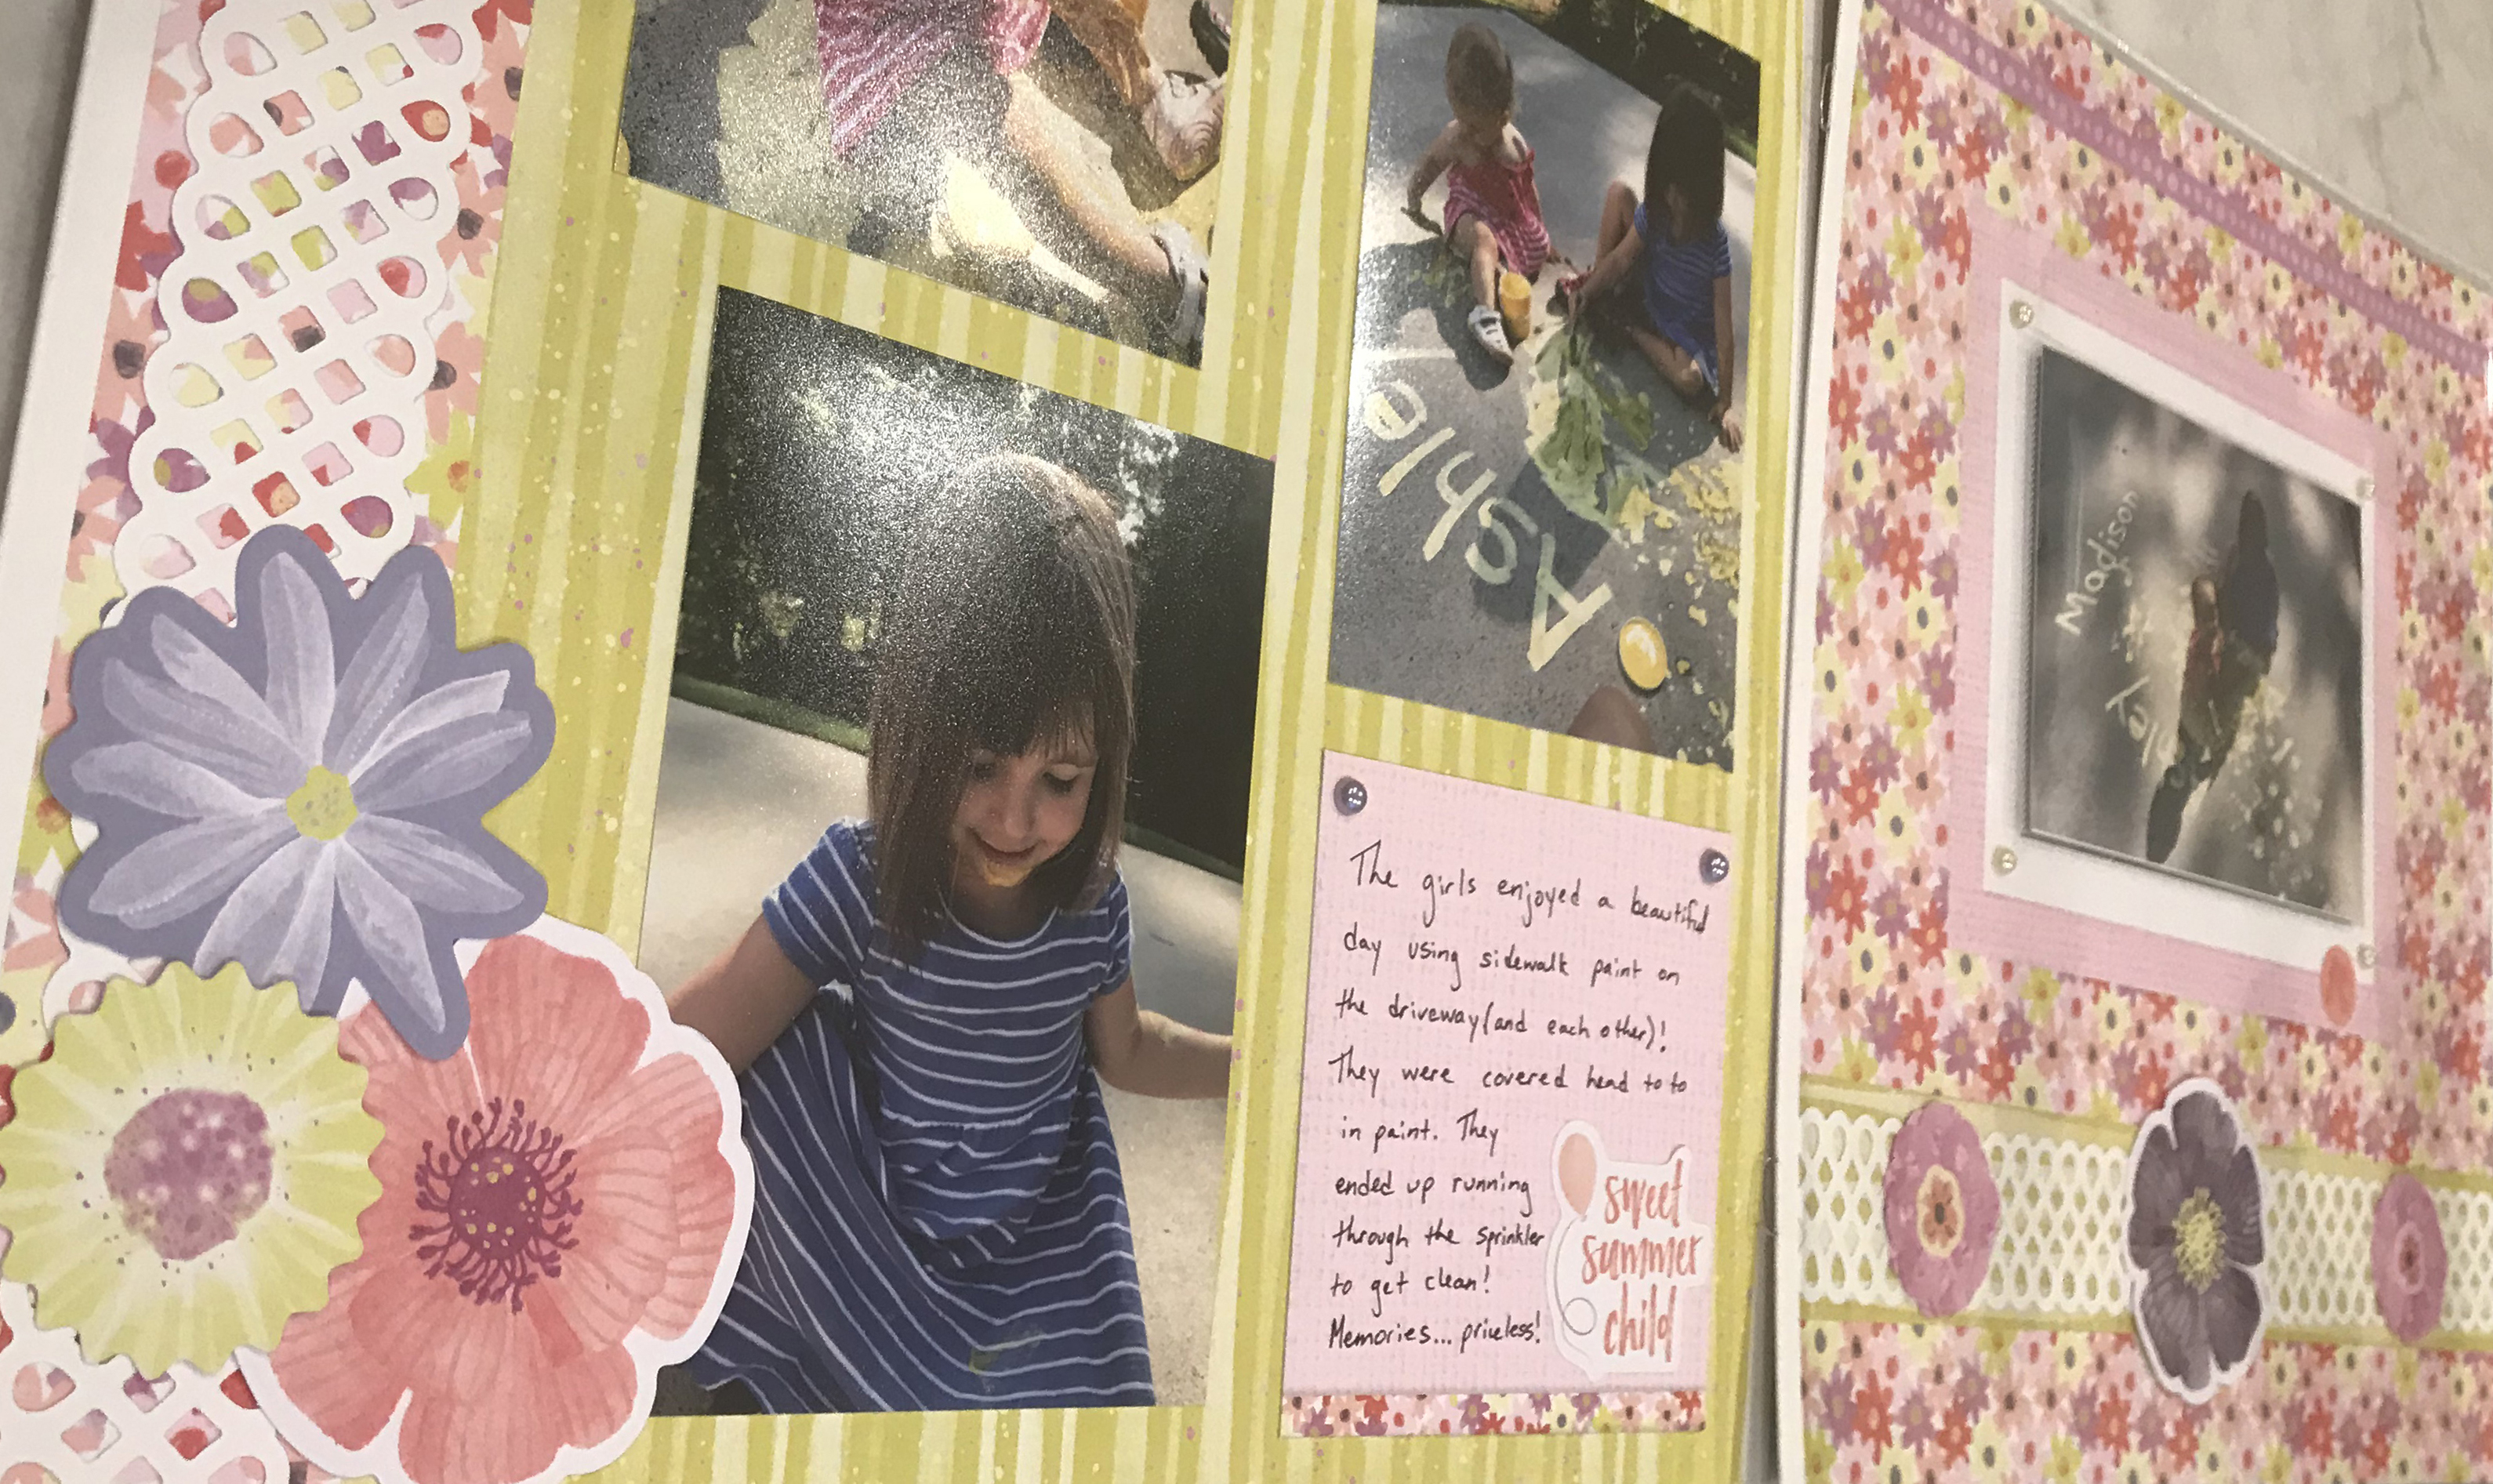
The pictures for this layout were from a summer day with my girls using sidewalk paint on the driveway. The Full Bloom Collection complemented the pictures perfectly. As a mom who takes A TON of pictures, it’s easy to say that Peekaboo Pockets™ have become a staple in my album making!!
To create these scrapbooking pages, you will need:
- White 12×12 Page
- Fast2Fab™ Full Bloom Refill Pages
- Full Bloom Paper Pack
- Full Bloom Stickers
- Full Bloom Embellishments
- Full Bloom Variety Mat Pack
- Dewdrop Flower Punch
- Teardrop Lattice Border Punch
- White Cardstock
- Peekaboo Pockets™
- Tape Runner and Repositionable Tape Runner Refill
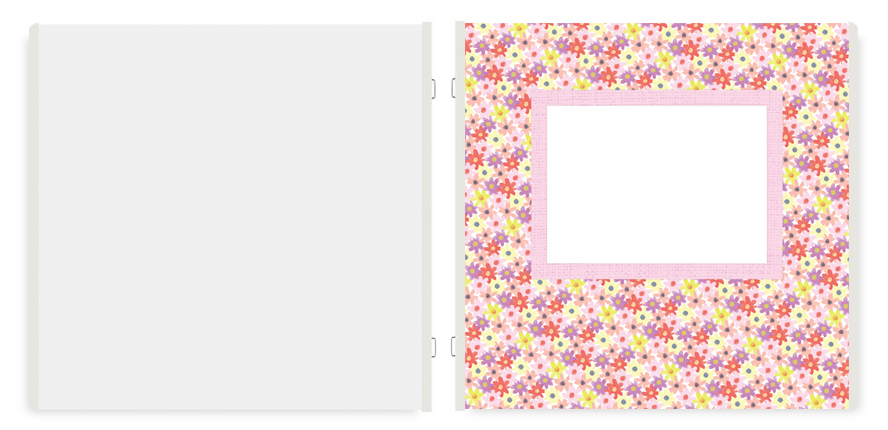
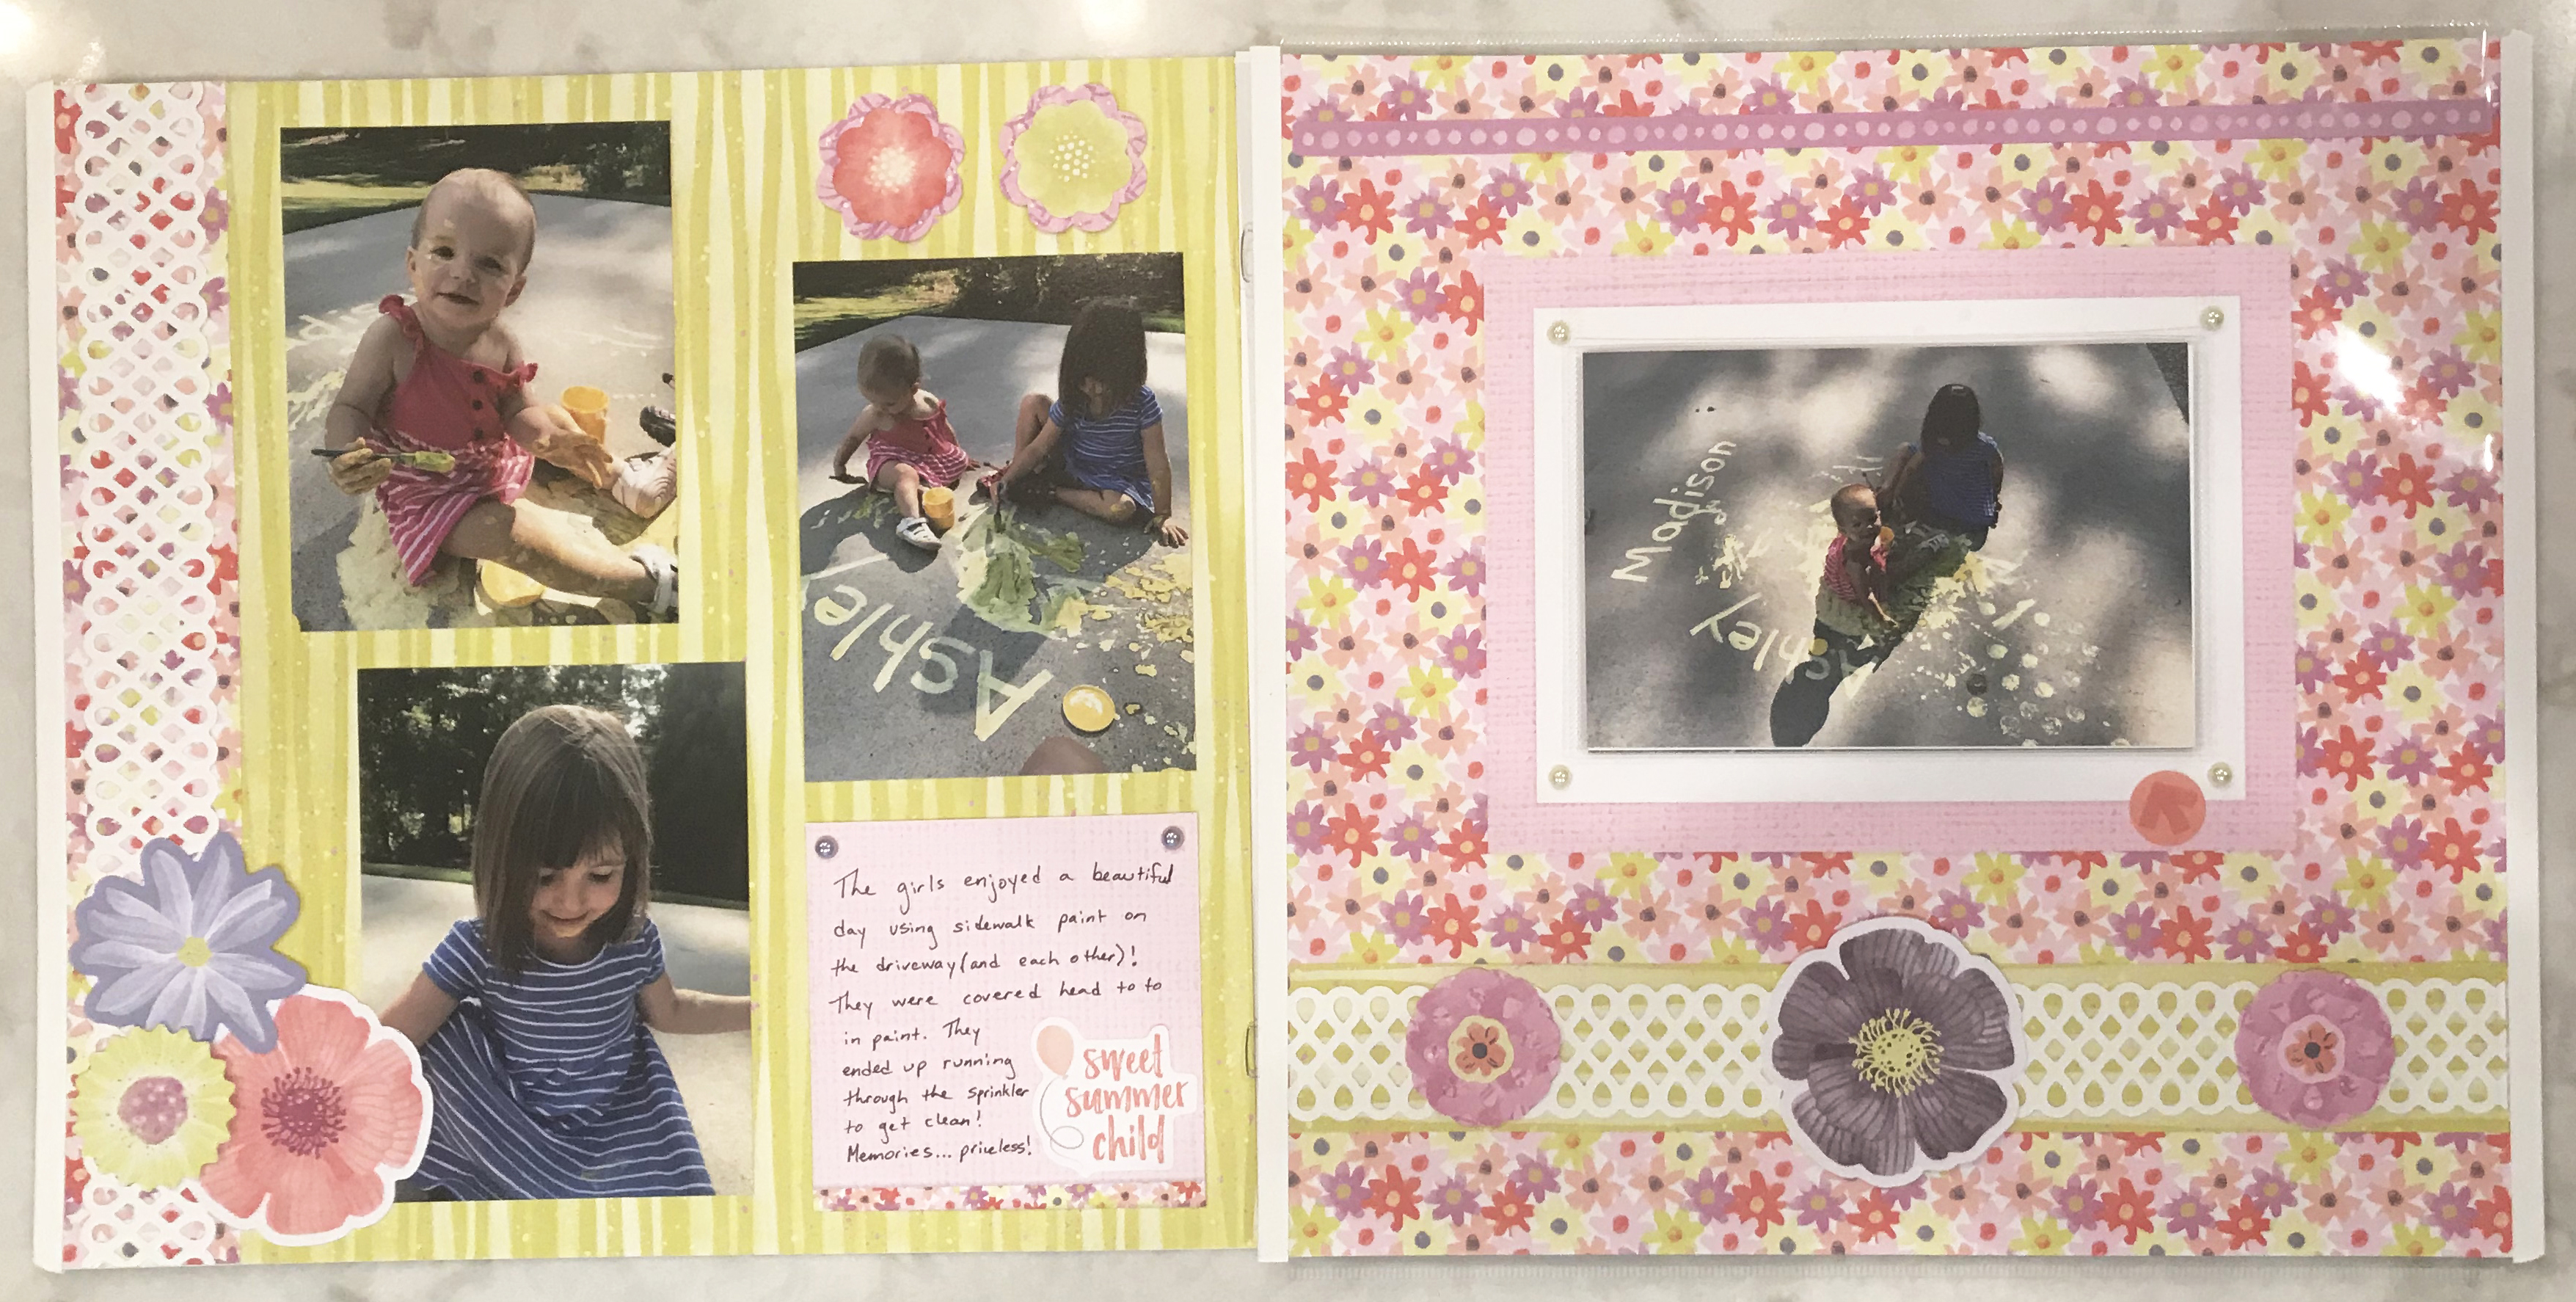
Step 1: Place a White 12×12 Page on left and Fast2Fab™ Full Bloom Page on the right.
Step 2: Using the 12-inch Straight Trimmer, cut a strip of the yellow striped paper to measure 1-5/8″. Make sure to cut paper in the direction you prefer the lines to run.
Step 3: Adhere the remaining large piece of yellow striped paper to the left page using a Tape Runner. Leave room on the left side for a border.
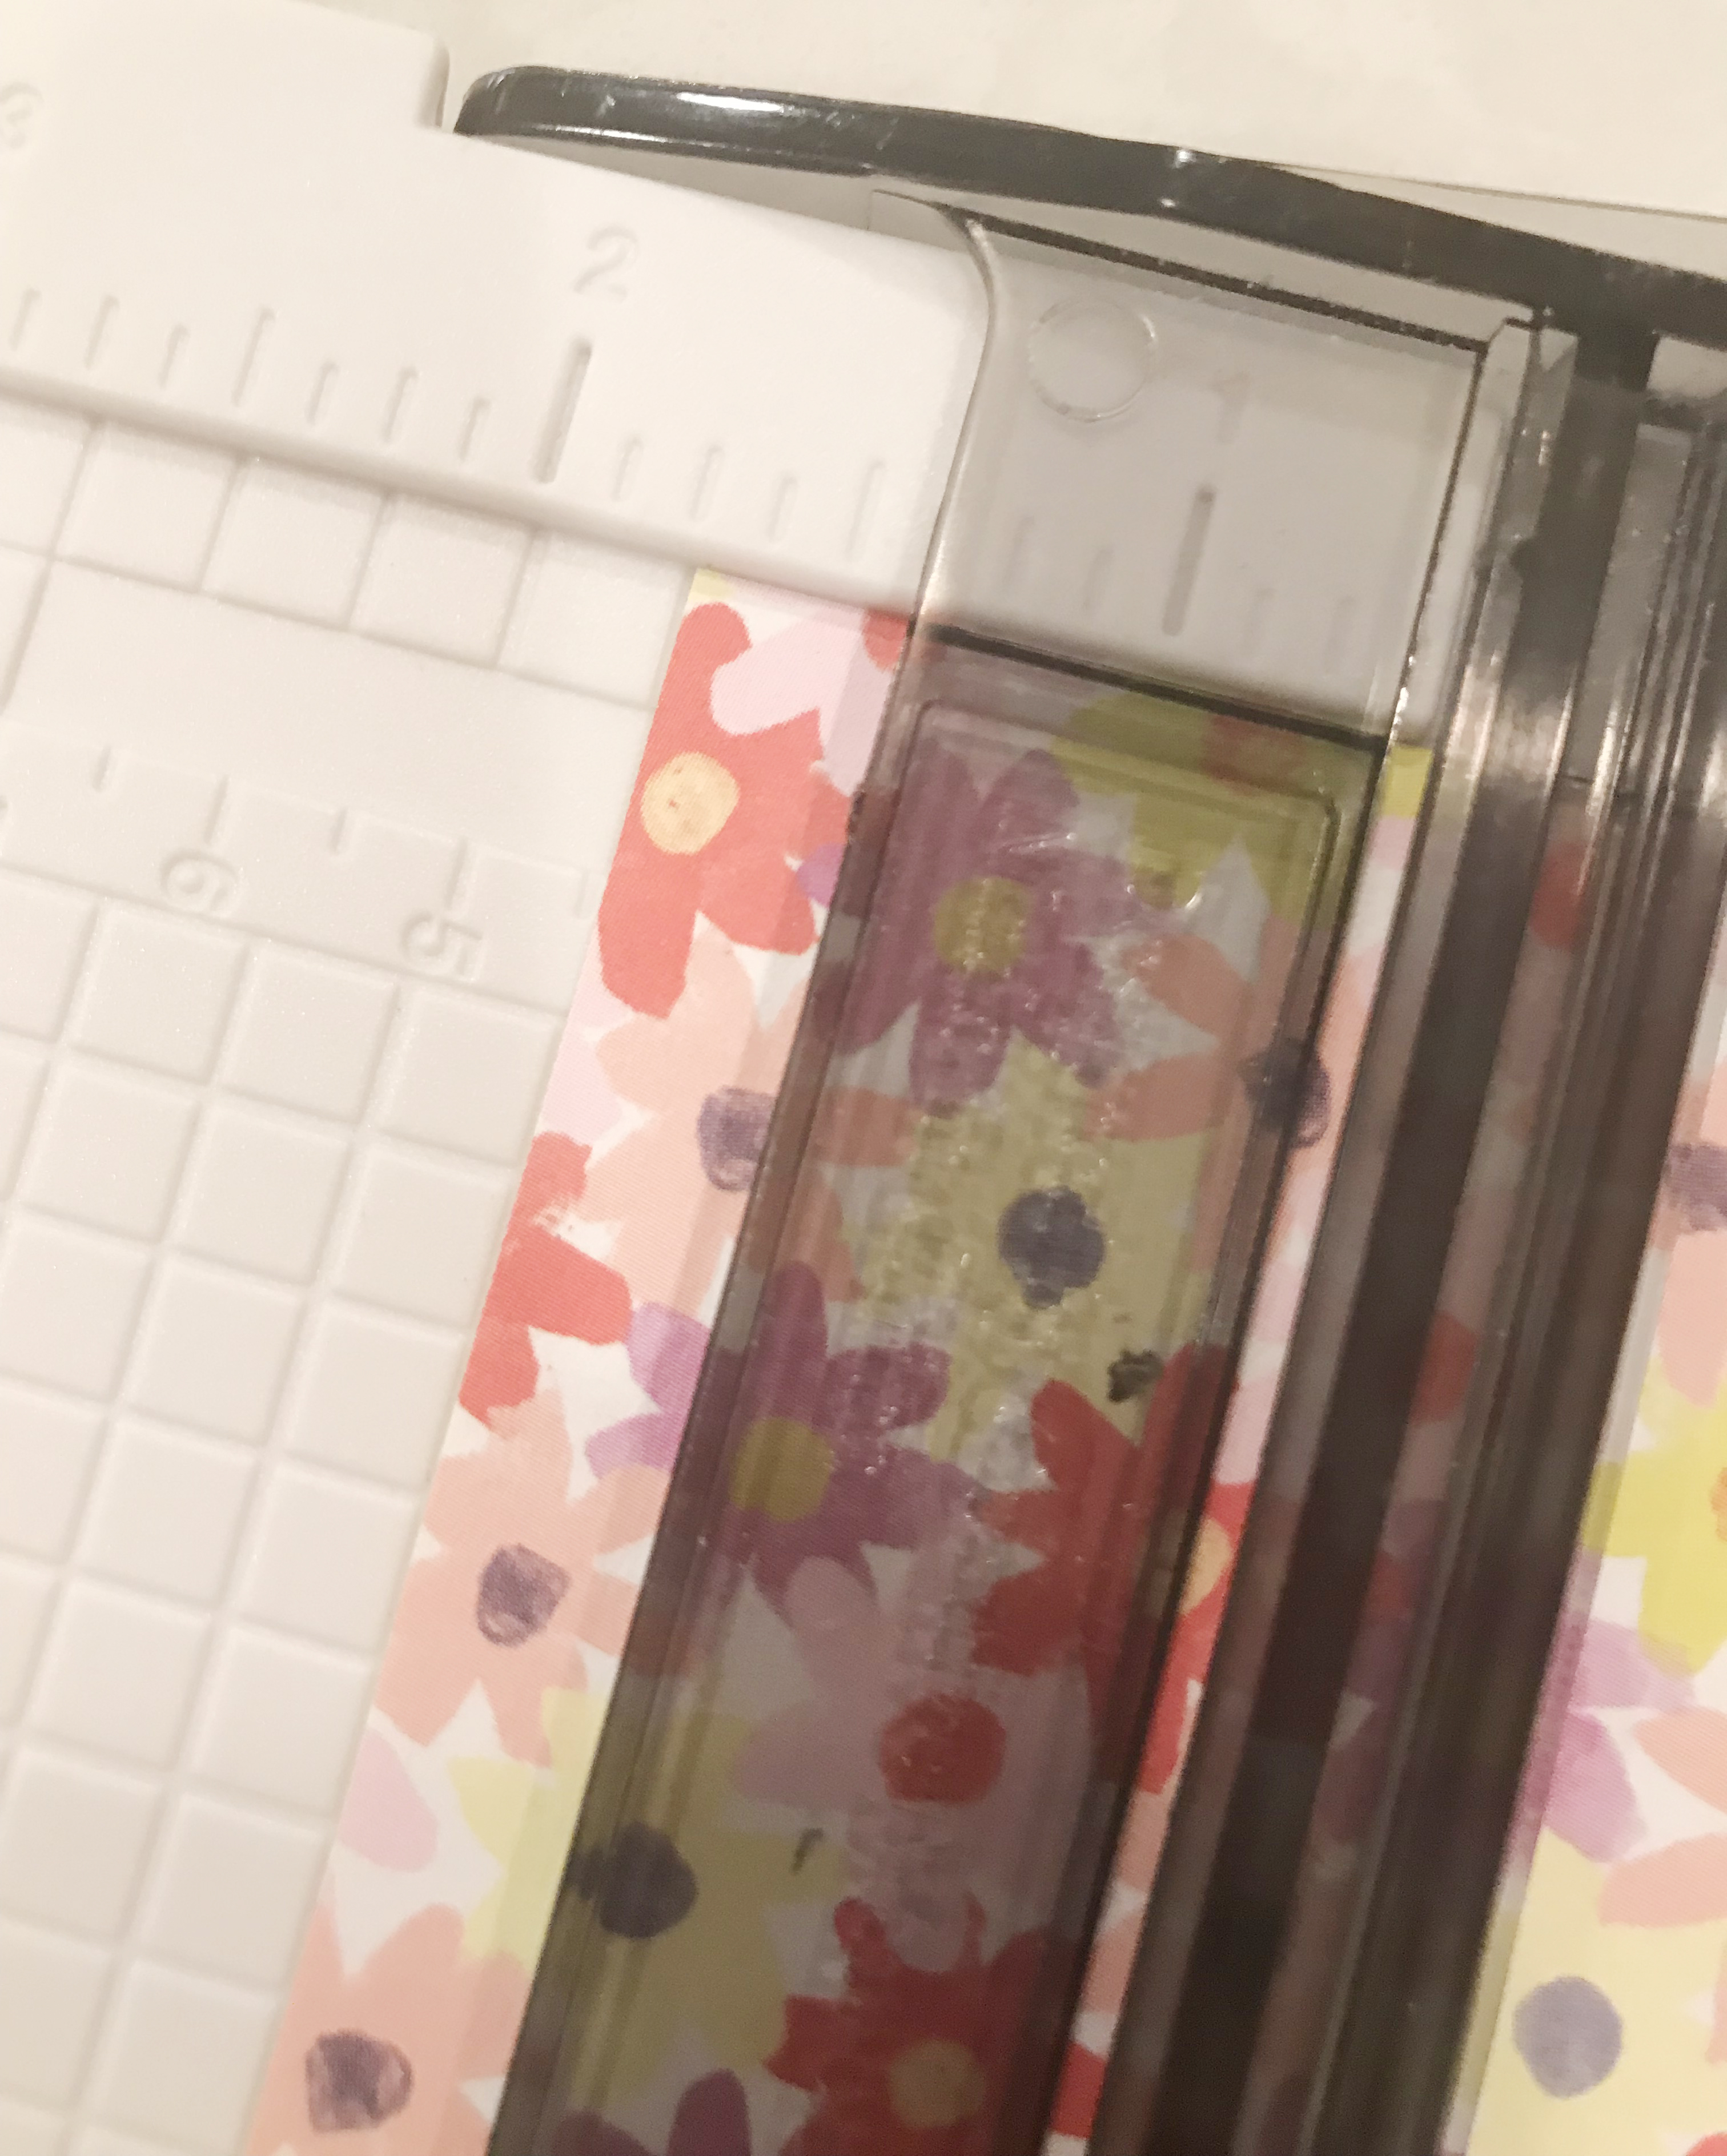
Step 4: Using the 12-inch Straight Trimmer, cut the colorful daisy patterned paper to measure 1-3/4″.
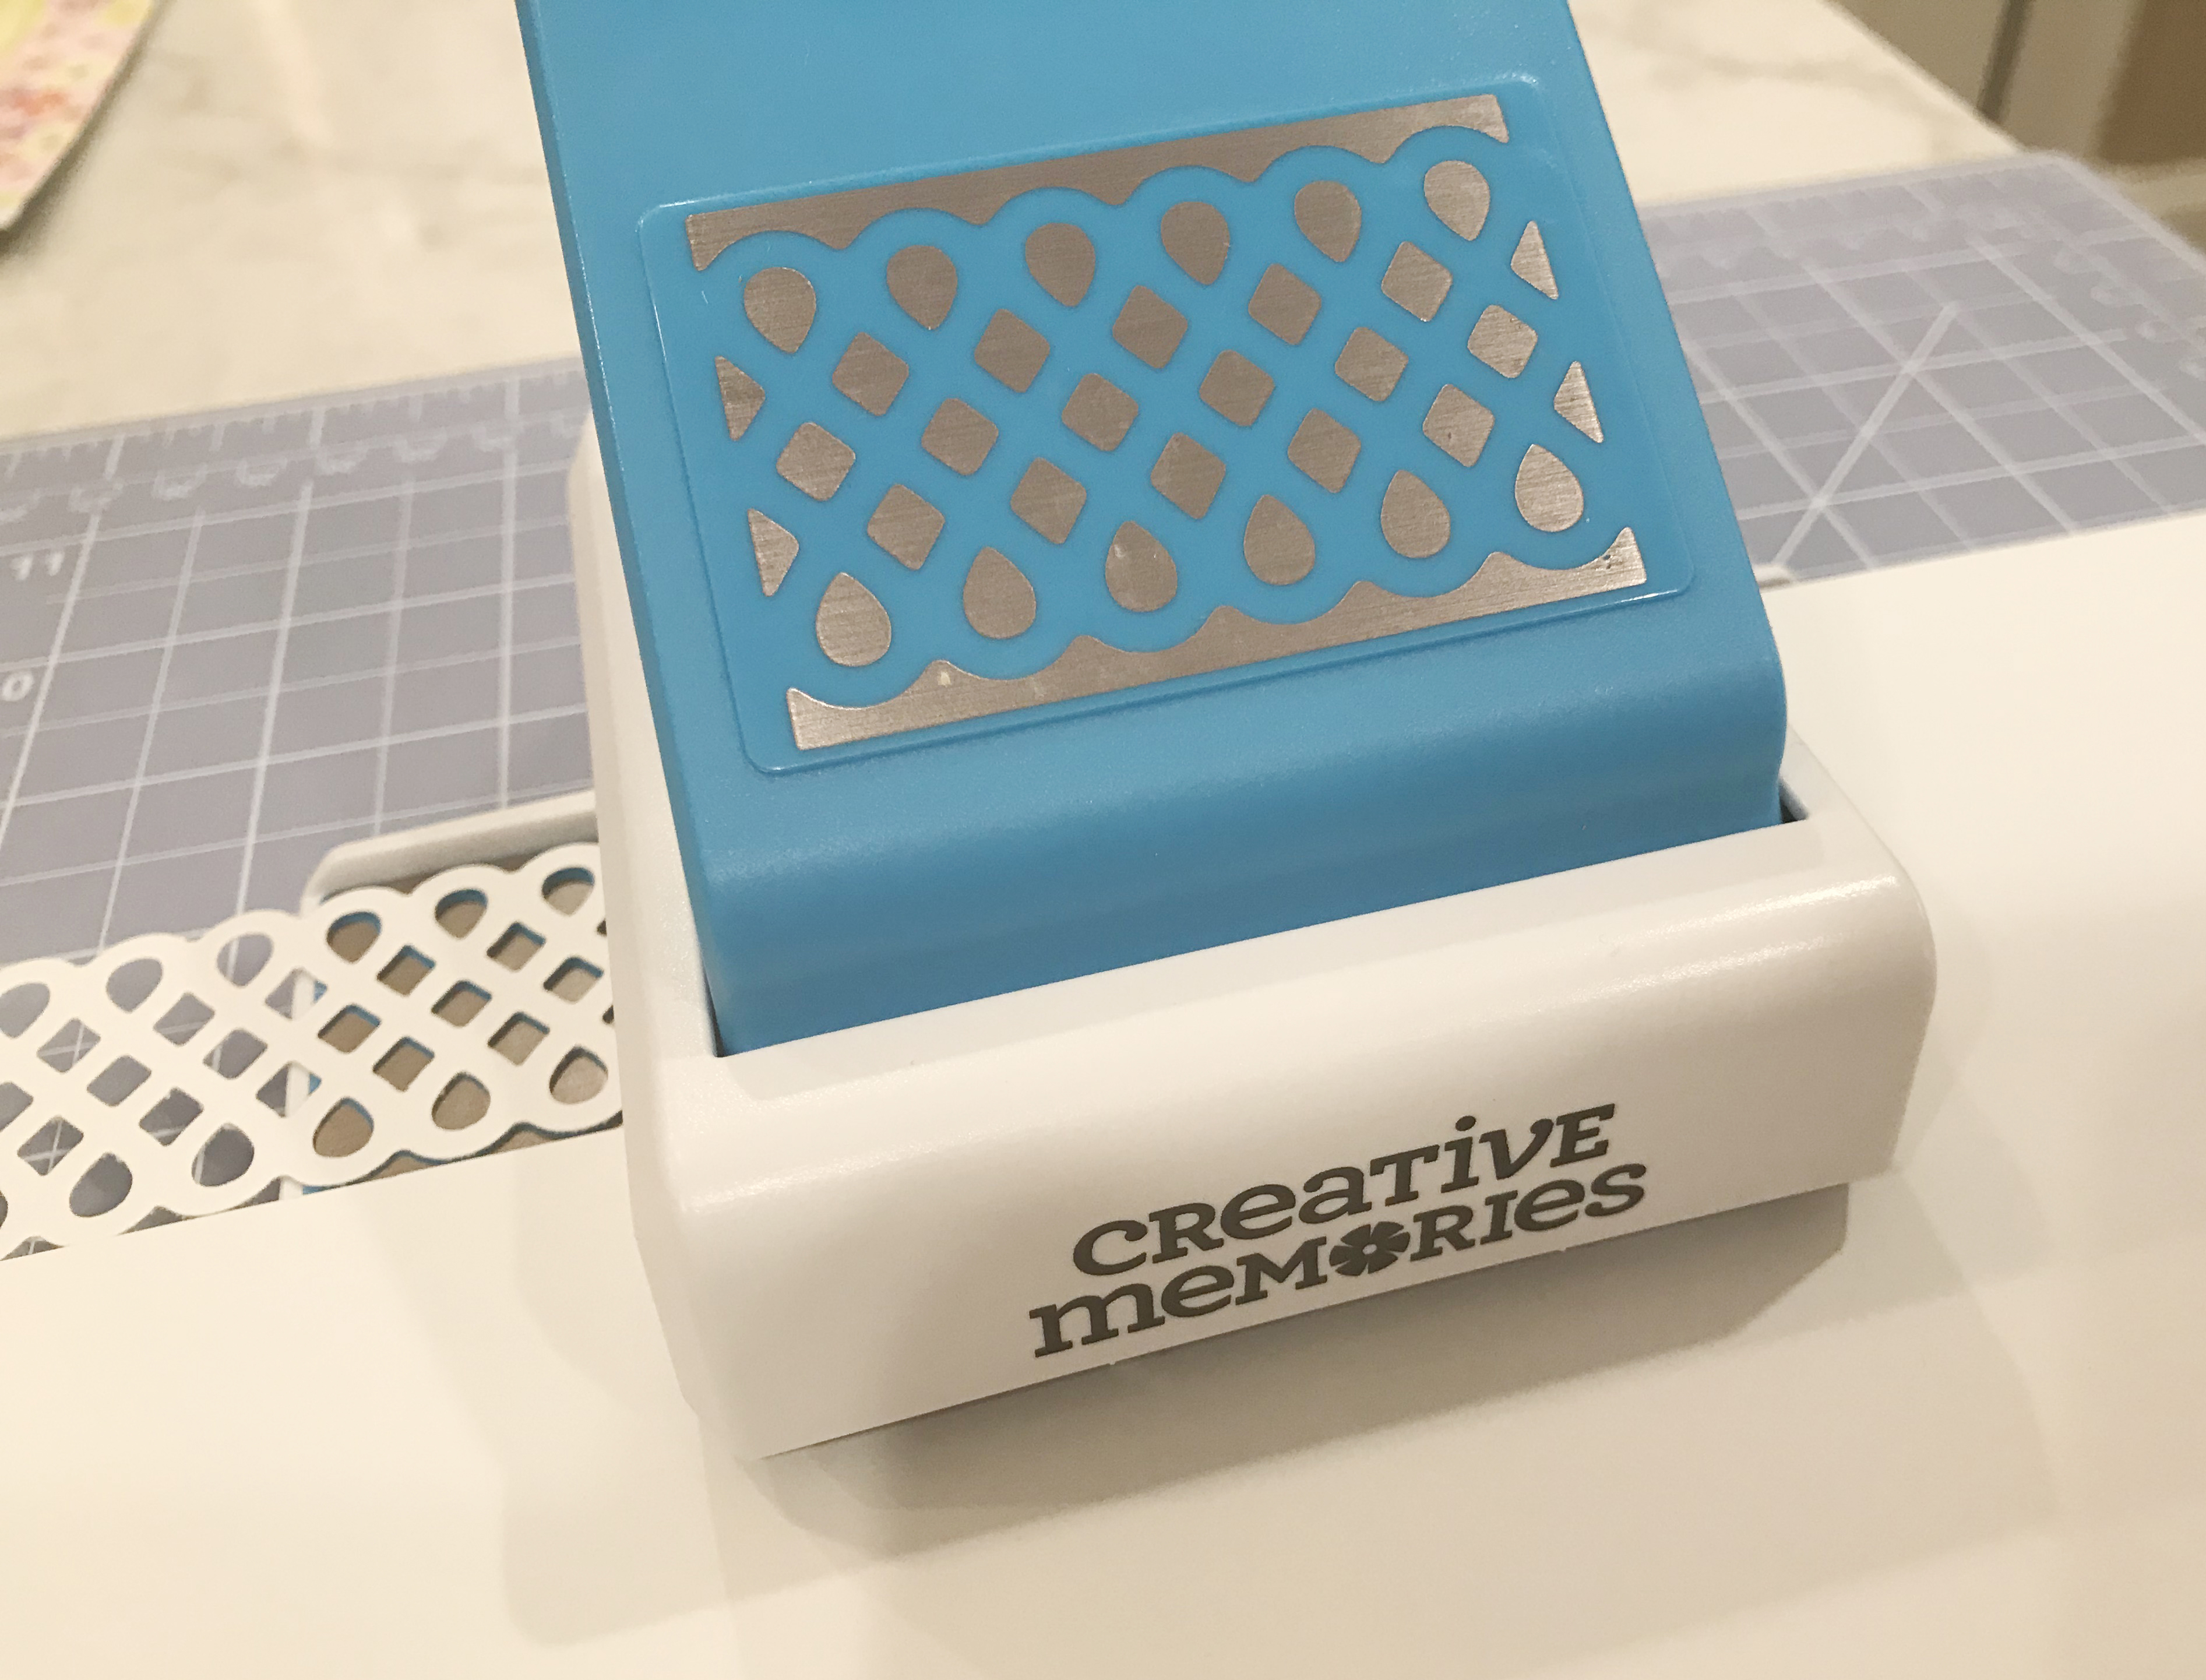
Step 5: Cut two borders out of White Cardstock using Teardrop Lattice Border Punch.
Step 6: Using the Repositionable Tape, adhere the white teardrop lattice border to the colorful daisy paper and the yellow stripe paper. Thus, creating two borders. Adhere the colorful daisy teardrop lattice border to the left page vertically (make sure the yellow stripe paper tucks under the border) and adhere the yellow stripe teardrop lattice border horizontally on the bottom of the right page.


Step 7: Using the Dewdrop Flower Punch, punch six flowers out of the pink patchwork paper. Layer two of the flowers using opposite sides of the paper for the right page. The remaining two flowers will be used on the left page.

Step 8: Select desired flower embellishments and/or stickers to adhere to the six punched flowers. You may add depth to the page by using Foam Squares if desired.
Step 9: Adhere pictures to the pages.

Step 10: Cut a journal mat down to fit in space. Add sticker to the corner and journal. Add gems, stickers and additional flowers to the pages as desired.
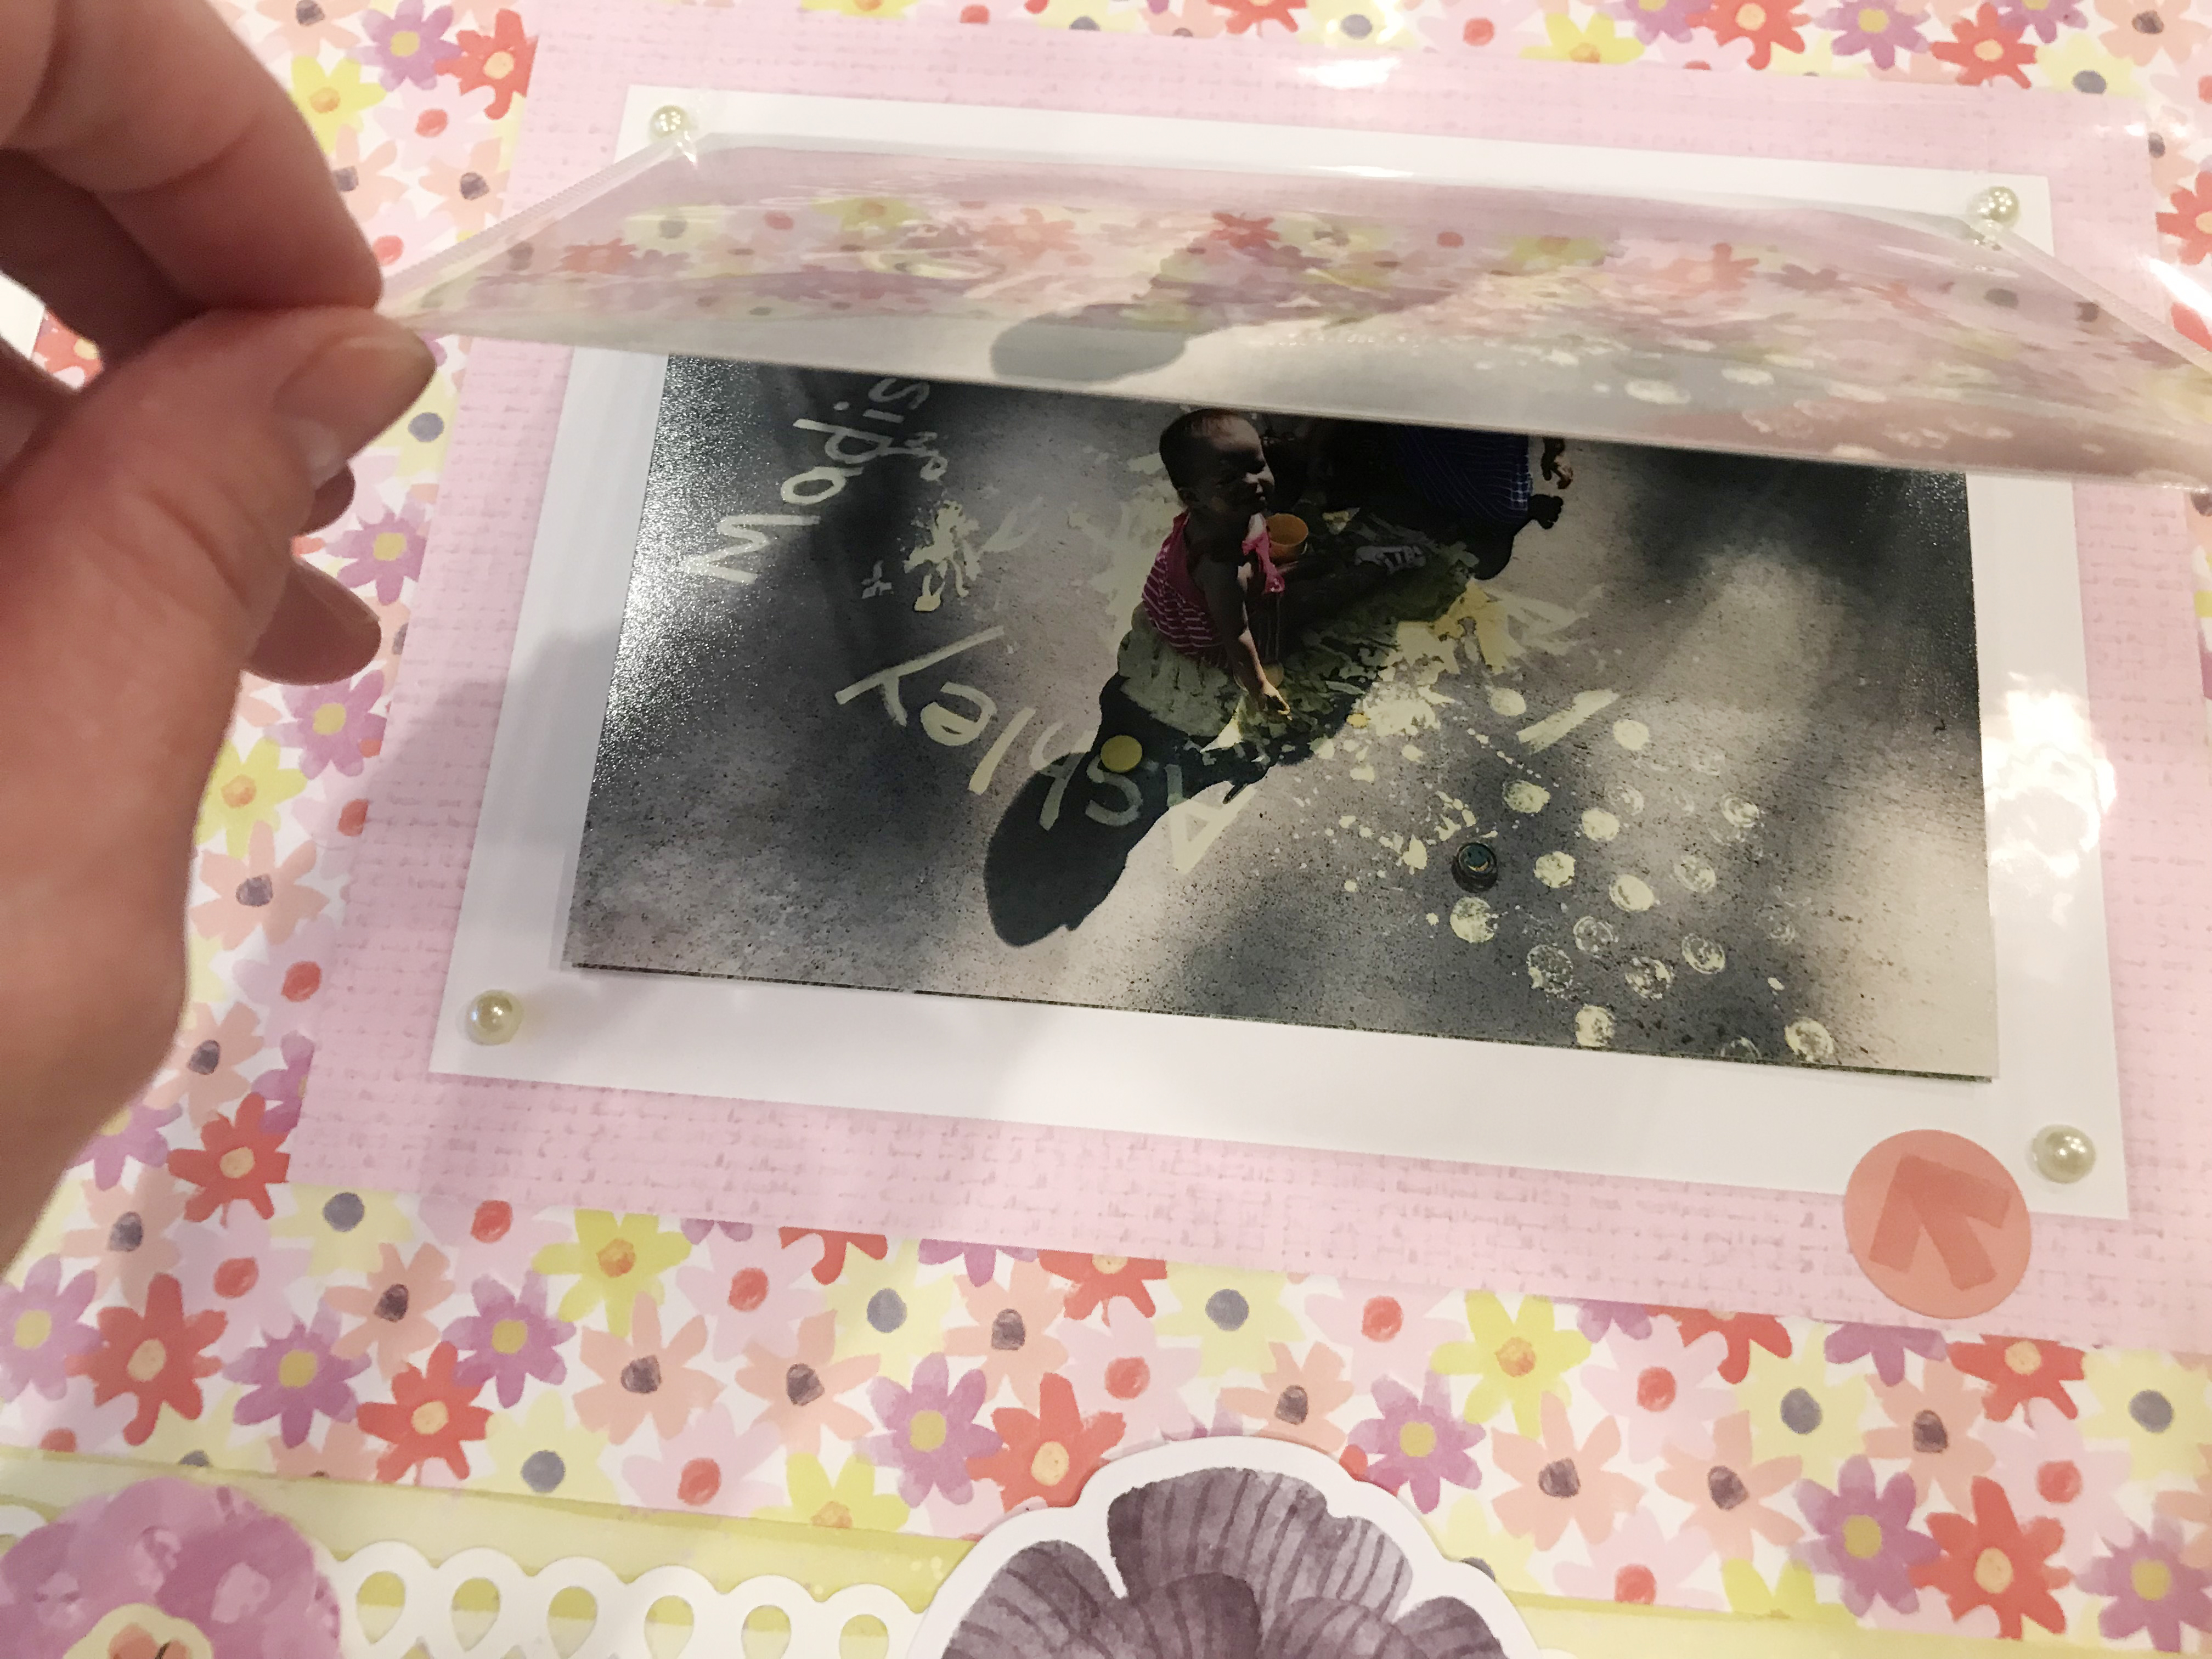
Step 11: Insert Page Protector over both pages. Then, adhere a Peekaboo Pocket™ to the Fast2Fab™ page on the outside of the Page Protector. Insert pages into your album and share with others!
I hope this example will inspire you to integrate Fast2Fab™ with traditional pages throughout your albums. What other ideas do you have to use with the Fast2Fab™ pages?
– Karen

Lovely pages, great tips!
I wish that you had shown the original 2 pages of the Fast2Fab before adding all of the embellishments. but the end result is precious.
Thanks for calling that to our attention! We have now added a photo above so you can see what it looked like to start with. She used a white page on the left and a Fast2Fab™ page on the right.
Oops. Sorry about that. Now I see that you did show us the original 2 pages: 1 traditional (plain white) and 1 from Fast2Fab. I somehow skipped that before.