August 28, 2018
Enjoy a Blast from the Past with the Essentials Classic Scrapbook Borders

The Essentials collection is all about adding old-school cool to your scrapbook layouts and projects. With a primary palette and papers decorated with classic geometric shapes, you can create blast-from-the-past vintage borders with a modern edge. Read on to learn how to make beautiful classic scrapbook borders for your favorite academic using the Essentials collection, plus get a BONUS outdoor-themed border using Essentials and Fanatic together!


To create these borders, you will need:
- Essentials Accent Paper Pack
- Essentials Tone-on-Tone Paper Pack
- Back to School Essentials Stickers
- Flower Child Border Punch
- Starburst Punch
- Original Border Maker System with the Sunshine Border Maker Cartridge
- 12-inch Straight Trimmer
- Tape Runner and Repositionable Tape Runner Refill
- Foam Squares
Essentials Star Student Border
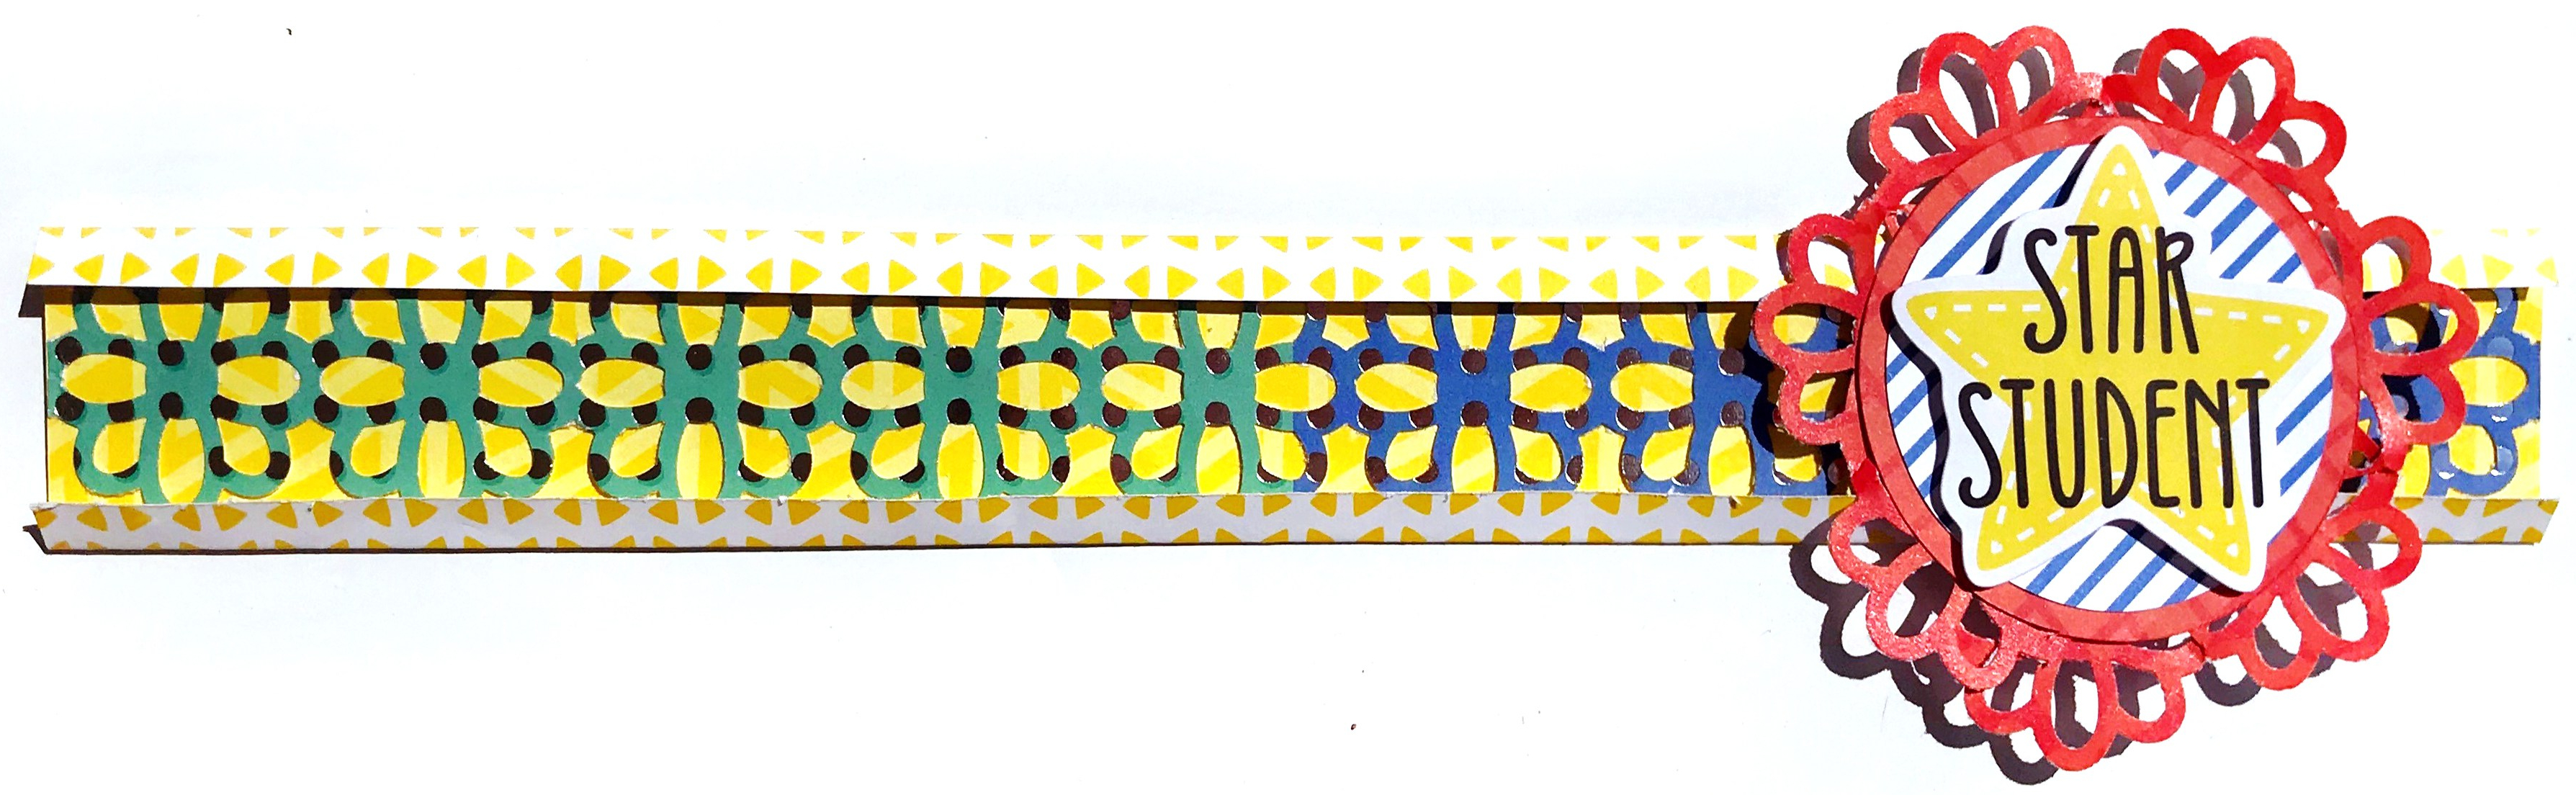
Step 1: Cut the yellow patterned paper to measure 12″ x 2″. Then, fold the top and bottom edges at 1/4″. This will be the base for your border.
Step 2: Punch a border with the foiled patterned paper and the Flower Child Border Punch. Cut the border in half approximately where the medallion decoration will go. Then, rotate the right piece clockwise 180° so that both ends of the border look neat. Adhere these pieces to the base using Repositionable Adhesive.
Step 3: Cut a circle using red patterned paper and the medium circle from the Custom Cutting System on the inside with the Red Blade. Then, cut another medium circle using blue patterned paper on the inside with the Green Blade.

Step 4: Punch a border using the Flower Child Border Punch and red patterned paper. Make a small slit between the flowers using scissors.

Step 5: Adhere this border around the red circle from the back side.
Step 6: Adhere the blue circle to the red circle. Then, add a sticker using Foam Squares. To finish, adhere the medallion decoration to the border base using Foam Squares.
Essentials Sunshine Border Maker Cartridge Border

Step 1: Cut the yellow patterned paper to measure 12″ x 1-3/8″. This will be the base for your border.
Step 2: Punch a border with the blue patterned paper and the Sunshine Border Maker Cartridge and trim the to measure 12″ x 1-1/8″.

Step 3: Punch the red patterned paper with the Starburst Punch five times. Adhere the center pieces to the back of the blue strip and the Starburst pieces to the front.
Step 4: Adhere the border piece to the yellow base. Finish by adding stickers using Foam Squares for added dimension.
Bonus! Essentials + Fanatic Scrapbook Border
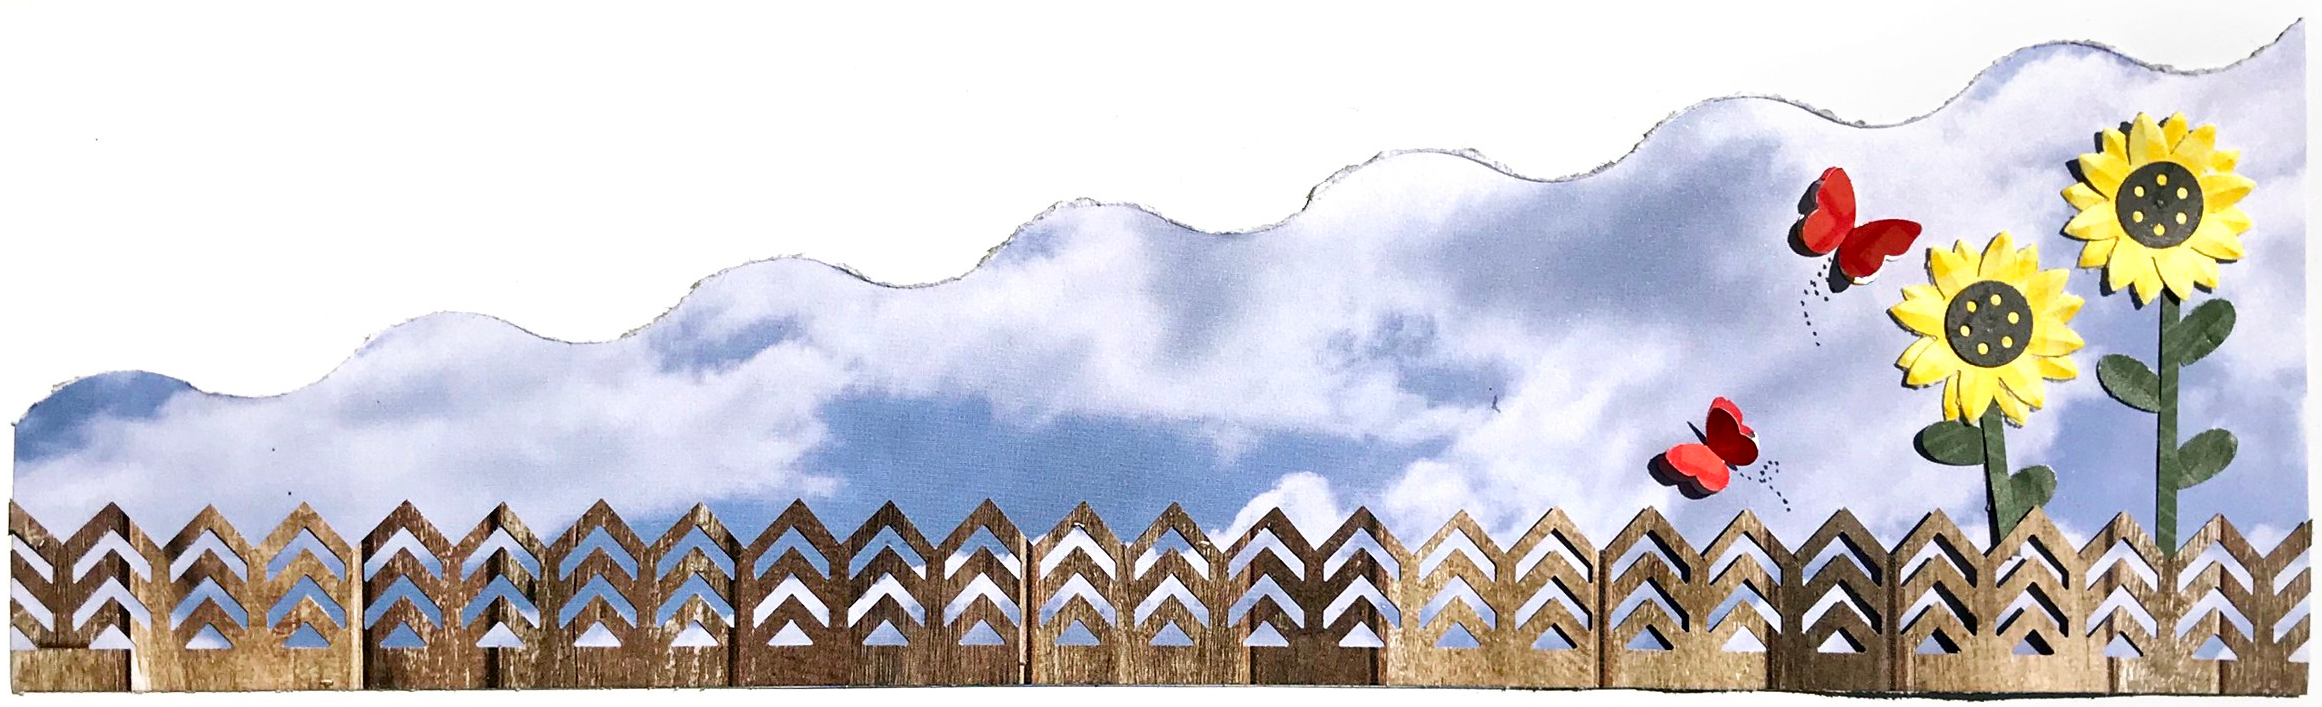
Step 1: Tear the sky patterned paper from the Fanatic Paper Pack using the Double Wave Tearing Tool. The height of higher side is approximately 3-1/2″ and lower side is 1-1/2″.
Step 2: Punch a border using the Double Chevron Border Maker Cartridge and wood patterned paper from the Fanatic Paper Pack and trim to measure 12″ x 1-1/4″. Using scissors, cut the excess on the points on the zigzag side and adhere to the sky patterned paper.
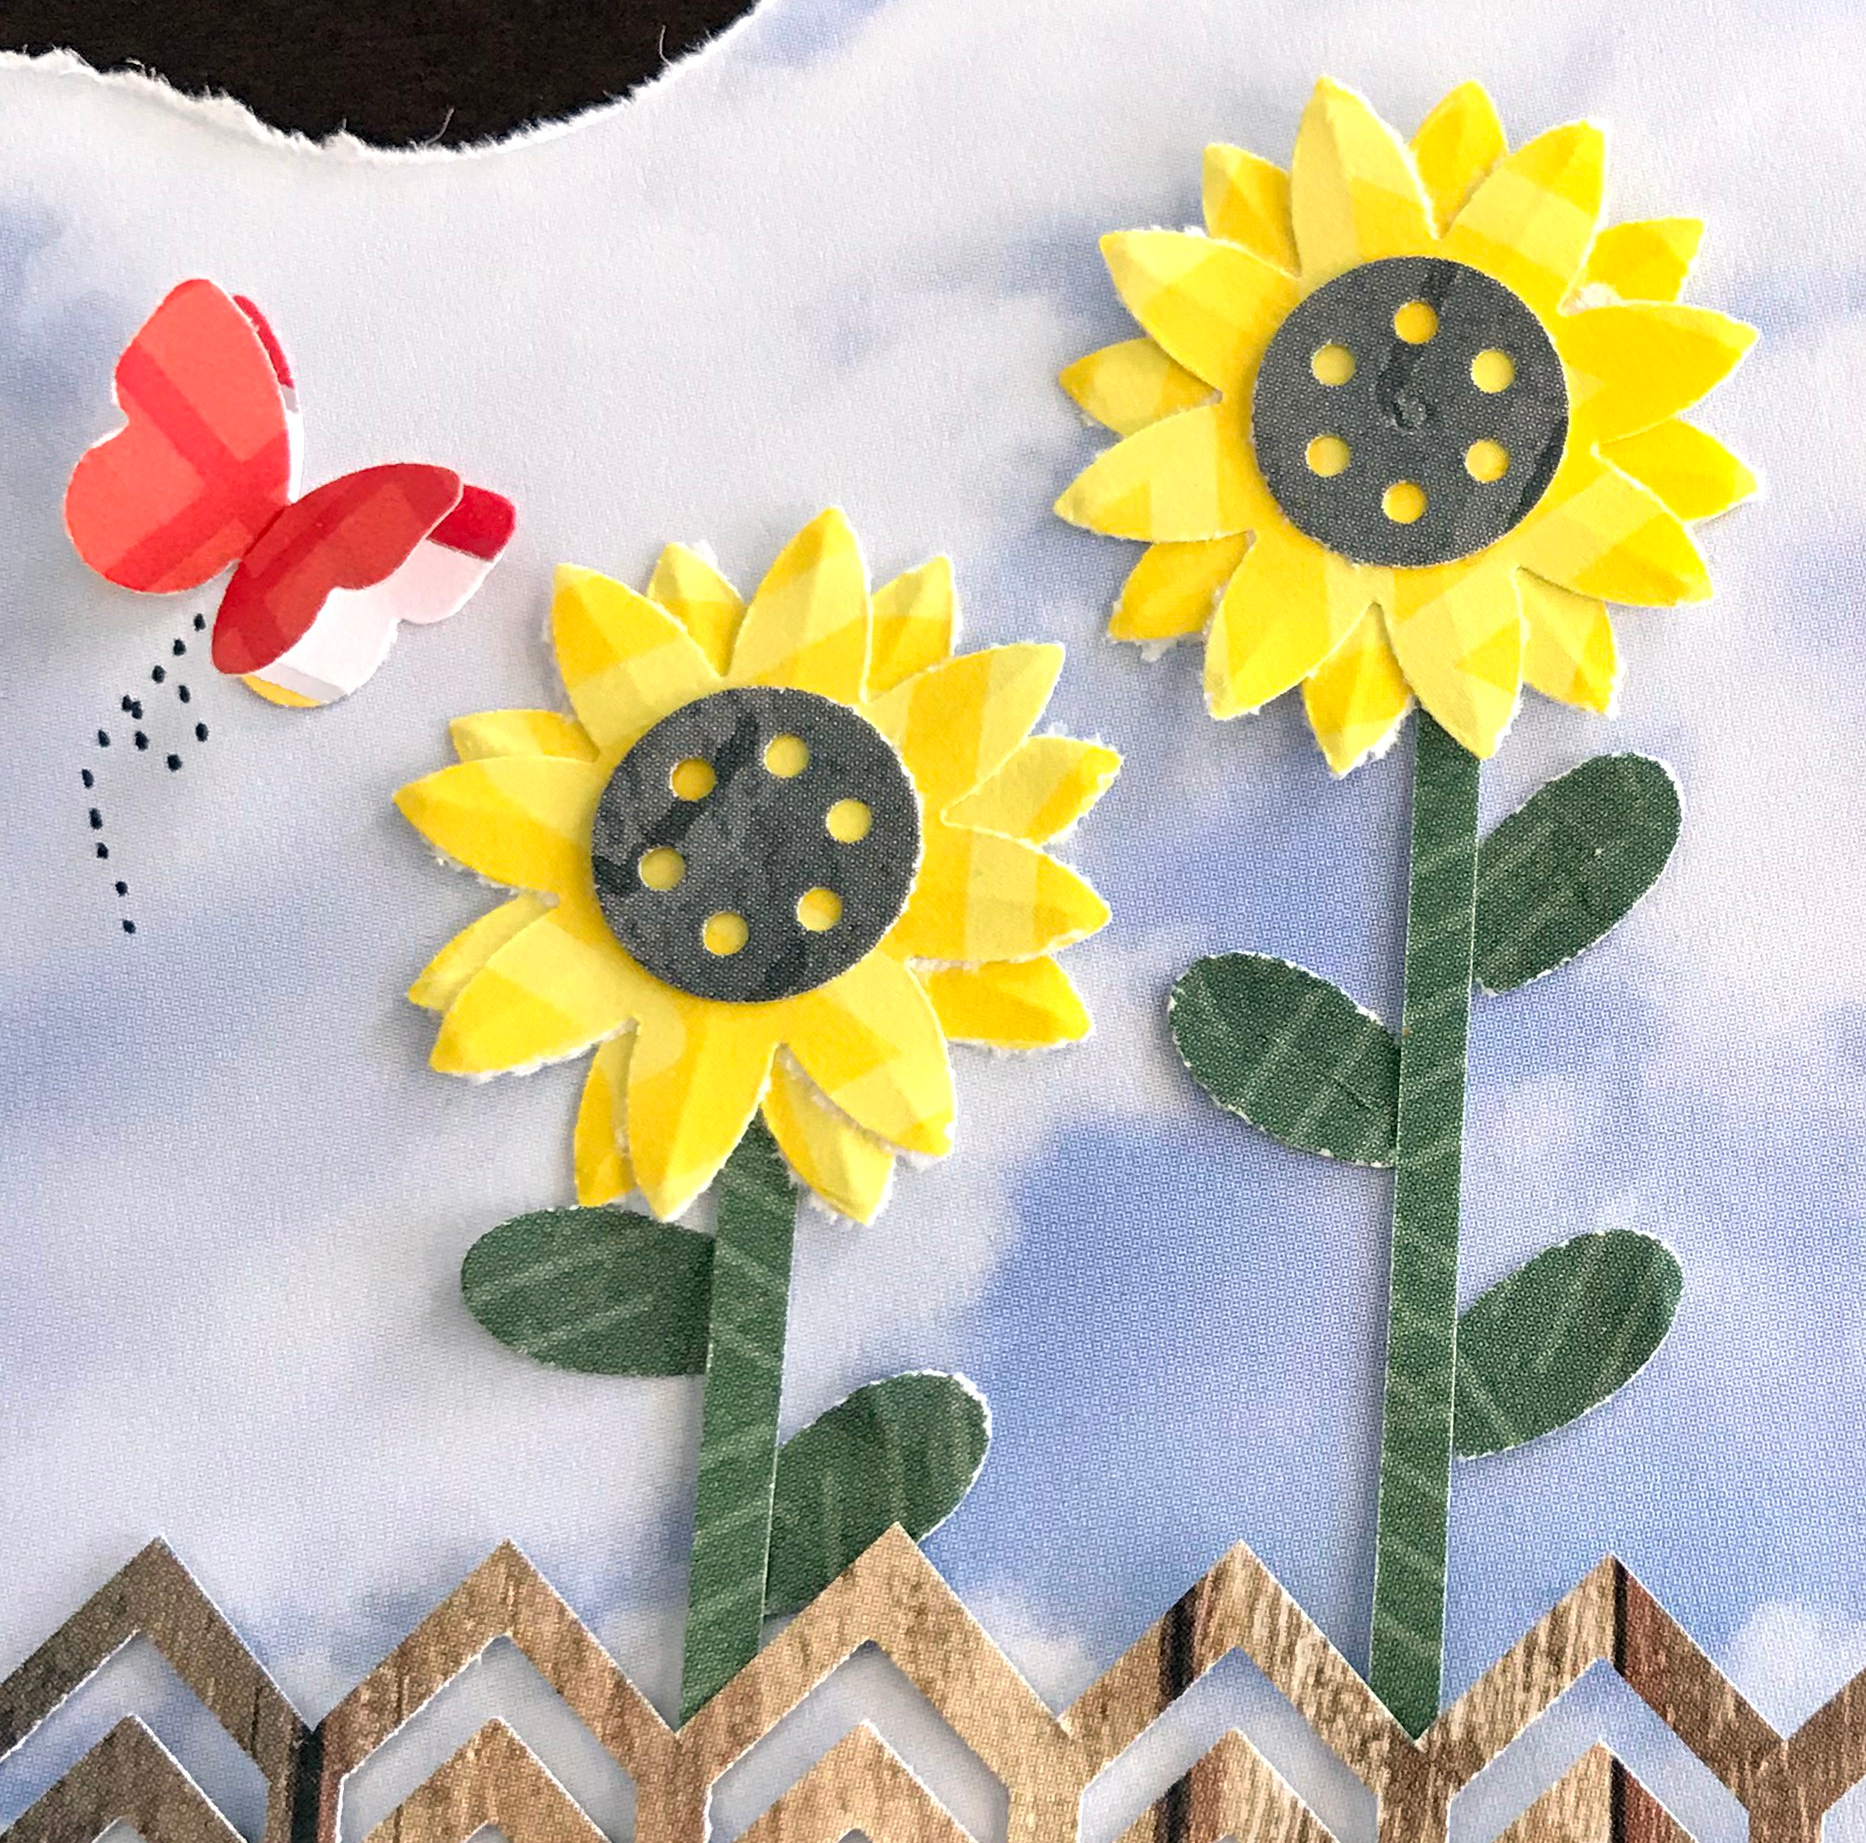
Step 3: For the flower petals, punch a piece of yellow patterned paper four times using the Embossed Trio Flower Punch. To create the center of the sunflower, punch the gray patterned paper from the Fanatic Paper Pack twice using the Embossed Trio Flower Punch.
Step 4: Punch the green patterned paper from the Fanatic Paper Pack using the Flower Child Border Punch. Use the punch-out pieces as leaves. Then, cut the green patterned paper using scissors and use it for a stem.

Step 5: Punch a piece of red patterned paper twice with the Butterflies Border Maker Cartridge. Use the four biggest butterflies and fold each butterfly and adhere to the sky patterned paper. Draw dots with a Black Dual-Tip Pen so the butterflies can “fly.”
So there you have it! Now you can add vintage charm to any school layout with a geometric scrapbook border and make a one-of-a-kind outdoor border for any page or project!
Which borders will you make? And if you were to create these borders with a different CM collection, which one would you choose and why? Comment below!

Love, love the borders! More please!
These are really great! I love the instruction on how to round a border into a circle. Thanks for the tips!
muy bonitas las ideas