August 13, 2020
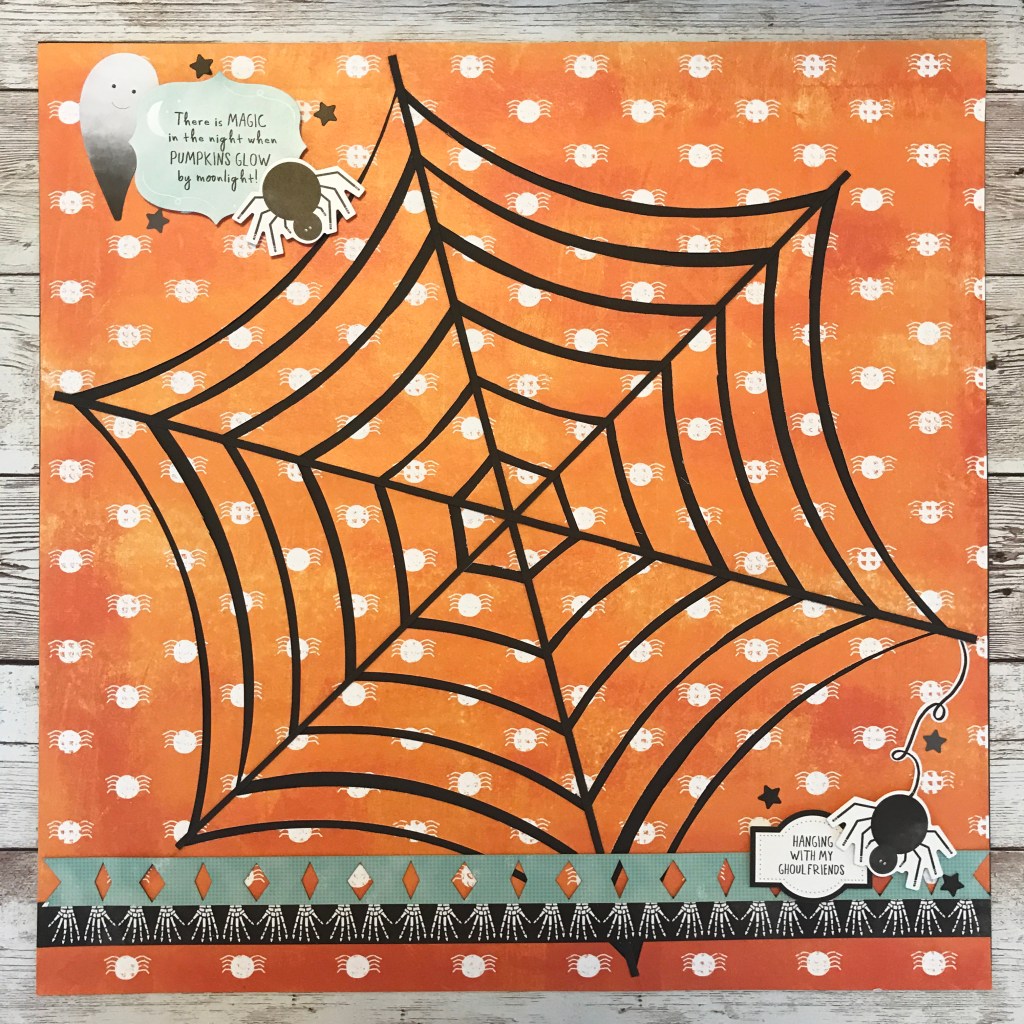
Let Your Creativity Creep In With This Halloween Scrapbook Layout
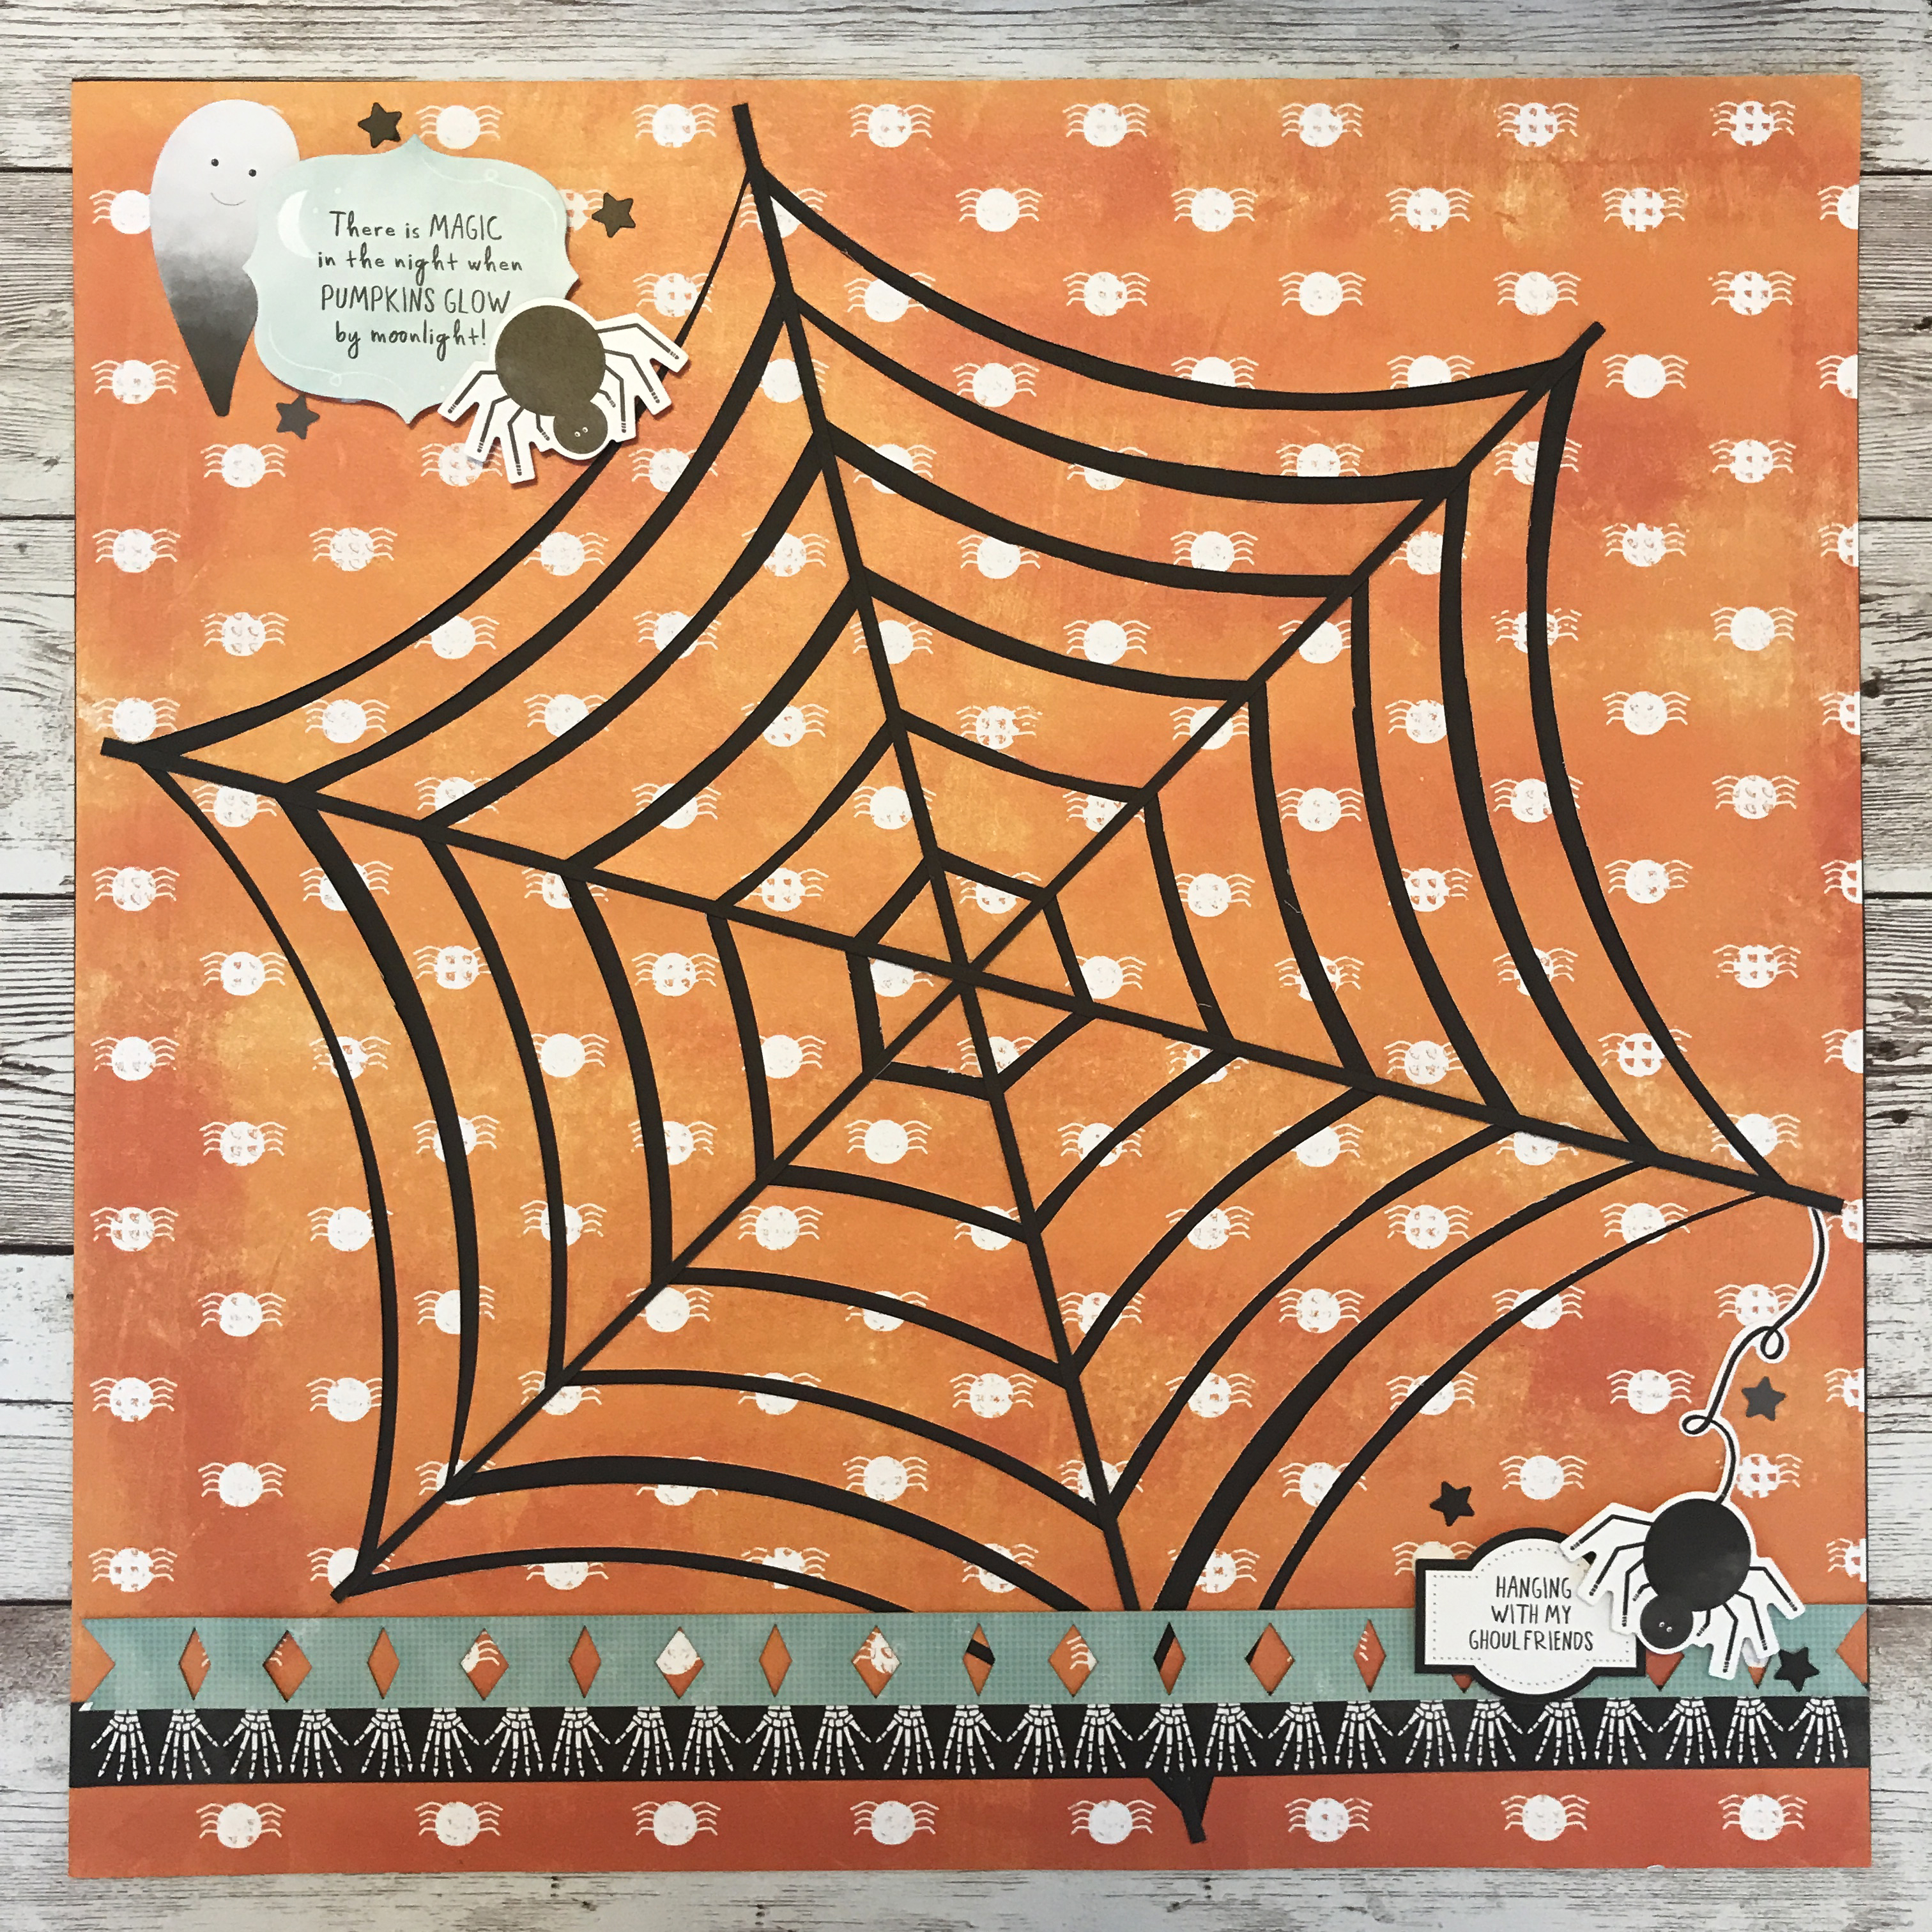
There are many great occasions throughout the calendar year, but Halloween continues to hold a festive (and fun!) place in the hearts of many. In fact, blog contributor Sachiyo Omitsu adores Halloween, and she wanted to bring this October festivity to life with a Halloween scrapbook layout — check it out!
Sachiyo’s Inspiration
Halloween is one of the things I like most about American culture. All the spooky and creative decorations, Halloween parades and trick-or-treating is awesome, but my absolute favorite part of Halloween is carving pumpkins with our friends. Kids enjoy scooping out the pumpkin guts, dads carve jack-o’-lanterns and moms enjoy chatting over a glass of wine — what’s not to love? We don’t know how Halloween will look like this year due to the pandemic, but we do know that we will be carving our jack-o’-lanterns and make spook-tacular memories with our kids!
To create this layout you will need:
- Carving Memories Theme Pack or (Shop Canada | Shop Australia)
- 12×12 Black Solid Cardstock or (Shop Canada | Shop Australia)
- Carving Memories Laser Cut Borders or (Shop Canada | Shop Australia)
- Jumbo Circle Custom Cutting System Bundle or (Shop Canada | Shop Australia)
- Red Custom Cutting System Blade Cartridge or (Shop Canada | Shop Australia)
- Green Custom Cutting System Blade Cartridge or (Shop Canada | Shop Australia)
- 13×13 Custom Cutting System Mat or (Shop Canada | Shop Australia)
- 12-inch Trimmer or (Shop Canada | Shop Australia)
- All-Purpose Scissors or (Shop Canada | Shop Australia)
- Repositionable Tape Runner or (Shop Canada | Shop Australia)

Step 1: Use a piece of Black Cardstock as the base.
Step 2: Fold the teal patterned paper in half to make a triangle. Fold the triangle along the 60-degree line of the 13×13 Custom Cutting System Mat. Mark both sides of the folded triangle at 1″ increment up to 6″, as shown.

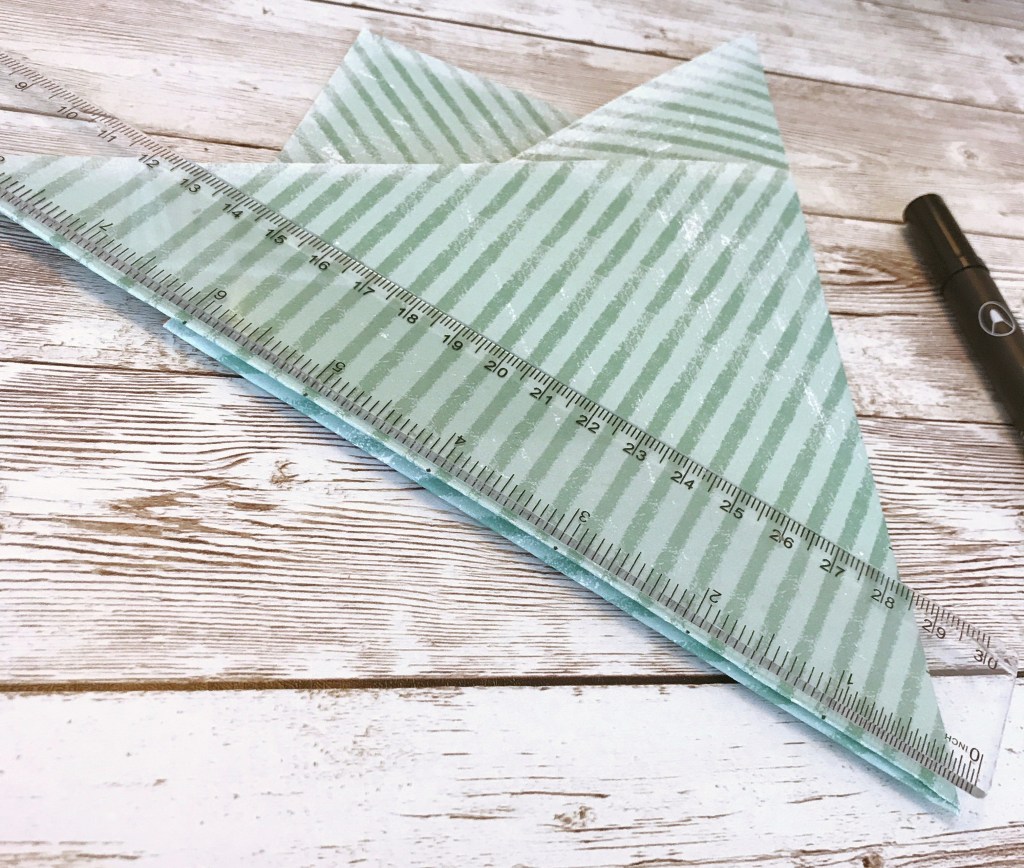
Step 3: Line up the Jumbo Circle Custom Cutting System Pattern with the marks, then cut with the Green Blade and then the Red Blade. Use the All-Purpose Scissors to cut if the blade doesn’t cut all the way.

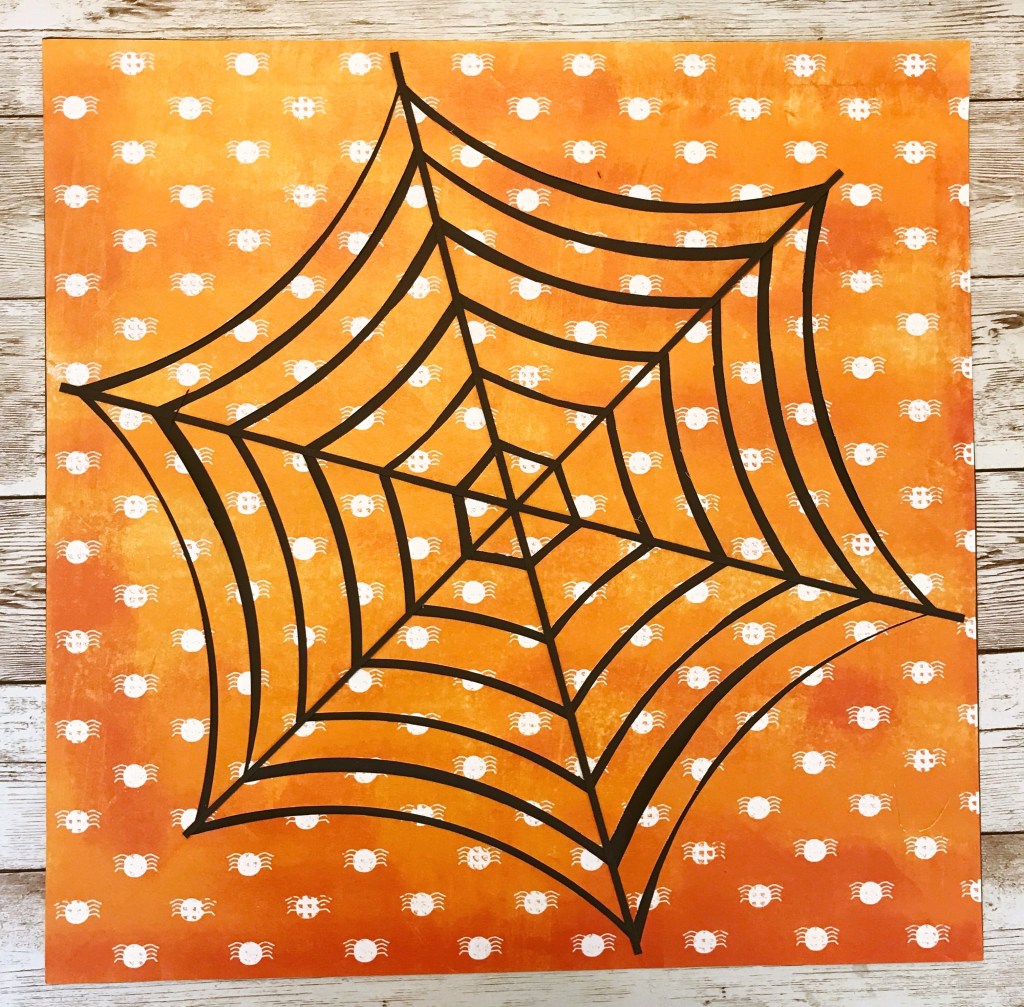
Step 4: Adhere the pieces to the base, facing the orange patterned side up. Skip the narrow strips to make a spiderweb.

Step 5: Cut three strips of Black Cardstock to measure 1/8″ x 12″. Adhere to the base.
Step 6: Adhere stickers and laser cut borders, using Foam Squares on some for added dimension.
What types of Halloween scrapbook layouts have you been making with the Carving Memories Theme Pack? Let us know in the comments below!

This spiderweb is super cute, but I feel like I need a video or a couple more pictures between steps 2-4 to really understand how to do it!
I agree…a video would be very helpful!
FYI, I uploaded the tutorial video at my YouTube channel. Hope it helps.
https://youtu.be/0n3kTLPGMIs
How do we get from the teal paper to black paper?
I used a piece of black cardstock as the base/background.
just know when you do this, Sachiyocm is using the 12×12 mat that has angle on it from the left corner. The 13×13 mat has angles differently. If you do this,with the 13×13 mat, put the center of the triangle fold on the 3″ mark, that is at the end of the 60* angle line, and then fold.
Nice Post I loved your Site Thanks For Sharing US. You visit My Halloween website using this :-Happy Halloween Images
. I think You must like them
This needs step by step even on the video the second fold is very confusing