June 25, 2026
A Freshly Picked Layout with Hydrangea Haven
The Hydrangea Haven collection pairs beautifully with a mix of new tools that help bring your pages to life in an easy, approachable way. This layout layers soft florals, punched details and a bit of dimension to create something that feels full without feeling fussy. It’s a simple reminder that a few thoughtful touches can go a long way in turning everyday photos into a page you’ll want to keep coming back to.
To create this layout, you will need:
- Hydrangea Haven Designer Paper
- Hydrangea Haven Tone-on-Tone Paper
- Hydrangea Haven Stickers
- Embossed Leaves Punch
- Hydrangea Blossoms BMC
- Original Border Maker System
- CCS Bundle
- 12-inch Trimmer
- Repositionable Tape Runner
- Precision Point Adhesive Pen
- Write On! Stickers
- Foam Squares
- Black Dual-Tip Pen
- All-Purpose Scissors
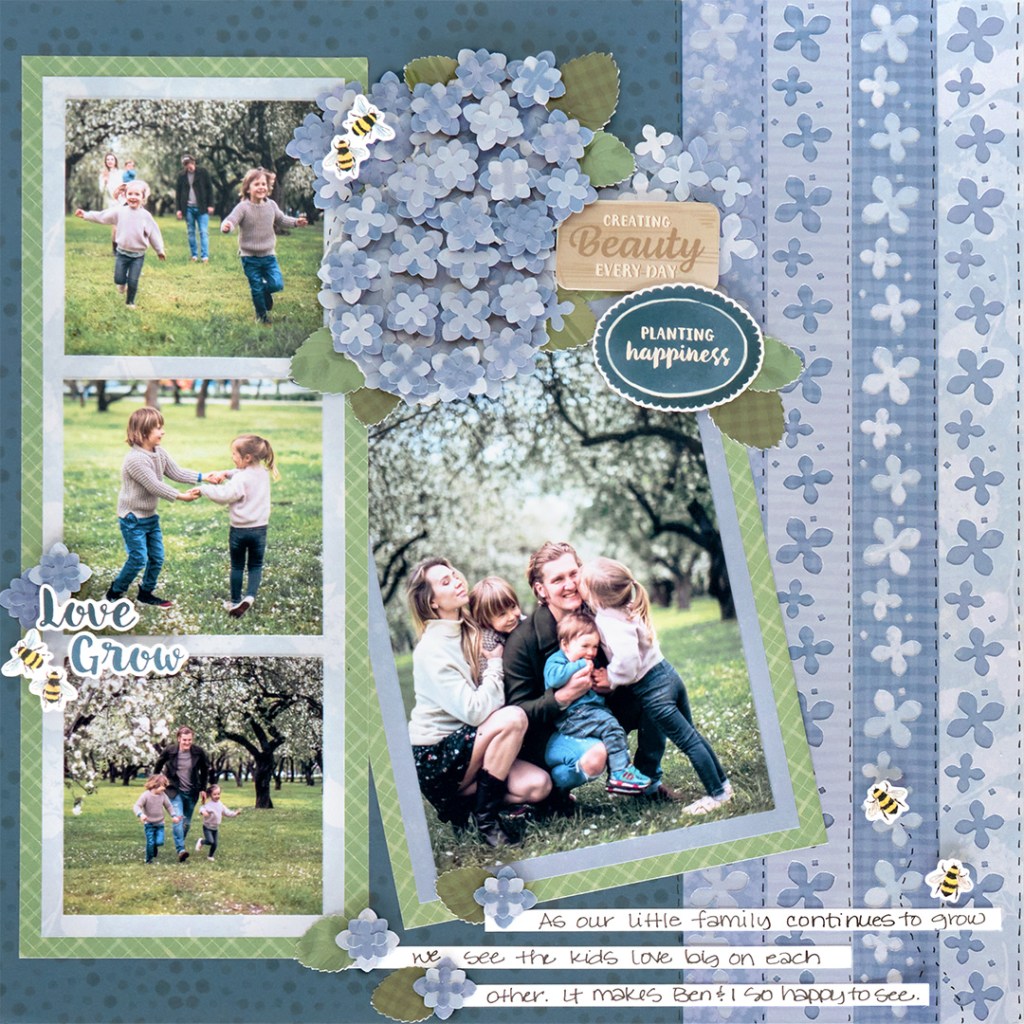

Step 1: Use a sheet of spare paper or cardstock as the base for this layout.
Step 2: Cut four pieces of designer paper in a variety of colors and patterns to measure 3″ x 12″, then use the Hydrangea Haven BMC to punch a border along the right edge of each piece. Set all knock-out flower pieces aside for later use.
Step 3: Using a contrasting piece of paper, cut to measure 1-1/4″ x 12″. Adhere it behind the first 3″ x 12″ paper so the punched section shows through, then adhere the layered piece along the far right edge of the layout.
Step 4: Adhere the next 3″ x 12″ piece, overlapping the top of the first piece at 1” vertically. Adhere the next piece over the second at 2″, and the next over the third at 3″, layering each as shown.
Step 5: Adhere an 8″ x 12″ piece of navy designer paper on the left side of the layout as shown.
Step 6: Cut two pieces of green grid designer paper to measure 4″ x 10-1/2″ and 5″ x 7″. Cut a piece of light blue tonal paper to measure 3-1/2″ x 10″ and adhere it to the 4″ x 10-1/2″ green piece. Add three 3″ x 3″ photos, then adhere this entire piece about 1/2″ from the left edge of the layout.
Step 7: Cut a piece of lilac designer paper to measure 4-1/2″ x 6-1/2″ and adhere it to the 5″ x 7″ green piece. Mat a 4″ x 6″ photo on top, then adhere the entire piece tucked and angled behind the left strip as shown.
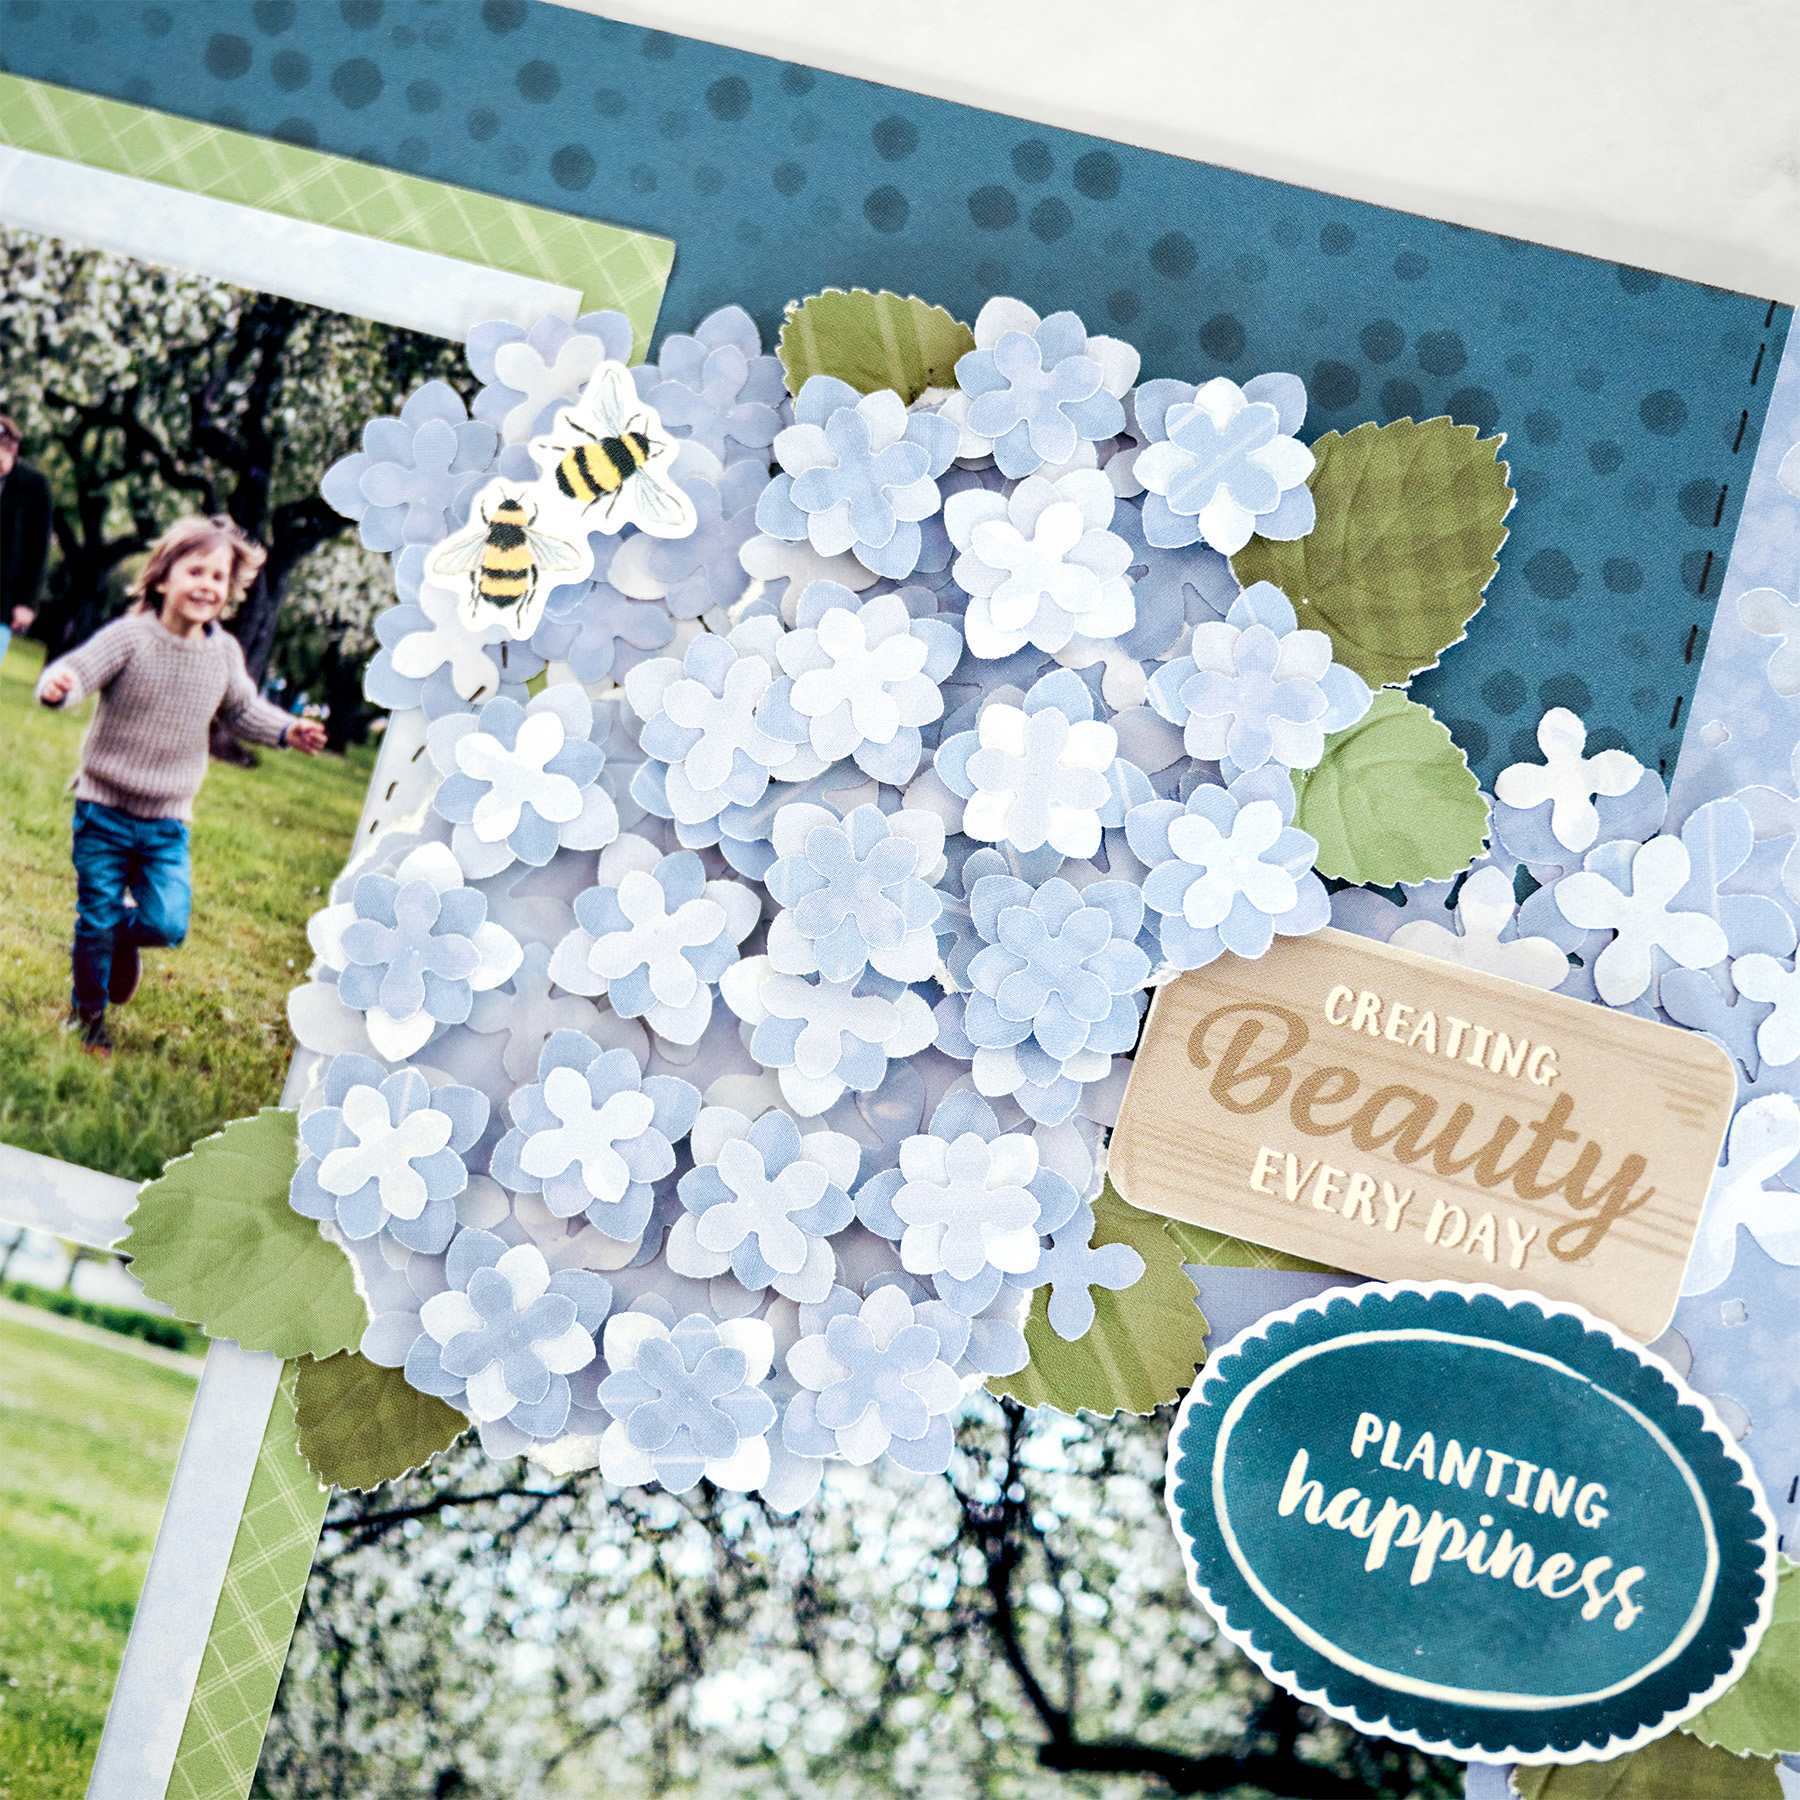
Layered Floral Cluster:
Step 1: Using light blue designer paper, cut a circle using the inside of the large CCS circle with the green blade. Then, gently tear the edges all the way around to create a soft border.
Step 2: Using the light blue designer paper, cut a circle using the inside of the medium CCS circle with the red blade and gently tear the edges all the way around.
Step 3: Adhere a variety of knocked-out flowers to the tops of both torn circles using the Precision Point Adhesive Pen.
Step 4: Create layered hydrangea-style blooms by stacking the three punched flower sizes with the Precision Point Adhesive Pen. Adhere them to the tops of the circles using Foam Squares for added dimension.
Step 5: Adhere the torn circles with layered flowers to the layout, then add additional knocked-out flower pieces under and around the clusters.
Step 6: Use the Embossed Leaf Punch to punch leaves from a variety of green designer papers, then tuck and adhere them around and under the flowers.
Step 8: Adhere stickers to the layout, using Foam Squares on some for added dimension. Then adhere Write On! Stickers to the lower right for journaling.
Step 9: Journal as desired.
A little layering goes a long way—letting your Hydrangea Haven memories truly bloom on the page. Happy scrapping!
P.S. Are YOU a member of the Virtual Crop Group? It’s your go-to place for MONTHLY Virtual Crops, MONTHLY Completed Album Challenges, QUARTERLY Secret Box Openings with project tutorials and so much more! We hope you’ll join our community of more than 50,000 fellow memory-keeping enthusiasts — you’ll feel right at home!

