August 22, 2020
Fuel Your Creative Engine With These Train Scrapbook Projects

What is it that creates a fascination for trains? Perhaps it’s the speed and power? Or how about the metal-clanging (and choo-chooing!) noise? Maybe you’ve taken an amazing vacation trip on one! No matter the reason, the Trains collection is the perfect ticket for all the locomotive lovers who can’t get enough of the railroad. Check out these train scrapbook projects and start thinking up ways to incorporate them into your albums!
To create these borders and card, you will need:
- Trains Paper Pack or (Shop Canada | Shop Australia)
- Trains Stickers or (Shop Canada | Shop Australia)
- Trains Laser Cut Embellishment Accents or (Shop Canada | Shop Australia)
- Rich Brown Solid Cardstock or (Shop Canada | Shop Australia)
- Train Tracks Border Punch or (Shop Canada | Shop Australia)
- 12-inch Trimmer with Straight & Deckle Blades or (Shop Canada | Shop Australia)
- All-Purpose Scissors or (Shop Canada | Shop Australia)
- Tape Runner or (Shop Canada | Shop Australia)
- Repositionable Tape Runner or (Shop Canada | Shop Australia)
- Foam Squares or (Shop Canada | Shop Australia)
Check out the Train Tracks Border Punch in action in the video below!

Welcome Aboard Border

Step 1: Cut a piece of cream patterned paper to measure 12″ x 1-3/4″.
Step 2: Using the Train Tracks Border Punch, punch a border from the silver patterned paper. Adhere to the top of the previous piece.
Step 3: Adhere the train tracks border sticker to the top of the punched tracks.
Step 4: Adhere the stickers to the layout using Foam Squares on some for added dimension.
Toot Border
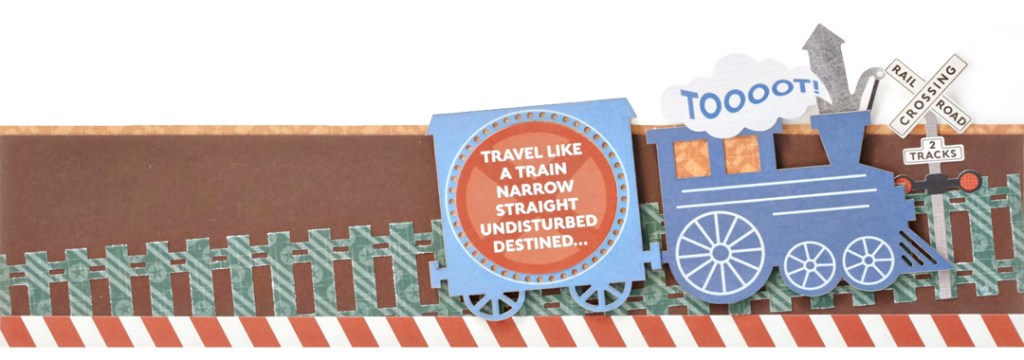
Step 1: Cut a piece of the gold patterned paper to measure 12″ x 2-3/4″.
Step 2: Using the Train Tracks Border Punch, punch a border from the green patterned paper.
Step 3: Cut a piece of Rich Brown Cardstock to measure 12″ x 2-1/2″. Adhere the train tracks border to the cardstock at a slight angle. Trim off any excess with scissors.
Step 4: Adhere border sticker along the bottom edge of the border.
Step 5: Adhere train embellishments and stickers to the border, adhering some with Foam Squares for added dimension.
Chugga Chugga Choo Choo Card
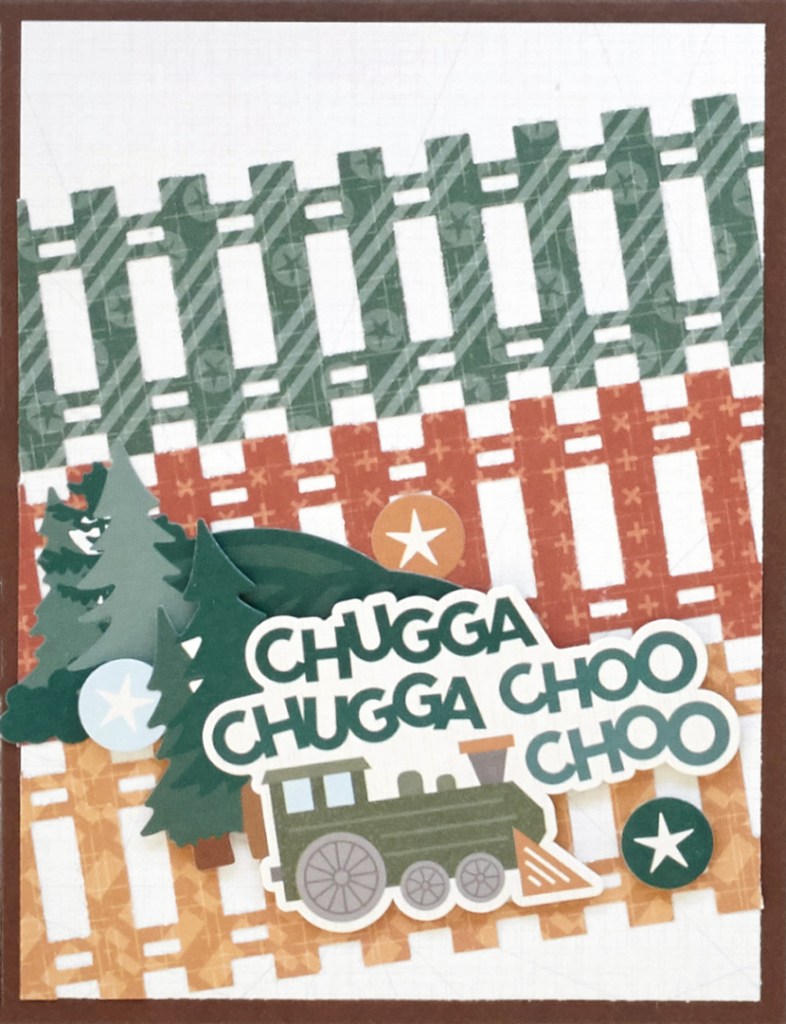
Step 1: Cut a piece of Rich Brown Cardstock to measure 4-1/4″ x 11″. Fold in half to create card.
Step 2: Cut a piece from the cream patterned paper to measure 4″ x 5-1/4″.
Step 3: Using the Train Tracks Border Punch, punch borders from a variety of patterned papers. Adhere at a slight angle to the cream paper. Trim any excess paper with a scissors.
Step 4: Adhere stickers to the front of the card using Foam Squares on some for added dimension.
Which one of these train scrapbook projects do you like the most? Let us know in the comments below!

Melissa, I have a brother-in-law who is train ga-ga. Every time we go out to visit, he takes to some event that has trains involved. These borders will be great for pages about those times! Thank you. :-)
Love them all but I must say welcome aboard is my fav. I’ll definitely be adding that to my train pages. Thanks for another great creative idea.