February 1, 2021
Fuel Your Fiestas With This Birthday Scrapbook Layout
Bring on the candles, wrapped gifts, balloons, confetti and sugary cupcakes — the new Party Time! collection is today’s debuting gift for you. Whether you’re five or 95, birthdays and birthday parties can make one feel special, and you can definitely amp up those good vibes with this celebratory collection! Not only that, these products, with both a bright, youthful side, as well as a neutral, sophisticated side, can be used to commemorate graduations, anniversaries, fiestas and all of life’s superb soirées! Let’s take a look at how the vibrant and vivacious side makes your celebrations pop off the page with this birthday scrapbook layout!
To create this layout you’ll need:
- Party Time! Bright Paper Pack or (Shop Canada | Shop Australia)
- Party Time! Variety Mat Pack or (Shop Canada | Shop Australia)
- Party Time! Stickers or (Shop Canada | Shop Australia)
- Party Time! Border Stickers or (Shop Canada | Shop Australia)
- Party Time! Embellishments or (Shop Canada | Shop Australia)
- White Solid Cardstock or (Shop Canada | Shop Australia)
- Double Balloon Punch or (Shop Canada | Shop Australia)
- Custom Cutting System with Jumbo Circle & Circle Patterns or (Shop Canada | Shop Australia)
- 12-inch Trimmer or (Shop Canada | Shop Australia)
- Micro-Tip Scissors (Shop Canada | Shop Australia) — Returning March
- Tape Runner or (Shop Canada | Shop Australia)
- Repositionable Tape Runner or (Shop Canada | Shop Australia)
- Foam Squares or (Shop Canada | Shop Australia)
- Black Dual-Tip Pen or (Shop Canada | Shop Australia)
Check out the whole Party Time! collection in the video below!

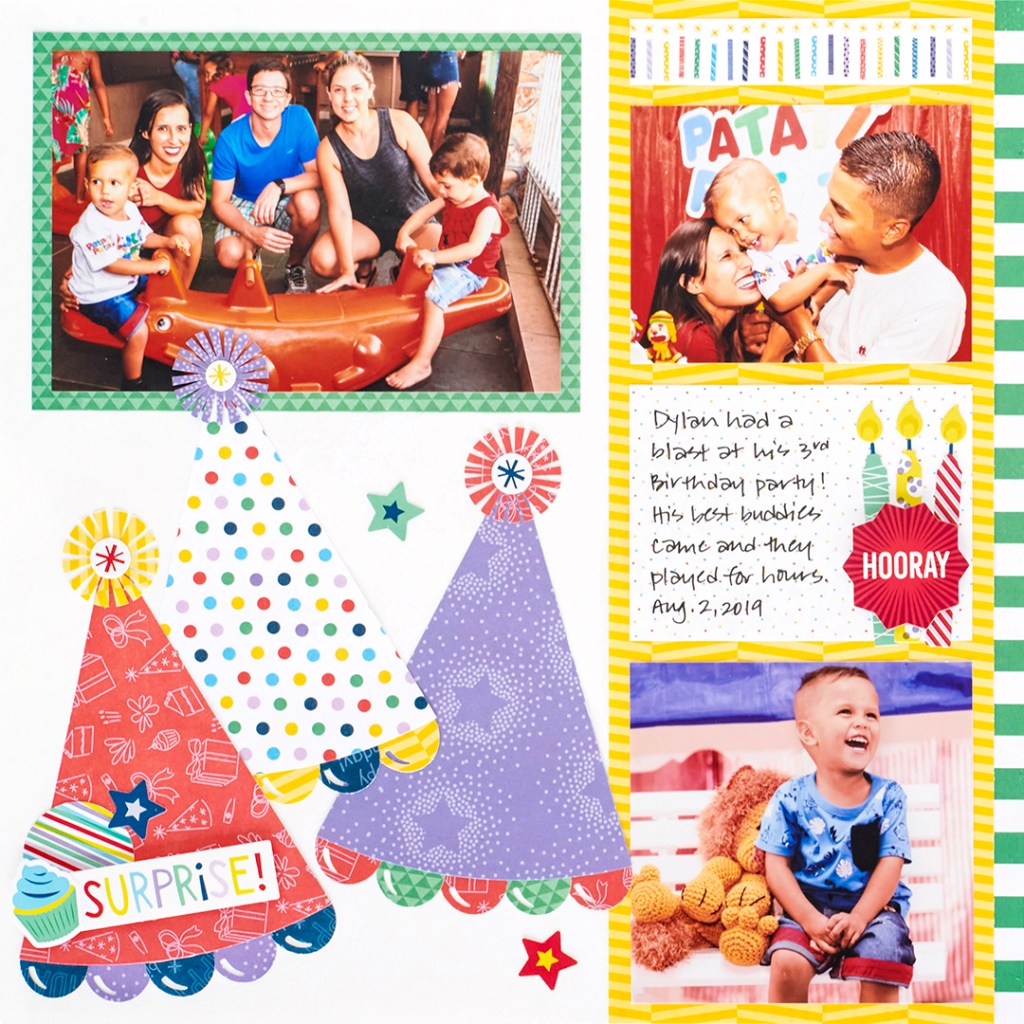
Step 1: Use a piece of White Solid Cardstock or a White Refill Page as the base for this layout.
Step 2: Cut a 1/2″ x 12″ strip of green striped paper and adhere to the right edge of the layout. Cut a 4-1/2″ x 12″ yellow chevron paper and adhere next to the green striped piece.
Step 3: Mat a 6″ x 4″ photo with a 6-1/2″ x 4-1/2″ piece of green triangles paper. Crop a photo to measure 4″ x 3″ and another to measure 4″ x 4″. Cut a piece of white “confetti” dots paper to measure 4″ x 3″ and a strip of the candles paper to measure 4″ x 3/4″. Adhere all to the layout as shown.

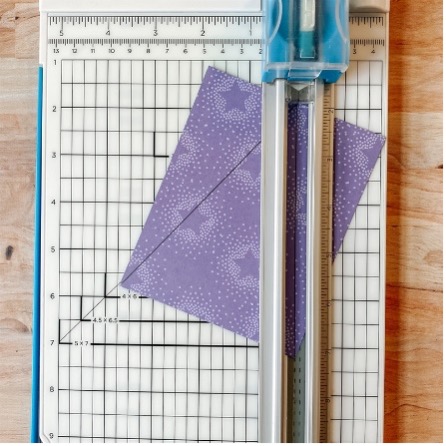

Step 4: Cut a 4″ x 5″ piece of each red party icons, bold multi-hued polka dots and purple stars papers. Mark the middle (2″) of the top 4″ side. Trim from the mark to one corner and then from the mark to the other corner to create a triangular party hat as shown.


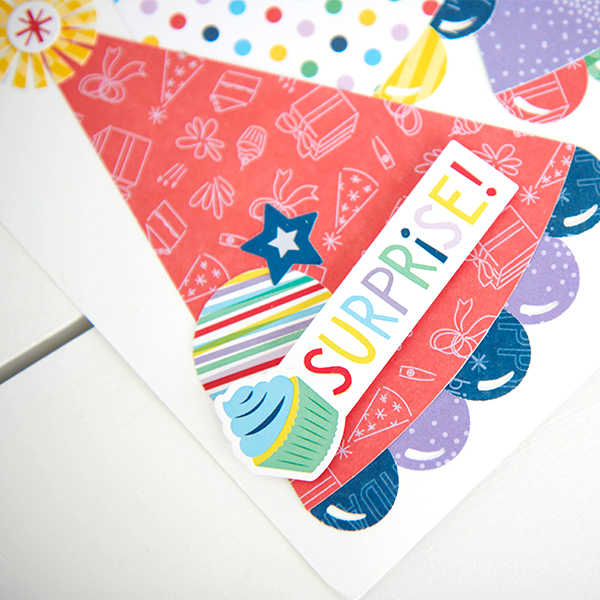
Step 5: Using the outside of the Jumbo Circle Custom Cutting System Pattern and the Red Blade, cut a curved edge at the bottom of the party hat. Repeat these steps to create the other two party hats. Punch several balloons using the Double Balloon Punch from scraps of papers. Adhere rounded sides to the bottom of each party hat as shown.


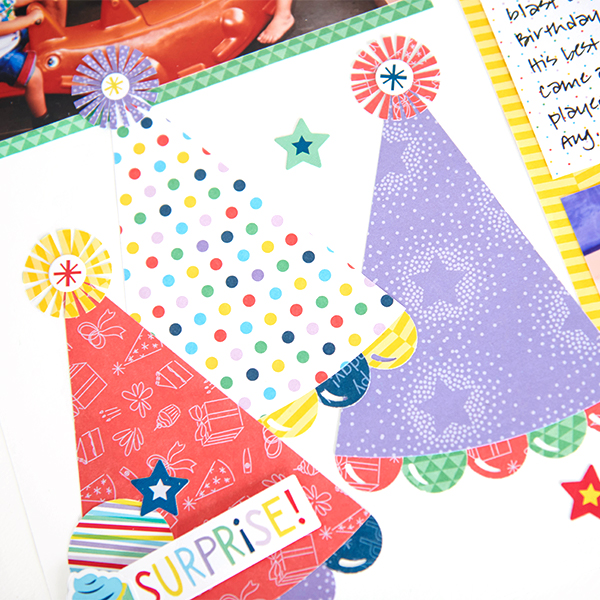
Step 6: Using the inside of the smallest Circle Custom Cutting System Pattern and the Green Blade, cut a circle with each yellow chevron, purple stars and red party icons papers. Snip small notches all the way around each circle using the Micro-Tip Scissors to create pompons. Adhere to the top of each hat. Mount all hats on the layout as shown.
Step 7: Add stickers and journal as desired.
What do you like most about this birthday scrapbook layout and the new Party Time! collection? Let us know in the comments below!

The collection is bright and colorful! I love the party hats! Thanks for sharing this fun layout.
With a title like this- I thought for sure I’d see a piñata or two! Come on CM- let’s get more cultural items out there!
I love the party hats! Please share more ideas on how to use tools like this.
[…] Scrapbooking is always a party, especially with the new Party Time! collection. Learn how to make this birthday layout by reading this blog post! […]
Great idea with party hats, Can you show a video of making the party hats..