February 2, 2021
Revive Retro With This Vintage Scrapbook Layout
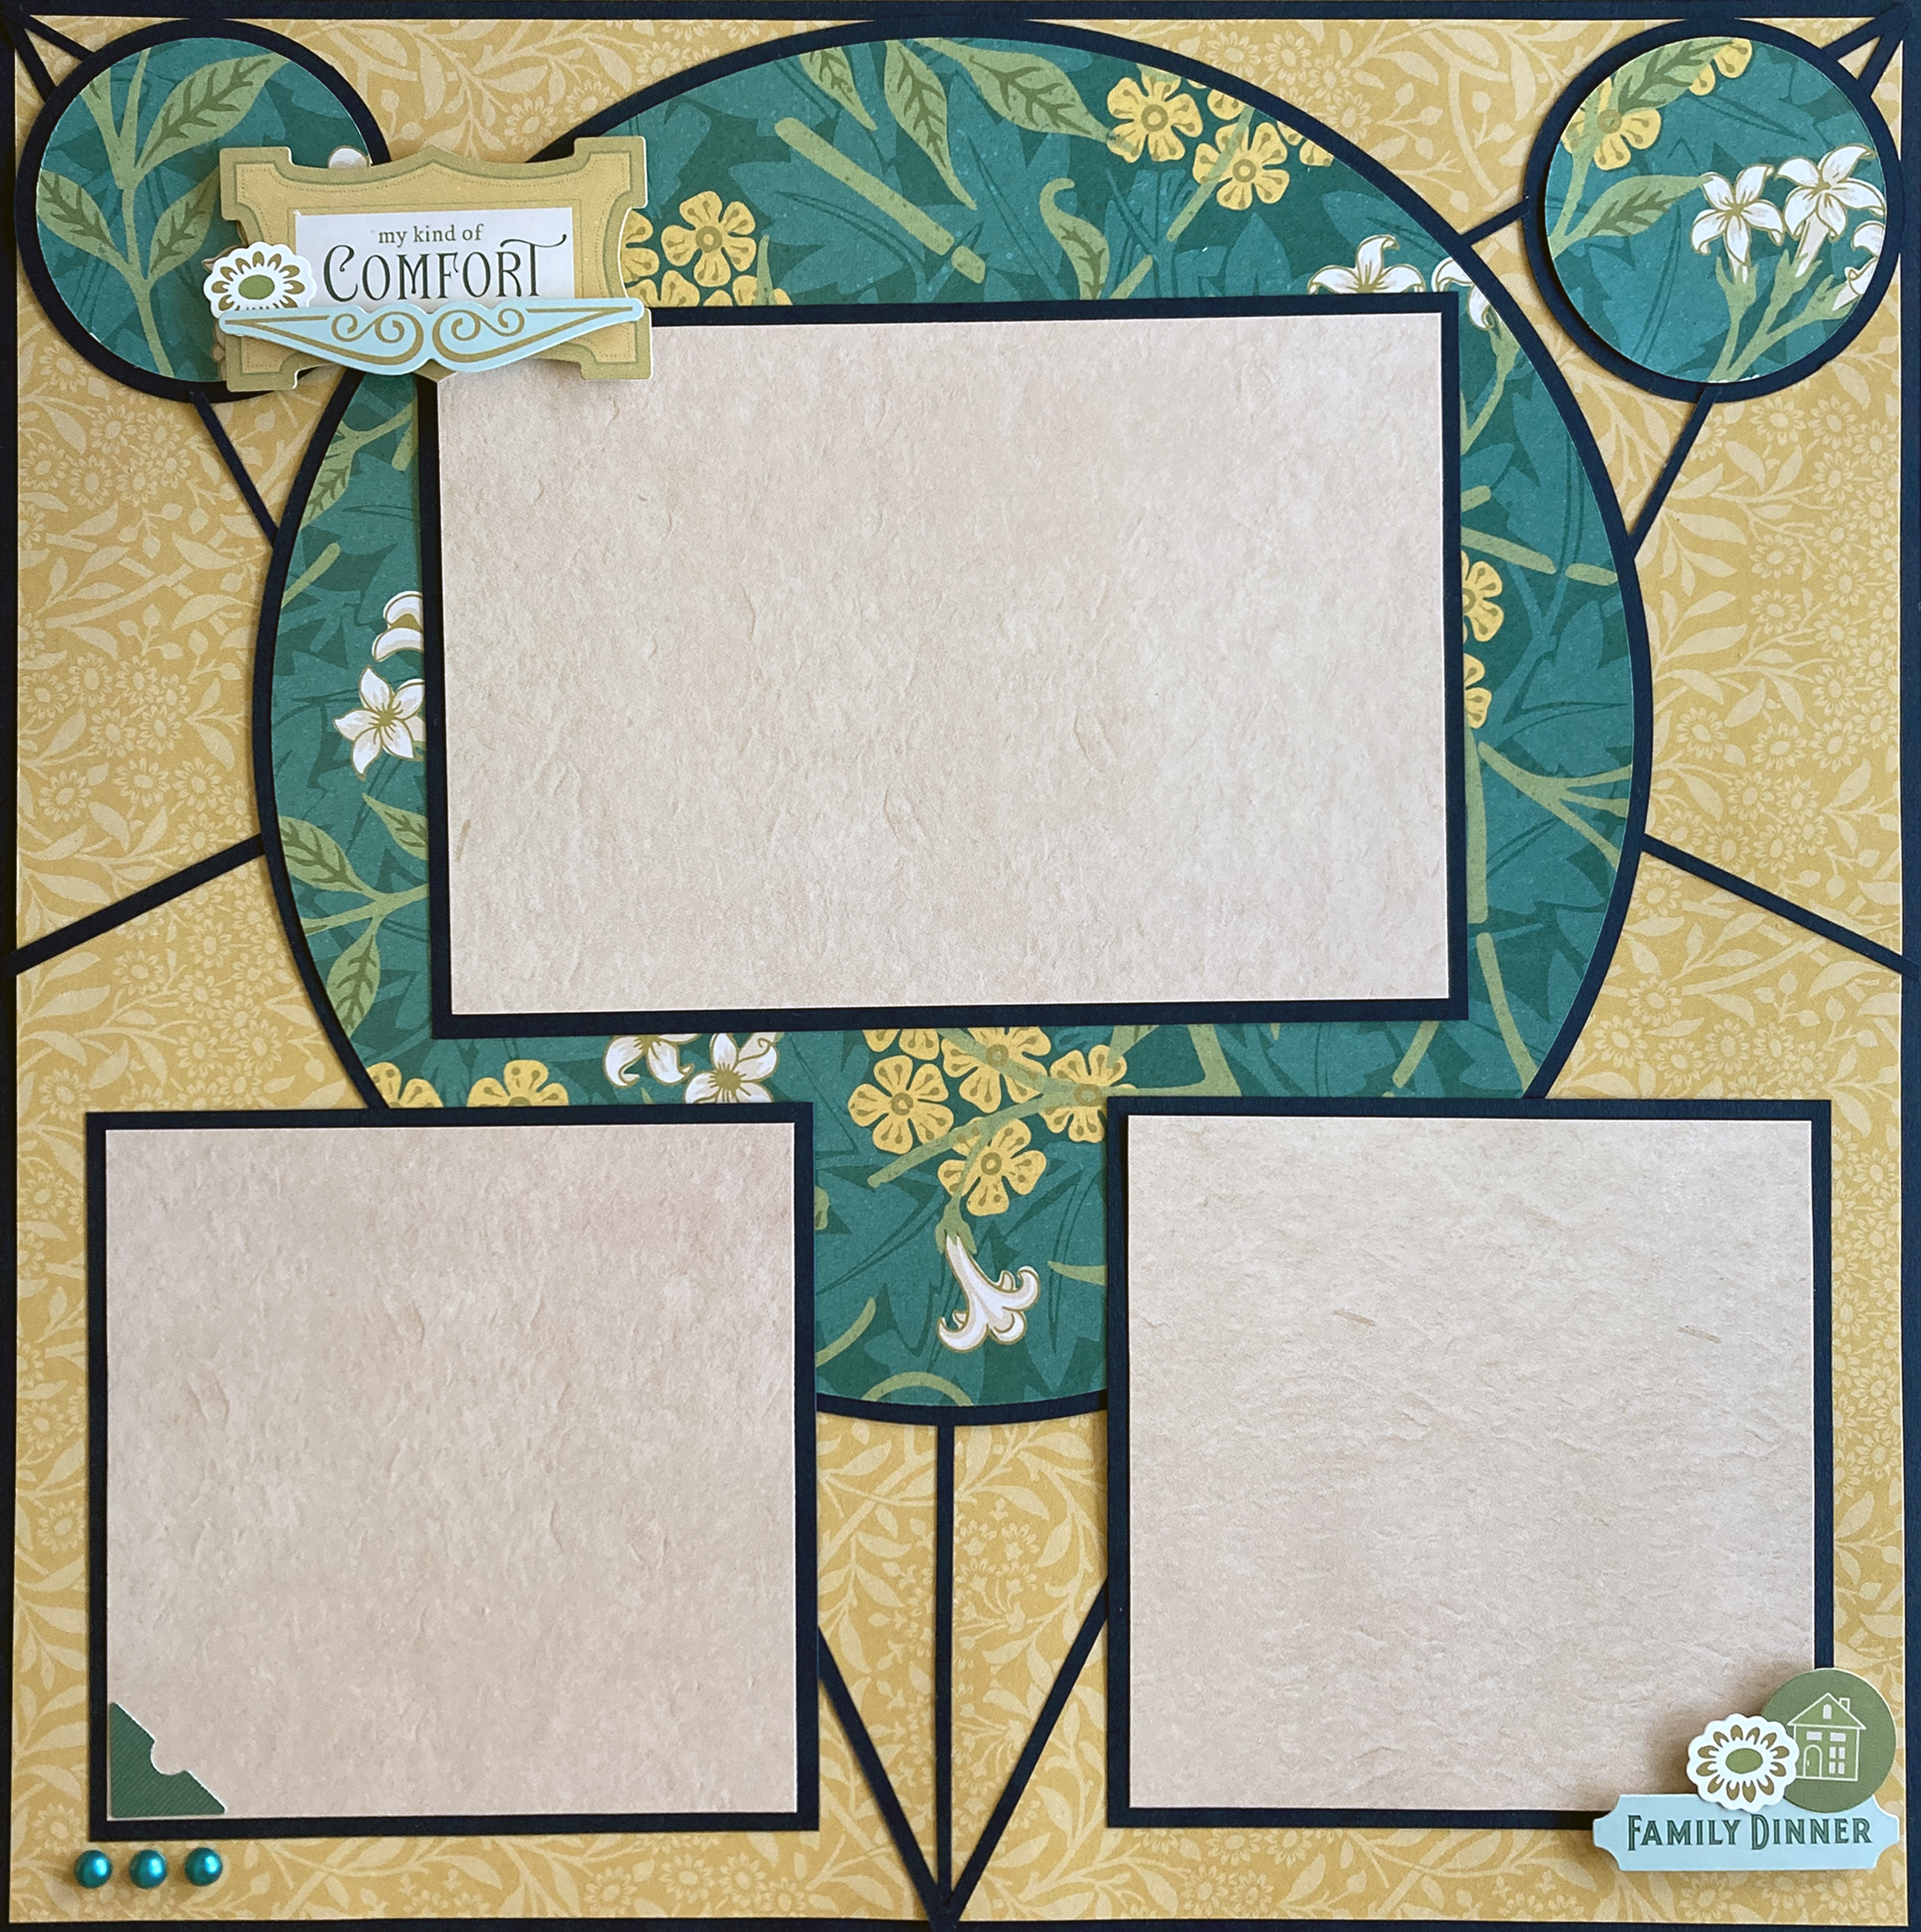
The Art Nouveau movement was a popular design style at the turn of the 20th century with its curved lines, natural forms and ornamental details seen throughout architecture, interior design, jewel and glass design, posters and illustrations… and now revived in today’s era with the Art Nouveau collection! In fact, blog contributor Sachiyo Omitsu was hit with some retro inspiration when she saw the timeless elegance of this collection’s products! Take a step back in time and put forth a beautiful vintage scrapbook layout!
Sachiyo’s Inspiration?
The Art Nouveau collection reminded me of a historic venue I once visited for a weekend crop. The place had a California Mission Revival style structure, but also a nostalgic interior design and retro atmosphere that made me think of the Art Nouveau collection. Seeing antiques or vintage items really makes me think about the stories behind them. Do you remember your grandmother’s rocking chair? Your grandfather’s jacket? I always think what we scrapbookers are doing — making albums — is like compiling family history, and protecting, cultivating and passing on the family tradition.
To create this layout you will need:
- Art Nouveau Paper Pack or (Shop Canada | Shop Australia)
- Navy Solid Cardstock or (Shop Canada | Shop Australia)
- Art Nouveau Stickers or (Shop Canada | Shop Australia)
- Custom Cutting System with Jumbo Circle & Circle Patterns or (Shop Canada | Shop Australia)
- 12-inch Trimmer or (Shop Canada | Shop Australia)
- Repositionable Tape Runner or (Shop Canada | Shop Australia)
- Foam Squares or (Shop Canada | Shop Australia)

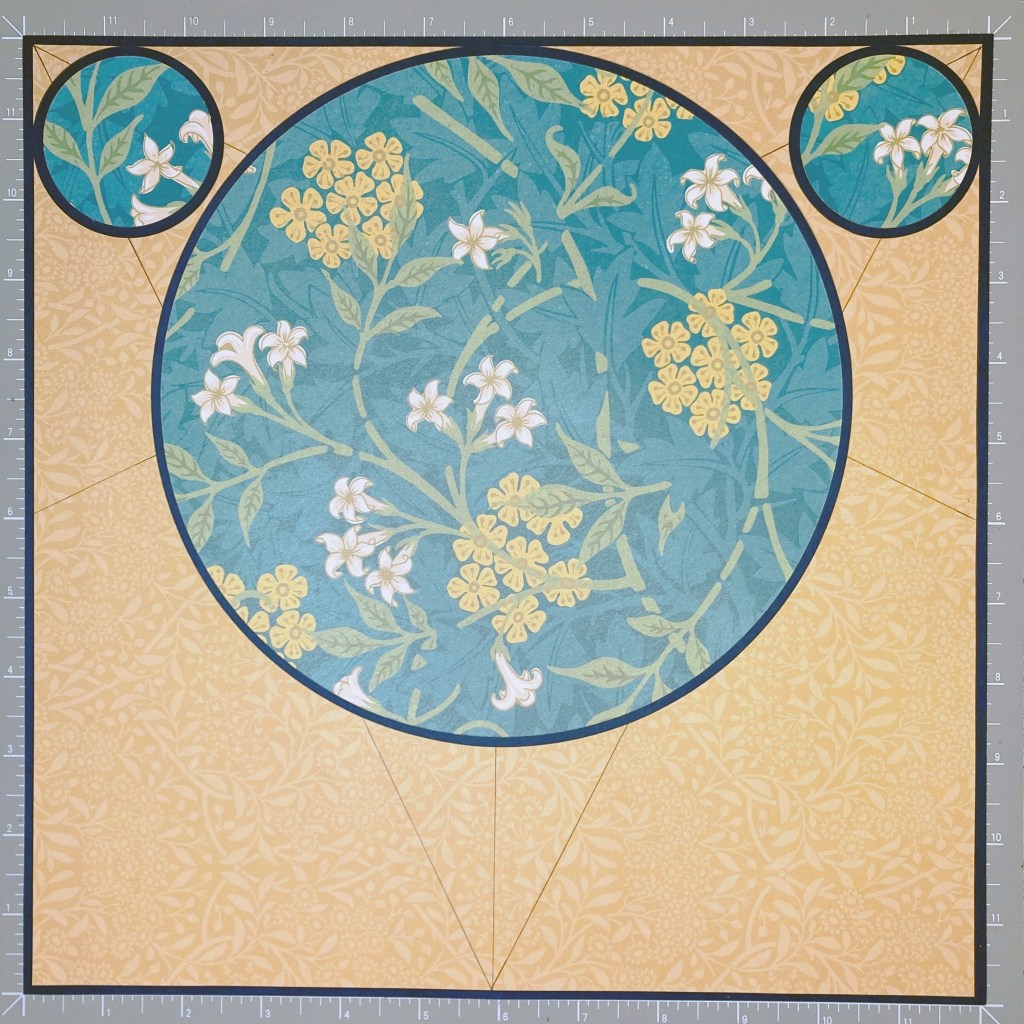
Step 1: Cut out the following shapes from the teal large florals patterned paper:
- A circle using the inside of the Jumbo Custom Cutting System Circle Pattern with the Green Blade
- Two circles using the inside of the medium Custom Cutting System Circle Pattern with the Green Blade
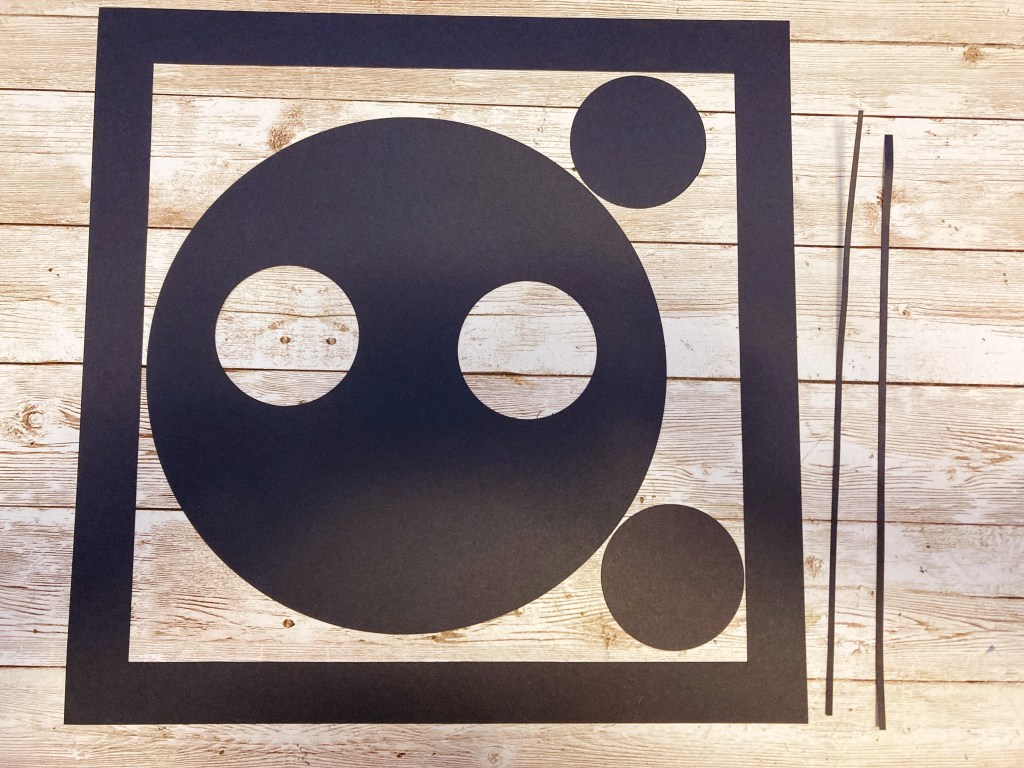
Step 2: Cut out a 1″ width frame from Navy Solid Cardstock and use it as the base. Cut out the following shapes from the Navy Solid Cardstock:
- A circle using the inside of the Jumbo Custom Cutting System Circle Pattern with the Red Blade
- Two circles using the inside of the medium Custom Cutting System Circle Pattern with the Red Blade
- Three pieces of 1/8″ strips
Step 3: Adhere the teal large florals patterned paper circles on the cardstock circles.
Step 4: Cut the mustard yellow florals patterned paper to measure 11-3/4″ x 11-3/4″. Adhere it to the base.
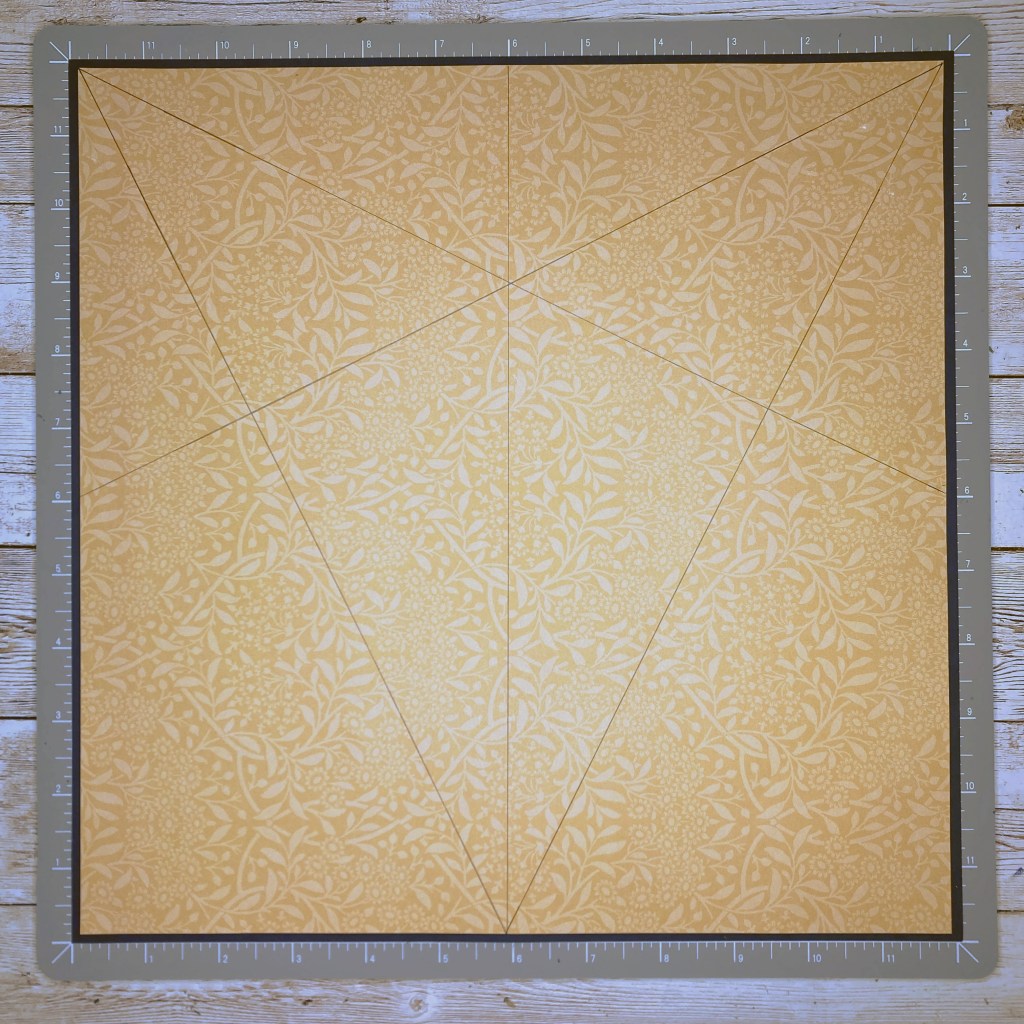
Step 5: Draw a line in the middle and lines connecting from six-inch points to the corner as shown.
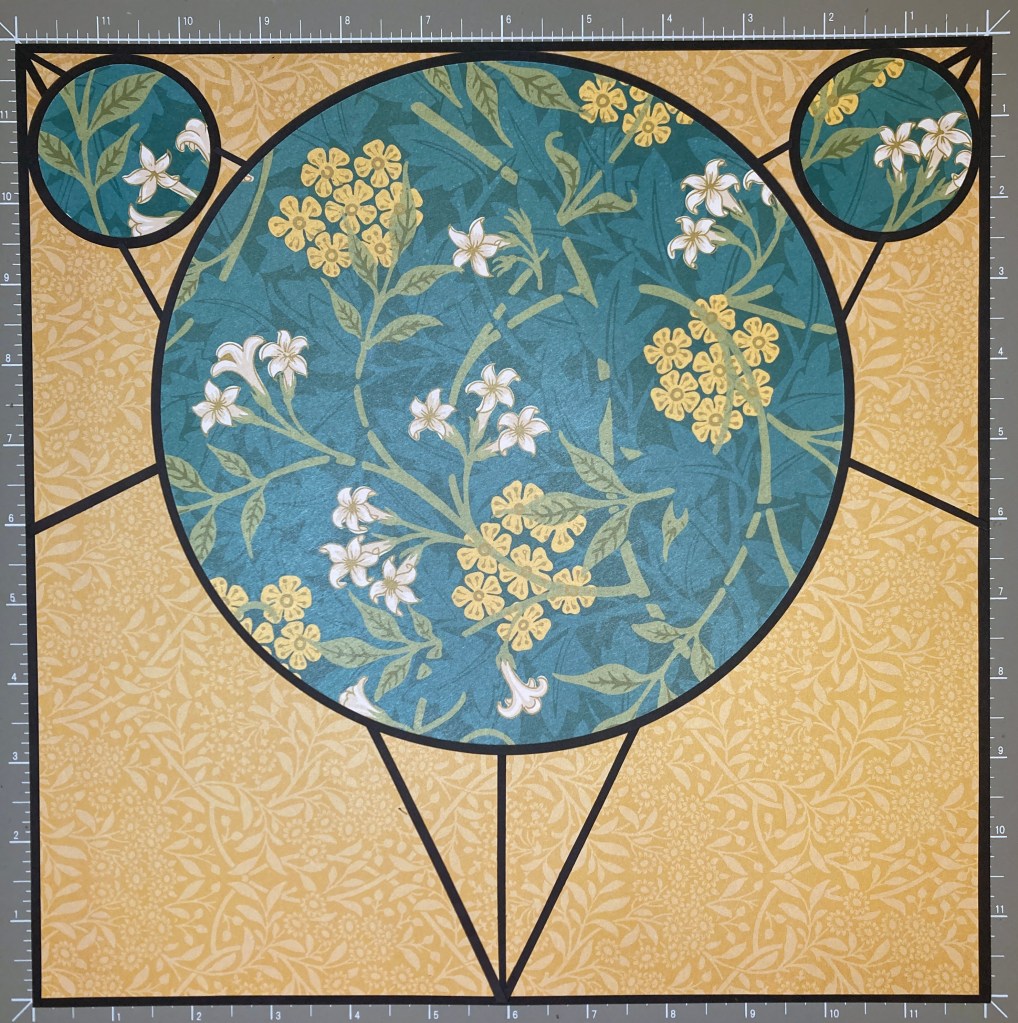
Step 6: Adhere circles. Adhere strips along the lines previously drawn.
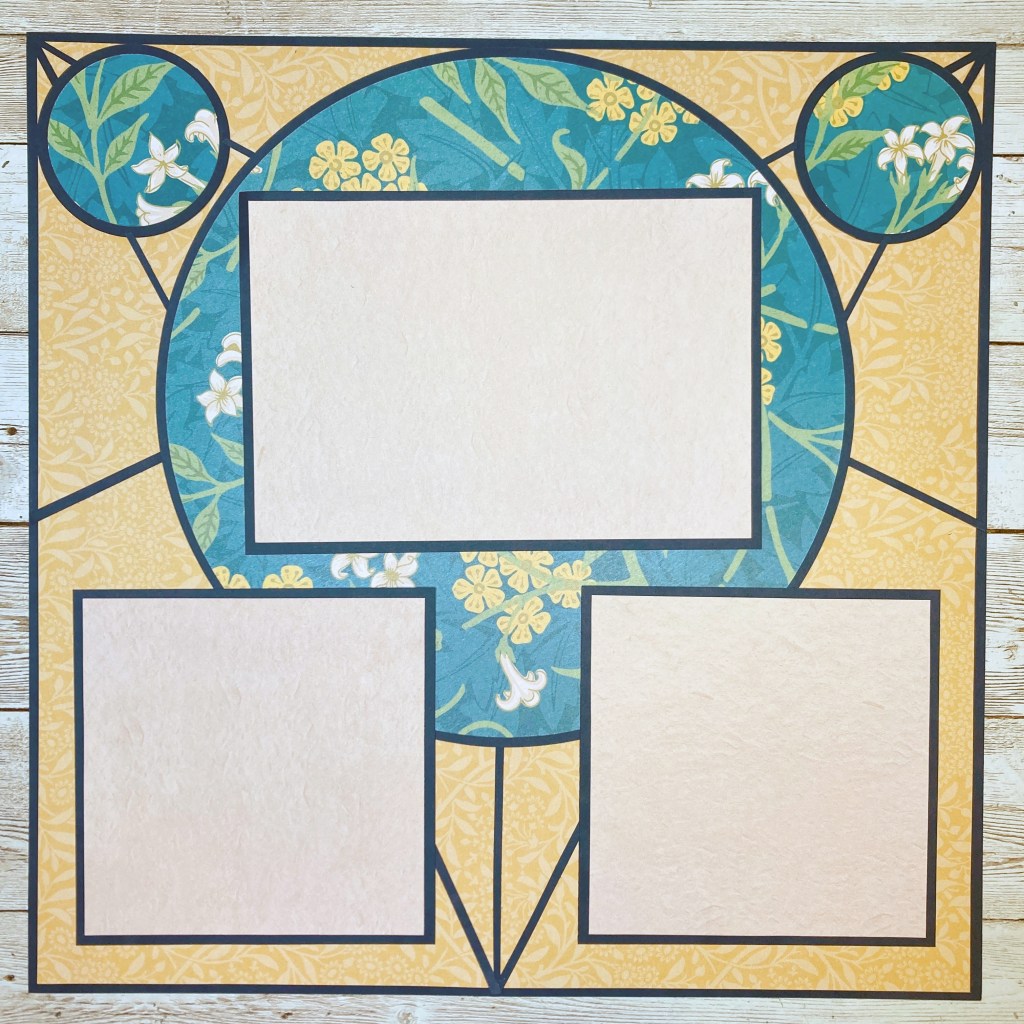
Step 7: Cut a mat to measure 4-1/2″ x 6-1/2″ and two mats to measure 4-1/2″ x 4-1/2″ from Navy Solid Cardstock. Cut a mat to measure 4-1/4″ x 6-1/4″ and two mats to measure 4-1/4″ x 4-1/4″ from the beige patterned paper. Add the beige mats on the navy mats and adhere to the page.
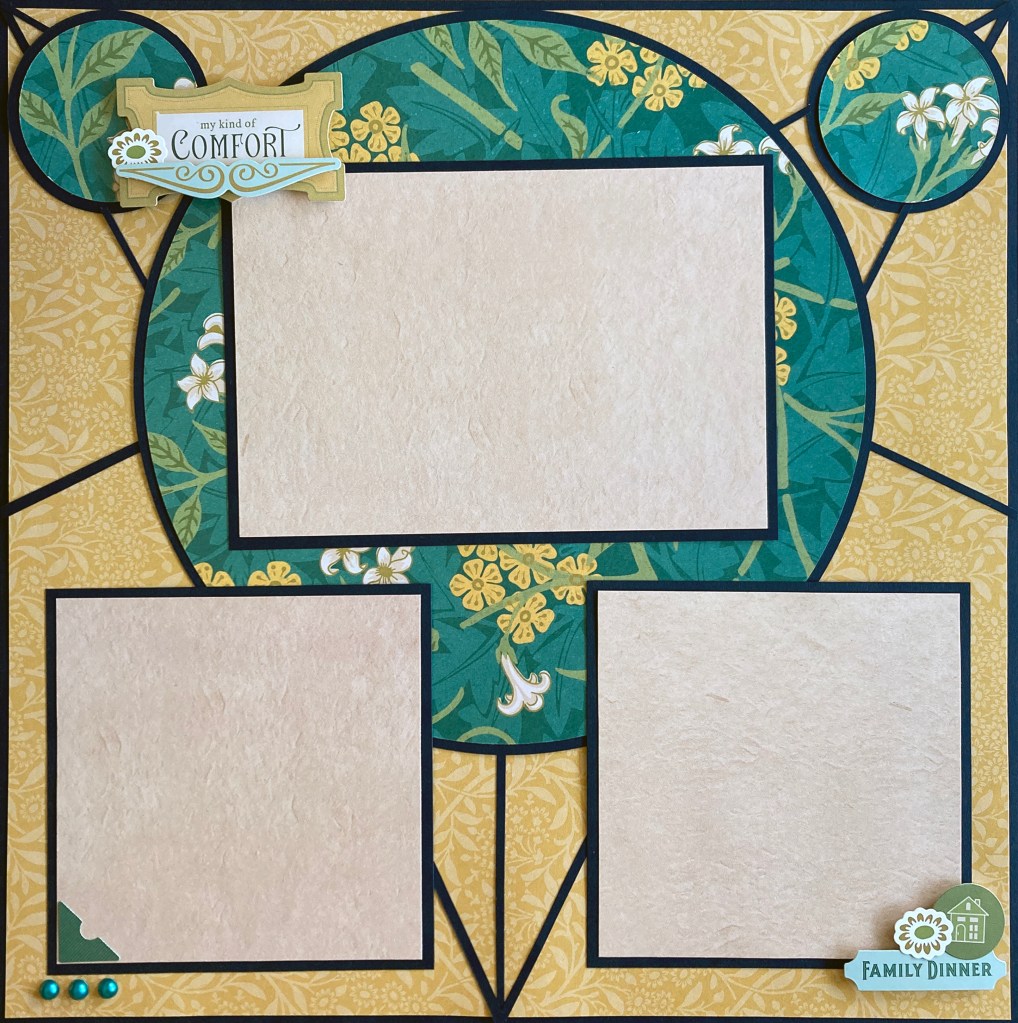
Step 8: Adhere stickers, using Foam Squares on some for added dimension.
What do you like thee most about this vintage scrapbook layout? Let us know in the comments below!

I like the look of a template without adding another to my collection
Love it ??
So pretty
Beautiful ?
Love this!
Sachiyo, I love everyone of your layouts! As soon as I see a layout I can tell when they are yours without seeing your name. Your layouts are incredibly creative and intricate with your instructions easy to follow. Keep them coming!
T thanks for the layout. I just love the crisp sharp lines of the layout
I LOVE this layout! Great techniques for saving paper and some of the bulk as well. You have such wonderful ideas!
Is there anywhere I can find the various sizes of circles the Custom Cutting system can make? I am considering buying the circle kit, but I need to know what the actual available sizes are.