March 10, 2021
Wing It On With These Dragonfly Scrapbook Projects
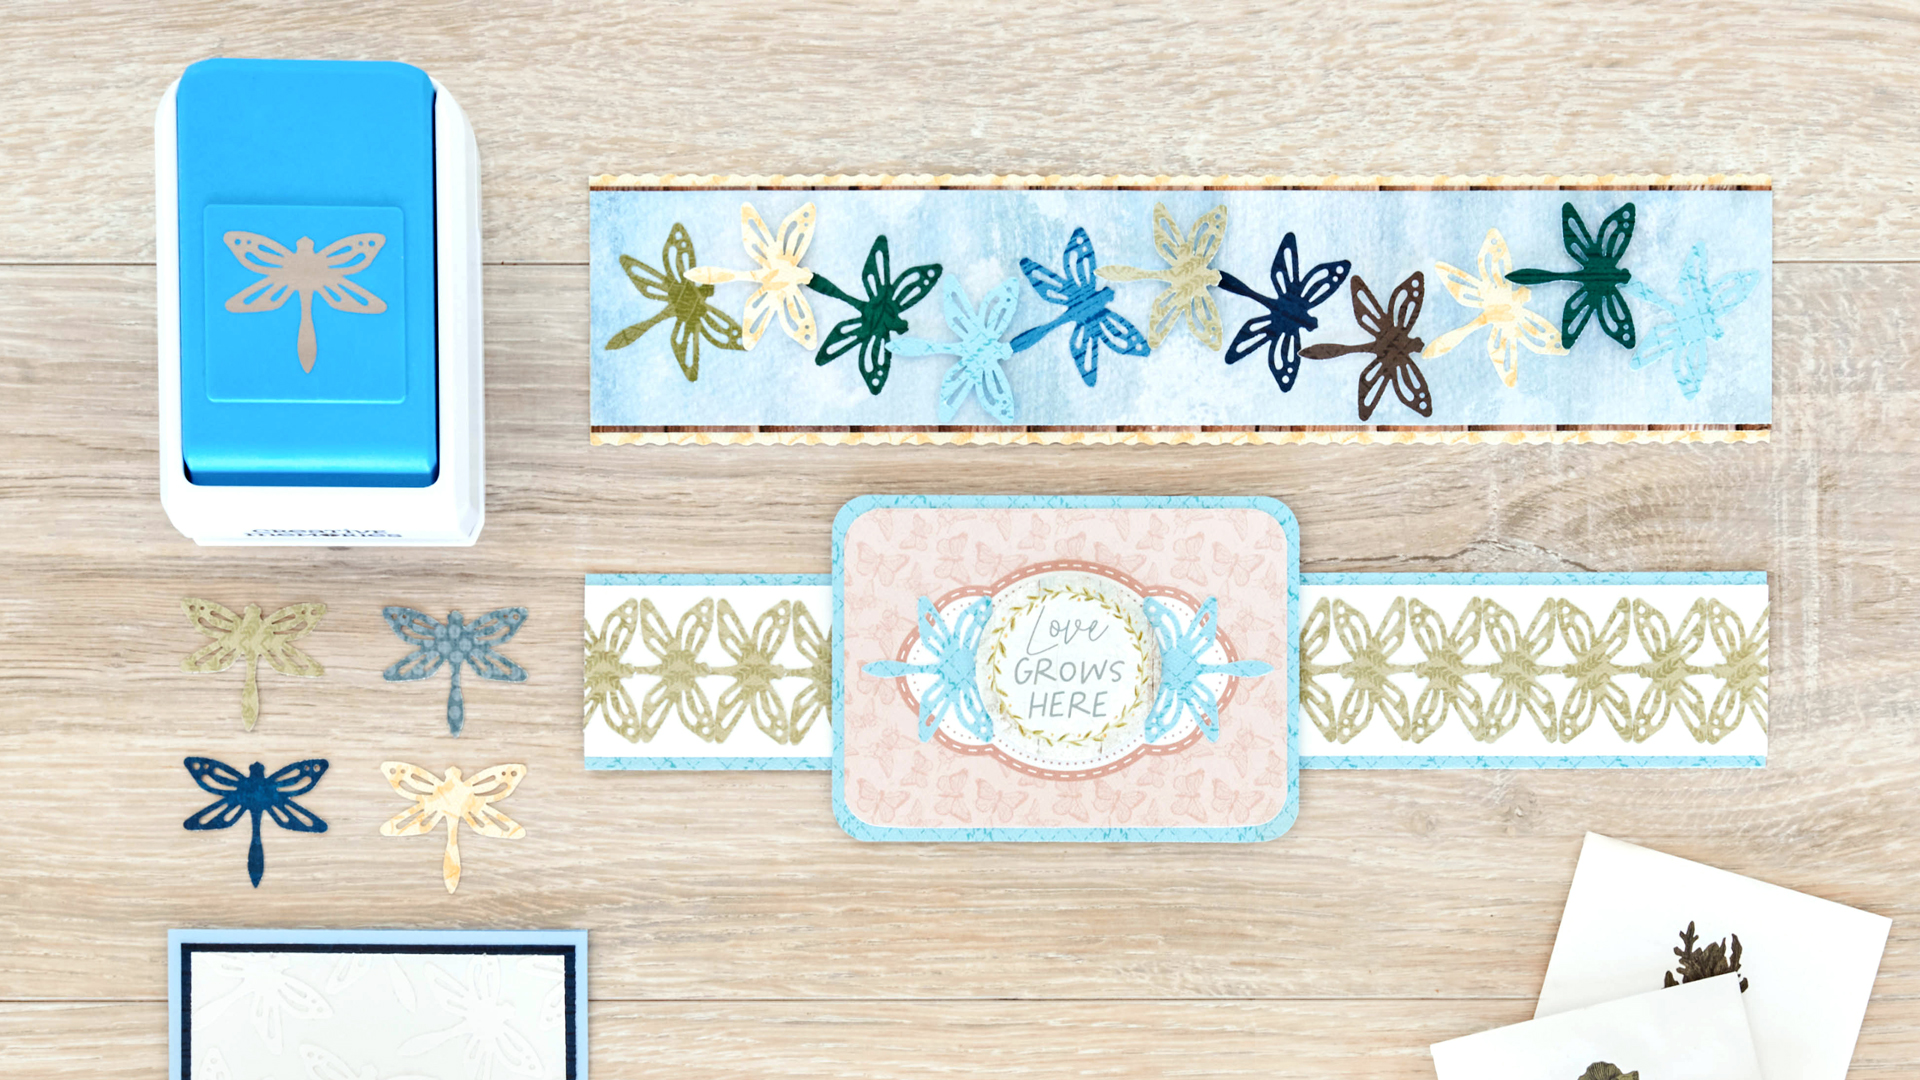
Whether perched upon a cattail or performing aerial aerobics above a lake or pond, dragonflies are a sure sign of springtime and summer. And while these fluttering, transparent-winged beings are some of the world’s oldest insects (estimated to have inhabited around 300 million years ago!) this insect has swarmed onto the CM scene as one latest punches to take your projects to new heights — it’s the Dragonfly Punch! Curious to what dragonfly scrapbook projects and DIY dragonfly card we have line up for you today?

To create these borders and card, you will need:
- Spring Cottage Paper Pack or (Shop Canada | Shop Australia)
- Spring Cottage Tone-on-Tone Paper Pack or (Shop Canada | Shop Australia)
- Spring Cottage Stickers or (Shop Canada | Shop Australia)
- Spring Cottage Variety Mat Pack or (Shop Canada | Shop Australia)
- Cloud & White Solid Cardstocks or (Shop Canada | Shop Australia) — NOTE: Cloud Solid Cardstock is OOS; feel free to use another blue-hued cardstock of your choice
- 12-inch Trimmer with Straight, Scoring & Wave Blades or (Shop Canada | Shop Australia)
- 2-Way Corner Rounder or (Shop Canada | Shop Australia)
- All-Purpose Scissors or (Shop Canada | Shop Australia)
- Tape Runner or (Shop Canada | Shop Australia)
- Repositionable Tape Runner or (Shop Canada | Shop Australia)
- Foam Squares or (Shop Canada | Shop Australia)
Check out the Dragonfly Punch in action in the video below!

Let’s Go Outside Card
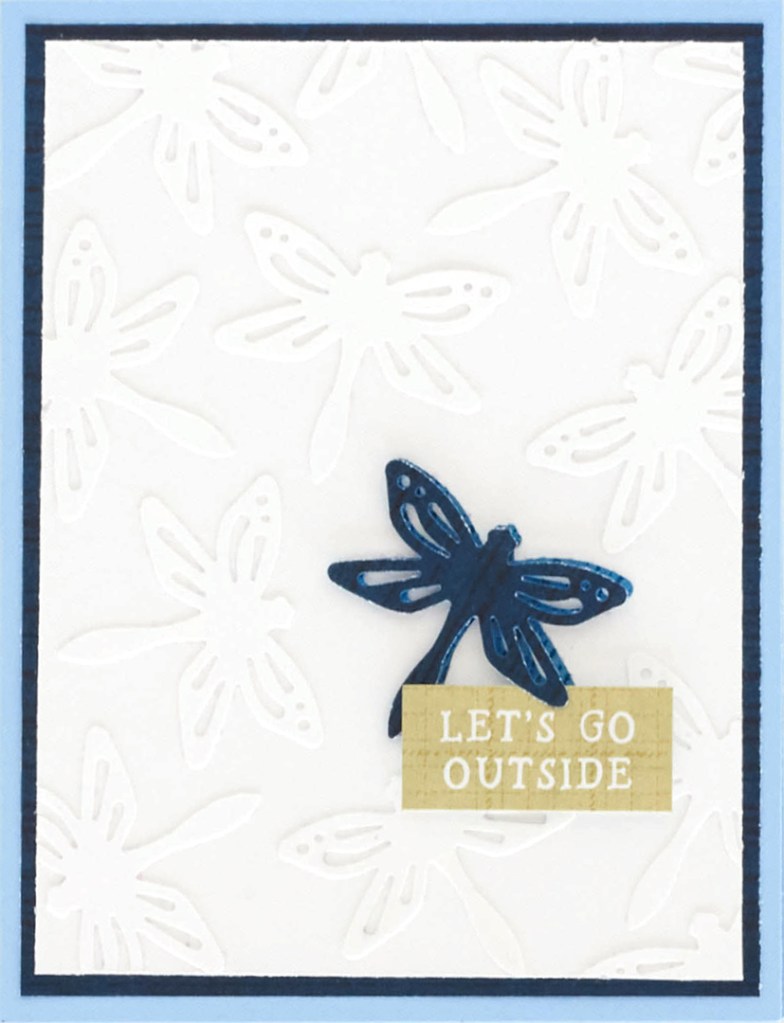
Step 1: Cut a piece of Cloud Solid Cardstock (or another blue cardstock of your choice) to measure 5-1/2″ x 8-1/2″. Fold in half to create the card base.
Step 2: Cut a piece of navy tonal paper to measure 4″ x 5-1/4″. Adhere to the front of the card.
Step 3: Cut a piece of White Solid Cardstock to measure 3-3/4″ x 5″.
Step 4: Punch one dragonfly using blue paper. Adhere to the White Solid Cardstock using Repositionable Tape Runner adhesive.
Step 5: Punch numerous dragonflies using the Dragonfly Punch from White Solid Cardstock. Using Repositionable Tape Runner adhesive, adhere the dragonflies around the navy dragonfly in different directions. If there are any pieces of the dragonflies hanging off the edge of the cardstock, cut with a scissors. Adhere to the front of the card.
Step 6: Punch another dragonfly with the navy blue tonal paper. Adhere to the top of the previous blue piece with Foam Squares.
Step 7: Adhere the “Let’s go outside” sticker to the card using Foam Squares.
Love Grows Here Border

Step 1: Cut a piece of aqua gingham picnic blanket tonal paper to measure 12″ x 2″. Use as the base of the border.
Step 2: Cut a piece of White Solid Cardstock to measure 12″ x 1-3/4″. Adhere to the base.
Step 3: Cut a piece of aqua gingham picnic blanket tonal paper to measure 4-3/4″ x 3-1/2″. Round the corners with a 2-Way Corner Rounder.
Step 4: Cut a large mat in half (4-1/2″ x 3-1/4″). Round the corners. Adhere to the previous pieces.
Step 5: Adhere the “Love grows here” sticker in the middle using Foam Squares.
Step 6: Using the Dragonfly Punch, punch 11 pieces from the green leaves chevron designer paper. Adhere four coming in from the left edge, so that the wings of the dragonfly touch. Adhere seven coming in from the right side of the border. Cut any excess off with a scissors.
Step 7: Punch two dragonflies using the Dragonfly Punch from the aqua gingham picnic blanket tonal paper. Adhere slightly under each side of the round sticker.
Dragonfly Border
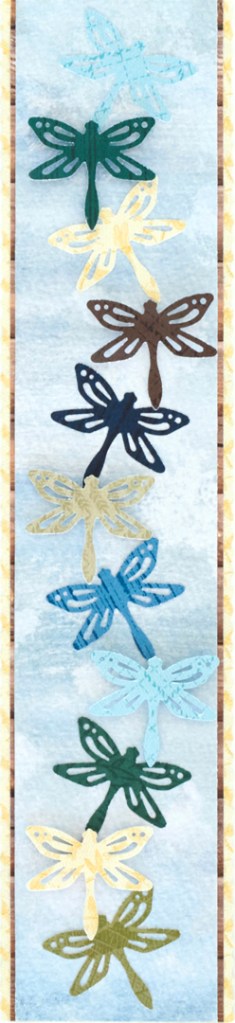
Step 1: Cut a piece of yellow dragonflies designer paper to measure 2-3/4″ x 12″ using the 12-inch Trimmer with the Wavy Blade.
Step 2: Cut a piece of wood cabin wood grain paper to measure 2-1/2″ x 12″. Adhere to the top of the previous piece.
Step 3: Cut a piece of sky paper to measure 2-3/8″ x 12″. Adhere to the top of the previous piece.
Step 4: Using the Dragonfly Punch, punch a total of 11 pieces from a variety of hues and patterns of paper. Adhere six of them to the sky piece angling each one opposite, with approximately 3/4″ in between, using Repositionable Tape Runner adhesive.
Step 5: Adhere the remaining five using Foam Squares in between each of the previous pieces as shown.
What do you think of these dragonfly scrapbook projects? Which of them draws you in the most? Comment below with your thoughts — and tell us if you have another great border or DIY dragonfly card idea with the Dragonfly Punch!

Interesting. I thought the dragonflies were from an embossing folder. I would never have thought they were punched out of the same colour paper. The coloured one makes a nice contrast.
Nice punch! I can see lots of uses!
I love to border piece! Can’t wait for this punch to arrive here in Alaska.
[…] Let your creativity take flight with the Dragonfly Punch! See how it’s used on this card and some borders within this blog post! […]