July 2, 2021
Pledge Allegiance to This Independence Day Scrapbook Layout

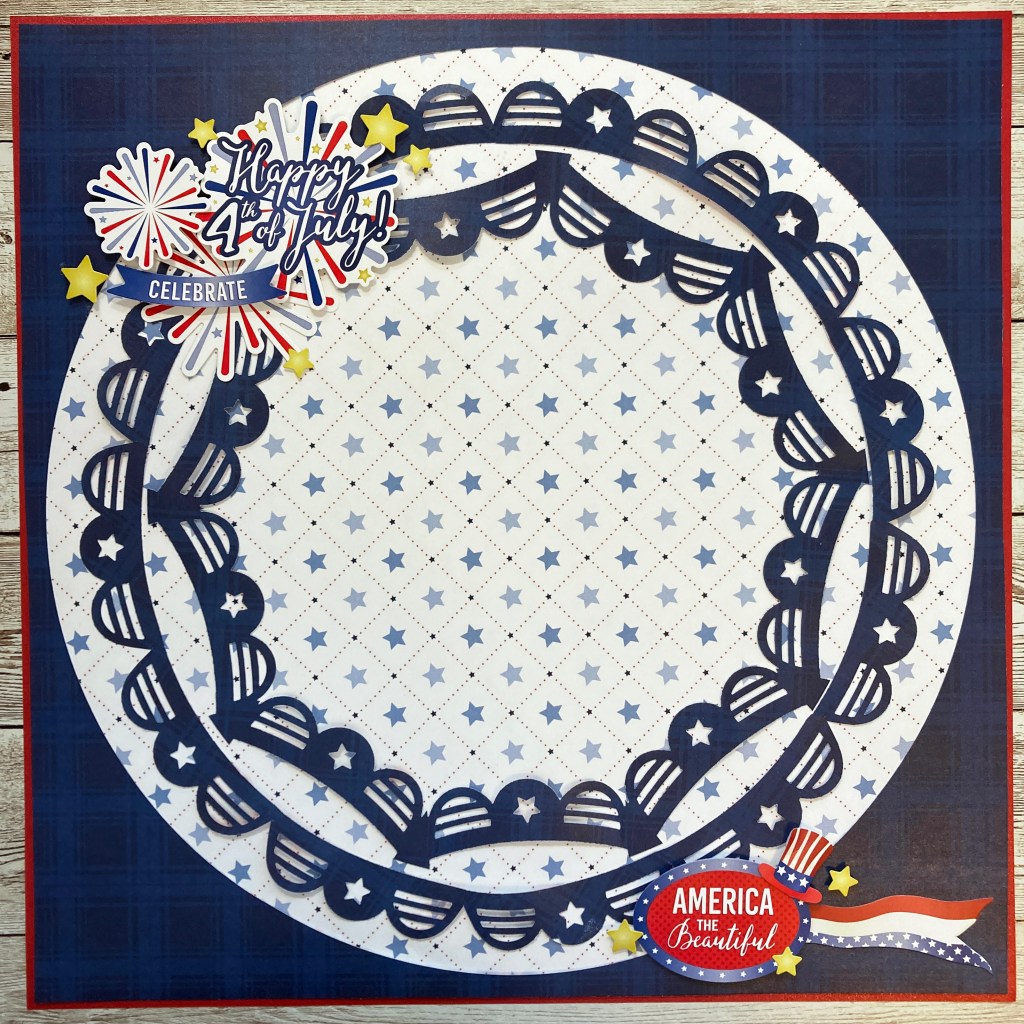
There’s a lot of star-spangled spirit on the U.S. Independence Day, and with that, tons of activities, celebrations and fun to take note of, like backyard grill outs with burgers and corn on the cob, patriotic party decorations and apparel, camping adventures with friends and family and saluting to and thanking service men and women. Blog contributor Sachiyo Omitsu was feeling festive for this July jubilee and created this Independence Day scrapbook layout (pssst, the Fourth of July is this Sunday)! Check out this Americana idea and let your creativity take off like fireworks!
Sachiyo’s Inspiration
In this time of year, I love seeing red, white and blue hues everywhere I go. I not only see the flag itself, but also red, white and blue candies, cakes, flower bouquet and more! I also love the way American people call the flag by different names; The Red, White and Blue; The Stars and Stripes; Old Glory; and The Star-Spangled Banner. Do you display the American flag on the Fourth of July?
To create this layout you will need:
- United We Stand Paper Pack or (Shop Canada | Shop Australia)
- United We Stand Stickers or (Shop Canada | Shop Australia)
- Firecracker Shimmer Solid Cardstock or (Shop Canada | Shop Australia)
- Flag Banner Border Punch or (Shop Canada | Shop Australia)
- Custom Cutting System with the Jumbo Circle Pattern or (Shop Canada | Shop Australia)
- 12-inch Trimmer or (Shop Canada | Shop Australia)
- All-Purpose Scissors or (Shop Canada | Shop Australia)
- Repositionable Tape Runner or (Shop Canada | Shop Australia)
- Foam Squares or (Shop Canada | Shop Australia)

Step 1: Use a piece of Firecracker Shimmer Solid Cardstock as the base.
Step 2: Place the Jumbo Custom Cutting System Circle Pattern in the middle of the navy plaid paper and cut inside and outside of the pattern with the Red Blade.
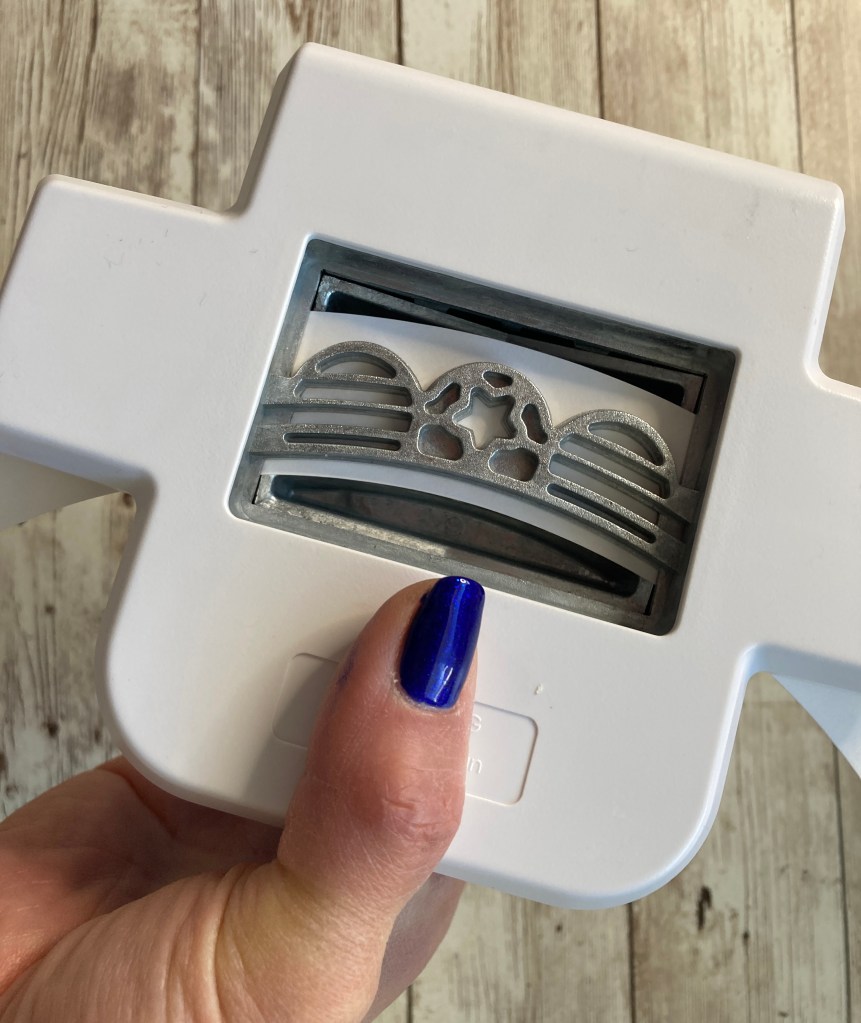

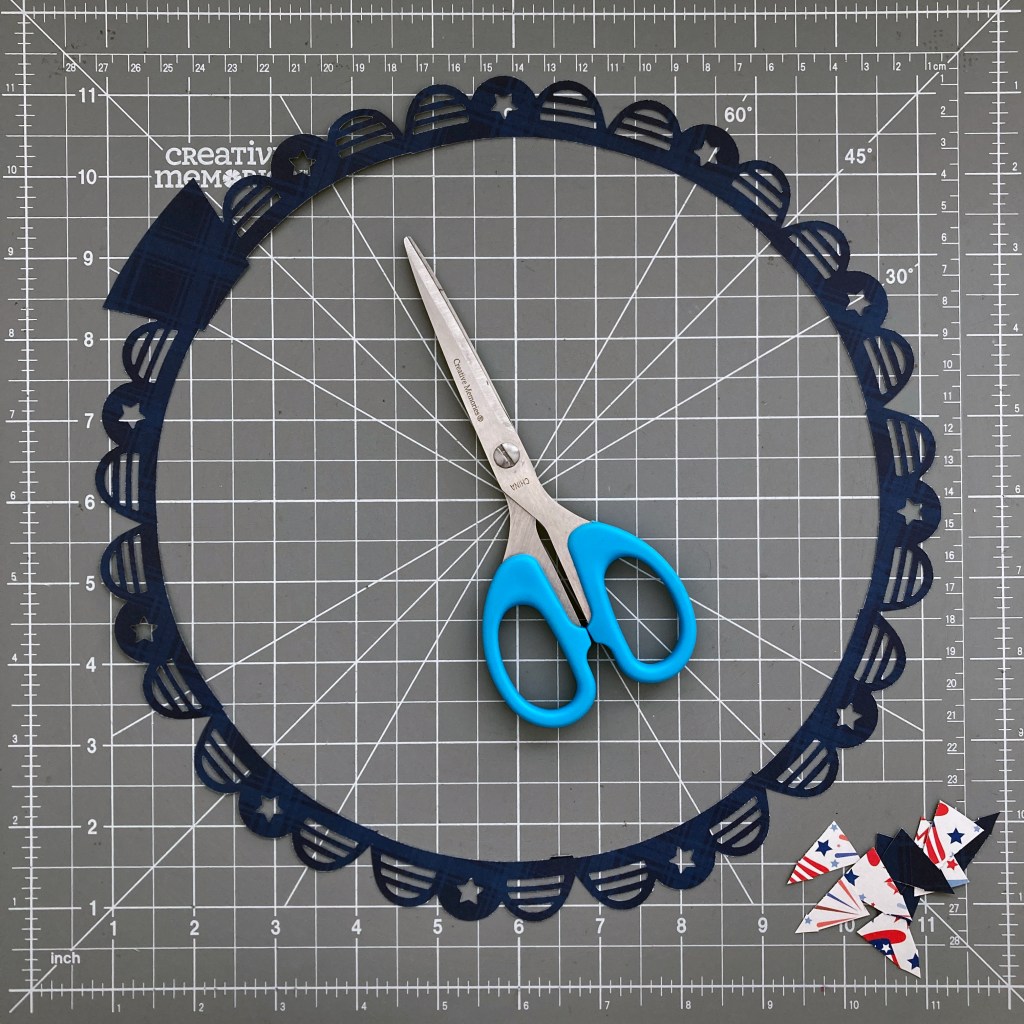
Step 3: Using the Flag Banner Punch, punch inside of the ring as follows. Hold the Flag Banner Border Punch upside down so you can see the punching window. Insert the paper ring to the punch, gently close the punch so the paper stays in place, flip the punch with the punching face down and punch. Flip the punch back again and insert the paper as shown. Punch 11 times in total. You will have an unpunched portion in the end. Cut along the banner curve to trim off the triangular-shaped pieces.
Pro tip: Make sure the curved line of the ring is matched up with the curved line of the punch design. There should be paper under the punching area, so that punched border has complete design.
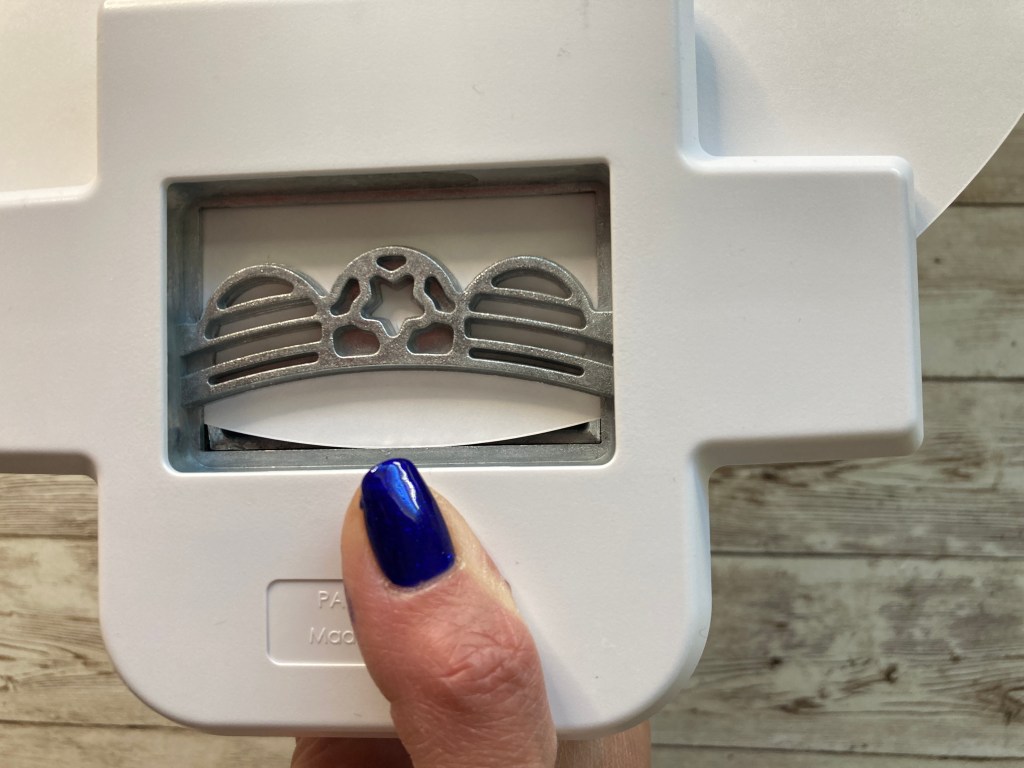


Step 4: Using the Flag Banner Border Punch, punch outside of the navy plaid circle as follows. Hold the Flag Banner Border Punch upside down so that you can see the punching window. Insert the circle to the punch, gently close the punch so the paper stays in place, flip the punch with the punching face down, and punch. Flip the punch again, insert the paper as shown. Punch nine times in total. You will have an unpunched portion in the end. Trim the excess as shown.
Pro tip: When inserting your paper, the top of the circle touches the middle of the punching window. There should be paper under the punching area, so that punched border has complete design.

Step 5: Trim the navy plaid frame and the white star grid paper to measure 11-3/4″ x 11-3/4″. Add the white star grid paper to the base and then add the navy plaid frame on top.
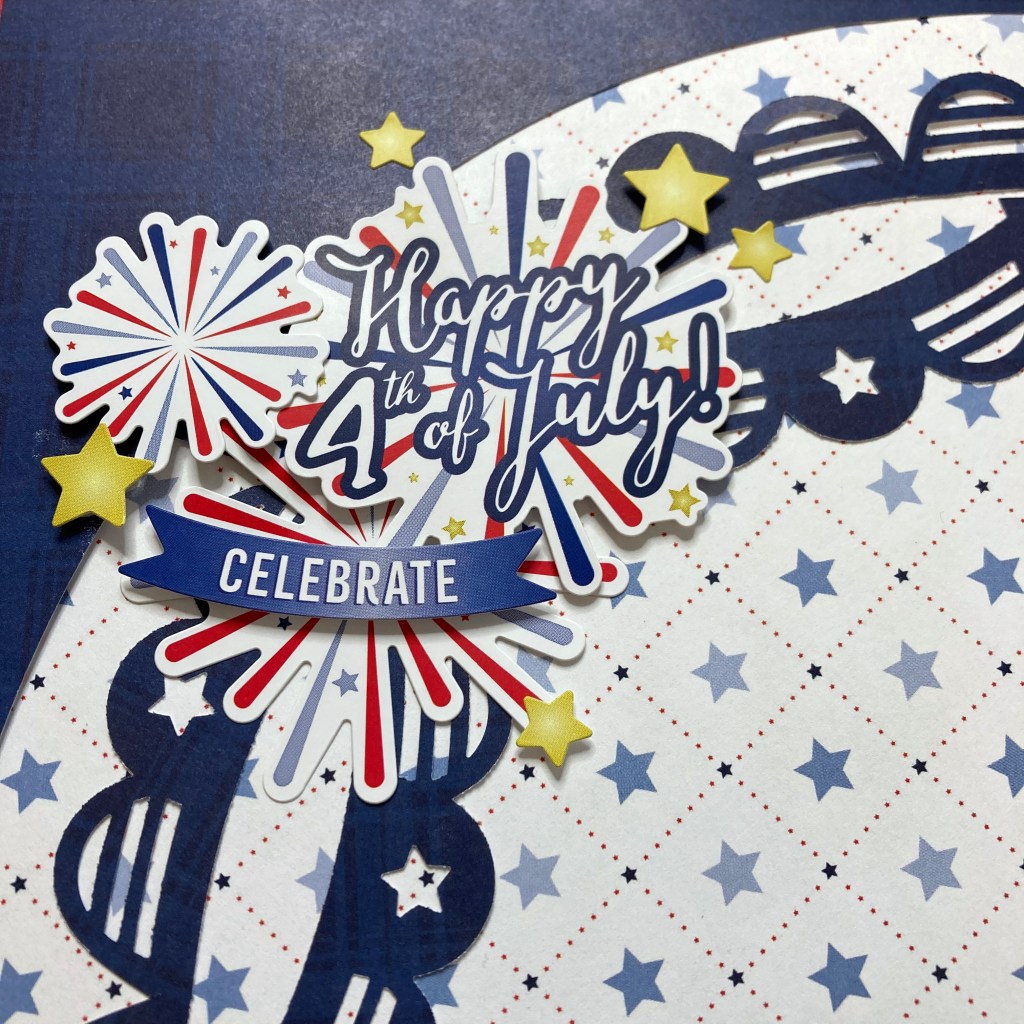
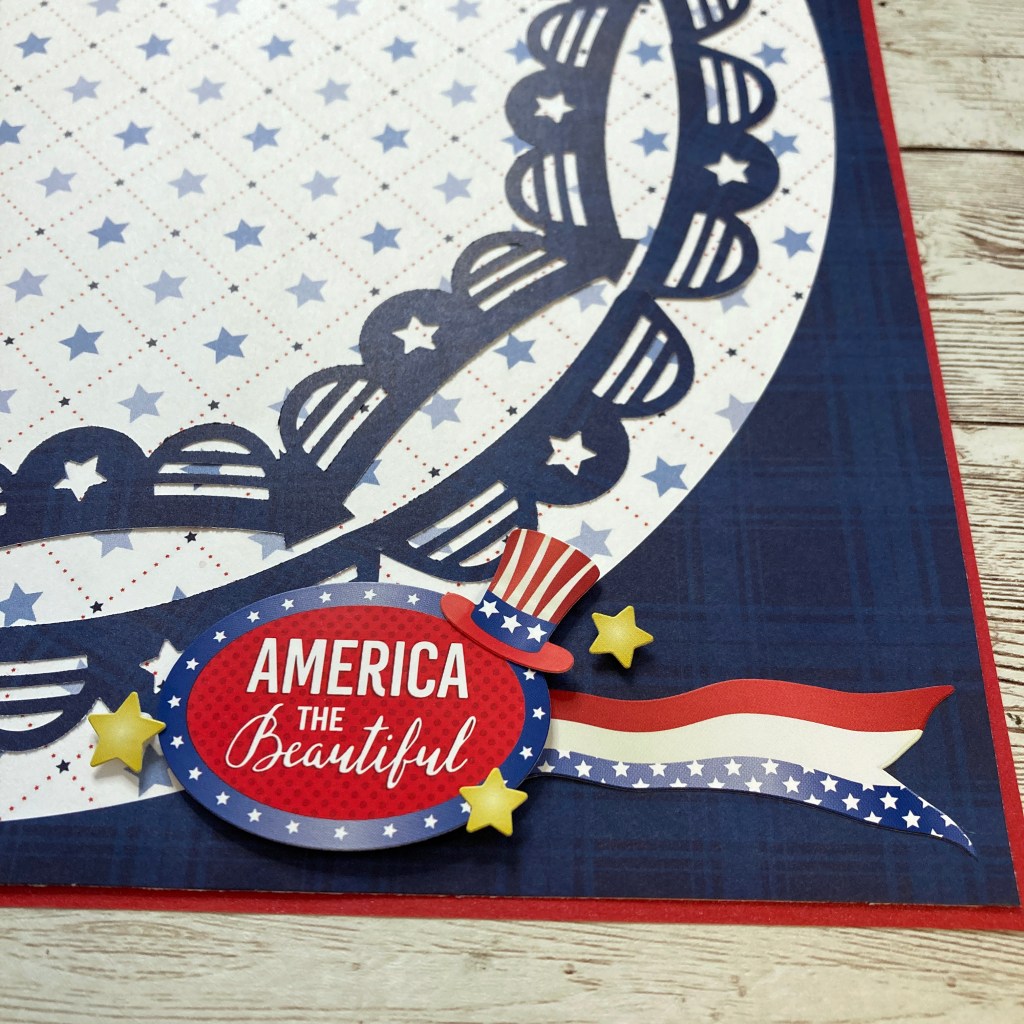
Step 6: Add the banner rings to the page. Adhere stickers, using Foam Squares on some for added dimension.
What are your plans for the Fourth of July? What do you think of Sachiyo’s Independence Day scrapbook layout? Give a holler in the comments!

This is Fantastic! Thank you. I can’t wait to try it.
Love it!
Thanks for sharing! Great idea!
This is a beautiful layout, for a beautiful country celebration! Thank you for this beautiful layout!
Firecracker Amazing…Big, Bold and Beautiful! A scrapbook page to remember…Happy 4th!
Perfect for this special holiday .
Did you have Old Glory in your list of names?
Yes you did!
I’m still hunting for one you might have missed.
Fabulous border punch idea.