February 10, 2022
New Places With Familiar Faces: Travel Scrapbook Layout

Whether it’s a study abroad program with fellow friends and classmates or a fun-filled family vacation exploring historical sites and delicious cuisines, making travel plans with others can be a great way to not only see the world, but to experience it in a new lens… all while building stronger relationships and enjoying life’s amazing cultures. Relay your recent treks, journeys and wayfaring by creating this travel scrapbook layout!
To create this layout you will need:
- Wanderlust Paper Pack or (Shop Canada | Shop Australia)
- Wanderlust Tone-on-Tone Paper Pack or (Shop Canada | Shop Australia)
- Wanderlust Stickers or (Shop Canada | Shop Australia)
- Wanderlust Embellishments or (Shop Canada | Shop Australia)
- Wanderlust Variety Mat Pack or (Shop Canada | Shop Australia)
- Original Border Maker System with Chevron Arrows Border Maker Cartridge or (Shop Canada | Shop Australia)
- 12-inch Trimmer or (Shop Canada | Shop Australia)
- Tape Runner or (Shop Canada | Shop Australia)
- Repositionable Tape Runner Refill or (Shop Canada | Shop Australia)
- Foam Squares or (Shop Canada | Shop Australia)
- Black Dual-Tip Pen or (Shop Canada | Shop Australia)

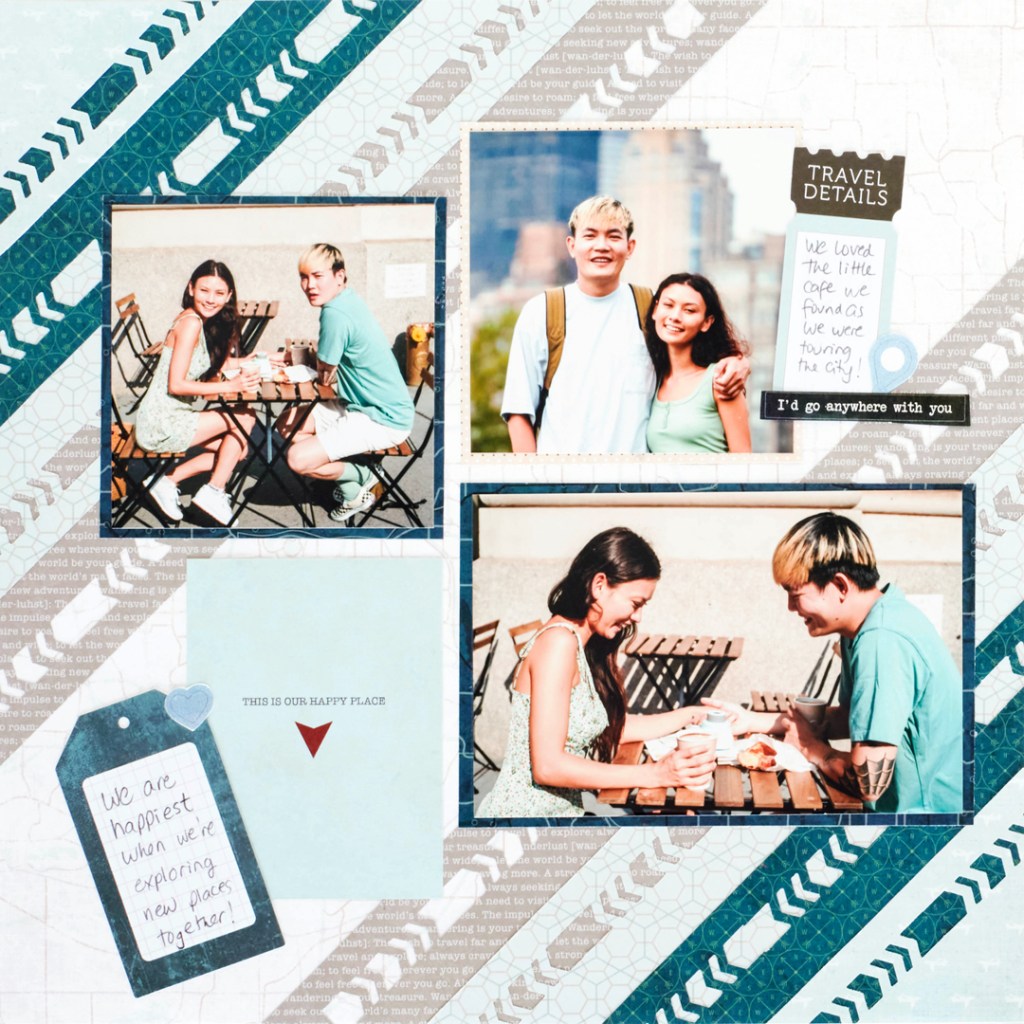
Step 1: Use the beige road map designer paper as your base.
Step 2: Using the 12-inch Trimmer, cut a 9″ x 9″ square from the “Wanderlust” definition tonal paper, a 7″ x 7″ square from the mint hexagons designer paper, a 5″ x 5″ square from the navy compasses designer paper and a 3″ x 3″ square from the mint tiny airplanes tonal paper. Cut each square in half diagonally from corner to corner to yield eight triangles.
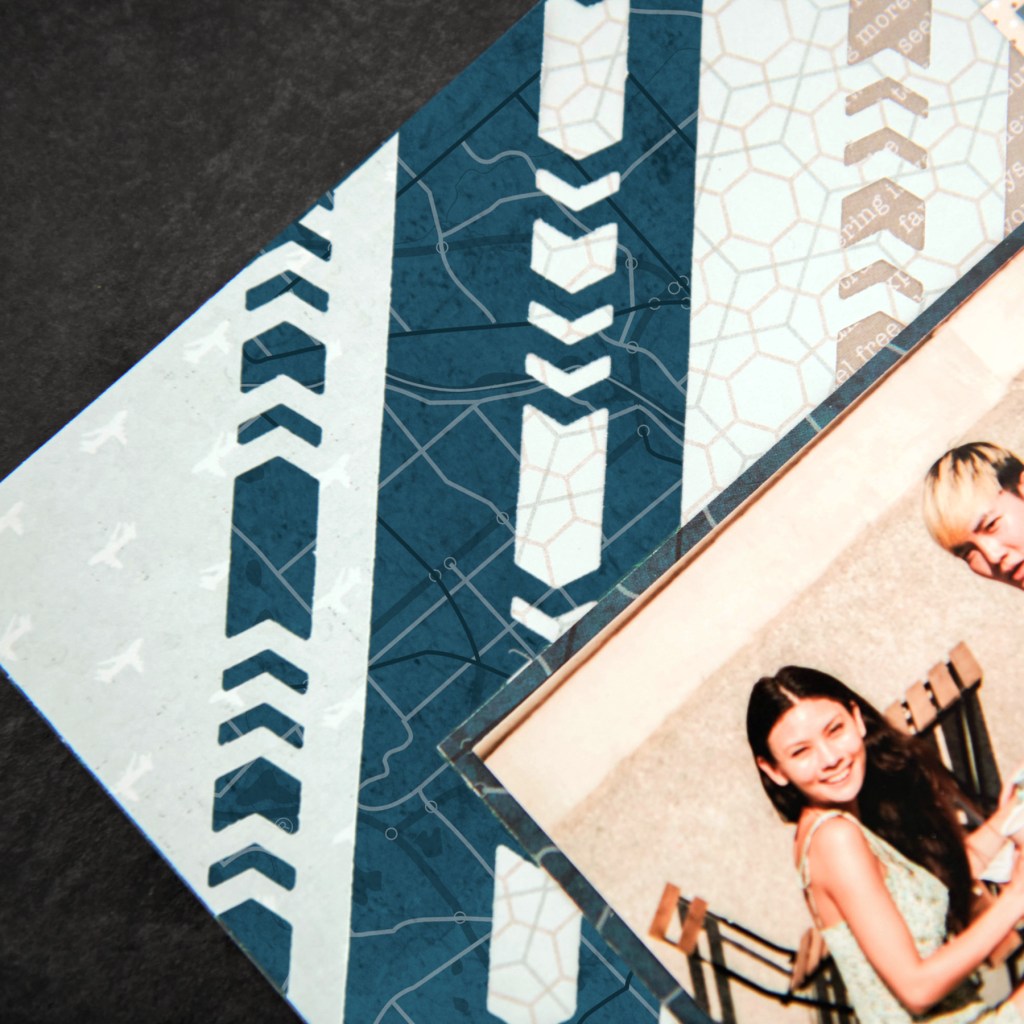
Step 3: Punch the longest edge of each triangle with the Original Border Maker System and the Chevron Arrows Border Maker Cartridge. Stack four triangles with the largest on the bottom, adhering them together with the Repositionable Tape Runner as you arrange and stack. Repeat with remaining four triangles. Adhere each set of stacked triangles to opposite corners of the base page.
Step 4: Using the 12-inch Trimmer, cut a 4″ x 4″ square from the beige dot grid tonal paper. Mount a 3-3/4″ x 3-3/4″ photo on top. Cut a 4″ x 4″ square and a 6″ x 4″ rectangle from the navy compasses designer paper. Mount 3-3/4″ x 3-3/4″ and 5-3/4″ x 3-3/4″ photos on them. Arrange photos as shown and adhere to base page with a Tape Runner.
Step 5: Journal on the tag embellishments. Add the “This is our happy place” mat, tag embellishments and stickers as shown or as desired. Use Foam Squares for added dimension.
What do you think of this travel scrapbook layout? What memories (with family, friends or even solo trips!) would you pack onto the page? Let us know!

I love these simple and beautiful layouts.
This layout was so much fun to make. The instructions were a little confusing to start, as I’m new to using the blog, but reading and doing at the same time I managed to accomplish the finished page. Can see this layout working for other paper packs. Thanks CM – am loving the blog.
[…] You can view the original blog post HERE. […]