June 28, 2023
Build A Fortress Of Fun With These Castle Scrapbook Layouts

Calling all queens and kings, princesses and princes, witches and wizards — unlock the magic of your imagination with a fortress of fun! Whether you’re building your own blanket fort on a rainy day to escape pesky dragons or standing in real-time in front of an expanding amusement park castle with tall spires, today’s blog is a fairytale destination creation! These castle scrapbook layouts surely pass the magical test… and the memory test of time! See for yourself and let the adventure take over!
To create the Enchanted Wizard castle layout you will need:
- Enchanted Wizard Paper Pack or (Shop Canada | Shop Australia)
- Enchanted Wizard Stickers or (Shop Canada | Shop Australia)
- Black Solid Cardstock or (Shop Canada | Shop Australia)
- Original Border Maker System with Home Sweet Home Border Maker Cartridge or (Shop Canada | Shop Australia)
- 12-inch Trimmer or (Shop Canada | Shop Australia)
- 2-Way Corner Rounder or (Shop Canada | Shop Australia)
- Micro-Tip Scissors (Shop Canada | Shop Australia)
- Tape Runner or (Shop Canada | Shop Australia)
- Repositionable Tape Runner or (Shop Canada | Shop Australia)
- Foam Squares or (Shop Canada | Shop Australia)
- Black Dual-Tip Pen or (Shop Canada | Shop Australia)
- CM Zero-Centering Ruler or (Shop Canada | Shop Australia)
- Pencil
To create the Enchanted Princess castle layout you will need:
- Enchanted Princess Paper Pack or (Shop Canada | Shop Australia)
- Enchanted Princess Stickers or (Shop Canada | Shop Australia)
- White Solid Cardstock or (Shop Canada | Shop Australia)
- Original Border Maker System with Home Sweet Home Border Maker Cartridge or (Shop Canada | Shop Australia)
- 12-inch Trimmer or (Shop Canada | Shop Australia)
- 2-Way Corner Rounder or (Shop Canada | Shop Australia)
- Micro-Tip Scissors (Shop Canada | Shop Australia)
- Tape Runner or (Shop Canada | Shop Australia)
- Repositionable Tape Runner or (Shop Canada | Shop Australia)
- Foam Squares or (Shop Canada | Shop Australia)
- Black Dual-Tip Pen or (Shop Canada | Shop Australia)
- CM Zero-Centering Ruler or (Shop Canada | Shop Australia)
- Pencil

NOTE: Below are instructions on how to create both the Enchanted Wizard and Enchanted Princess layouts. The specific cardstock or paper Krislyn used for the Enchanted Wizard castle layout will be BEFORE the slash. The specific cardstock or paper Krislyn used for the Enchanted Princess castle layout will be AFTER the slash.
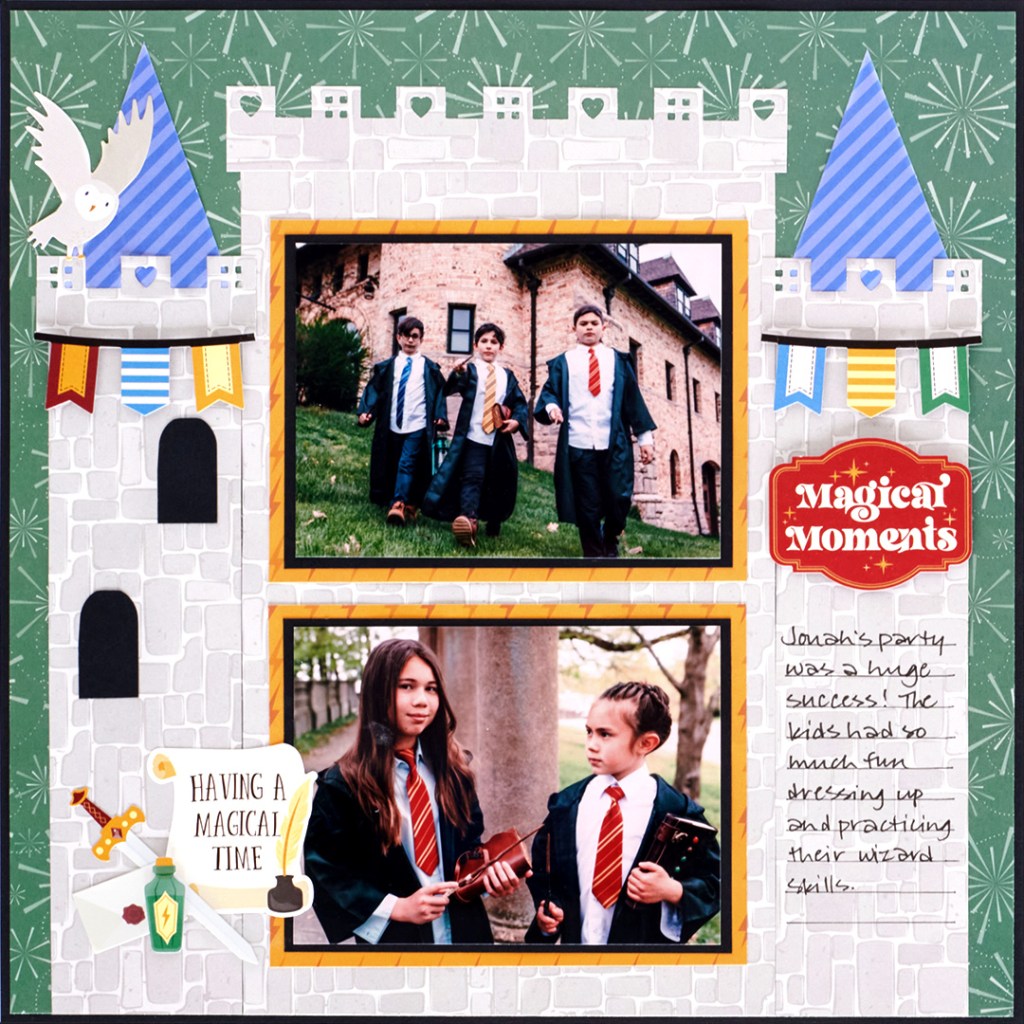
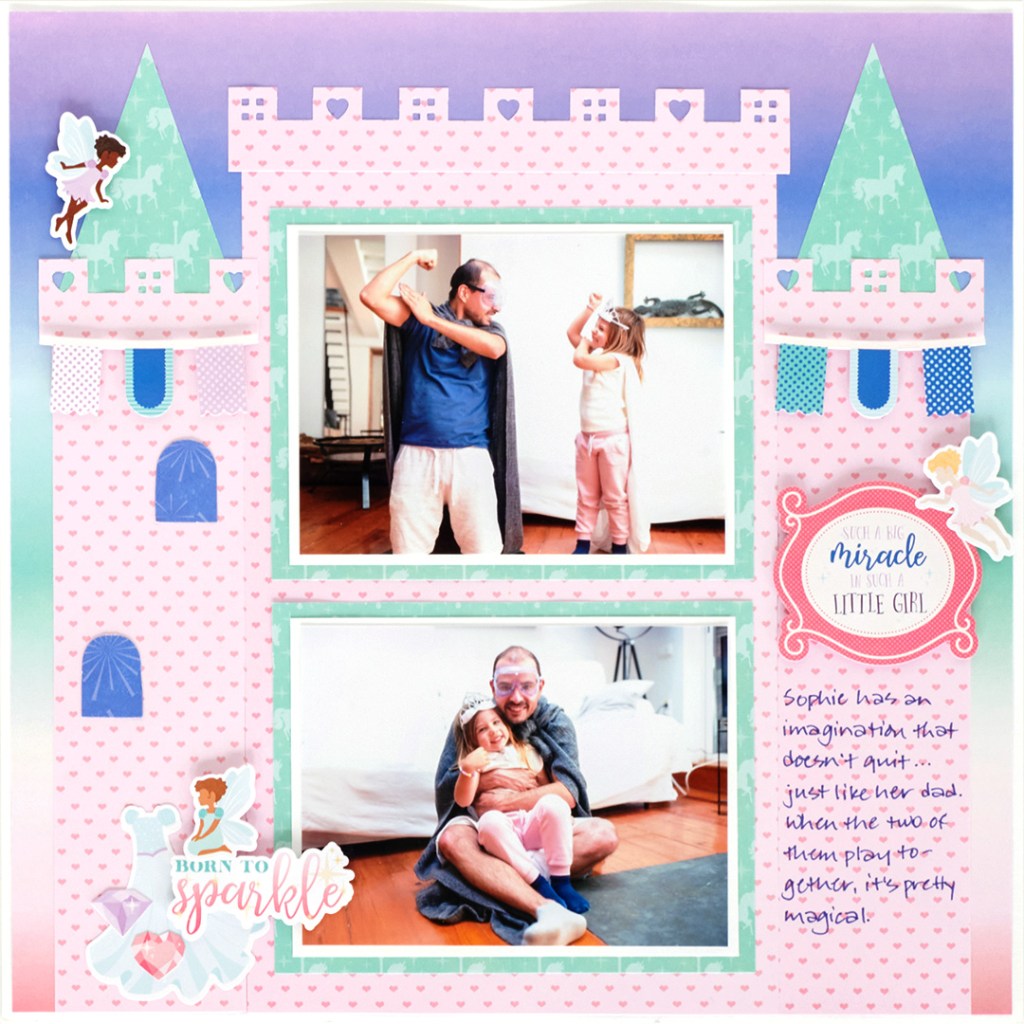
Step 1: Use a piece of Black/White Solid Cardstock for the base. Cut a piece of dark green bursts/ombré rainbow paper to 11-3/4″ x 11-3/4″ and mount on the base.
Step 2: Cut a 6-1/4″ x 10″ piece with castle wall/soft pink hearts paper. Adhere to the middle of the layout, aligned at the bottom of the designer paper. Cut two 2-1/4″ x 8″ strips with castle wall/soft pink hearts paper. Adhere on either side of the middle piece, aligned at the bottom of the designer paper.


Step 3: Cut two 2-1/2” x 3-1/2” pieces with blue diagonal stripes/magical unicorns paper. Using a ruler and pencil, make a mark at the middle of the top (1-1/4”). Cut from the mark to each of the corners, creating a triangle. Adhere each on top of the “turrets.”

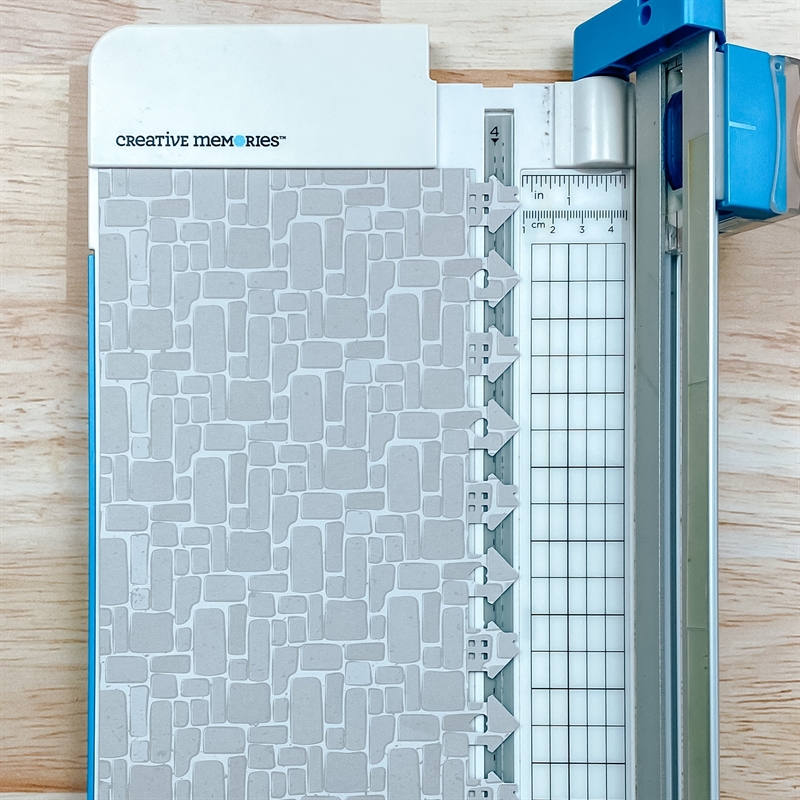
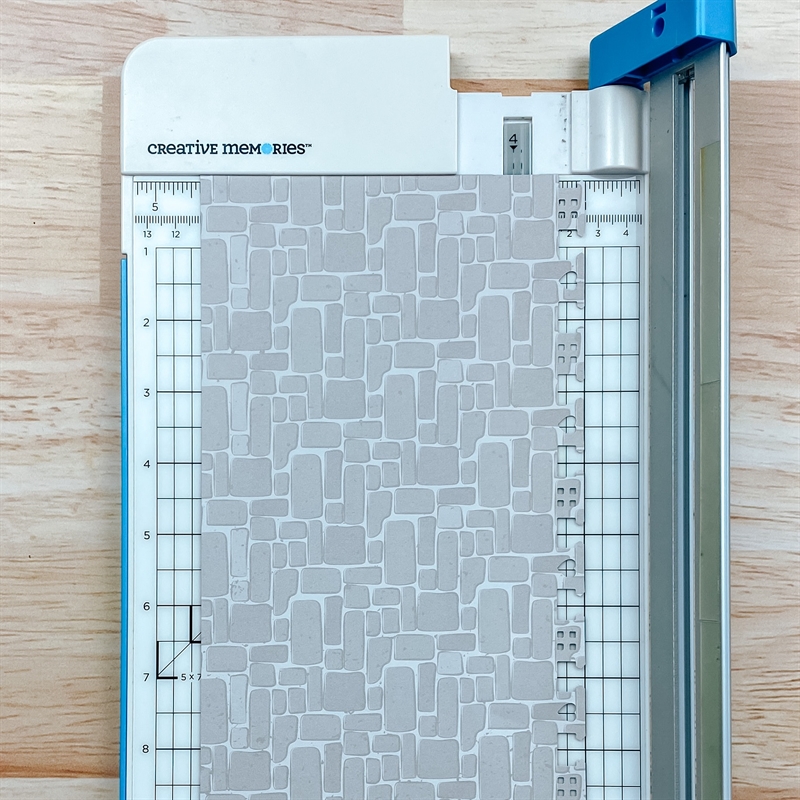
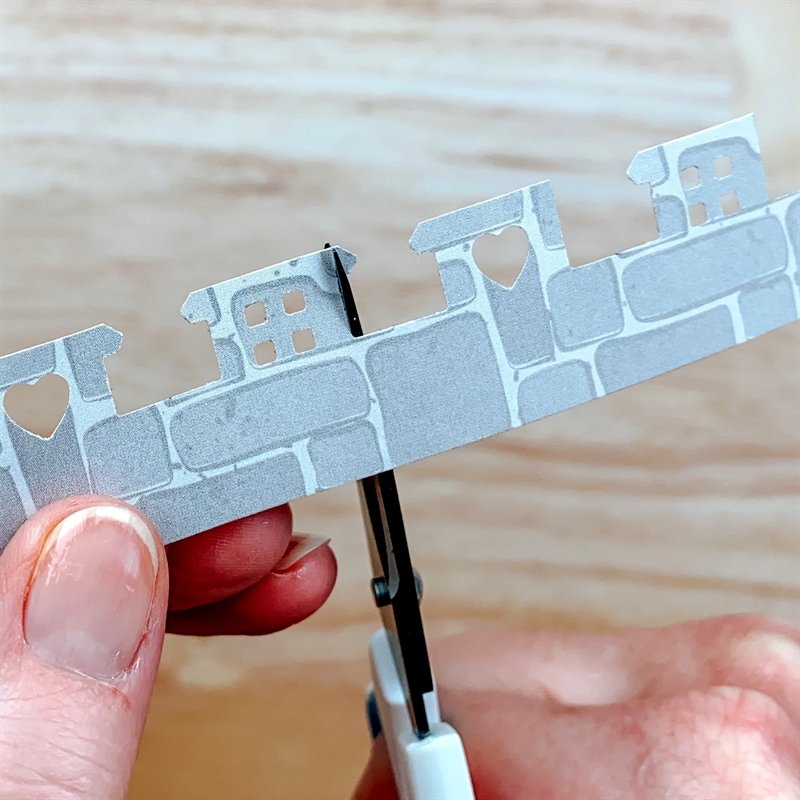
Step 4: Using the Home Sweet Home Border MakerCartridge, punch a border with castle wall/soft pink hearts paper. Place the border in the 12-inch Trimmer so that the roofs of the houses are aligned at the 3/8″ mark. Cut the tops off the houses. Place the border (roofless) at the 1″ mark and cut the border off the paper. Using Micro-Tip Scissors, snip the roof points off the houses, creating the castle structure. Repeat with a second border. Trim into two 2-1/2″ sections and one 6-1/2″ section. Adhere on the tops of the castle walls as shown.
Step 5: Cut two 1-1/4″ x 3/4″ pieces with Black Solid Cardstock/blue variety mat. Using the 2-Way Corner Rounder, round two corners of each to create windows. Adhere as shown.
Step 6: Cut two 5-5/8″ x 4-3/8″ photo mats with lightning bolts/magical unicorns paper. Cut two 5-1/4″ x 4″ photo mats with Black/White Solid Cardstock. Crop two photos to 5″ x 3-3/4″. Layer and adhere on the layout as shown.
Step 7: Cut apart flag banner stickers and mount using Foam Squares. Add additional stickers.
Step 8: Journal as desired.
Do you like the magical aura of these castle scrapbook layouts using the Enchanted collection? What memories and photos would you marvel at on them?
P.S. Are YOU a member of the Virtual Crop Facebook Group? It’s your go-to place for MONTHLY Virtual Crops, MONTHLY Completed Album Challenges, WEEKLY LIVE STREAMING of Fast & Fun Projects with Noreen, LIVE QUARTERLY Secret Box Openings with project tutorials and so much more! We hope you’ll join our community of more than 33,000 fellow memory-keeping enthusiasts — you’ll feel right at home!

This is so cute Krislyn! I thought the castle “turrets” made with the Home Sweet Home BMC were stickers at first! Brilliant!
such a good idea!! I used outline of sticker castle on black card and fussy cut it, but the bmc is much easier with similar result!!
Would it be possible to get these directions in a printable version. ?
Krislyn, these are adorable layouts!!! Thanks for sharing the instructions!