March 4, 2024
See Your Layouts Bloom With This Spring Scrapbook Layout
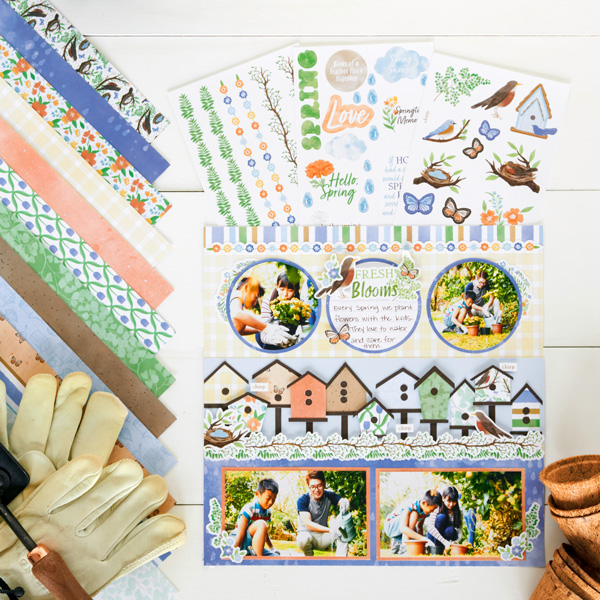
Fly into spring with this layout created with materials from the Birds & Blossoms collection! Using its spring scrapbook paper and complementary spring scrapbook stickers, you can record memories of birdwatching, strolling through gardens and visiting the local farmers market. Plus, using the 12-inch Trimmer, you can choose exactly how you want your birdhouses to look in the layout!
To create this layout you will need:
- Birds & Blossoms Paper Pack or (Shop Canada | Shop Australia)
- Birds & Blossoms Stickers or (Shop Canada | Shop Australia)
- Hot Fudge Solid Cardstock or (Shop Canada | Shop Australia)
- 12-inch Trimmer or (Shop Canada | Shop Australia)
- Custom Cutting System with Circle Patterns or (Shop Canada | Shop Australia)
- Handheld 1-Hole Punch or (Shop Canada | Shop Australia)
- Foam Squares Variety Pack or (Shop Canada | Shop Australia)
- Foam Tape or (Shop Canada | Shop Australia)
- Tape Runner or (Shop Canada | Shop Australia)
- Repositionable Tape Runner or (Shop Canada | Shop Australia)
- Micro-Tip Scissors or (Shop Canada | Shop Australia)
- Precision Point Adhesive Pen or (Shop Canada | Shop Australia)
- Brown Dual-Tip Pen or (Shop Canada | Shop Australia)


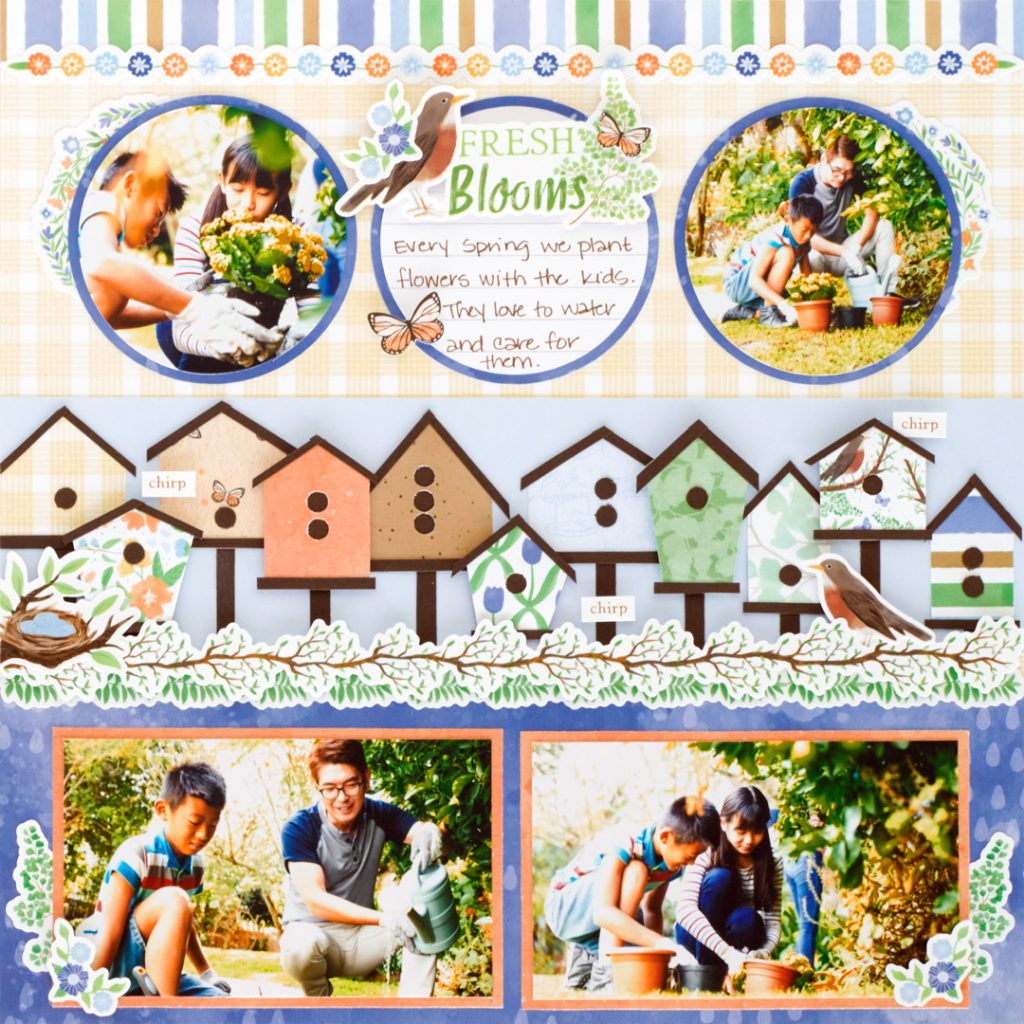
Step 1: Use canary plaid paper for the base of the layout.
Step 2: Cut a piece of rain paper to measure 12? x 4?. Adhere along the bottom edge of the layout.
Step 3: Cut a piece of stripes paper to measure 12? x 3/4?. Adhere along the top edge of the layout.
Step 4: Cut a piece of Baby Blue Solid Cardstock to measure 12? x 3?.
Step 5: Using the 12-inch Trimmer, cut several small pieces of a variety of papers for the bird houses. Gently fold the ends together of each piece, and cut at an angle with scissors to create the roofs.
Step 6: Cut several 1/8? strips of Hot Fudge Solid Cardstock. Adhere along the bottom edges and the tops of the houses using the Precision Point Adhesive Pen. Use scissors to cut where desired.
TIP: Adhere the thin cardstock pieces along the edge while placing the birdhouse on either Foam Square or Sticker backing sheet to avoid getting adhesive on your tabletop.
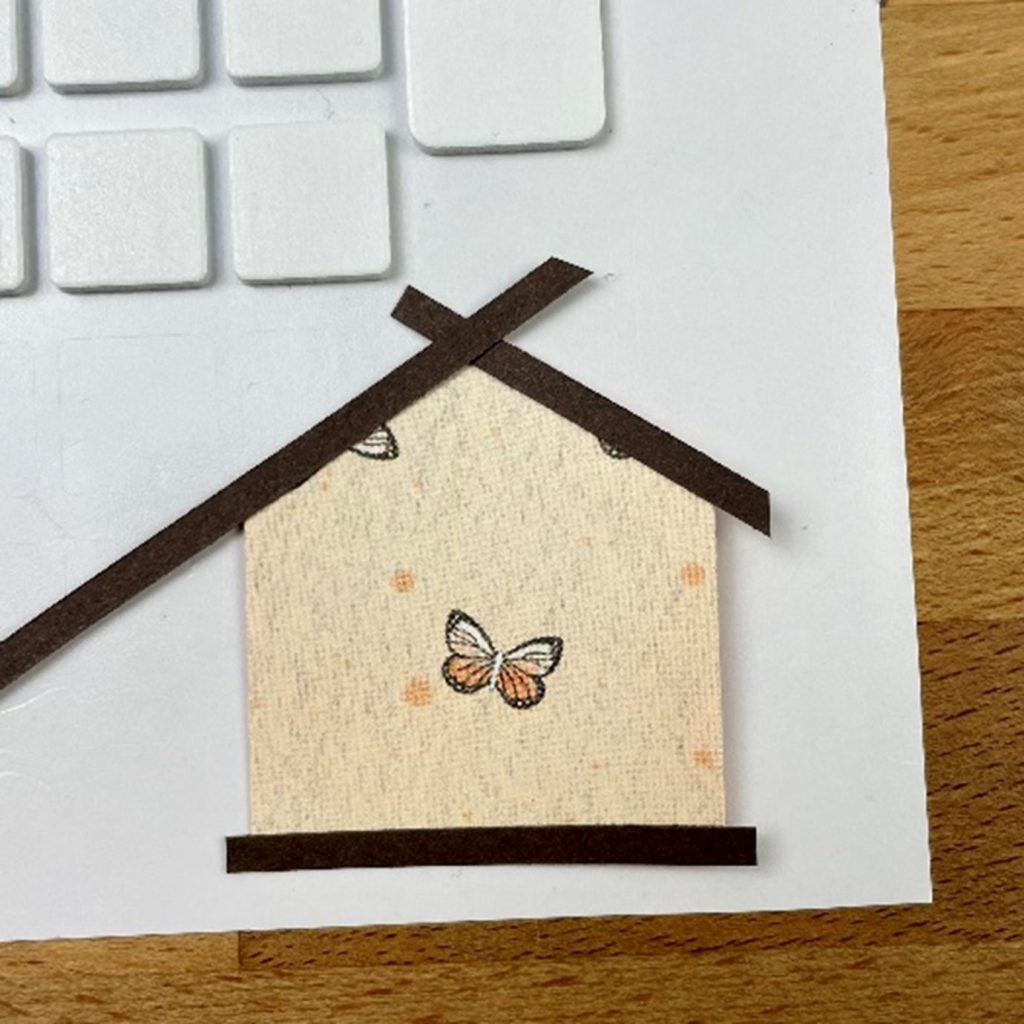

Step 7: Cut several strips of Hot Fudge Solid Cardstock to measure 1/4?. Use to adhere as the “stakes” of the birdhouses. Adhere the houses to the top of each strip. Use Foam Squares behind some of the birdhouses to create dimension.
Step 8: Use the Handheld 1-Hole Punch and punch several pieces to adhere to the houses for the “openings” using the Precision Point Adhesive Pen.

Step 9: Adhere the Baby Blue Solid Cardstock piece with birdhouses to the layout.
Step 10: Using the inside edge of the large Circle Custom Cutting System Pattern and the Red Blade, cut three circles from rain paper. Adhere to the layout.
Step 11: Using the inside edge of the large Circle Custom Cutting System Pattern and the Green Blade, cut two photos. Adhere to two of the rain circle mats.
Step 12: Using the inside edge of the large Circle Custom Cutting System Pattern and the Green Blade, cut a circle from white lined designer paper. Adhere to a rain circle mat for journaling.
Step 13: Cut two pieces from orange watercolor paper to measure 5-1/4? x 3-1/4?. Adhere to the rain paper on the bottom portion of the layout.
Step 14: Cut two photos that measure 5? x 3?. Adhere to the orange watercolor paper mats.
Step 15: Adhere stickers and embellishments, using Foam Squares on some for dimension.
Step 16: Journal as desired.
There’s so much room for creativity in this spring scrapbook layout! How did your birdhouses turn out?
P.S. Are YOU a member of the Virtual Crop Facebook Group? It’s your go-to place for MONTHLY Virtual Crops, MONTHLY Completed Album Challenges, WEEKLY LIVE STREAMING of Fast & Fun Projects with Noreen, LIVE QUARTERLY Secret Box Openings with project tutorials and so much more! We hope you’ll join our community of more than 38,000 fellow memory-keeping enthusiasts — you’ll feel right at home!

Love the page spread and color coordination. The hot fudge makes it pop! Beautiful!??
So fun! What is the general size of each bird house?
Really eye-catching! Love the making of the bird houses! What a great idea for scrap paper too. So fun for Spring.