September 5, 2025
Leaf Your Mark with the New Grateful Harvest Inks
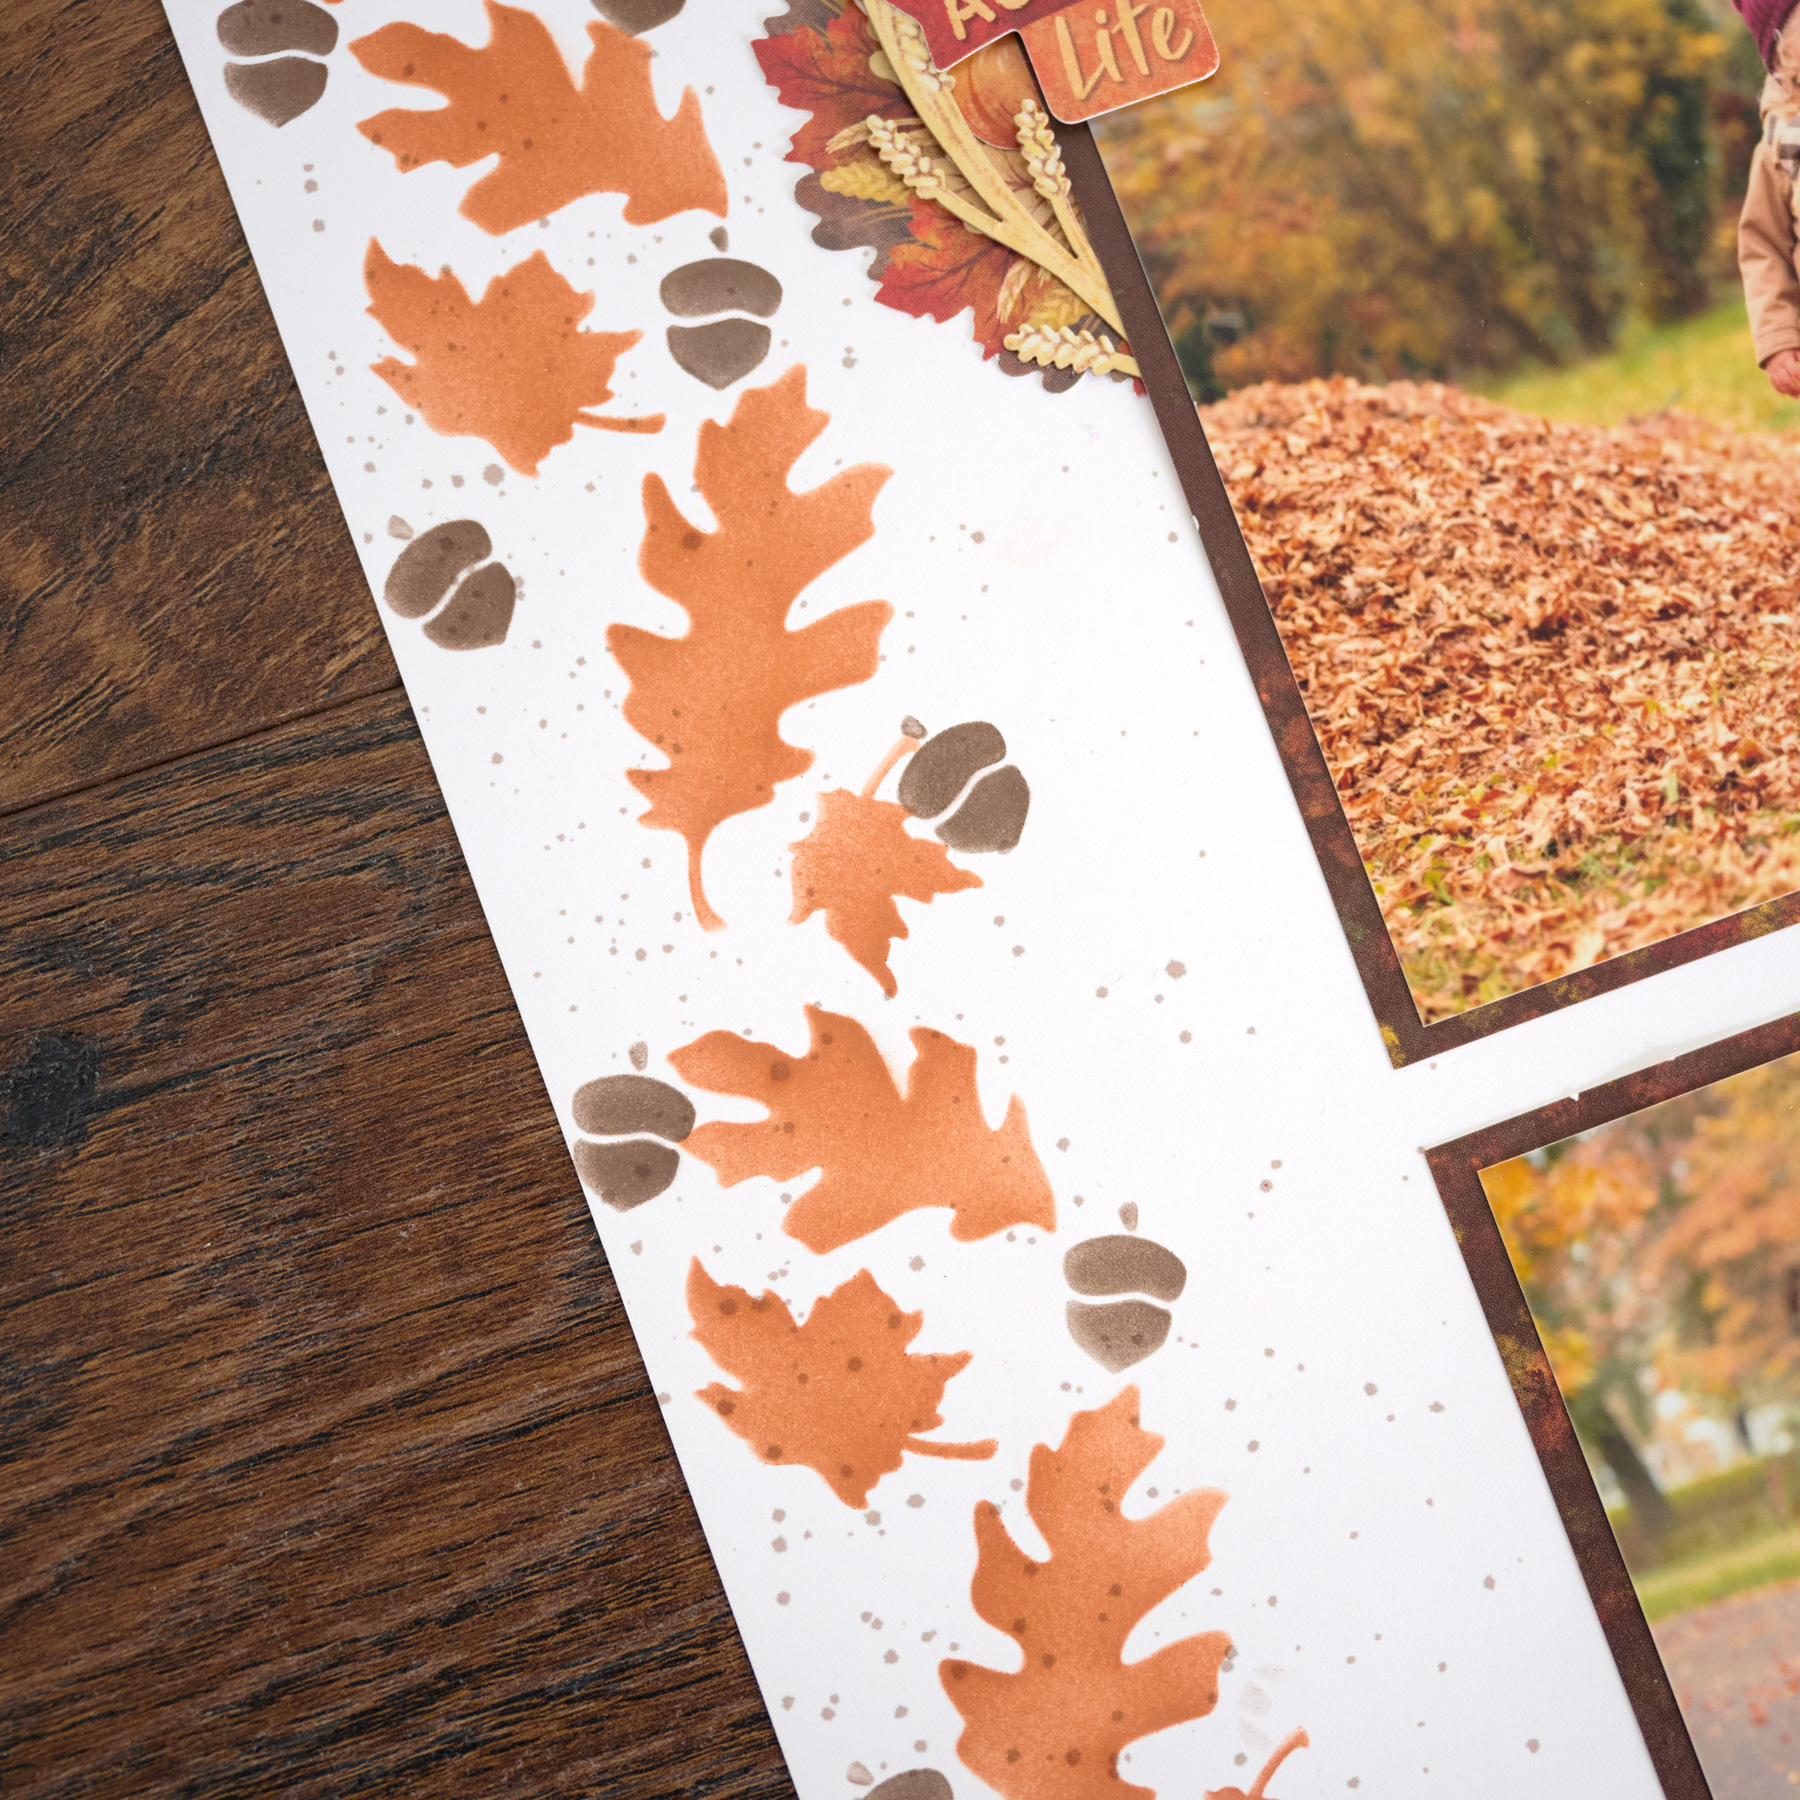
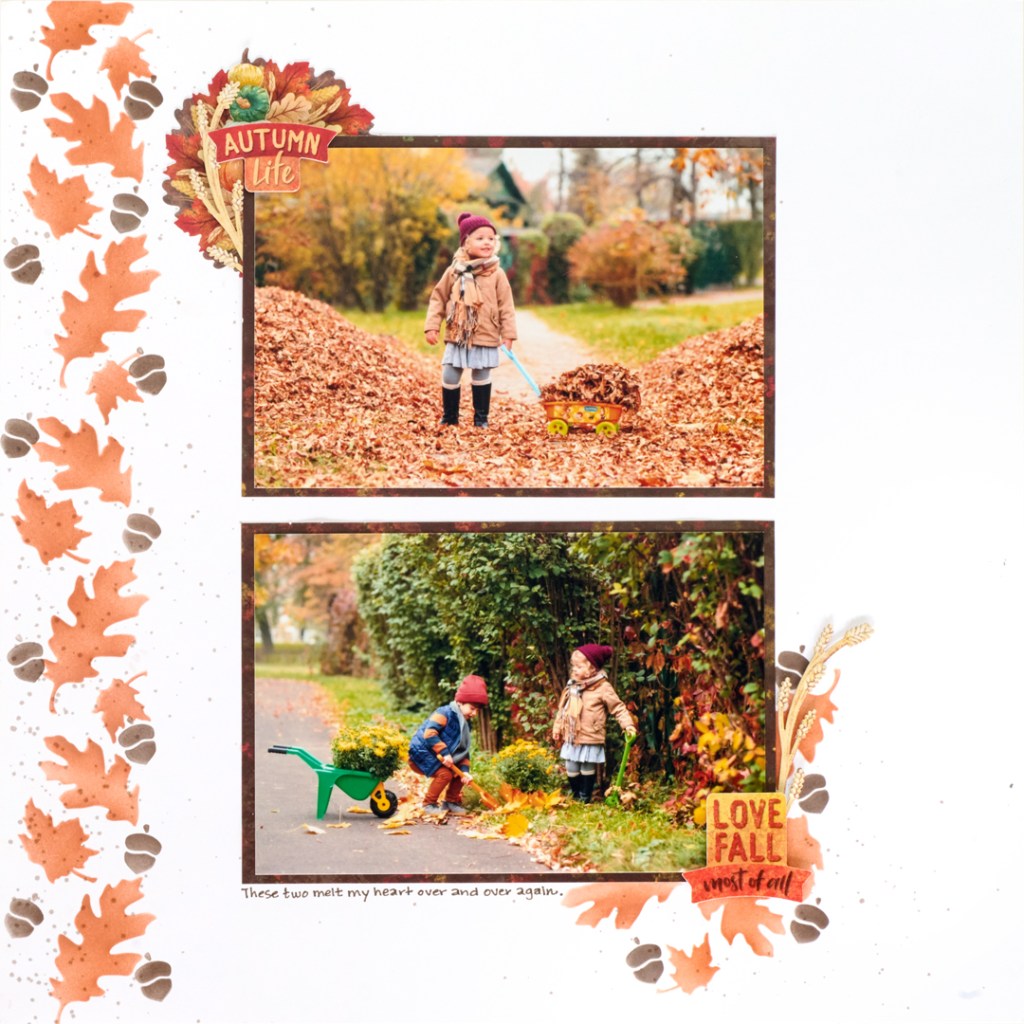
Autumn vibes incoming! This single-page layout blends earthy ink splatters, leafy stencil work and cozy harvest hues to frame your photos with seasonal charm.
To create this layout you will need:
- Ink Pad – Potter’s Clay or (Shop Canada | Shop Australia)
- Ink Pad – Rich Cocoa or (Shop Canada | Shop Australia)
- 12×12 Bright White Solid Cardstock or (Shop Canada | Shop Australia)
- Grateful Harvest Stickers or (Shop Canada | Shop Australia)
- Grateful Harvest Tone-on-Tone Paper Pack or (Shop Canada | Shop Australia)
- Grateful Harvest Laser Border Embellishments or (Shop Canada | Shop Australia)
- Foam Squares Variety Pack or (Shop Canada | Shop Australia)
- 12-inch Trimmer or (Shop Canada | Shop Australia)
- The Tape Runner or (Shop Canada | Shop Australia)
- Photo Trimmer or (Shop Canada | Shop Australia)
- Black Dual-Tip Pen or (Shop Canada | Shop Australia)
- Pencil
- Paintbrush

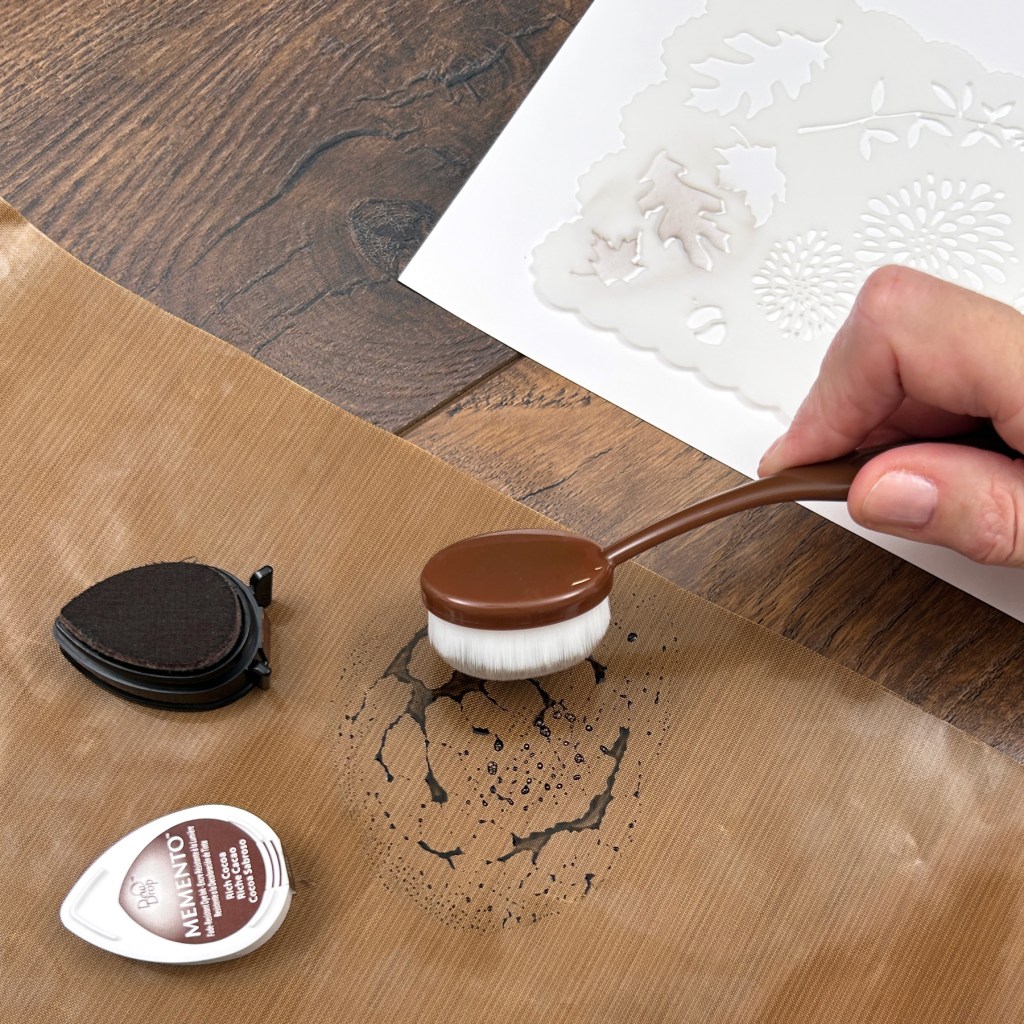
Step 1: Use Bright White Solid Cardstock as your base. Splatter the left edge and bottom right of your page with Rich Cocoa ink.
SPLATTERING: Rub a small amount of ink directly on a piece of an empty embellishment bag. Spritz once with water. Mix the water and paint with a small paintbrush. Pick up some of the ink-colored water with the paintbrush and tap it on your finger over the paper. Add as much or as little as you’d like.
Step 2: Tape off the stencil so that only leaves are showing. You can use washi tape, Post-it notes, stencil tape or anything with a light tack.
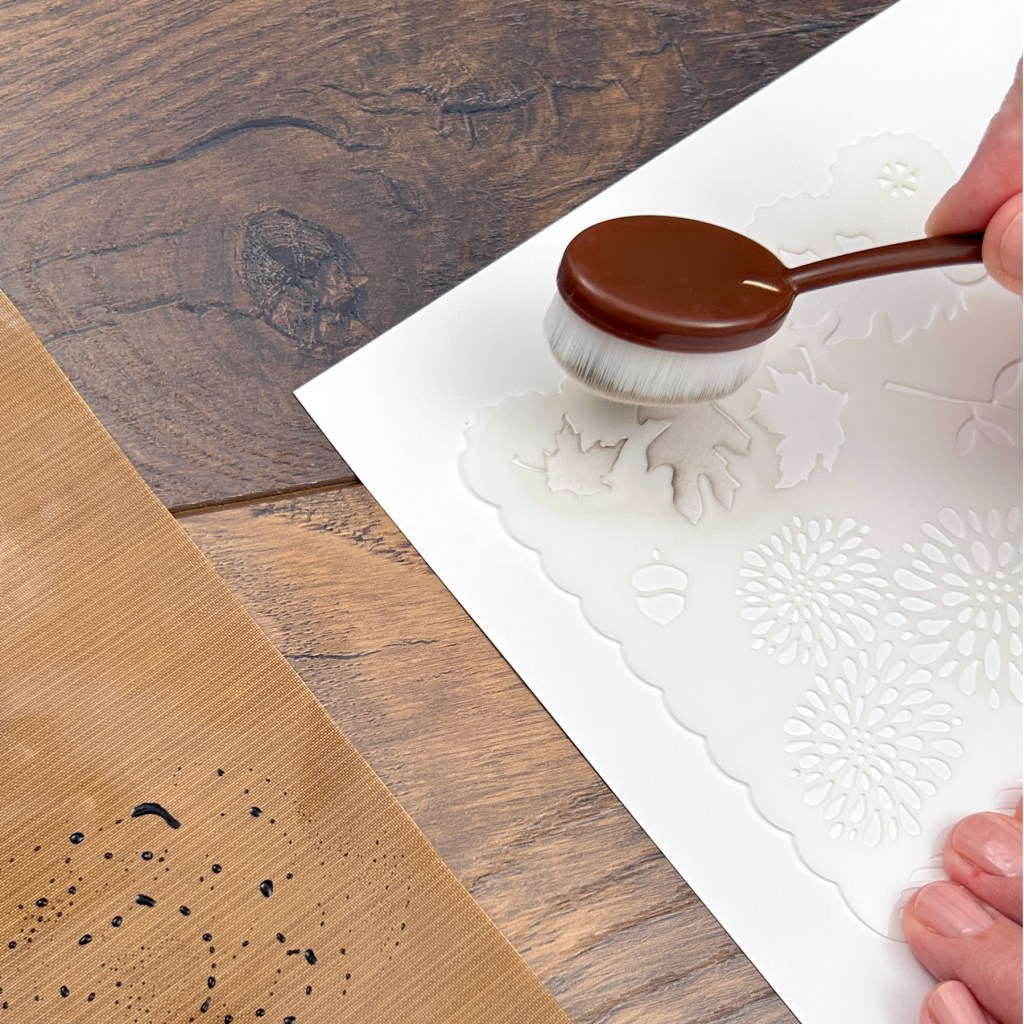
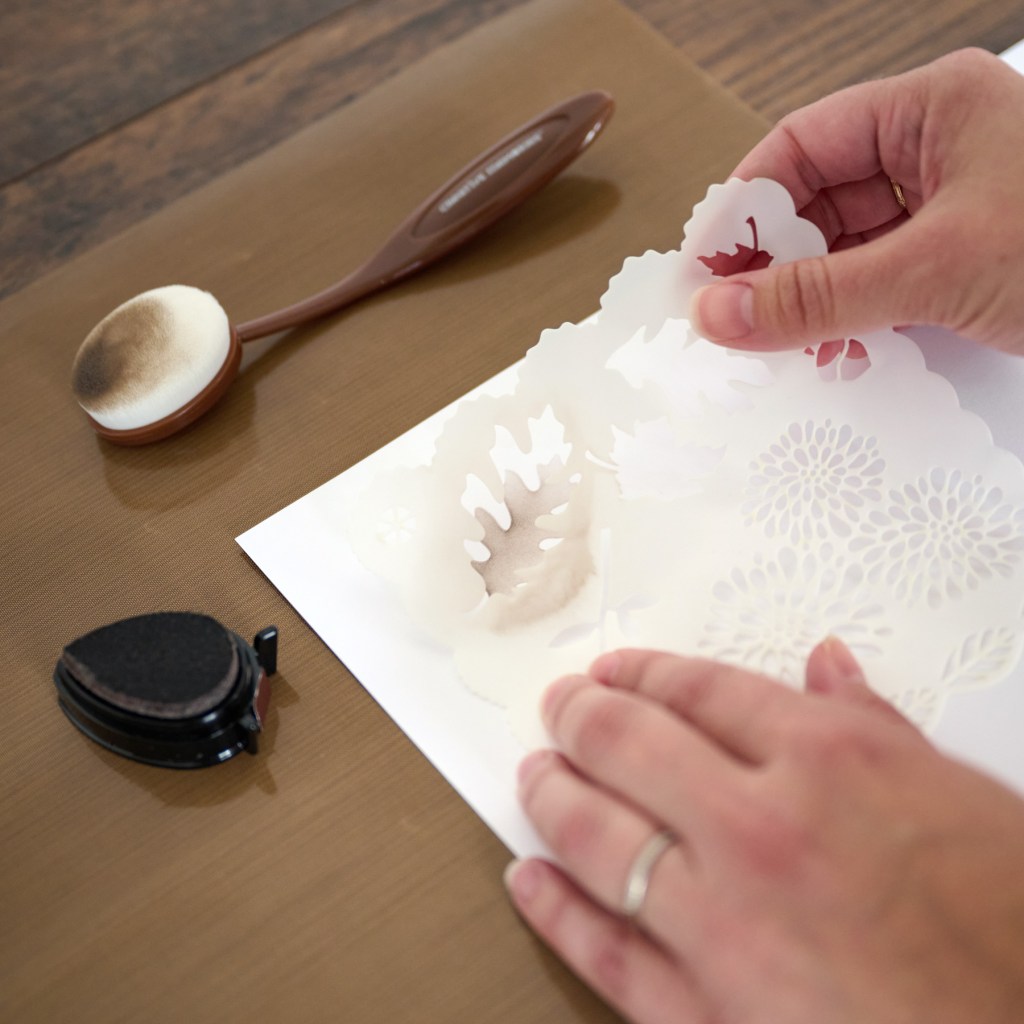
Step 3: Place the stencil over the splattered area on the left edge of the page. Use the Potter’s Clay ink to color inside the leaves on the stencil. Keep moving the stencil up to get a full border of leaves.
TIPS:
- When you pounce ink on your brush, quickly dab the brush on a piece of scrap paper for a gentler ink application.
- Rub the ink in a circular motion with a light hand — you can always add more ink, but you can’t take ink away. You should see the splatters through the leaves.
Step 4: Cut two 6-1/4″ x 4-1/4″ pieces of autumn brown designer paper. Set the bottom piece 1-3/4″ from the bottom and 3″ from the right edge. Do not adhere yet. Instead, draw a pencil line around the bottom right corner. Remove the autumn brown designer paper.
Step 5: Tape off your leaves individually as you select random leaves to stencil. Move the stencil around and use different leaves to make a nice corner border where you have the penciled corner. You can go over that mark so that your leaves appear to come out of the corner. About five leaves of various sizes is plenty to add.
Step 6: Clean your stencil. You can do this with a spritz of water or a wet wipe. Dry it well with a paper towel and then tape the stencil so that only the acorn is showing. Using Rich Cocoa ink, color the acorns around the leaves on the left edge and the bottom right corner.
Step 7: Add the autumn brown designer paper back to the layout. The bottom mat is 1-3/4″ from the bottom and 3″ from the right edge. The top mat is 1-3/4″ from the top and 3″ from the right edge. Adhere your photos.
Step 8: Add Grateful Harvest Stickers and pieces of the laser-cut wheat border as shown. Use foam squares as desired.
We’d love to hear how you adapted this harvest-themed idea — share your favorite inking tips and leave your questions in the comments below!
P.S. Are YOU a member of the Virtual Crop Group? It’s your go-to place for MONTHLY Virtual Crops, MONTHLY Completed Album Challenges, QUARTERLY Secret Box Openings with project tutorials and so much more! We hope you’ll join our community of more than 47,000 fellow memory-keeping enthusiasts — you’ll feel right at home!

I love this I need to get it!