December 19, 2025
Where Vacation Stories Bloom: A Tropical Garden Layout
Vacation memories are full of color, fun moments and little details you don’t want to forget. The Tropical Garden collection makes it easy to capture those memories with bright patterns, leafy designs and tone-on-tone papers that layer together beautifully. This layout focuses on mixing papers and textures to create a playful design that’s perfect for documenting trips, adventures or warm-weather memories!
To create this layout, you will need:
- Tropical Garden Paper Pack (Shop Canada | Shop Australia)
- Tropical Garden Tone-on-Tone Paper Pack (Shop Canada | Shop Australia)
- Tropical Garden Embellishments (Shop Canada | Shop Australia)
- Tropical Garden Stickers (Shop Canada | Shop Australia)
- Dark Green Solid Cardstock (Shop Canada | Shop Australia)
- Avocado Solid Cardstock (Shop Canada | Shop Australia)
- Bamboo Border Punch (Shop Canada | Shop Australia)
- 12-inch Trimmer (Shop Canada | Shop Australia)
- Photo Trimmer (Shop Canada | Shop Australia)
- Micro-Tip Scissors (Shop Canada | Shop Australia)
- Tape Runner (Shop Canada | Shop Australia)
- Repositionable Tape Runner (Shop Canada | Shop Australia)
- Foam Squares (Shop Canada | Shop Australia)
- Black Dual-Tip Pen (Shop Canada | Shop Australia)
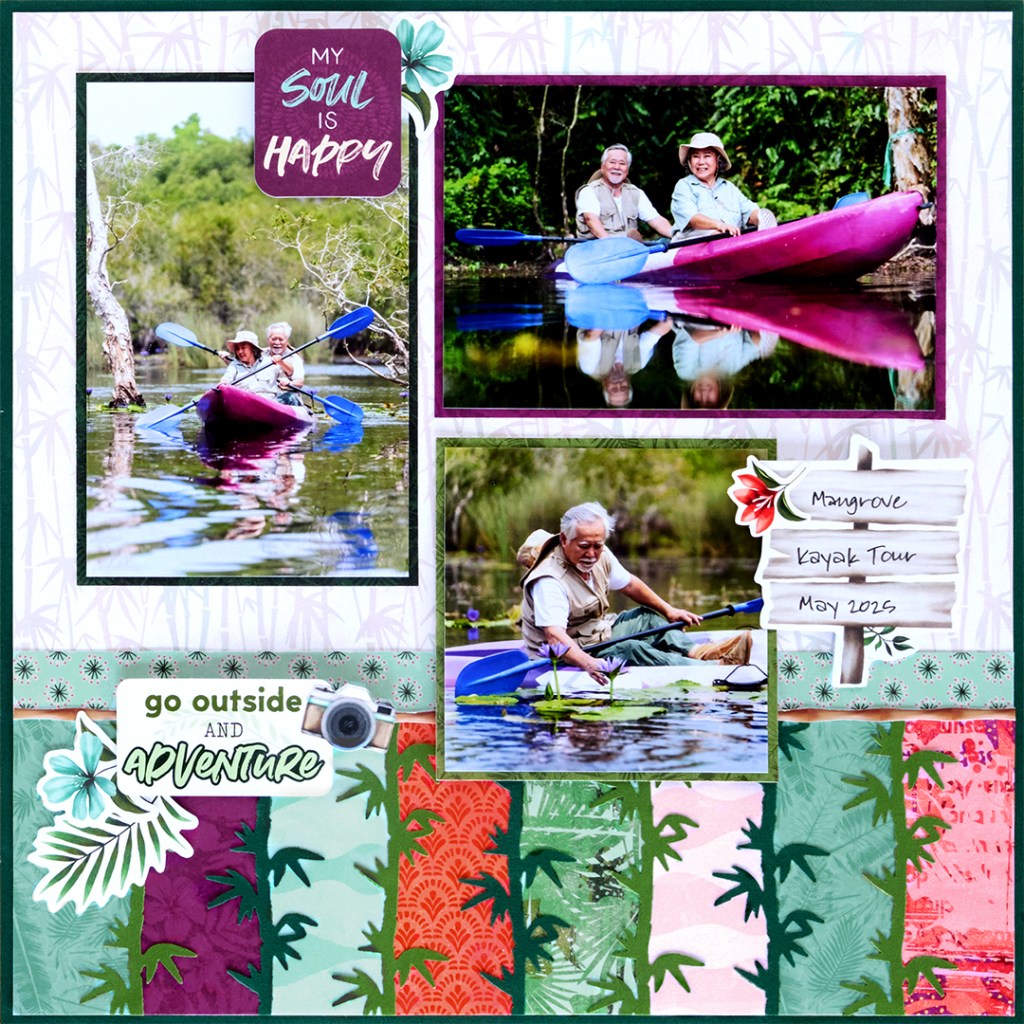

Step 1: Use a sheet of Dark Green Solid Cardstock as the base for this layout. (Tip: You may wish to remove the inside of this piece to conserve paper.) Cut a sheet of bamboo designer paper to 11-3/4” x 11-3/4” and adhere it to the base.
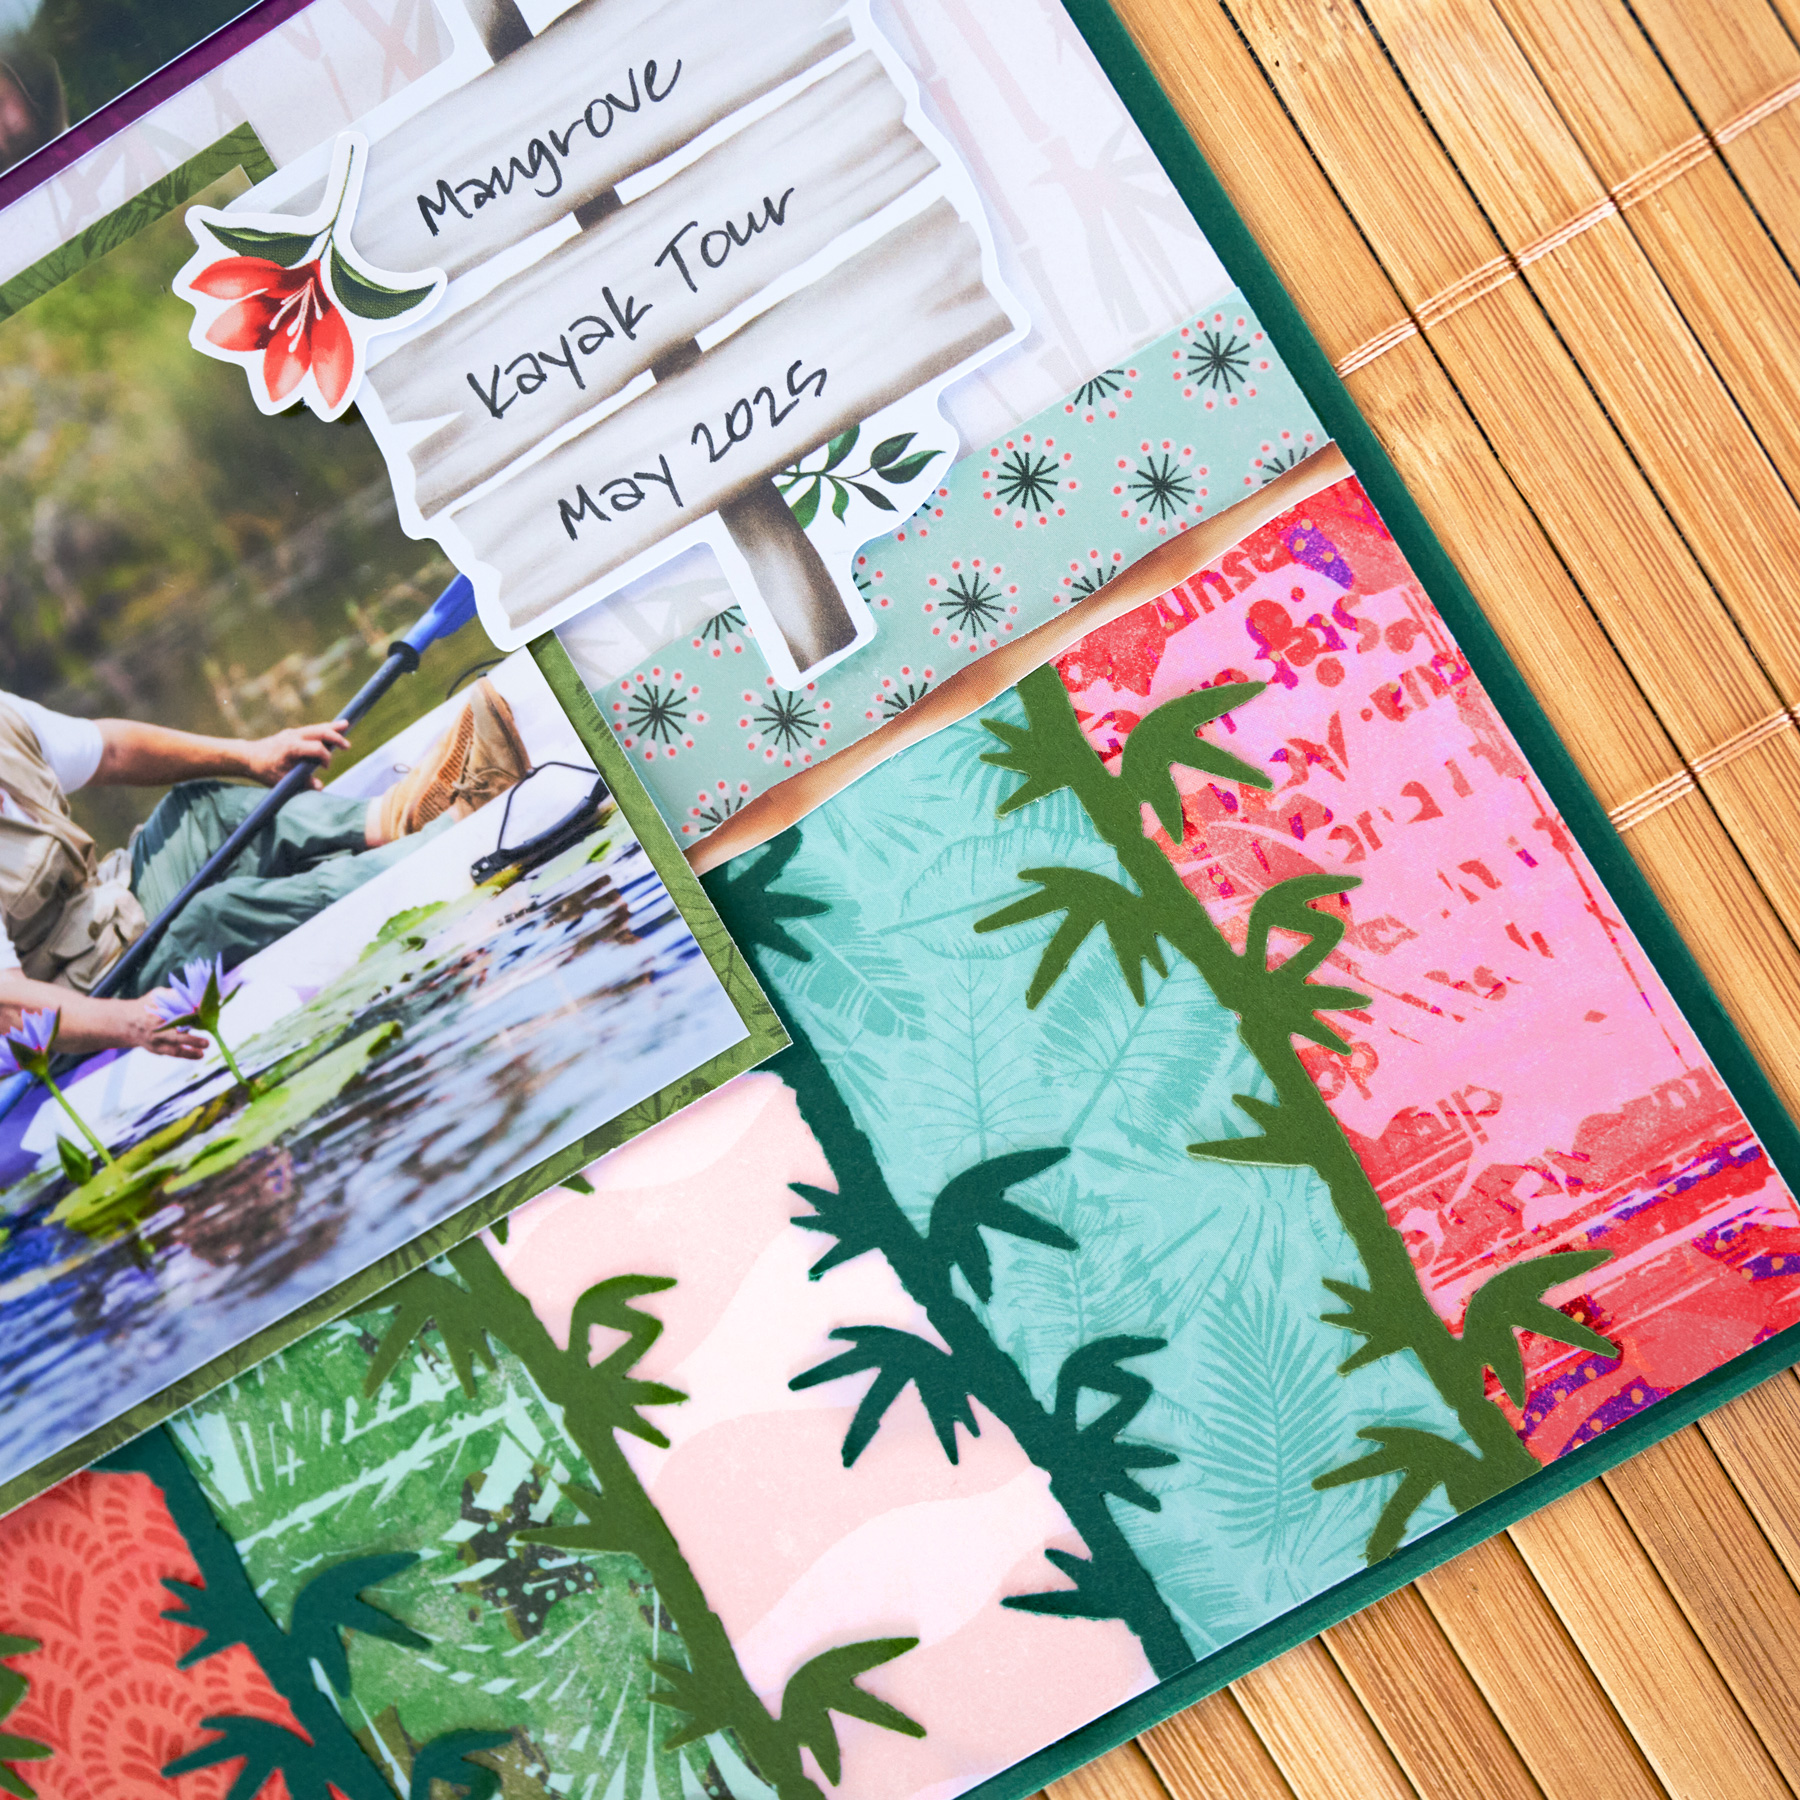
Step 2: Cut a 12” x 4” piece of scrap paper to use as the base for the border. Cut 1-1/2” x 4” strips with several tonal and designer papers. Adhere them side by side on the scrap strip. Using the Bamboo Border Punch, punch several borders from Dark Green and Avocado Solid Cardstock. Adhere 4” sections on the seams between 1-1/2” strips, alternating colors. Trim the piece to 11-3/4” x 3-1/2” (giving you clean edges) and adhere on the bottom of the bamboo designer paper.
Step 3: Cut an 11-3/4” x 3/4″ strip from the blue tropical burst designer paper and adhere it just above the border. Cut a bamboo border sticker to 11-3/4” and adhere it along the seam.
Step 4: Cut a 4” x 6” mat from the dark green leaves tonal paper. Mount a 3-3/4” x 5-3/4” photo on top. Cut a 6” x 4” mat from the purple designer paper. Mount a 5-3/4” x 3-3/4” photo on top. Cut a 4” x 4” mat from the light green leaves tonal paper. Mount a 3-3/4” x 3-3/4” photo on top. Adhere all photo mats to the layout as shown.
Step 5: Adhere stickers and embellishments, popping some up with foam squares for added dimension.
Step 6: Journal on the wooden sign embellishment as desired.
Plant the seeds for your next layout using this collection, then let us know in the comments how you’d make it your own!
P.S. Are YOU a member of the Virtual Crop Group? It’s your go-to place for MONTHLY Virtual Crops, MONTHLY Completed Album Challenges, QUARTERLY Secret Box Openings with project tutorials and so much more! We hope you’ll join our community of more than 49,000 fellow memory-keeping enthusiasts — you’ll feel right at home!

