March 18, 2026
Stretch Your Travel Stories with Peekaboo Pockets
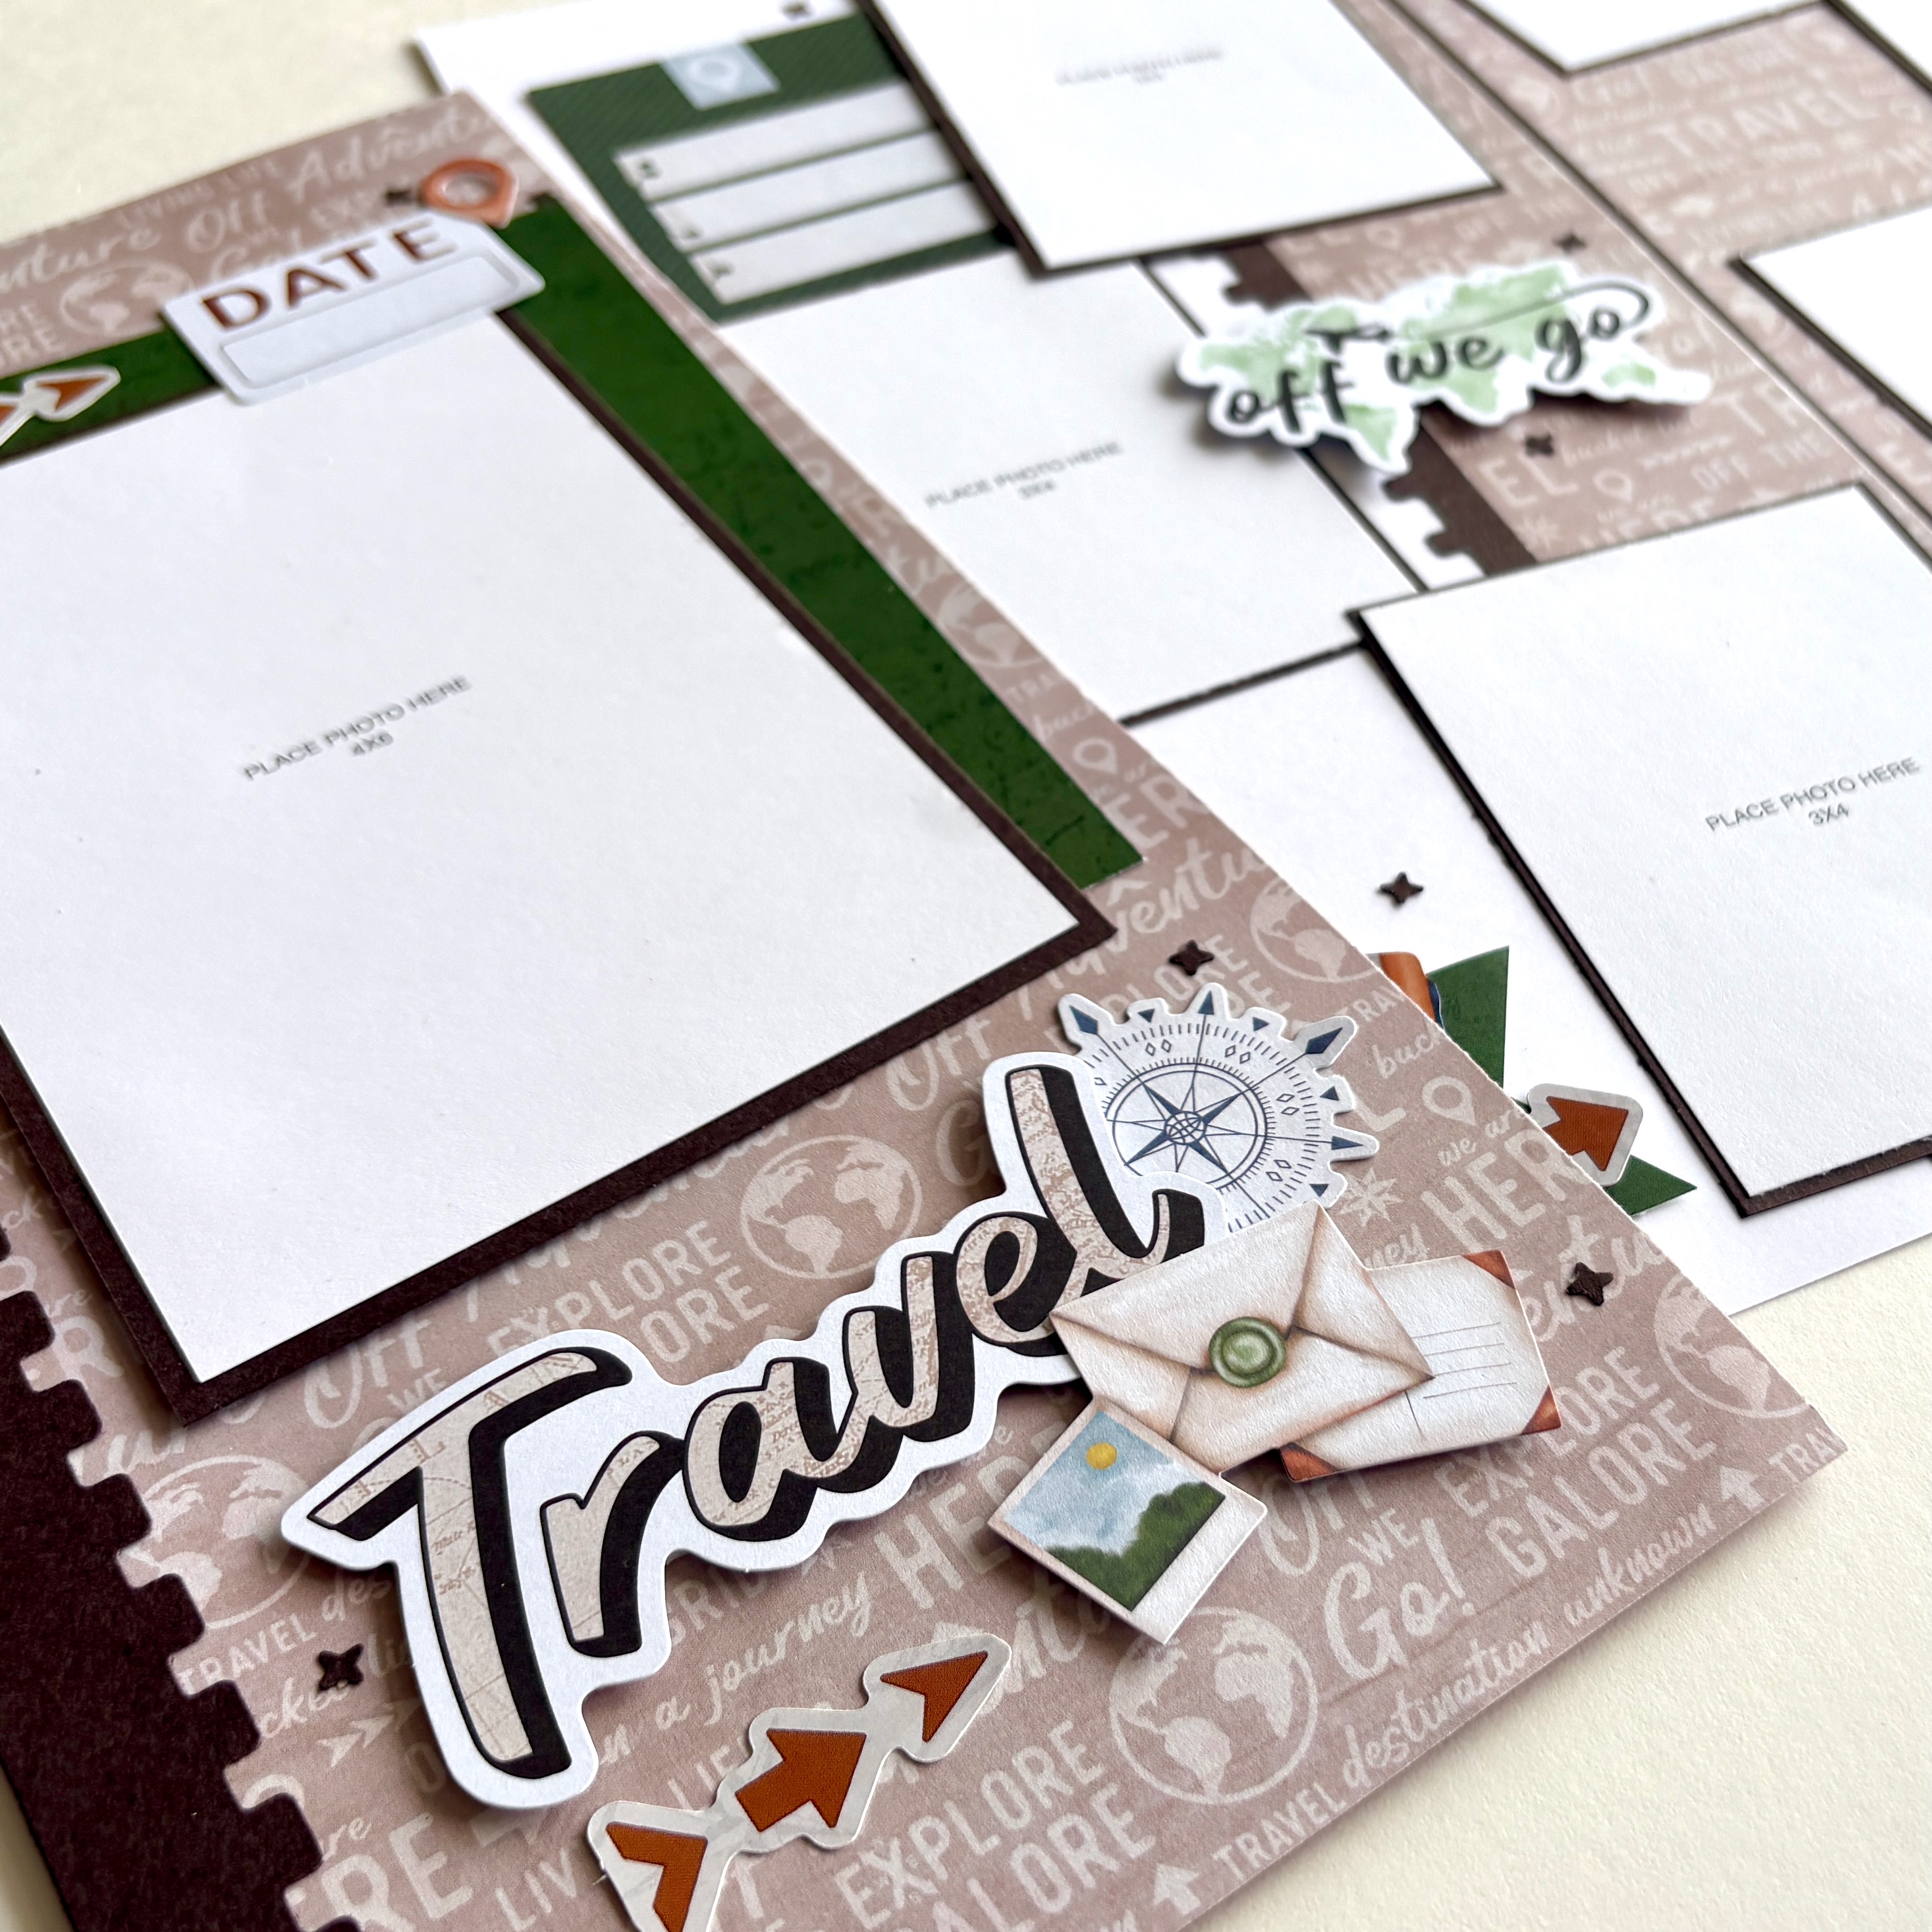
It’s so easy to come home from a trip with hundreds of photos — but not every moment needs a full two-page spread. This clever solution lets you include more photos and meaningful journaling without adding bulk to your album, and it makes a perfect title page for your travel memories. By using a 6″ x 12″ Peekaboo Pocket™, you can seamlessly expand your page to hold even more content in an interactive way. It’s an excellent way to capture those extra moments and stories that deserve more storytelling than just a short caption. Check out the tutorial video, cutting guide, and sketches that go with the instructions below to create this functional and interactive layout!
To create this layout, you will need:
- Global Getaway Designer Paper Pack
- Global Getaway Embellishments
- Global Getaway Stickers
- Global Getaway Mat Cards (Optional)
- Vintage Post BMC
- In Flight Decorative Border Punch
- Bright White Solid Cardstock
- Hot Fudge Cardstock
- 6×12 Peekaboo Pocket
- Original Border Maker System
- 12-inch Trimmer
- Photo Trimmer
- Tape Runner
- Repositionable Tape Runner
- Foam Squares Variety Pack

Tip: Watch the direction of your paper.

Tip: Watch the direction of your paper.
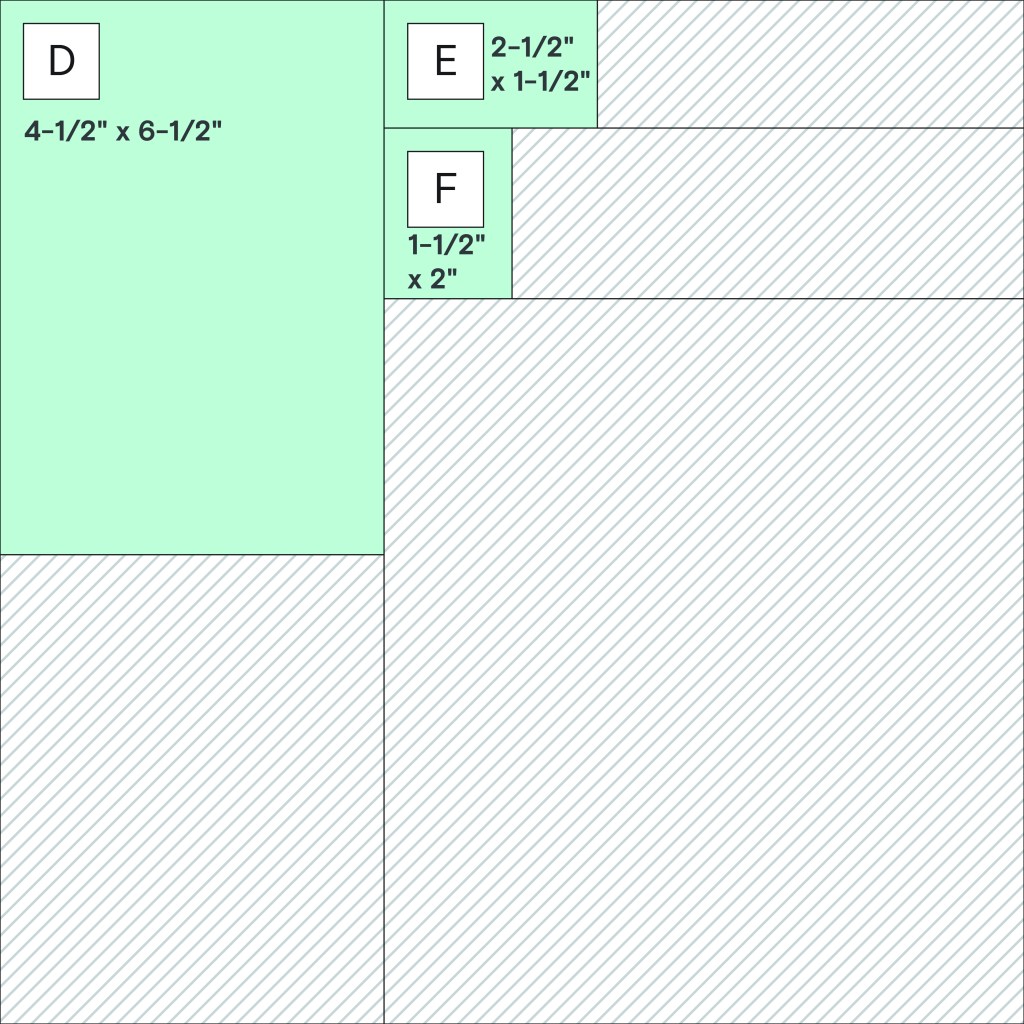
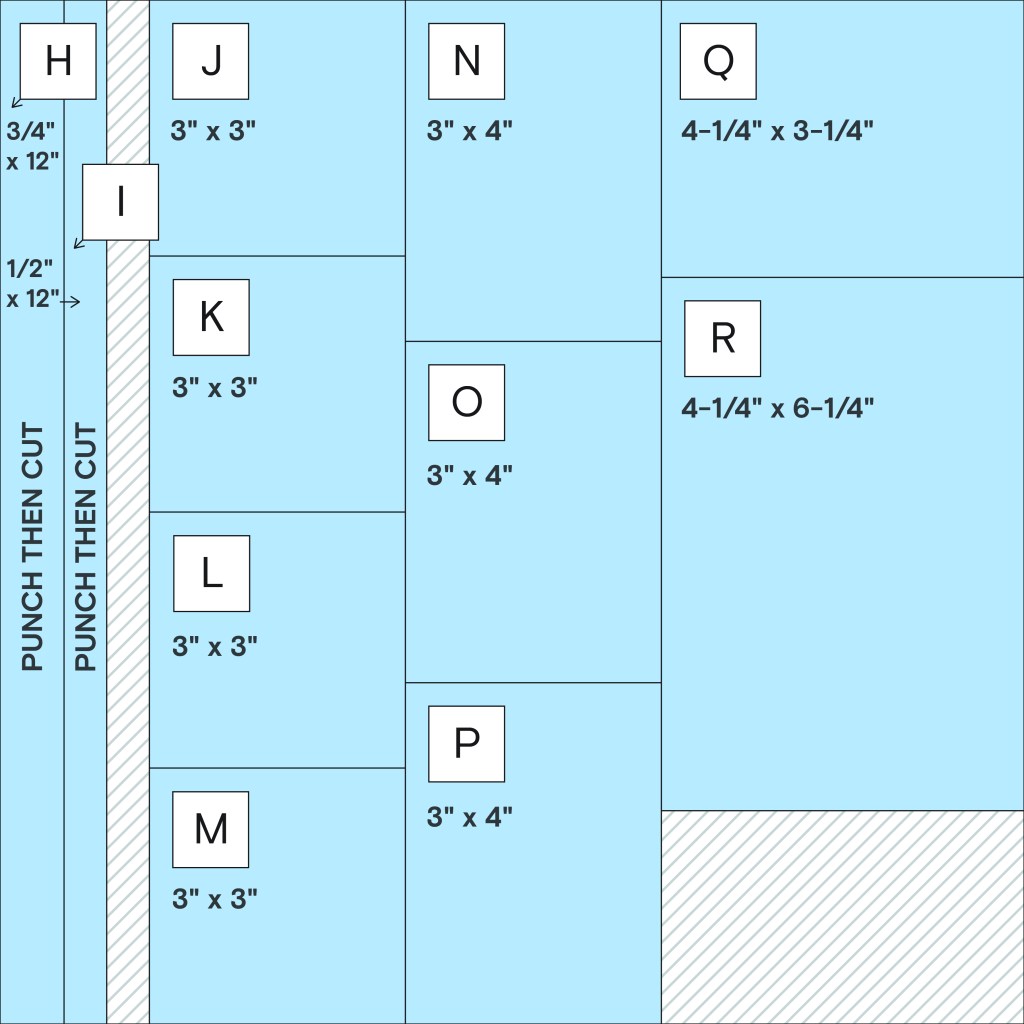

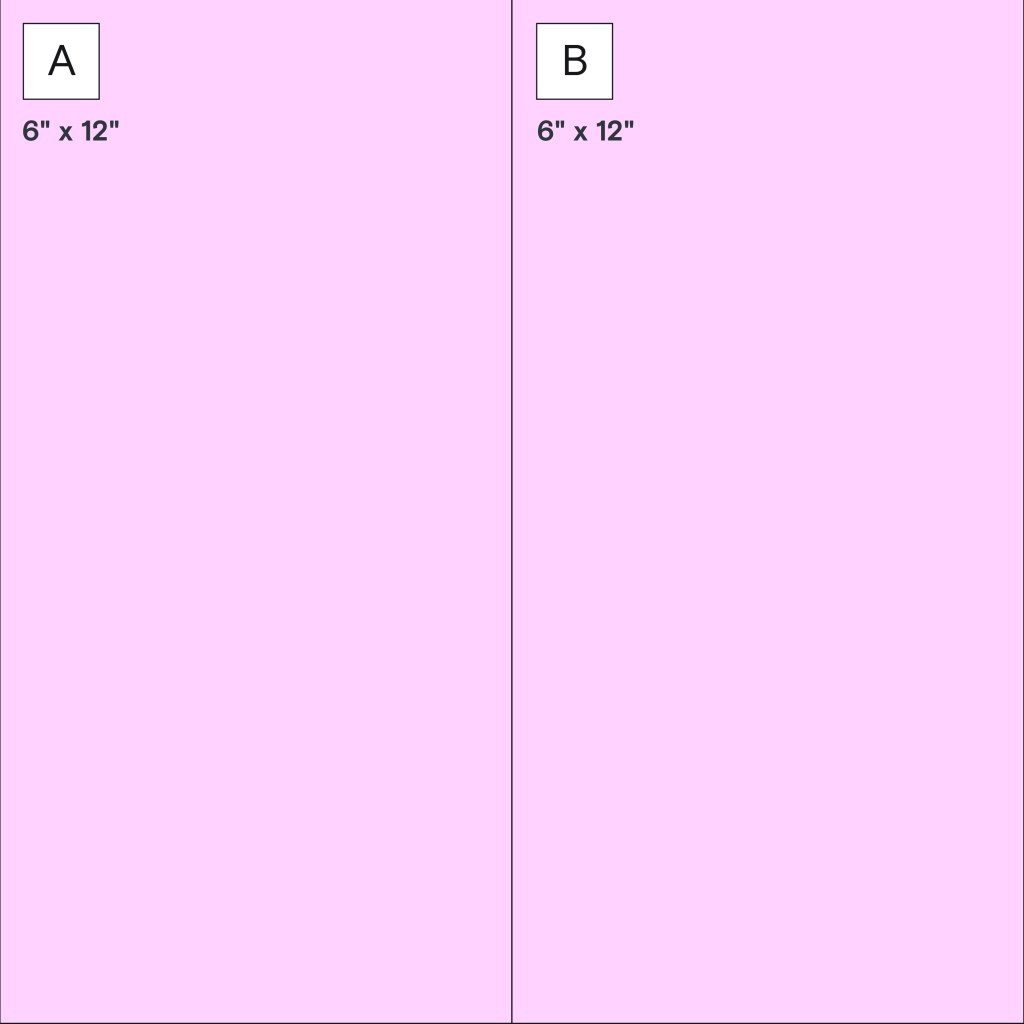
Use the cutting guide to trim your papers, gather your base pieces and follow the instructions to assemble the layout. Add photos, stickers and embellishments as shown in the sample layouts or arrange them as desired. Journal directly on lighter papers or on scraps of Bright White Solid Cardstock. Use varying thicknesses of Foam Squares to add dimension and depth.
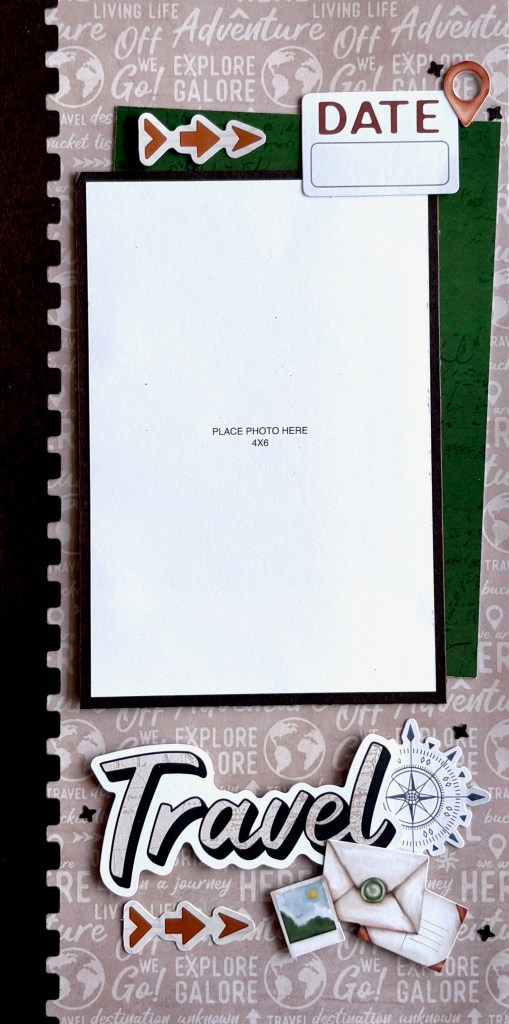
12×12 Base Page:
Step 1: Use a sheet of Bright White Solid Cardstock as the base for the layout.
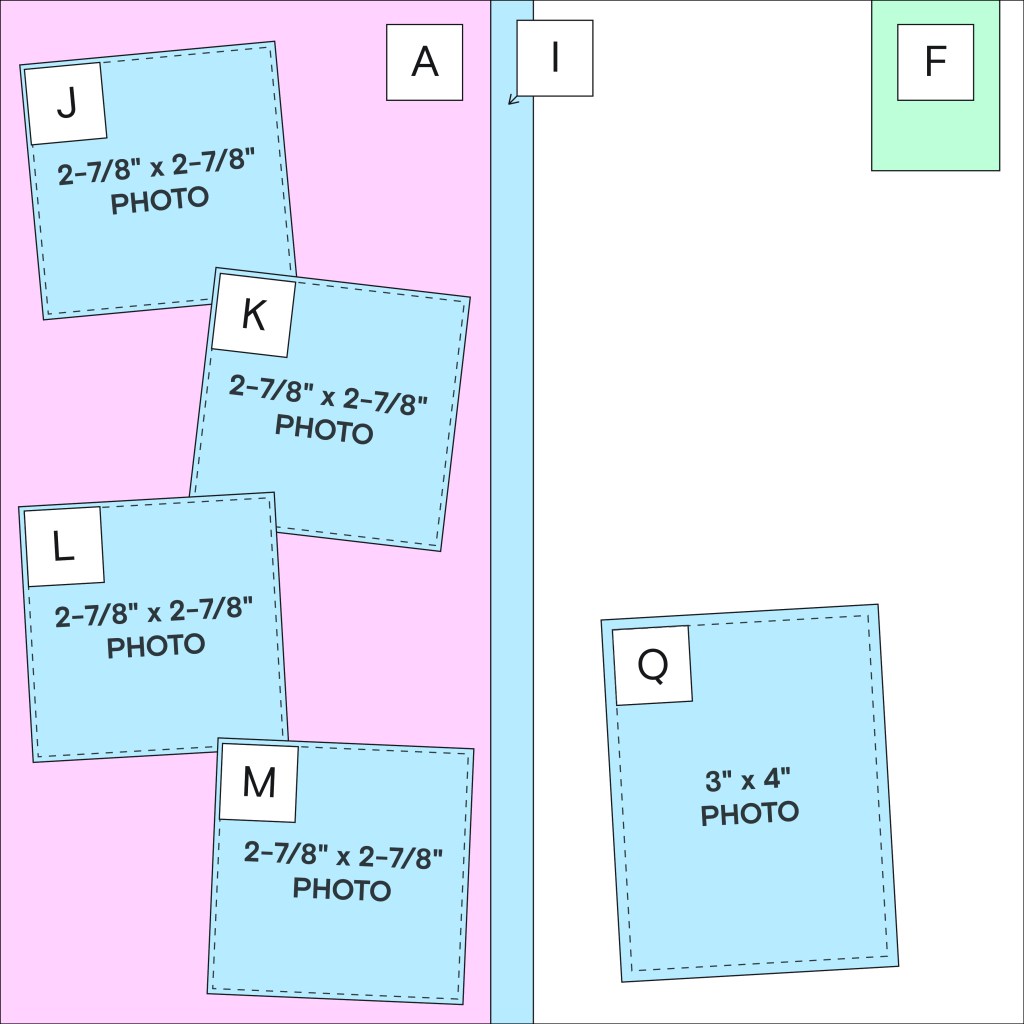
Step 2: Adhere piece A flush along the left edge of the base page.
Step 3: Trim three photos to 2-7/8″ x 2-7/8″ and mat them on pieces J-M. Mat one 3″ x 4″ vertical photo on piece Q.
Step 4: Attach piece I along the right edge of piece A to create the layered border.
Step 5: Arrange the matted photos on the page at a slight angle as shown and adhere them in place.
Step 6: Trim piece F into a banner and adhere it flush with the top of the base page, approximately 1/8″ from the right edge.
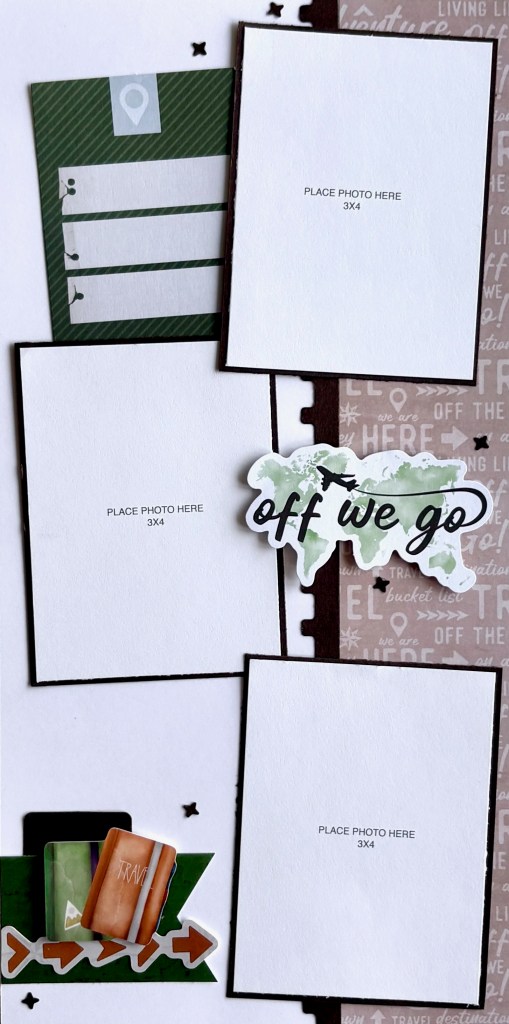
6×12 Outside Flap:
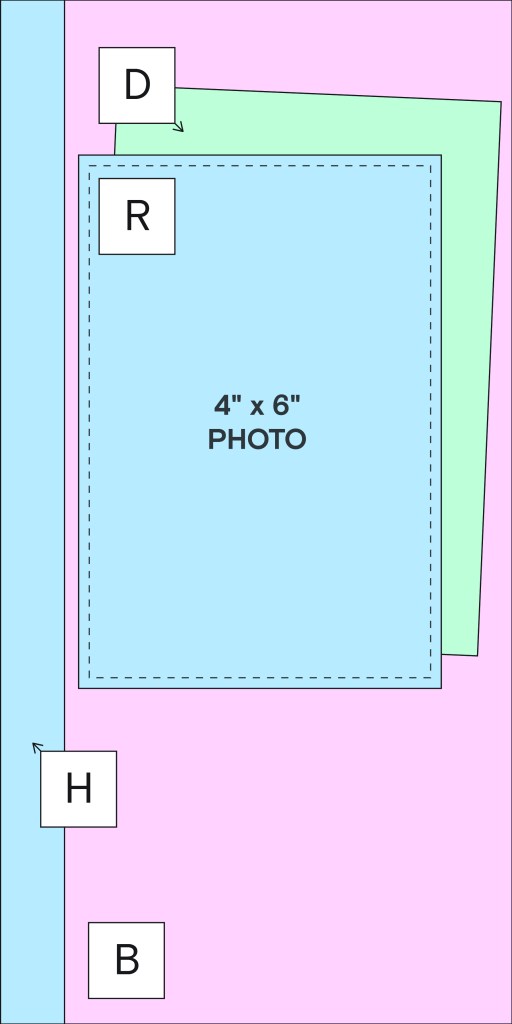
Step 7: Use B as the base for the outside flap.
Step 8: Adhere piece H flush along the left edge of the base page.
Step 9: Attach piece D approximately 1″ from the top of the page, angling it slightly so the top right corner sits about 1-1/2″ from the top edge.
Step 10: Adhere piece R on top of piece D, aligning it slightly below the top of piece D and about 1/4″ to the right of piece H.
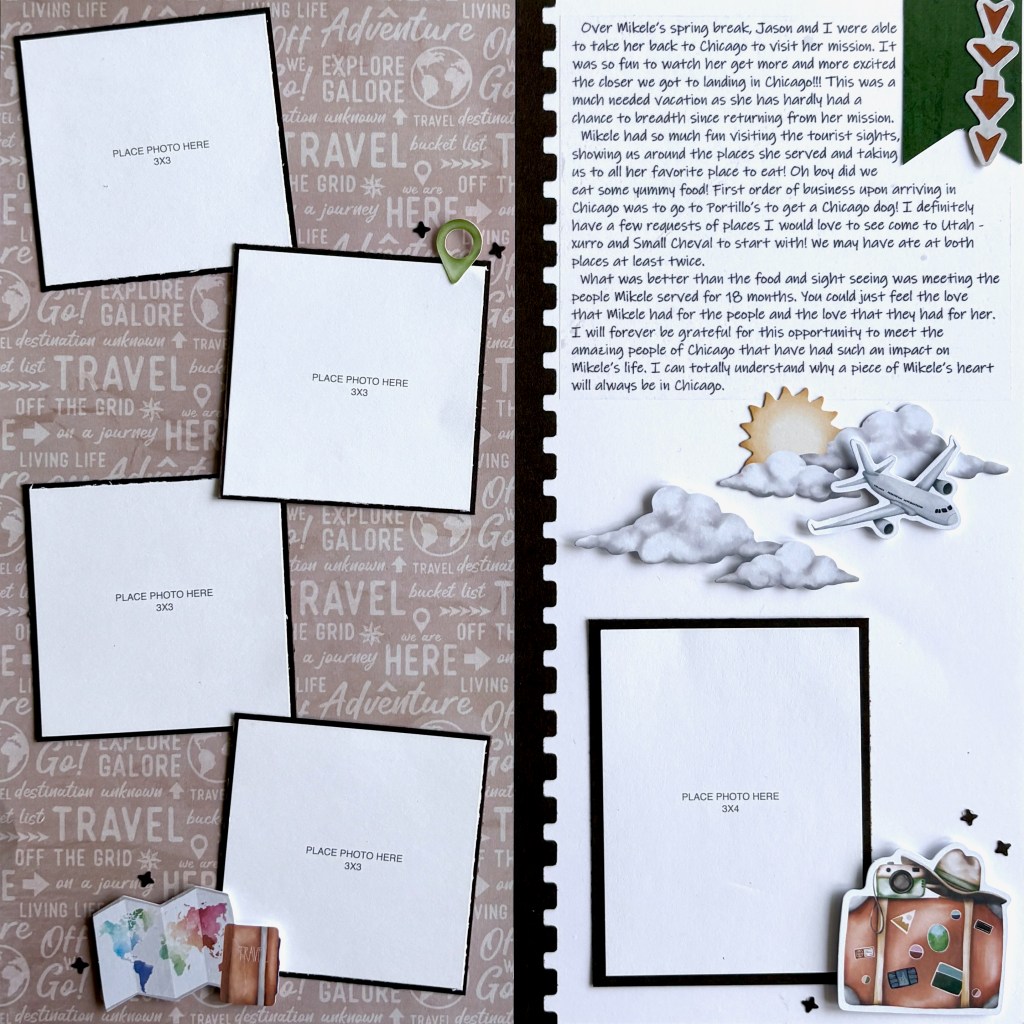
6×12 Inside Flap:

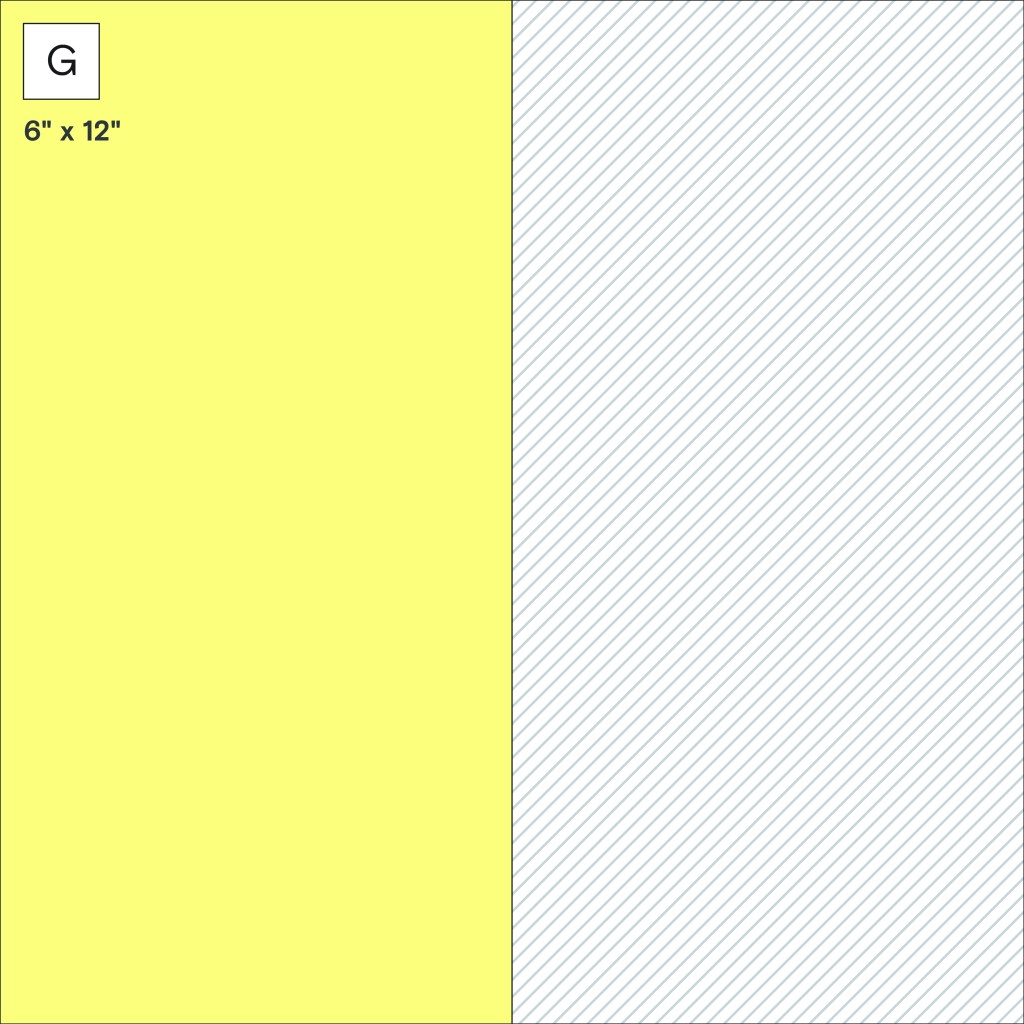
Step 11: Use piece G as the base of your layout.
Step 12: Adhere piece C flush along the right edge of the base page.
Step 13: Attach the negative Vintage Post BMC punches from piece H flush along the left edge of piece C, positioning the seams between pieces so they will be covered by photos and embellishments.
Step 14: Trim three photos to 2-7/8″ x 3-7/8″ and mat them on pieces N-O. Arrange pieces N-O down the page, angling them in different directions and overlapping as shown, covering the seams along the negative Vintage Post BMC punches.
Step 15: Trim piece E into a banner and adhere it flush with the bottom left of the base page, approximately 1/2″ from the bottom edge.
Step 16: Tuck the dark green journaling embellishment behind pieces N and O.
Final Touches:
Step 17: Trim the arrow border sticker to create a four-arrow section, five-arrow section, and two three-arrow sections, and add them to the layouts as shown.
Step 18: Add your stickers and embellishments clusters as shown, using Foam Squares for added dimension. Finish the layout by adding punched stars from scrap papers for the final decorative touch.
Step 19: Once your layout is complete, insert the 12″ x 12″ base page into a Top-Loading Pocket Page and add the 6″ x 12″ Peekaboo Pocket along the left edge of the page protector.
Tip: If you’re working with a plain page, position the Peekaboo Pocket directly on the page. With the Peekaboo Pocket folded out, apply your base layout to the page, covering the adhesive strip from the Peekaboo Pocket. Then slip the Page Protector over the page, and fold the Peekaboo Pocket into place.
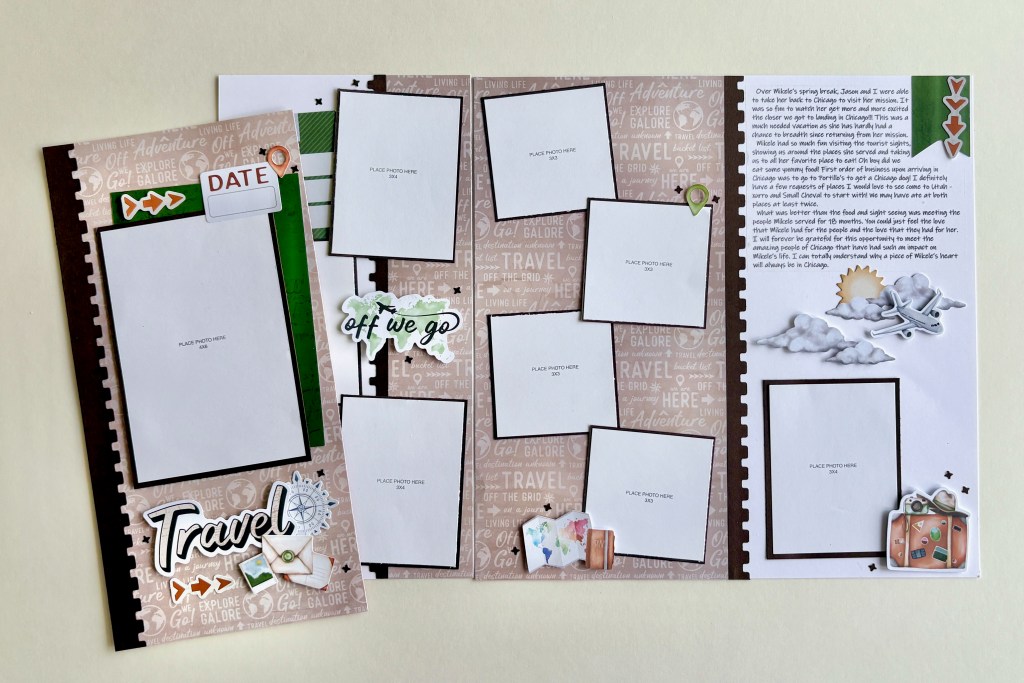
Step 20: Finally, place your two half-page layouts into the Peekaboo Pocket, with Layout 2 facing outside and Layout 3 facing inside.
Using the Global Getaway Collection, this technique pairs perfectly with your Playbook, blog and album kit layouts — giving your travel memories the space they deserve without overfilling your album.
P.S. Are YOU a member of the Virtual Crop Group? It’s your go-to place for MONTHLY Virtual Crops, MONTHLY Completed Album Challenges, QUARTERLY Secret Box Openings with project tutorials and so much more! We hope you’ll join our community of more than 52,000 fellow memory-keeping enthusiasts — you’ll feel right at home!


This is a great demo. Thanks
Loved this demo. Never occurred to me to extend the layout using the back side of the 6×12 peekaboo pocket. Can’t wait to try this layout. Thank you!
Fabulous demo. Loved it.
I haven’t been a big fan of peekaboo pockets (never shown how to use or attach them correctly).
This demo was so helpful. Thank you.
Peekaboo pockets on my “wish list”.