August 3, 2016
Create Beautiful Cards: Creative Memories Natural Elegance Scrapbooking Collection

Cards.
There is so much sentiment and meaning behind a card.
There is even more if you create the card yourself!
It doesn’t have to be difficult. (…and, really it is not!)
Start with a card base. I usually use cardstock for this, so that it is sturdy.
Layer on a few stickers or embellishments, and WAAAA-LA! You have yourself a beautiful card! Personally, I believe that layering is the key to beauty when making a card. Use those foam squares between each layer! Just take a look at the dimension.


To create the cards below, you will need:
- Natural Elegance Paper Pack
- Natural Elegance Embellishments
- Natural Elegance Stickers
- Natural Elegance Slide-Ins
- Hello Baby Cardstock
- Custom Cutting System-Circles
- 12″ Straight Trimmer
- Pink ABC/123 Stickers
- Foam Squares
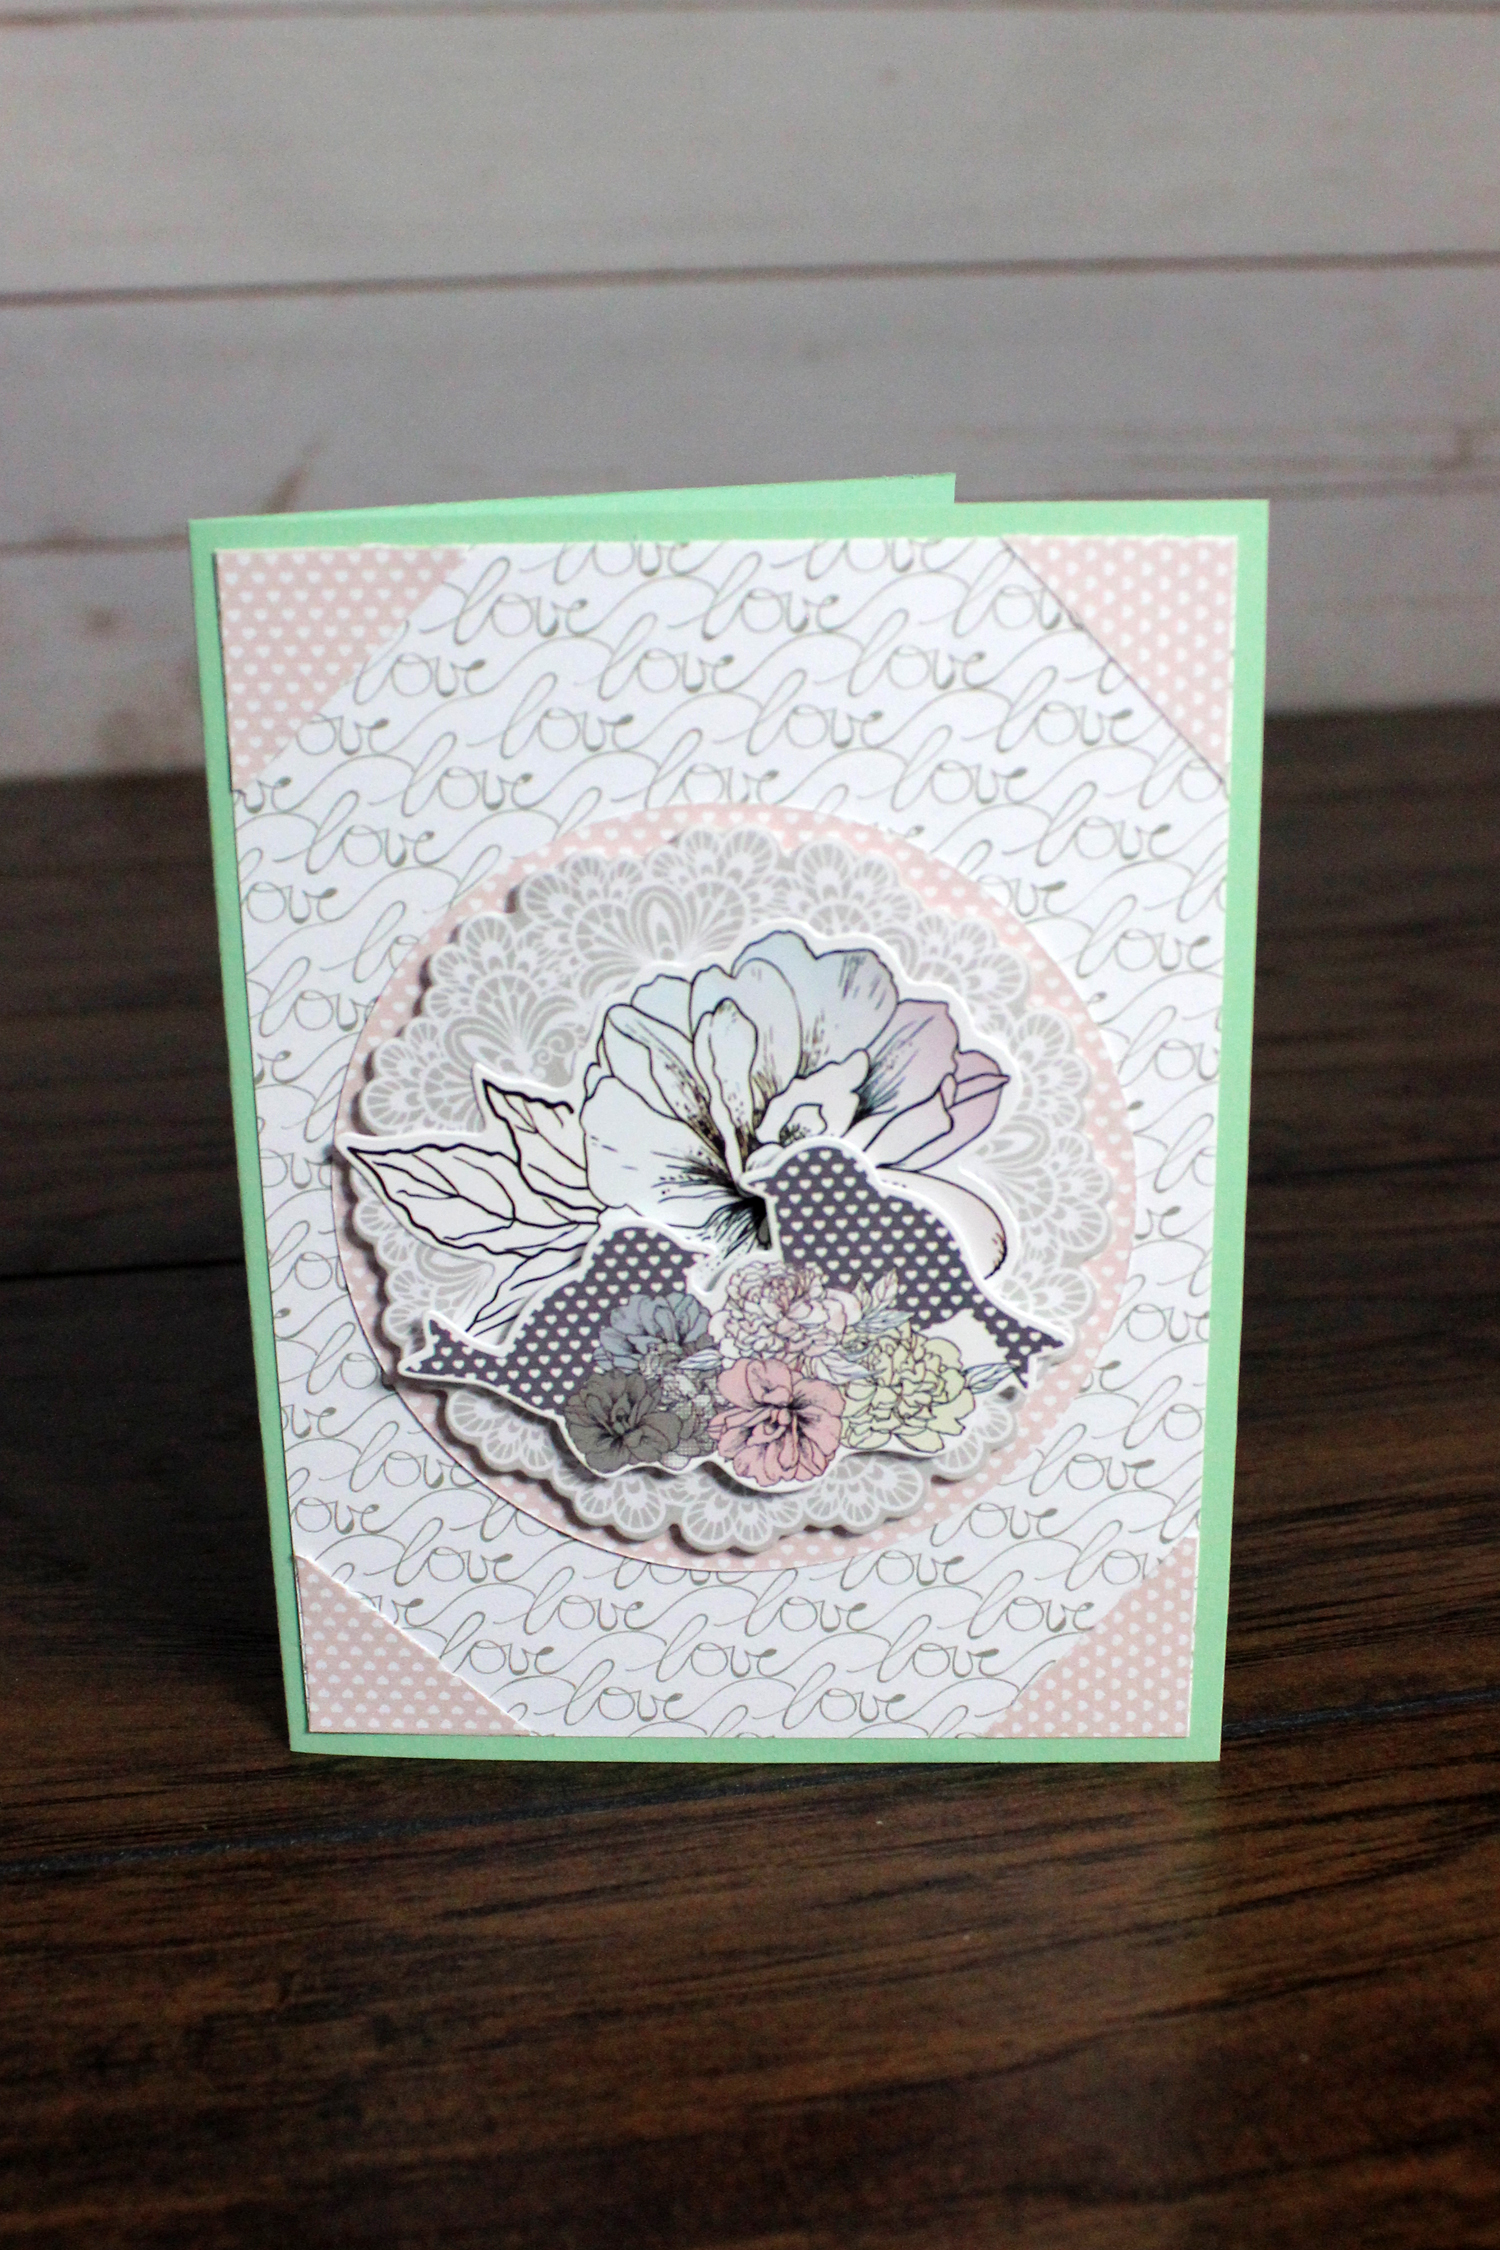
Love Birds Card:
Step 1: Cut a piece of the mint green cardstock to measure 8-1/2″ x 5-1/2″. Fold in half.
Step 2: Cut a piece of the love word paper to measure 4″ x 5-1/4″. Adhere to the front of the card.
Step 3: Using the pink paper, cut a circle using the inside of the large CCS-circle with the red blade. Adhere to the center of the card using Foam Squares.
Step 4: Cut two pieces from the pink paper to measure 1″ x 1″. Cut at an angle. Adhere to the corners of the card.
Step 5: Adhere the circle embellishments and stickers to the center of the card using foam squares.
Congrats Card:
Step 1: Cut a piece of gray cardstock to measure 5-1/2″ x 8-1/2″. Fold in half.
Step 2: Cut a piece of the floral paper to measure 5-1/4″ x 4″. Adhere to the front of the card.
Step 3: Adhere the gray embellishment using foam squares.
Step 4: Adhere the flower and leaf embellishments using foam squares.
Step 5: Use Pastel Pink ABC/123 Stickers for the title.
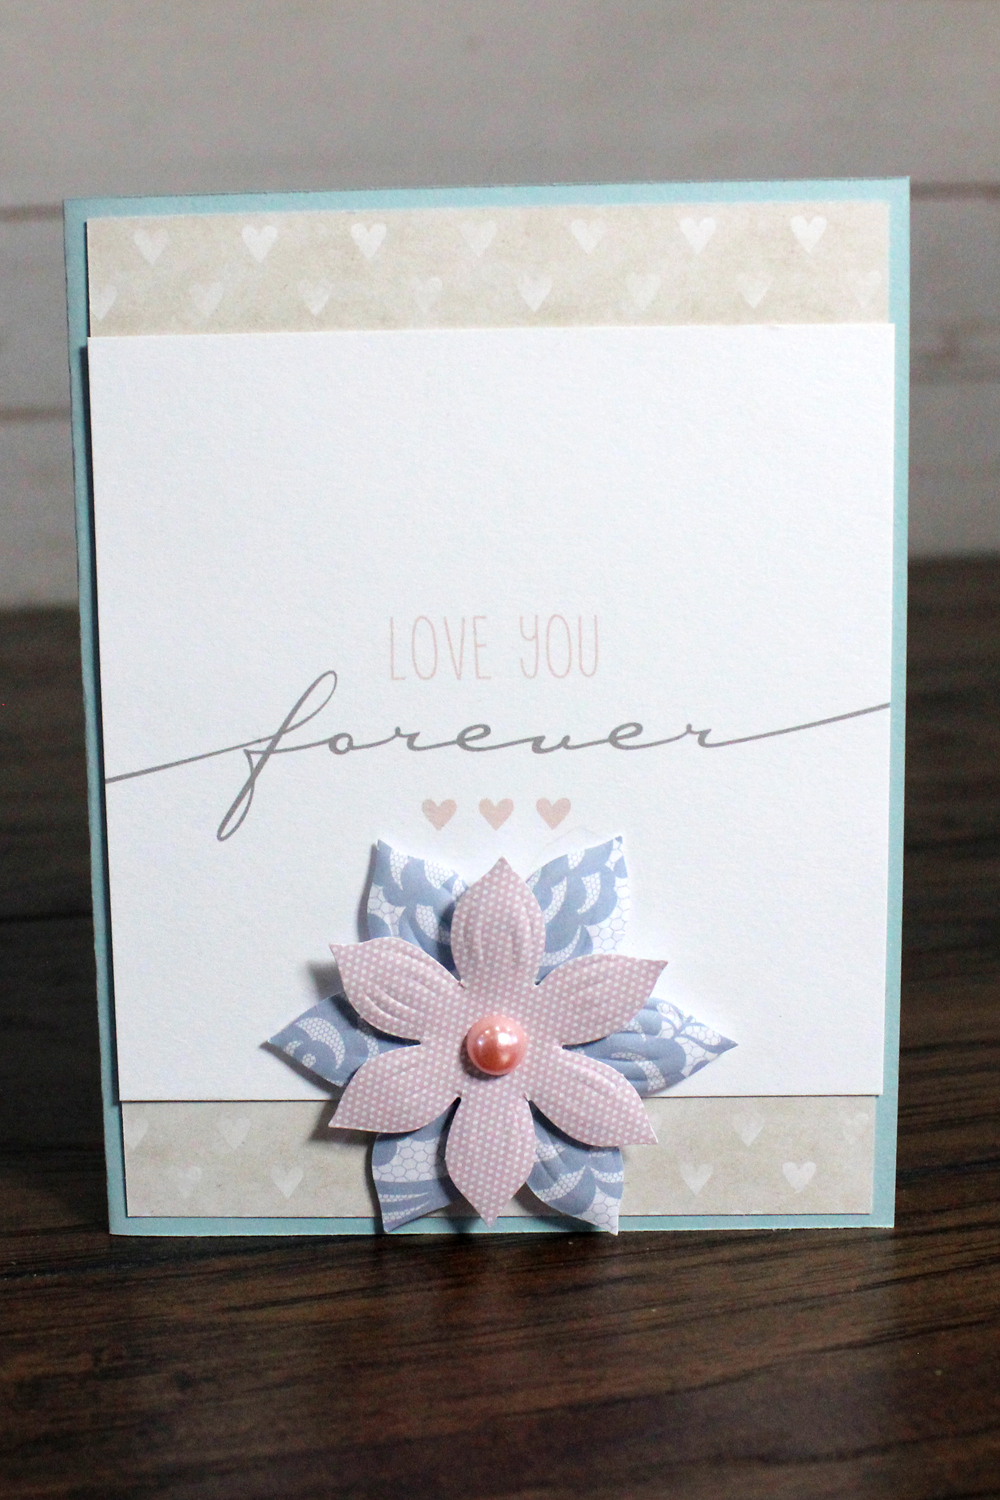
I Love You Forever Card:
Step 1: Cut a piece of the light blue cardstock to measure 8-1/2″ x 5-1/2″. Fold in half.
Step 2: Cut a piece of the heart paper to measure 4″ x 5-1/4″. Adhere to the front of the card.
Step 3: Cut the slide-in to measure 4″ wide. Adhere to the center of the card.
Step 4: Adhere the flowers to the front of the card using foam squares.
Now—go ahead, and make some cards yourself!
Change up the papers for a whole new look!
We would LOVE to see them!
We welcome you to share on our Facebook Page, or on Instagram (creativememories)!
Happy Creating!
Melissa

Melissa, I love these!! So beautiful. I’m going to make a batch up for upcoming weddings. Thanks!
these cards are absolutely beautiful. I love the style you have chose to share…Karen Lemanquais
Nice to see other people’s ideas.
[…] We would love to see what you make, so share your cards and other projects with us on Facebook, Instagram and Twitter. For more holiday and greeting card ideas, check out our birthday cards, romantic cards, digital holiday cards and wedding cards. […]